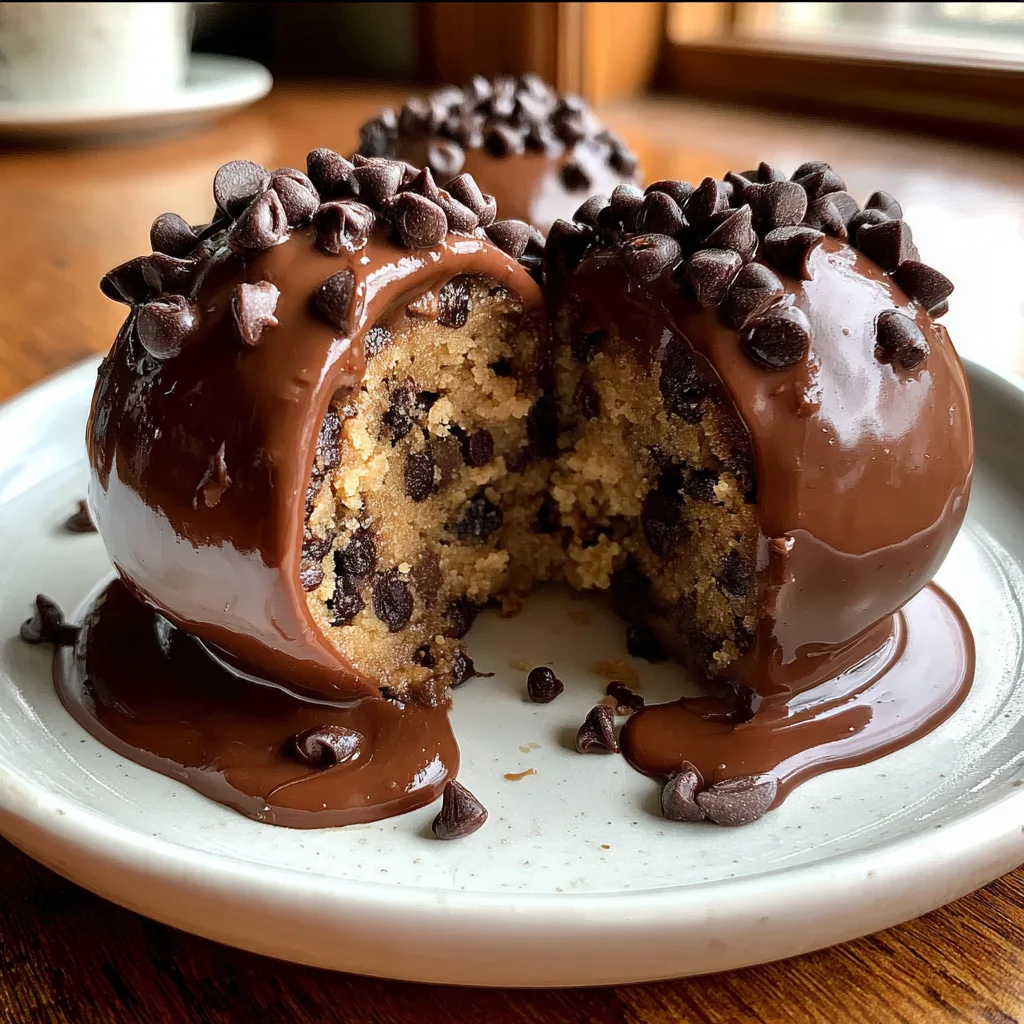
Ultimate Edible Cookie Dough Truffles Recipe
The Ultimate Guide to Edible Cookie Dough Truffles
There is a universal truth known to bakers and sweet-tooths alike: the best part of making cookies is eating the dough. Forget waiting for the timer to ding; the creamy, sugary, slightly gritty texture of raw dough is a nostalgic indulgence that often beats the finished product. However, the risk of raw eggs and untreated flour often puts a damper on this guilty pleasure. Enter the Edible Cookie Dough Truffle.
This recipe transforms that forbidden treat into a safe, elegant, and completely addictive bite-sized dessert. Imagine a core of classic, buttery chocolate chip cookie dough—made completely safe to eat—enrobed in a snap-crisp shell of milk chocolate. It is the perfect marriage of a high-end confection and comfort food. Whether you are looking for a party favor, a holiday gift, or just a midnight snack to keep in the freezer, these truffles are the answer.
In this comprehensive guide, we will walk you through the science of safe raw dough, the art of the perfect chocolate dip, and how to achieve that professional “chocolatier” look right in your own kitchen.
Why You Will Love This Recipe
These truffles are more than just delicious; they are incredibly practical. Here is why this recipe belongs in your permanent rotation:
- No-Bake Ease: Save your oven space for dinner. Aside from a quick flour heat-treat, this is entirely a mixing bowl operation.
- Safety First: By eliminating eggs and heat-treating the flour, we remove the risks associated with raw dough (Salmonella and E. coli), making this 100% safe for kids and pregnant women.
- Make-Ahead Friendly: These freeze beautifully. You can make a batch today and enjoy them for months.
- Highly Customizable: While we love the classic chocolate chip version, the base dough is a canvas for nuts, dried fruit, or different candy mix-ins.

The Secret to Safe Dough: Heat-Treating Flour
Many people know to skip the raw eggs, but did you know raw flour is also a health risk? Flour is a raw agricultural product and can contain harmful bacteria. To make your truffles safe, you simply need to bake the flour on a baking sheet at 350°F (175°C) for about 5 minutes, or microwave it in intervals until it reaches 160°F (71°C). This kills off any potential pathogens, giving you peace of mind with every bite.
Ingredients
The beauty of this recipe lies in its simplicity. You likely have most of these ingredients in your pantry right now.
For the Dough
- All-Purpose Flour – 2 cups (Heat-treated and cooled)
- Unsalted Butter – 1 cup (2 sticks), softened to room temperature
- Light Brown Sugar – 3/4 cup, packed (provides that classic caramel flavor)
- Granulated Sugar – 1/4 cup (adds texture)
- Salt – 1/2 teaspoon (crucial to balance the sweetness)
- Milk or Heavy Cream – 2 to 4 tablespoons (acts as the binder in place of eggs)
- Vanilla Extract – 2 teaspoons (use high quality for best flavor)
- Mini Chocolate Chips – 1 cup (mini chips distribute better in small balls than regular size)
For the Coating
- Melting Chocolate or Wafers – 12 oz (Milk or Dark chocolate works best)
- Vegetable Oil or Coconut Oil – 1 teaspoon (optional, helps thin the chocolate for easier dipping)
- Extra Mini Chips – For garnish
Instructions
Step 1: Heat Treat the Flour
1. Preheat your oven to 350°F (175°C). Spread the flour onto a rimmed baking sheet lined with parchment paper.
2. Bake for 5-7 minutes. Let it cool completely before using. If you use hot flour, it will melt your butter and ruin the texture.
Step 2: Make the Dough Base
3. In a large bowl (or stand mixer), beat the softened butter, brown sugar, and granulated sugar together on medium speed for about 2-3 minutes. You want the mixture to be pale and fluffy.
4. Add the vanilla extract and salt. Mix until combined.
5. Turn the mixer to low speed. Gradually add the cooled, heat-treated flour. The mixture will look crumbly at first.
6. Add the milk or cream one tablespoon at a time. Mix continuously until the dough comes together and resembles a standard cookie dough texture. If it is too dry, add a little more milk; if it is too sticky, add a teaspoon more flour.
Step 3: Add Mix-ins and Shape
7. Fold in the mini chocolate chips by hand or on the lowest mixer setting.
8. Line a baking sheet with parchment paper.
9. Using a small cookie scoop or a tablespoon, scoop the dough and roll it between your palms to form smooth balls. Place them on the prepared baking sheet.
10. Freeze the balls for at least 30 minutes. This is critical—if the balls are warm, they will fall apart when dipped in warm chocolate.
Step 4: Dip and Decorate
11. Place your coating chocolate in a microwave-safe bowl. Microwave in 30-second intervals, stirring in between, until completely smooth. If the chocolate is too thick, stir in a teaspoon of oil.
12. Remove the dough balls from the freezer.
13. Using a fork or a dipping tool, dip one ball into the melted chocolate. Tap the fork against the side of the bowl to shake off excess chocolate.
14. Place the truffle back on the parchment paper. Immediately sprinkle a few extra mini chips on top before the chocolate sets.
15. Repeat with remaining balls. Refrigerate for 10 minutes to set the shell completely.
Expert Tips for Success
Sift the Flour: After heat-treating flour, it tends to clump up. Always sift it before adding it to your butter mixture to ensure a smooth, velvety dough without hard flour lumps.
Temperature Matters: Ensure your butter is truly room temperature before creaming. If it is too melted, the dough will be greasy. If it is too cold, it won’t mix with the sugar properly.
The “Snap” Factor: For a professional hard shell, use high-quality melting wafers (like Ghirardelli) or couverture chocolate. Standard chocolate chips contain stabilizers that make them thicker and harder to melt smoothly for dipping.
Variations to Try
Once you master the base, the sky is the limit. Try these creative twists:
- Birthday Cake: Swap chocolate chips for rainbow sprinkles and use white chocolate for the coating.
- Peanut Butter: Replace 1/4 cup of butter with peanut butter and use peanut butter chips inside.
- Oreo Delight: Crush Oreos into the flour mixture and dip in white chocolate.
- Double Chocolate: Add 2 tablespoons of cocoa powder to the flour mixture for a dark chocolate dough base.
Storing and Serving
Fridge: Store these truffles in an airtight container in the refrigerator for up to 2 weeks. They are delicious cold!
Freezer: These are a meal-prepper’s dream. Freeze in a freezer-safe bag for up to 3 months. You can eat them frozen (they won’t be rock hard) or let them thaw on the counter for 10 minutes.
Serving Suggestion: Serve these on a platter at your next party, or package them in clear cellophane bags tied with a ribbon for a thoughtful, handmade gift.
Fun Facts & Cultural Context
The “cookie dough craze” exploded in the mid-2010s, leading to the opening of scoop shops dedicated entirely to raw dough in New York City and beyond. It tapped into a deep childhood nostalgia—the memory of licking the spoon while baking with grandma. By removing the egg, we have turned a “forbidden” kitchen scrap into a celebrated gourmet dessert. This recipe brings that trendy scoop-shop experience right into your home kitchen, bridging the gap between nostalgic comfort and modern culinary safety.
Edible Cookie Dough Truffles
Ingredients
Equipment
Method
- Spread flour on a baking sheet and bake at 350°F (175°C) for 5 minutes to heat treat. Let cool completely.
- In a large bowl, cream together softened butter, brown sugar, and granulated sugar until light and fluffy.
- Beat in the vanilla extract, salt, and milk until combined.
- Gradually mix in the heat-treated flour until a dough forms. If too dry, add milk 1 tsp at a time.
- Fold in the mini chocolate chips.
- Roll dough into 1-inch balls and place on a parchment-lined baking sheet. Freeze for 30 minutes.
- Melt the chocolate wafers in the microwave in 30-second intervals until smooth.
- Dip chilled dough balls into chocolate, shake off excess, and return to baking sheet. Top with extra chips.
- Refrigerate for 10-15 minutes to set the chocolate before serving.