Caramel Bloomin’ Apples
The Ultimate Caramel Bloomin’ Apples Dessert
There is something inherently magical about the combination of warm, cinnamon-spiced baked apples and cold, creamy vanilla ice cream. When autumn rolls around, or quite frankly, whenever the craving for a comforting, fruit-based dessert strikes, the standard apple pie or apple crisp often comes to mind. But what if you could capture all of those nostalgic, deeply comforting flavors in a stunning, individual-sized presentation that requires half the work of a traditional pie? Enter the Caramel Bloomin’ Apple—a spectacular, fan-shaped baked dessert that is as beautiful to look at as it is incredible to eat.
Inspired by the famous deep-fried “blooming onion” appetizer found in steakhouses, this sweet twist utilizes a similar cutting technique to transform a standard apple into a striking, petal-like masterpiece. By slicing the apple in a concentric grid pattern while leaving the base intact, the fruit opens up, or “blooms,” as it bakes in the oven. This brilliant method does more than just create a pretty visual; it creates dozens of deep crevices and surface areas for the butter, brown sugar, and cinnamon to melt into, ensuring that every single bite is thoroughly infused with sweet, spiced goodness.
In this comprehensive guide, we are going to explore everything you need to know to master the art of the Bloomin’ Apple. From selecting the absolute best apple varieties for baking to mastering the delicate knife work required for the perfect bloom, we will cover all the bases. Whether you are hosting an elegant autumn dinner party, looking for a fun weekend baking project with the kids, or simply treating yourself to a well-deserved, decadent dessert, this recipe is guaranteed to impress.
Why You Will Fall in Love With This Bloomin’ Apples Recipe
If you need convincing to put down the pie crust and pick up a pairing knife, here are the top reasons why Caramel Bloomin’ Apples are about to become your new favorite dessert.
First and foremost, the texture contrast is phenomenal. When baked to perfection, the apple softens and becomes tender, yet retains a slight bite so it doesn’t turn into mush. The edges of the “petals” get slightly caramelized and chewy from the brown sugar and butter mixture. Then, you introduce the crowning glory: a generous scoop of freezing cold, velvety vanilla ice cream. As the ice cream melts over the hot apple, it mixes with the cinnamon-spiced juices and the sticky caramel drizzle, creating a rich, luscious sauce that coats every bite.
Secondly, the presentation is undeniably show-stopping. Placing one of these beautifully fanned-out, caramel-drenched apples in front of a guest immediately signals that they are in for a special treat. It looks like a complex pastry that took hours to construct, but the reality is that it takes mere minutes of active prep time.
Furthermore, this dessert is naturally portion-controlled. Everyone gets their own individual apple, eliminating the messy slicing and serving associated with pies and cobblers. It is also inherently customizable; while the classic combination of brown sugar, cinnamon, and caramel is unbeatable, you can easily adjust the spices, add chopped nuts for crunch, or swap the caramel for hot fudge depending on your mood.
Selecting the Perfect Apple for Baking
The success of a Bloomin’ Apple rests entirely on the foundation of the fruit itself. Not all apples are created equal, especially when it comes to withstanding the heat of an oven. If you choose the wrong variety, your beautifully cut apple will disintegrate into applesauce before it even has a chance to bloom.
The Ideal Candidates: You are looking for apples that are firm, crisp, and have a good balance of sweet and tart flavors. The structure of the apple needs to hold up during the baking process so the “petals” maintain their shape.
Honeycrisp: Often considered the gold standard for this specific recipe. Honeycrisp apples are incredibly firm, wonderfully sweet, and just tart enough to balance the heavy sugars and caramel. They hold their shape beautifully and provide a substantial, juicy bite.
Granny Smith: If you prefer a dessert that leans heavily into the tart-and-sweet dynamic, Granny Smith is your best friend. Their firm, bright green flesh stands up remarkably well to high heat, and their sharp acidity cuts perfectly through the richness of the vanilla ice cream and caramel sauce.
Braeburn and Fuji: Both of these varieties are excellent alternatives. They are crisp, highly flavorful, and bake wonderfully without turning mushy. Pink Lady apples also work wonderfully, offering a beautiful rosy color and a delightful sweet-tart crunch.
Apples to Avoid: Steer clear of McIntosh, Red Delicious, and Gala apples for this specific recipe. While delicious for snacking, their flesh is too soft and mealy for baking, and they will likely collapse in the oven, ruining the signature bloomin’ effect.
The Magic of Fall Baking and Comfort Food
There is a profound psychological comfort tied to the scent of apples and cinnamon wafting through a home. It triggers memories of crisp autumn air, cozy sweaters, and holiday gatherings. Baking apples transforms them from a simple, snappy snack into a deeply warming, restorative dessert.
When apples are exposed to the dry heat of an oven, their natural sugars concentrate and caramelize. The application of heat breaks down the complex carbohydrates within the fruit walls, softening the texture while intensifying the flavor. By adding butter, we introduce a rich fat that carries the fat-soluble flavor compounds of the cinnamon and nutmeg deep into the fruit. The brown sugar, with its molasses content, adds a deep, slightly smoky sweetness that plain white sugar simply cannot replicate.
The Bloomin’ Apple takes this comforting chemistry and amplifies it by maximizing the surface area exposed to the heat and the sweet, buttery coating. It is the ultimate expression of comfort baking—simple ingredients elevated through a clever technique to create a highly satisfying sensory experience.
Essential Ingredients
To create these stunning, mouth-watering Bloomin’ Apples, you will need the following simple, high-quality ingredients. Do not skimp on the butter or the ice cream; this is a dessert meant for indulging.
- – 4 large, firm baking apples (Honeycrisp, Granny Smith, or Braeburn)
- – 1/3 cup unsalted butter, melted
- – 1/2 cup packed dark brown sugar
- – 1 tablespoon ground cinnamon
- – 1/4 teaspoon ground nutmeg
- – A pinch of salt
- – 4 generous scoops of premium vanilla bean ice cream
- – 1/2 cup high-quality caramel sauce (store-bought or homemade)
Step-by-Step Instructions: Mastering the Cut
The most crucial part of this recipe is the cutting technique. It requires a bit of patience and a sharp paring knife. Follow these detailed instructions to achieve the perfect, intact bloom.
- Prepare the Oven and Pan: Preheat your oven to 375°F (190°C). Lightly grease a rimmed baking dish or an oven-safe skillet with a little bit of butter or non-stick cooking spray. A dish with sides is essential to catch the bubbling caramel and juices.
- Prep the Apples: Wash the apples thoroughly. Using a sharp knife or an apple corer, carefully slice off the top 1/4 inch of the apple (the stem end) to create a flat surface. Next, use a melon baller or a small measuring spoon to scoop out the core and the seeds, being extremely careful not to puncture the bottom of the apple. You want to create a small, neat well in the center.
- The First Cuts: Place the apple flat-side down on your cutting board. Using a sharp paring knife, make a straight cut straight down the center of the apple, stopping about 1/2 inch from the bottom. Do not cut all the way through, or the apple will fall apart. Make a second perpendicular cut, creating a cross.
- Creating the Petals: Continue making cuts around the apple, spacing them about 1/4 inch apart, always making sure to stop 1/2 inch from the bottom. You should end up with a tight grid of square “petals.” Once the cuts are made, gently flip the apple over and carefully pry the segments apart slightly with your fingers to help it bloom. Place the scored apples into the prepared baking dish.
- Mix the Spiced Butter: In a small bowl, whisk together the melted unsalted butter, packed dark brown sugar, ground cinnamon, nutmeg, and a pinch of salt until it forms a thick, wet paste.
- Stuff and Coat the Apples: Spoon the butter and sugar mixture generously over the top of each apple. Use your fingers or a small brush to gently work the mixture deep into the cuts between the petals. Ensure the apples are thoroughly coated.
- Bake to Perfection: Place the baking dish in the preheated oven. Bake for 30 to 45 minutes. The exact time will depend on the size and variety of your apples. You want them to be tender when pierced with a fork, and the segments should be widely fanned out. The sugar mixture should be bubbly and caramelized.
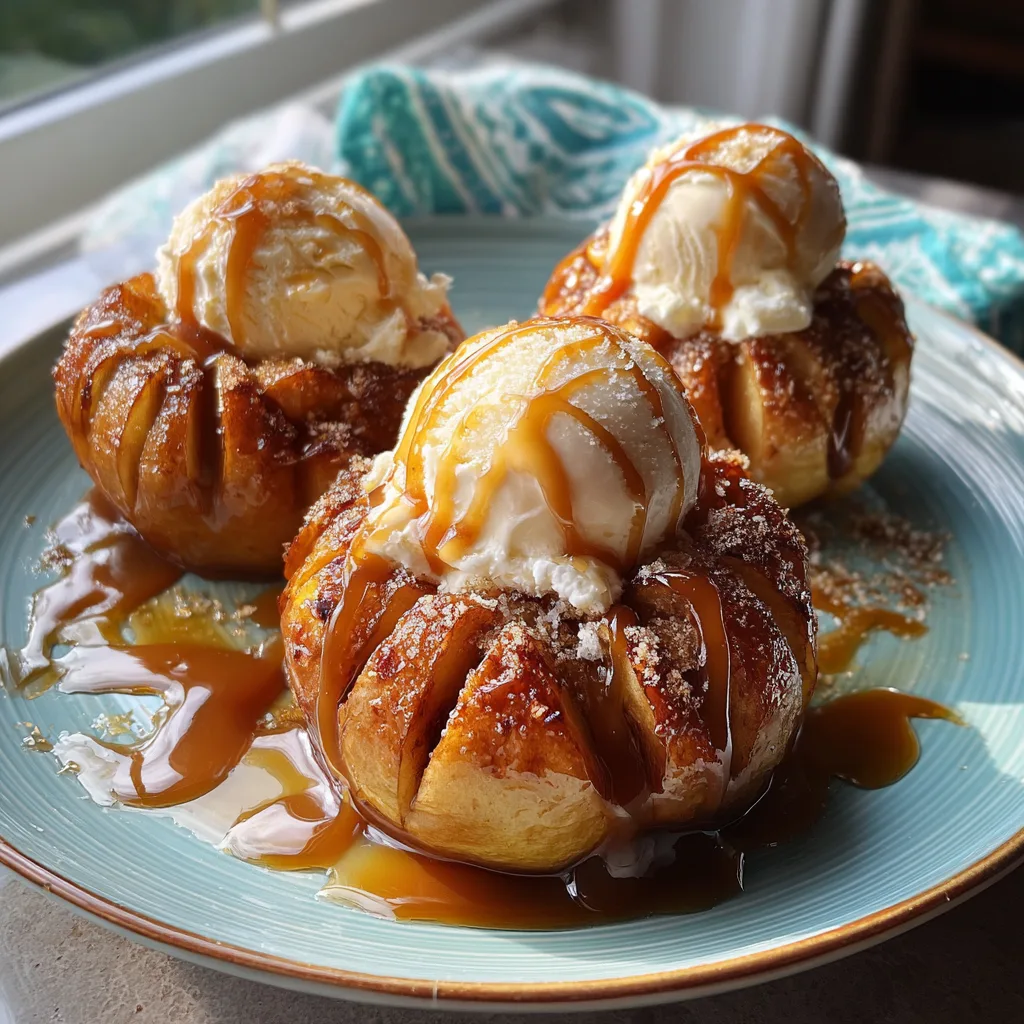
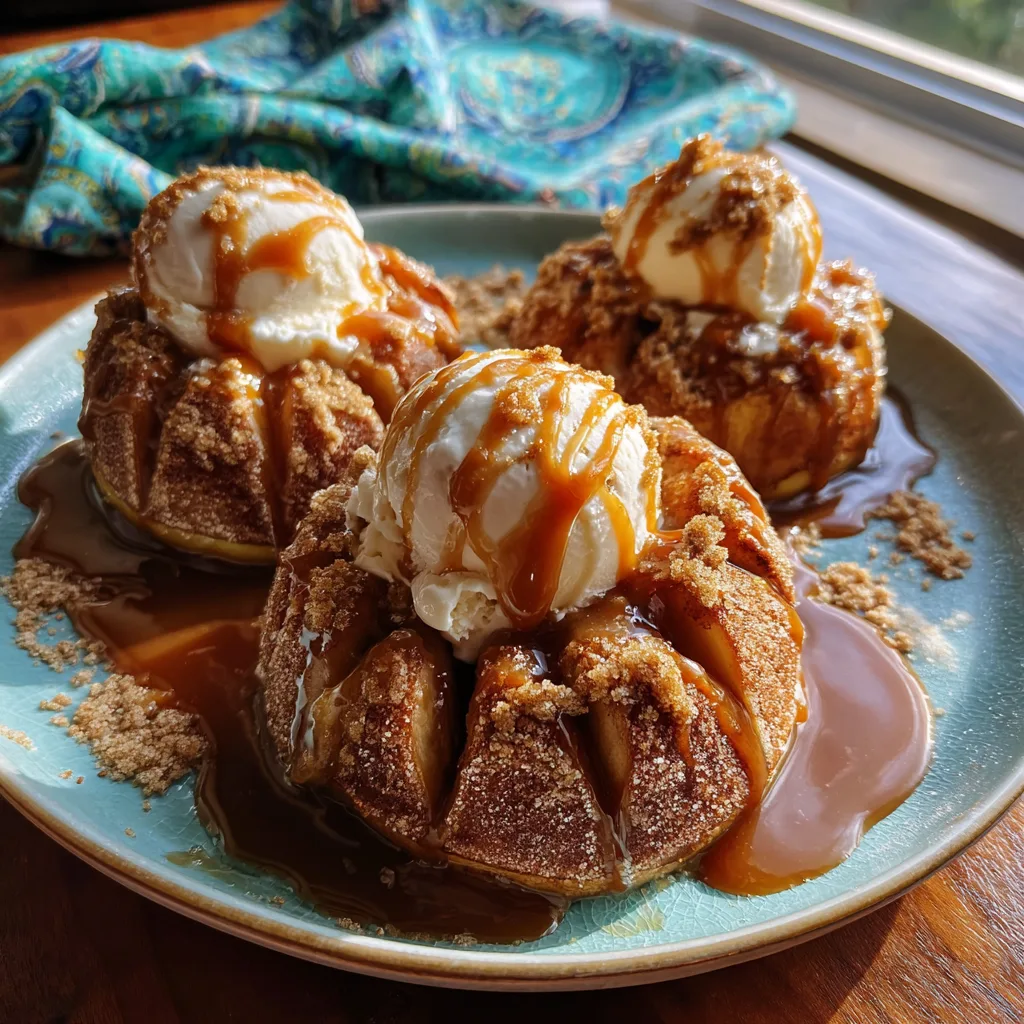
- The Grand Finale: Remove the apples from the oven and let them cool in the dish for about 5 minutes. Carefully transfer each apple to a serving plate using a large spatula. Immediately top the warm center of each apple with a large scoop of vanilla ice cream. Finally, generously drizzle the caramel sauce over the ice cream and let it cascade down the sides of the bloomin’ apple petals. Serve immediately while the contrast between hot and cold is at its peak.
Expert Tips for the Perfect “Bloom”
Even with the right apples and a sharp knife, getting that picture-perfect, deeply fanned-out look can take a little practice. Here are a few expert tips to guarantee success.
The Chopstick Trick: If you are worried about accidentally cutting all the way through the bottom of the apple, place two wooden chopsticks flat on the cutting board, one on either side of the apple. When you slice down, your knife blade will hit the chopsticks, stopping you from cutting through the base. It is a foolproof method for perfect depth every time.
Baste While Baking: After the apples have been in the oven for about 20 minutes, the butter and sugar will have melted and pooled at the bottom of the baking dish. Pull the dish out quickly, use a spoon to scoop up those glorious juices, and baste the apples by pouring the liquid back over the top. This ensures maximum flavor penetration and a beautifully glossy finish.
Delicious Variations and Toppings
The beauty of this recipe is how easily it can be adapted to suit your specific cravings. Consider the caramel and vanilla ice cream as a starting point, and feel free to get creative with your additions.
The Nutty Crunch: Before baking, stuff chopped pecans, walnuts, or sliced almonds deep into the crevices of the apple along with the sugar mixture. The nuts will toast beautifully in the oven, adding a fantastic earthy crunch to the tender fruit.
Streusel Topping: Mix 1/4 cup of flour, 2 tablespoons of cold cubed butter, and a tablespoon of sugar until crumbly. Sprinkle this streusel mixture over the top of the apples before baking for a delightful crumb-cake-like texture.
Alternative Drizzles: While caramel is classic, hot fudge sauce is an incredible pairing with the cinnamon apples. A drizzle of pure maple syrup, a dollop of fresh whipped cream instead of ice cream, or even a splash of bourbon in the butter mixture can elevate this dessert to new heights.
Serving Suggestions
Because these apples are best enjoyed immediately while they are still warm and the ice cream is melting, they are a fantastic dessert to serve at dinner parties. You can prep the apples—coring, slicing, and stuffing them with the butter mixture—several hours in advance. Keep them in the refrigerator covered in plastic wrap. Then, simply pop them in the oven right as you sit down to eat your main course. By the time dinner is finished, the house will smell incredible, and dessert will be hot, bubbly, and ready to plate.
How to Store and Reheat Leftovers
While Bloomin’ Apples are undoubtedly best eaten fresh out of the oven, leftovers can be saved. If you anticipate not eating all of them, do not top the extra apples with ice cream or caramel.
Storing: Place the un-topped, baked apples in an airtight container and store them in the refrigerator for up to 3 days.
Reheating: To reheat, place the apple in a microwave-safe dish and microwave on high for 45-60 seconds until warmed through. Alternatively, you can reheat them in a 350°F (175°C) oven for about 10-15 minutes. Once heated, add your fresh ice cream and caramel drizzle.
Conclusion
The Caramel Bloomin’ Apple is a masterclass in culinary simplicity yielding spectacular results. By utilizing an innovative slicing technique, everyday baking apples are transformed into a visually stunning, incredibly delicious dessert that rivals anything you could order in a restaurant. The intoxicating blend of warm, spiced fruit, cold ice cream, and rich caramel is a symphony of flavors and textures. Whether you are baking for a crowd or just treating yourself on a quiet evening, this recipe promises a deeply satisfying, unforgettable dessert experience. Grab your paring knife and discover the joy of the bloom!
Caramel Bloomin’ Apples
Ingredients
Equipment
Method
- Preheat your oven to 375°F (190°C). Lightly grease a rimmed baking dish.
- Slice off the top 1/4 inch of each apple to create a flat top. Use a melon baller to scoop out the core and seeds, being careful not to cut through the bottom.
- Place the apple flat-side down. Using a sharp paring knife, make concentric grid cuts 1/4 inch apart, stopping 1/2 inch from the base. Do not cut all the way through.
- Gently flip the apples over and slightly pry the segments apart to help them ‘bloom’. Place in the baking dish.
- In a bowl, mix melted butter, brown sugar, cinnamon, nutmeg, and salt. Spoon this mixture generously over the apples, working it into the cuts.
- Bake for 30-45 minutes until the apples are tender and the segments have fanned out.
- Remove from oven, transfer to serving plates, and immediately top each warm apple with a scoop of vanilla ice cream and a heavy drizzle of caramel sauce.