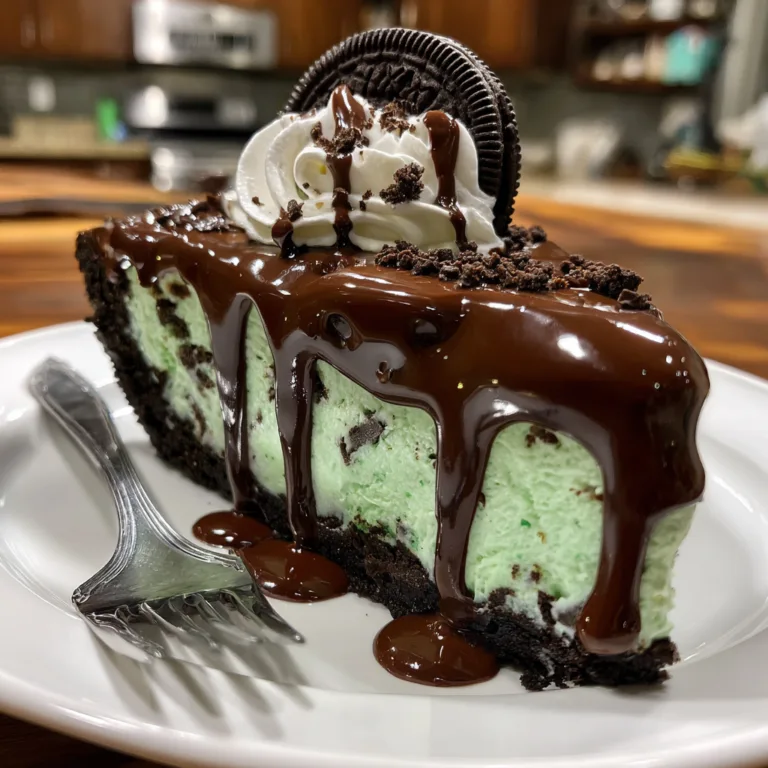
Peanut Butter Easter Eggs
Homemade Speckled Peanut Butter Easter Eggs: The Ultimate Spring Treat
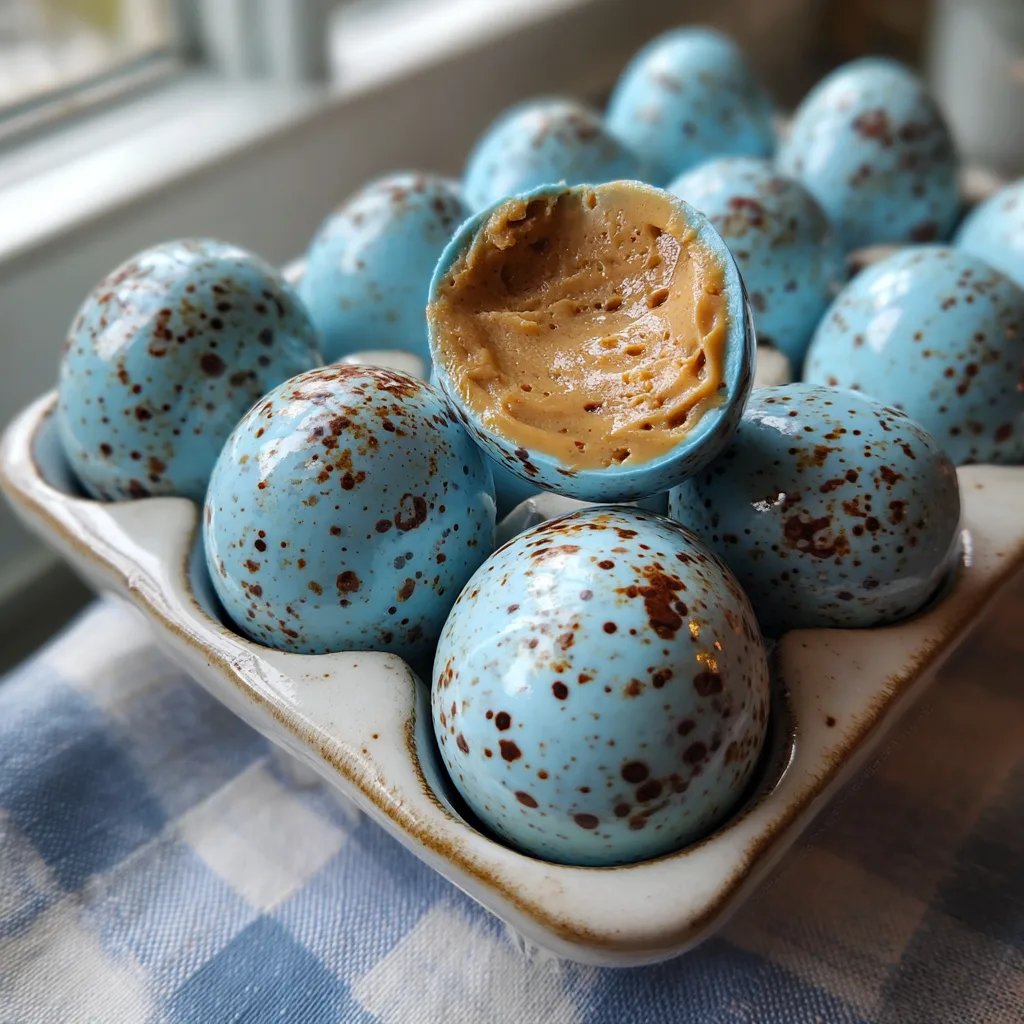
When spring finally arrives and the aisles of the grocery store become lined with pastel-colored candies, there is one treat that stands out above the rest: the peanut butter egg. There is something deeply nostalgic and undeniably delicious about the combination of a rich, salty-sweet peanut butter center enrobed in a crisp, sweet coating. However, as delicious as the store-bought versions are, making your own at home elevates this classic confection to an entirely new level of artisanal charm and mouth-watering flavor. Today, we are going to craft stunning, bakery-quality Speckled Peanut Butter Easter Eggs that look exactly like delicate robin’s eggs, complete with a beautiful blue candy shell and artistic brown speckles.
This comprehensive guide will walk you through every single step of the process. We will cover the science of getting the perfect peanut butter dough consistency, the secret to a smooth and flawless candy coating, and the incredibly fun technique used to create those realistic, rustic speckles. Whether you are looking to create a show-stopping centerpiece for your holiday dessert table, want to build the ultimate gourmet Easter basket, or just want a fun weekend baking project, these homemade peanut butter eggs are guaranteed to delight anyone who tries them.
Why Homemade Peanut Butter Eggs Reign Supreme
You might be wondering, why go through the effort of making peanut butter eggs from scratch when they are so readily available at the store? The answer lies in the quality of the ingredients and the sheer joy of customization. Commercial candies often rely on preservatives and artificial stabilizers to maintain a long shelf life, which can sometimes result in a waxy texture or an overly cloying sweetness.

By making these at home, you control exactly what goes into the filling. You can use your favorite brand of high-quality peanut butter, real butter for richness, and pure vanilla extract for depth of flavor. The resulting center is incredibly creamy, almost like a cross between fudge and cookie dough, with a pronounced roasted peanut flavor that perfectly balances the sweetness of the powdered sugar. Furthermore, the aesthetic appeal of these robin’s egg blue beauties simply cannot be found in a commercial wrapper. They look like they came straight from a high-end chocolatier.
The Anatomy of the Perfect Peanut Butter Center
The core of this confection is, of course, the peanut butter filling. Achieving the perfect texture is a delicate balancing act. You want a filling that is firm enough to roll into an egg shape and hold its form when dipped into warm candy melts, but soft enough to melt in your mouth when you take a bite.
The base consists of creamy peanut butter and softened unsalted butter. It is highly recommended to use standard, conventional creamy peanut butter (like Jif or Skippy) rather than natural peanut butter. Natural peanut butters, which contain only peanuts and salt, tend to separate and can make the dough far too oily and crumbly to hold a smooth shape. The conventional brands contain emulsifiers that bind beautifully with the powdered sugar, creating a smooth, pliable dough that is a dream to work with.
Powdered sugar acts as the thickener and sweetener, while a touch of vanilla extract and a pinch of salt round out the flavor profile, ensuring it does not just taste like eating peanut butter straight from the jar.
Mastering the Robin’s Egg Blue Candy Coating
To achieve that iconic springtime look, we bypass the traditional milk or dark chocolate coating and opt for white chocolate or vanilla-flavored candy melts. Candy melts (or almond bark) are generally easier for home cooks to work with because they do not require tempering—a complex process of heating and cooling true chocolate to ensure a glossy finish and a crisp snap.
To get that perfect pastel blue, you will need to tint your melted white coating. Crucial tip: You must use oil-based food coloring (often labeled as candy coloring) when coloring chocolate or candy melts. Standard water-based liquid food coloring or gel food coloring will cause the chocolate to seize, turning it into a clumpy, unworkable mess. A few drops of blue oil-based coloring, and perhaps a tiny speck of green if you want a more teal/robin’s egg hue, will yield a gorgeous, smooth pastel canvas for your eggs.
The Artistic Touch: Creating the Speckles
What truly transforms these candies from standard treats into breathtaking works of edible art is the speckling process. This step is incredibly fun and allows you to unleash your inner artist. To create the speckles, you will mix a small amount of unsweetened cocoa powder with a liquid that evaporates quickly. Vanilla extract is the traditional choice, but vodka or another clear extract works just as well. The alcohol evaporates, leaving the cocoa behind to dry perfectly on the candy shell.
Using a clean, stiff-bristled food-safe brush (or even a brand new, thoroughly washed toothbrush or pastry brush), you simply dip the bristles into the cocoa mixture and flick them with your thumb to splatter the brown droplets over the hardened blue eggs. Some speckles will be large, some will be microscopic—this natural variation is exactly what makes them look like real bird eggs!
Tools You Will Need for Candy Making Success
Having the right tools on hand will make this process incredibly smooth and enjoyable. Here is what you should gather before you begin:
- – Baking Sheets: You will need at least one large baking sheet to hold the eggs while they chill and after they are dipped.
- – Parchment Paper or Wax Paper: Absolutely essential for lining your baking sheets so the peanut butter and the final candy coating do not stick to the pan.
- – Stand Mixer or Hand Mixer: To thoroughly blend the thick peanut butter dough until smooth.
- – Microwave-Safe Bowls: For melting your candy wafers gently.
- – Dipping Tools: A specialized chocolate dipping fork is wonderful, but a standard kitchen fork works perfectly well for lifting the eggs out of the melted candy and allowing the excess to drip off.
- – Stiff-Bristle Brush: Dedicated for food use, this will be your speckling tool.
Ingredients for Speckled Peanut Butter Eggs
Here is a breakdown of the simple ingredients you will need to create these stunning candies:
- – Creamy Peanut Butter: The star of the show. Stick to conventional, no-stir varieties.
- – Unsalted Butter: Softened to room temperature to blend seamlessly into the peanut butter.
- – Powdered Sugar: Also known as confectioners’ sugar. This sweetens and thickens the filling into a moldable dough.
- – Vanilla Extract: Enhances the flavor of both the filling and the speckle mixture.
- – Salt: Just a pinch to cut through the sweetness and highlight the peanut flavor.
- – White Candy Melts or Almond Bark: Provides the smooth, sweet shell that encases the filling.
- – Oil-Based Blue Food Coloring: To achieve that perfect pastel robin’s egg blue.
- – Unsweetened Cocoa Powder: Mixed with vanilla to create the realistic brown speckles.
Step-by-Step Instructions for Perfection
Follow these detailed steps to ensure your peanut butter eggs turn out flawlessly every single time:
- Prepare the Pan: Line a large baking sheet with parchment paper or wax paper. Set aside.
- Mix the Filling: In a large mixing bowl (or the bowl of a stand mixer), combine the creamy peanut butter, softened butter, vanilla extract, and a pinch of salt. Beat on medium speed until completely smooth and creamy.
- Add the Sugar: Turn the mixer to low and gradually add the powdered sugar, about half a cup at a time. The mixture will become very thick, resembling a stiff cookie dough. If it feels too dry to hold together, add a tiny splash of milk. If it is too sticky to roll, add a little more powdered sugar.
- Shape the Eggs: Scoop out about one tablespoon of the dough and roll it into a ball between your palms. Then, gently roll it slightly longer and taper one end to form a classic egg shape. Place the shaped egg onto your prepared baking sheet. Repeat until all the dough is used.
- Chill the Filling: This is a crucial step! Place the baking sheet of uncoated peanut butter eggs into the freezer for at least 30 to 45 minutes, or until they are very firm. If they are not cold and firm, they will melt and fall apart when dipped into the warm candy coating.
- Melt and Tint the Coating: Just before taking the eggs out of the freezer, melt your white candy melts in a microwave-safe bowl in 30-second increments, stirring well after each burst, until completely smooth. Stir in a few drops of blue oil-based food coloring until you reach your desired pastel shade.
- Dip the Eggs: Working with just a few eggs at a time (keep the rest in the fridge/freezer so they stay cold), drop one egg into the blue melted candy. Use a fork to turn it until fully coated. Lift the egg out with the fork, tap the fork gently against the side of the bowl to remove excess coating, and carefully slide the coated egg back onto the parchment paper. Repeat for all eggs. Allow the coating to set completely.
- Prepare the Splatter: In a tiny bowl, mix 1 tablespoon of cocoa powder with about 1.5 tablespoons of vanilla extract. Stir until it forms a thin, watery paste.
- Speckle the Eggs: Dip your stiff-bristled brush into the cocoa mixture. Hold the brush over the tray of blue coated eggs and use your thumb to flick the bristles, creating a fine mist of brown speckles over the candies. Allow the speckles to dry completely.
Troubleshooting Common Candy Making Issues
Even with a simple recipe, things can occasionally go awry. Here is how to fix common issues:
The Candy Melts are Too Thick: If your melted blue coating resembles a thick paste rather than a smooth, dippable liquid, do not add water! Water will ruin it. Instead, stir in a teaspoon of vegetable oil, canola oil, or paramount crystals until it thins out to the right consistency.
The Eggs are Melting While Dipping: This means your peanut butter centers were not cold enough, or your candy coating is too hot. Let the melted candy cool for a few minutes, and put the peanut butter centers back into the freezer until they are rock solid.
The Chocolate Seized when Coloring: As mentioned, this happens if you use water-based food coloring. Unfortunately, seized chocolate usually cannot be saved for dipping. You will need to start over with fresh candy melts and ensure you are using specifically formulated oil-based candy colors.
Fun Variations to Try
While the robin’s egg look is stunning for Easter, this base recipe is incredibly versatile. Here are some fun ways to mix it up:
- – Crunchy Peanut Butter Eggs: Swap the creamy peanut butter for crunchy, or add a handful of Rice Krispies cereal to the dough for an amazing textural contrast.
- – Classic Dark Chocolate: Skip the blue candy melts entirely and dip the frozen centers into high-quality melted dark chocolate. Sprinkle the tops with flaky sea salt before the chocolate sets for a gourmet touch.
- – Different Pastels: Divide your melted white coating into different bowls and tint them pink, yellow, and light purple for a vibrant, multi-colored Easter basket display.
Storage and Gifting Suggestions
Because these peanut butter eggs contain dairy (butter) and do not have commercial preservatives, they need to be stored properly. Keep them in an airtight container in the refrigerator for up to two weeks. They actually taste fantastic straight from the fridge! You can also freeze them in a freezer-safe bag for up to three months; just let them thaw in the fridge before serving.
If you are planning to gift these, presentation is everything. Placing them inside a clean, new ceramic egg carton (as seen in many beautiful food photos) or a standard paper egg carton lined with decorative tissue paper makes for an incredibly charming gift. They also look beautiful placed in individual mini cupcake liners inside a bakery box tied with pastel ribbons.
Conclusion
Creating Homemade Speckled Peanut Butter Easter Eggs is a rewarding, creative, and utterly delicious project. The contrast between the crisp, sweet candy shell and the rich, creamy, slightly salty peanut butter center is a flavor combination that simply never gets old. By taking the time to shape them, dip them carefully, and add that artistic speckled finish, you elevate a simple no-bake treat into a show-stopping holiday masterpiece. Gather your ingredients, prepare your dipping station, and get ready to enjoy the most beautiful and delicious Easter candies you have ever tasted!
Homemade Speckled Peanut Butter Easter Eggs
Ingredients
Equipment
Method
- Line a large baking sheet with parchment paper.
- In a mixing bowl, beat together the creamy peanut butter, softened butter, vanilla extract, and salt until completely smooth.
- Gradually beat in the powdered sugar until a thick, moldable dough forms. If it is too crumbly, add a teaspoon of milk. If too soft, add a little more sugar.
- Scoop out 1 tablespoon portions of the dough and roll into ball shapes, then gently taper one end to form an egg shape. Place on the prepared baking sheet.
- Place the baking sheet in the freezer for at least 30 to 45 minutes until the eggs are completely firm and cold.
- Melt the white candy melts in the microwave in 30-second bursts, stirring until smooth. Stir in a few drops of oil-based blue food coloring until you reach a pastel blue shade.
- Dip the cold peanut butter eggs one at a time into the melted blue candy. Tap off excess coating and place back onto the parchment paper to set.
- In a small bowl, mix the cocoa powder and vanilla extract (or vodka) to create a thin, watery liquid.
- Dip a stiff-bristled brush into the cocoa mixture and flick the bristles with your finger to splatter brown speckles all over the dried blue eggs. Let dry completely before serving.