Easter Egg Oreo Balls
The Ultimate Easter Egg Oreo Balls Recipe: A Springtime Delight
When the snow begins to melt and the first signs of spring emerge, our taste buds naturally start craving something bright, cheerful, and sweet. Enter the Easter Egg Oreo Balls, a spectacularly festive, vibrant, and irresistibly delicious no-bake treat that will instantly become the star of your springtime dessert table. These bite-sized wonders combine the universally loved flavor of classic chocolate sandwich cookies with the rich tang of cream cheese, all enveloped in a smooth, colorful candy coating.
Whether you are hosting a massive neighborhood Easter egg hunt, planning a sophisticated springtime brunch, or just looking for a fun, engaging culinary project to tackle with the family on a rainy April afternoon, this recipe is guaranteed to deliver. In this comprehensive, deep-dive guide, we will explore every single facet of making the perfect Easter Egg Oreo Balls. We will cover the science behind the ideal truffle texture, the secrets to achieving a flawlessly smooth dip, creative flavor variations, and professional-level decorating techniques that will make your homemade treats look like they came from a high-end boutique bakery.
What Exactly Are Easter Egg Oreo Balls?
At their core, Easter Egg Oreo Balls are a seasonal variation of the legendary Oreo truffle. If you have never experienced an Oreo truffle before, prepare for a revelation. The interior consists of only two ingredients: finely crushed Oreo cookies (including the creamy center filling) and softened cream cheese. When mashed together, these two humble ingredients transform into a dense, fudgy, deeply chocolatey center that boasts a texture remarkably similar to a high-end ganache truffle, but with a satisfying cookie crumb bite.
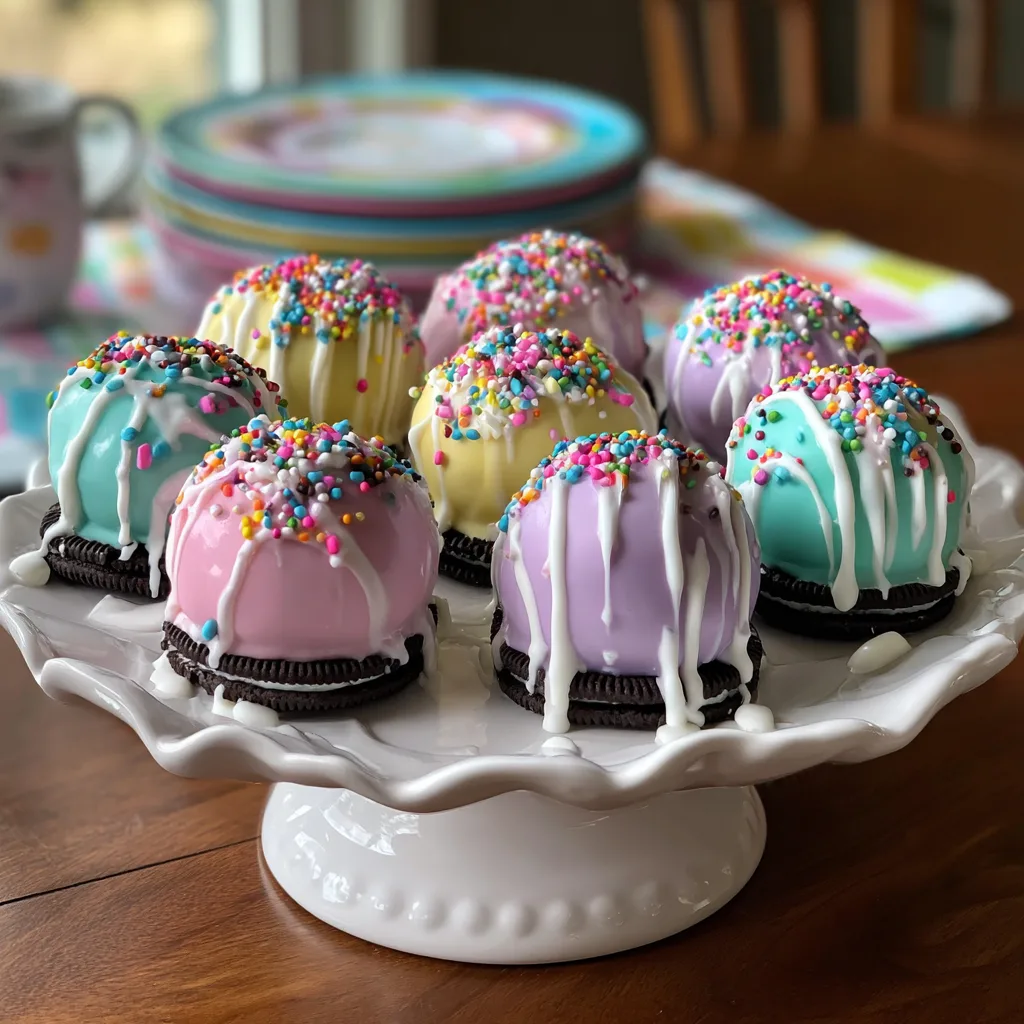
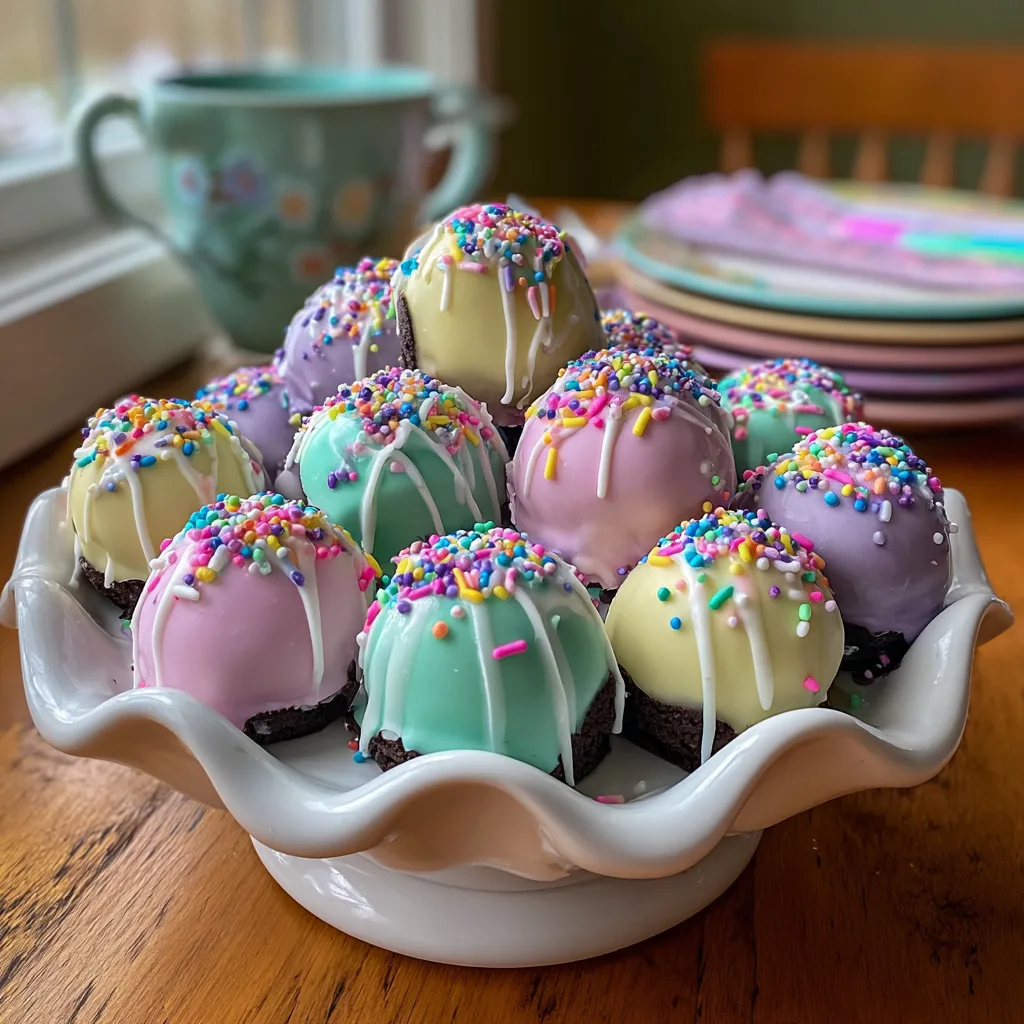
For this specific Easter variation, the traditional dark or milk chocolate outer coating is replaced with vibrant, pastel-colored candy melts or white chocolate dyed in festive hues of pink, lavender, baby blue, mint green, and pale yellow. Once coated, they are finished with a contrasting drizzle of white chocolate and a generous shower of bright, rainbow nonpareil sprinkles. The result is a treat that looks just like a beautifully decorated miniature Easter egg.
Why This Recipe is a Springtime Must-Have
The popularity of no-bake Oreo truffles has skyrocketed over the last decade, and it is incredibly easy to understand why. First and foremost, they require absolutely zero baking. This means you do not have to heat up your kitchen, worry about precise oven temperatures, or fret over over-baked, dry cakes. The process is straightforward, incredibly forgiving, and almost foolproof.
Secondly, the flavor profile is a guaranteed crowd-pleaser. The bitterness of the dark chocolate cookie is beautifully balanced by the rich, slightly sour tang of the cream cheese, preventing the treat from becoming overwhelmingly sweet. The hard candy shell provides a satisfying snap that gives way to the dense, melt-in-your-mouth interior.
Furthermore, these treats are highly customizable and visually stunning. The pastel colors scream “springtime” and look spectacular arranged on a platter or packaged in clear cellophane bags tied with ribbon for homemade Easter basket stuffers or party favors.
Essential Ingredients for Perfection
To create the best possible Easter Egg Oreo Balls, you only need a handful of ingredients. However, understanding how these ingredients interact is key to a flawless dessert.
The Cookie Base
You will need a standard package (usually around 14.3 ounces or 36 cookies) of classic chocolate sandwich cookies. While name-brand Oreos are the standard, high-quality generic store brands will also work perfectly. Do not use the “Double Stuf” or “Mega Stuf” varieties for this base recipe. The ratio of dry cookie to cream filling in the standard cookie is specifically calibrated to mix with the added cream cheese. Using a cookie with extra filling will result in a truffle mixture that is far too greasy, soft, and difficult to roll.
The Cream Cheese Binder
One standard 8-ounce block of full-fat cream cheese is the magic ingredient that turns dry cookie crumbs into fudgy perfection. It is absolutely crucial that you use the block style of cream cheese, not the spreadable kind that comes in a tub (which contains too much air and water). Additionally, the cream cheese must be softened to room temperature before mixing. Cold cream cheese will leave unappetizing white lumps throughout your dark chocolate truffles.
The Colorful Coating
To achieve those beautiful, solid pastel colors, you have two main options: colored candy melts or high-quality white chocolate mixed with oil-based food coloring. Candy melts (often sold by brands like Wilton or Sweet Tooth Fairy) are usually the easiest route for beginners. They are specifically formulated to melt smoothly and harden quickly with a great shine. If you choose to use real white chocolate, you must use oil-based candy coloring. Standard water-based or gel food coloring will cause the melted white chocolate to instantly “seize,” turning it into an unusable, grainy paste.
The Festive Decorations
You will need a small amount of bright white candy melts or white chocolate for the decorative drizzle. Finally, a generous amount of colorful rainbow nonpareil sprinkles (the tiny, hard round sprinkles) adds the perfect finishing touch of texture and festivity.
Detailed Ingredients List
For the Truffle Centers:
For the Pastel Coating and Decoration:
Step-by-Step Instructions for Flawless Oreo Balls
Follow these detailed steps carefully to ensure your Easter Egg Oreo Balls come out perfectly round, smooth, and delicious.
1. Crush the Cookies
Place the entire package of cookies (whole, do not remove the filling) into the bowl of a food processor. Pulse them until they are ground into a very fine, uniform crumb. You want a texture resembling damp sand, with no large chunks of cookie remaining. If you do not have a food processor, place the cookies in a heavy-duty, gallon-sized zip-top bag, seal it tightly, and use a rolling pin to crush them completely. This manual method takes a bit more effort but yields great results.
2. Mix in the Cream Cheese
Transfer the fine cookie crumbs to a large mixing bowl. Add the softened block of cream cheese. Using a hand mixer on medium speed, or simply using your hands (wearing food-safe gloves is highly recommended), blend the cream cheese and cookie crumbs together until completely combined. The mixture should look like a cohesive, dark, fudgy dough without any white streaks of unmixed cream cheese.
3. Shape the Eggs
Line a large baking sheet with wax paper or parchment paper. Using a small cookie scoop (about 1 tablespoon in size) to ensure uniform portions, scoop out the mixture and roll it between your palms into a smooth ball. For an Easter twist, you can gently pinch one end of the ball slightly to create a subtle egg shape, or simply leave them as perfect spheres. Place the shaped balls onto the prepared baking sheet.
4. The Crucial Chilling Step
This is arguably the most important step in the entire recipe. Place the baking sheet of shaped truffles into the freezer for at least 30 to 45 minutes, or in the refrigerator for 2 hours. The truffles must be very firm and cold before dipping. If they are warm or room temperature, they will fall apart and melt into the hot candy coating, leaving you with a messy, crumbly disaster.
5. Prepare the Candy Coating
Working with one color at a time, place your candy melts into a deep, microwave-safe bowl (a glass measuring cup works wonderfully because of its depth). Microwave on 50% power for 30 seconds. Remove and stir thoroughly. Repeat this process of microwaving on half power and stirring in 30-second increments until the candy is completely melted and smooth. Do not overheat, or the candy will burn and seize. If the melted candy seems too thick to dip easily, stir in a tiny amount (about 1/2 teaspoon) of coconut oil or vegetable oil to thin it out.
6. Dip the Truffles
Remove only a few chilled truffles from the freezer at a time (keep the rest cold). Drop one truffle into the melted candy coating. Use a fork to gently roll it around until completely coated. Lift the truffle out with the fork, tapping the handle of the fork gently against the side of the bowl to allow all excess coating to drip off. Gently slide the coated truffle back onto the wax paper-lined baking sheet.
7. Add Drizzle and Sprinkles
Allow the pastel base coating to set completely (this usually only takes 5-10 minutes). Meanwhile, melt your white candy melts or white chocolate. Transfer the melted white chocolate into a small zip-top bag and snip off a tiny corner. Drizzle the white chocolate quickly back and forth over the set pastel truffles. Immediately, before the white drizzle dries, shower them with the rainbow sprinkles so they stick to the wet drizzle.
8. Final Chill and Serve
Place the fully decorated truffles into the refrigerator for about 15 minutes to allow all the chocolate to fully set and harden before moving them to a serving platter or airtight container.
Pro-Tips for Dipping and Decorating
Dipping truffles can sometimes be frustrating for beginners. Here are some advanced tips to help you achieve a professional, bakery-quality finish.
Avoid the “Foot”: A “foot” is that little pool of hardened chocolate that forms around the base of the truffle after dipping. To minimize this, ensure you tap off as much excess chocolate as possible before placing it on the wax paper. Alternatively, after placing the truffle down, use a toothpick to gently trace a circle around the base, which helps separate the truffle from the excess pool, making it easier to snap off later.
Temperature Control is Everything: If your candy melts start to cool down and thicken while you are dipping, pop them back in the microwave for 10-15 seconds to loosen them back up. Conversely, if your uncoated truffles start getting soft while sitting on the counter, put them back in the freezer immediately.
Use a Toothpick for Stability: If using a fork feels too clunky, try inserting a toothpick into the chilled truffle, dipping it into the chocolate, tapping off the excess, and placing it on the wax paper. You can then carefully twist the toothpick out and cover the small hole with your decorative drizzle.
Creative Flavor Variations to Explore
Once you master the basic technique, the possibilities are virtually endless. Here are a few ways to customize the flavor profile of your Easter Egg Oreo Balls.
Golden Lemon Eggs: Swap out the standard chocolate Oreos for Golden Oreos. Add 1 tablespoon of fresh lemon zest and 1 teaspoon of lemon extract to the cream cheese mixture before rolling. Dip in pale yellow candy melts for a bright, citrusy spring treat.
Mint Chocolate Chip: Use Mint flavored Oreos instead of the original, or add 1/2 teaspoon of peppermint extract to the standard mixture. Coat them in mint green candy melts and use miniature chocolate chips instead of rainbow sprinkles for a delightful mint-chocolate combination.
Strawberry Shortcake: Use strawberry-flavored sandwich cookies or Golden Oreos mixed with 2 tablespoons of freeze-dried strawberry powder. Dip in pale pink candy melts for a fruity, creamy delight.
Storage and Freezing Instructions
Because these truffles contain dairy (cream cheese), proper storage is essential for food safety and optimal texture.
Refrigerator Storage: Store the finished, fully set Oreo balls in an airtight container in the refrigerator. They will stay fresh and delicious for up to 2 weeks. They are actually best served slightly chilled, as the interior stays dense and fudgy.
Freezer Storage: These freeze exceptionally well! Place them in a single layer in a freezer-safe airtight container, separating layers with wax paper. They can be frozen for up to 3 months. When you are ready to enjoy them, let them thaw in the refrigerator overnight before serving. Condensation may form on the outside as they thaw, but the taste will remain perfect.
Room Temperature Warning: Do not leave these sitting out at room temperature for more than 2 hours. Not only will the cream cheese center pose a food safety risk over time, but the interior will also become overly soft and mushy.
The Joy of Easter Baking Traditions
Making treats like Easter Egg Oreo Balls is more than just about satisfying a sweet tooth; it is about creating memories and partaking in seasonal traditions. Springtime holidays have long been associated with eggs, representing rebirth, renewal, and new life. Transforming a simple, modern cookie into a symbol of the season bridges the gap between convenience and festive tradition.
Getting children involved in the kitchen is highly encouraged with this recipe. While an adult should handle the hot melted candy, kids excel at crushing the cookies, rolling the dough into balls, and, of course, haphazardly applying the colorful sprinkles. It’s a messy, joyful process that embodies the playful spirit of the Easter holiday.
Frequently Asked Questions (FAQs)
Can I make these dairy-free or vegan?
Yes! You can substitute the standard cream cheese with a plant-based/vegan cream cheese alternative. Ensure you use vegan-certified chocolate sandwich cookies (many generic brands are accidentally vegan), and use vegan white chocolate or dairy-free colored candy melts for the coating.
My chocolate seized and turned clumpy, what happened?
Chocolate is notorious for seizing. The most common culprit is water. Even a single drop of water from a wet bowl or spoon will cause melted chocolate or candy melts to instantly harden into a grainy paste. Always ensure your bowls and utensils are bone-dry. The other culprit is overheating. Microwave in short bursts and stir frequently.
Do I have to use candy melts?
No, you can use high-quality white chocolate chips or white chocolate baking bars. However, white chocolate is thinner and slightly more finicky to work with. If you want to color white chocolate, remember you absolutely MUST use oil-based candy coloring, not liquid or gel food coloring from the grocery store.
Embrace the vibrant colors and sweet flavors of spring with this foolproof recipe. Your friends, family, and guests will be absolutely blown away by the taste and appearance of these delightful Easter Egg Oreo Balls. Enjoy the process, have fun with the decorating, and happy spring!
Easter Egg Oreo Balls
Ingredients
Equipment
Method
- Crush the entire package of cookies (including the filling) in a food processor until they form a fine crumb.
- In a large bowl, mix the cookie crumbs and softened cream cheese together until fully combined into a thick dough.
- Scoop out 1-tablespoon portions and roll them into smooth balls. Slightly pinch one end to form an egg shape if desired. Place on a wax paper-lined baking sheet.
- Freeze the rolled balls for 30-45 minutes, or refrigerate for 2 hours until very firm.
- Melt the pastel candy melts in microwave-safe bowls in 30-second intervals at 50% power, stirring until smooth. Add a little coconut oil if too thick.
- Dip the chilled truffles into the melted candy coating using a fork. Tap off excess coating and place back onto the wax paper.
- Once the base coat is set, melt the white candy melts, transfer to a zip-top bag, snip the corner, and drizzle over the truffles.
- Immediately add the rainbow nonpareil sprinkles onto the wet drizzle so they stick.
- Refrigerate for 15 minutes to fully set. Store in an airtight container in the refrigerator.