Quick Easy Bao Buns
The Best Quick and Easy Bao Buns Recipe: Pillowy Perfection at Home
Welcome to your new favorite culinary obsession! If you have ever ordered those incredibly soft, pillowy, cloud-like steamed buns at your favorite Asian restaurant and wondered if you could recreate that magic in your own kitchen, the answer is a resounding yes. These Quick and Easy Bao Buns are a revelation. They are soft, slightly sweet, satisfyingly chewy, and serve as the absolute perfect vessel for an endless variety of savory, sticky, and crunchy fillings. In this comprehensive guide, we are going to walk you through every single step to achieve steamed bun perfection, right from the comfort of your home.
Making bao dough from scratch might seem intimidating to the uninitiated, but it is actually one of the most forgiving and satisfying doughs you can work with. Unlike crusty artisanal breads that require complex sourdough starters and days of fermentation, this quick bao dough comes together beautifully with standard pantry ingredients and minimal resting time. By the time you finish reading this article, you will be equipped with all the knowledge, tips, and tricks necessary to become a bao-making master.
What Exactly Are Bao Buns?
Before we dive into the mixing bowls and bamboo steamers, let us take a moment to appreciate the history and context of this beloved dish. The term “bao” (pronounced “bow,” rhyming with “how”) simply translates to “bun” in Chinese. Therefore, saying “bao buns” is technically redundant (like saying “chai tea”), but it has become the widely accepted colloquial term in Western culinary culture to describe this specific type of folded, steamed bread.
The specific style of bun we are making today is known as a Gua Bao or a lotus leaf bun. Originally hailing from the Fujian province of China and wildly popularized as a street food staple in Taiwan, these buns are distinct because they are rolled out flat and folded over onto themselves before steaming. This creates a natural pocket—like a soft, edible taco shell—that is practically begging to be stuffed with rich, flavorful meats, crisp pickled vegetables, and fresh herbs.
The texture of a proper bao is unlike any Western bread. It is steamed rather than baked, which prevents a hard crust from forming. The result is a pristine white, smooth surface with an interior crumb that is impossibly light, airy, and delicately sweet. This subtle sweetness is crucial, as it provides the perfect counterbalance to the intensely savory, salty, and often spicy fillings tucked inside.
Why This Quick and Easy Recipe Works
Traditional bao recipes can be time-consuming, sometimes requiring multiple long proofs or the use of specific low-protein flours that are hard to find in a standard grocery store. This recipe has been meticulously optimized for the modern home cook who wants spectacular results without spending the entire day in the kitchen.
We utilize a combination of active dry yeast and baking powder. This dual-leavening approach is the secret weapon for quick bao. The yeast provides that classic, slightly fermented bakery flavor and foundational structure, while the baking powder gives the dough a rapid, reliable lift when it hits the heat of the steamer. This means we only need one primary resting period to let the dough relax and rise, drastically cutting down the overall preparation time.
Furthermore, we use standard all-purpose flour. While specialized bleached cake flours will yield an intensely bright white bun, standard all-purpose flour provides an excellent, sturdy texture that holds up beautifully to heavy fillings, and it is an ingredient you likely already have in your pantry.
The Anatomy of the Perfect Bao Bite
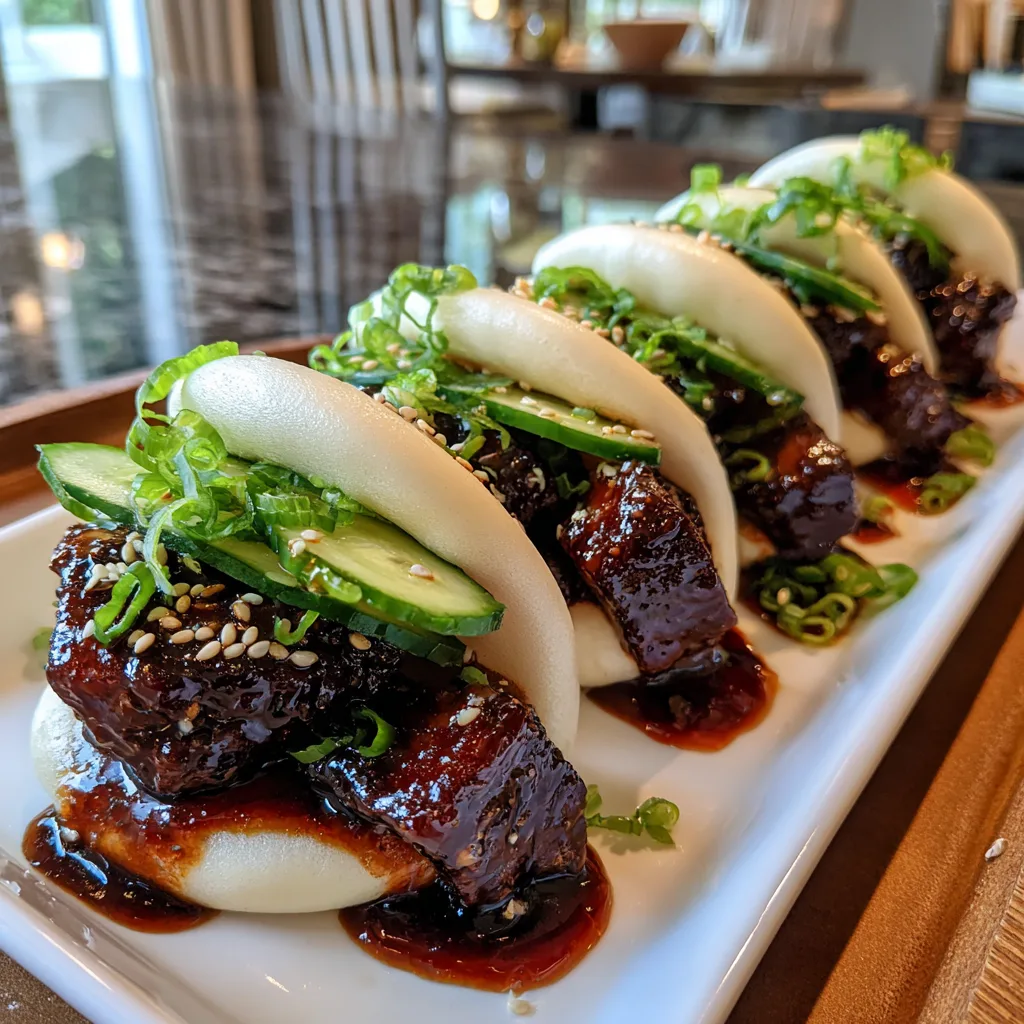
A truly spectacular bao experience is all about the contrast of textures and flavors. When you build your buns, you want to hit all the major sensory notes:
1. The Cloud-Like Exterior: The bun itself should be warm, soft, and slightly tacky to the touch. It provides a comforting, starchy embrace for the ingredients inside.
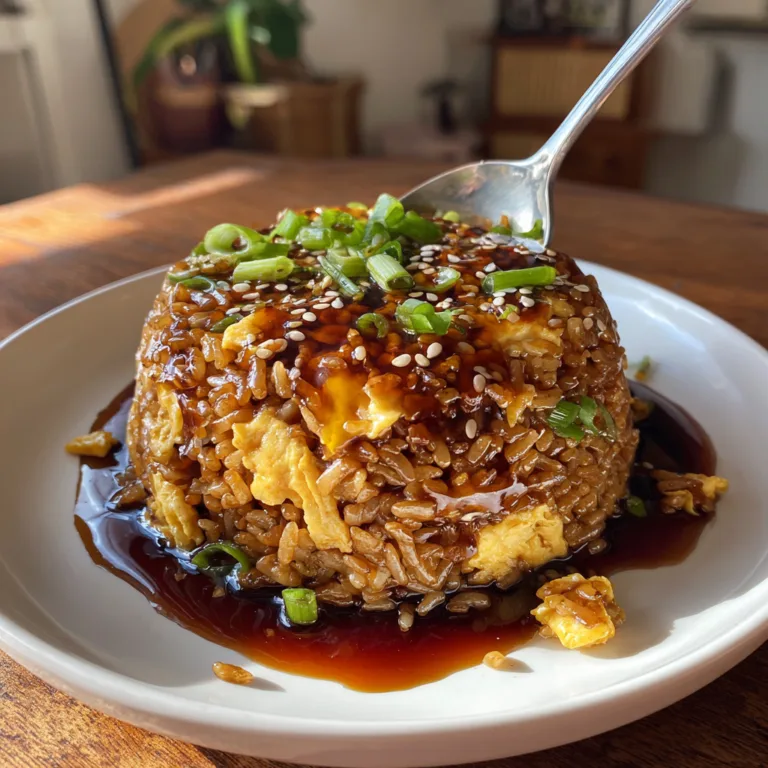
2. The Rich, Sticky Protein: In our featured image, you see deeply browned, sticky glazed pieces of meat. Whether you choose to use crispy fried chicken thighs tossed in a sweet soy glaze, slow-braised pork belly, or even crispy pan-fried tofu, the filling needs to be robust. It should be coated in a thick, glossy sauce—think hoisin, dark soy sauce, brown sugar, and garlic—that seeps just slightly into the soft interior of the bun.
3. The Fresh Crunch: To cut through the richness of the dough and the heavy meat, you must have a fresh, crunchy element. Thinly sliced cucumbers are traditional and perfect for this. Their high water content and crisp snap provide a refreshing contrast.
4. The Aromatic Garnish: Finally, the finishing touches. Freshly sliced green scallions add a sharp, oniony bite that awakens the palate, while toasted white sesame seeds offer a subtle nuttiness and a beautiful visual contrast against the dark, sticky filling.
Ingredients for Quick and Easy Bao Buns
Let’s break down exactly what you will need to bring these to life. The ingredients are split into the dough components and our highly recommended quick sticky glazed filling.
For the Fluffy Bao Dough:
- – All-Purpose Flour: Forms the structural base of our buns.
- – Active Dry Yeast: Essential for flavor and the initial rise.
- – Warm Milk & Water: The liquid activates the yeast. Using half milk adds a touch of fat for a softer crumb.
- – Granulated Sugar: Feeds the yeast and provides the signature subtle sweetness of the bun.
- – Baking Powder: Our secret ingredient for an extra fluffy, rapid rise during steaming.
- – Vegetable Oil: Adds moisture to the dough and is used to brush the buns so they don’t stick together when folded.
- – Salt: Enhances the overall flavor of the dough.
For the Sticky Glazed Filling & Garnish:
- – Protein of Choice: Boneless skinless chicken thighs (cut into strips), pork belly slices, or firm tofu.
- – Cornstarch: To coat the protein for a crispy pan-fry.
- – Soy Sauce & Hoisin Sauce: The savory, umami-rich base of the sticky glaze.
- – Brown Sugar: Creates the glossy, caramel-like coating.
- – Garlic & Ginger: Minced fresh for aromatic depth.
- – Cucumber: Thinly sliced into half-moons for crunch.
- – Scallions (Green Onions): Finely chopped for a fresh bite.
- – Sesame Seeds: For a nutty, attractive garnish.
Step-by-Step Instructions for Bao Mastery
Follow these steps closely, and you will be amazed at how easily these come together.
Part 1: Making and Shaping the Dough
- Activate the Yeast: In a small bowl, combine your warm water, warm milk, yeast, and a tablespoon of your sugar. Let this mixture sit for about 5 to 10 minutes until it becomes frothy and bubbly. This proves your yeast is alive and ready to work.
- Mix the Dry Ingredients: In a large mixing bowl (or the bowl of a stand mixer), whisk together the all-purpose flour, remaining sugar, baking powder, and salt.
- Knead the Dough: Pour the wet yeast mixture and a tablespoon of oil into the dry ingredients. Stir until a shaggy dough forms. Turn it out onto a clean surface and knead for about 8-10 minutes (or use a stand mixer with a dough hook for 5-7 minutes) until the dough is incredibly smooth, elastic, and slightly tacky but not wet.
- The Resting Phase: Place the dough in a lightly oiled bowl, cover it with a damp kitchen towel or plastic wrap, and let it rest in a warm spot for about 1 hour, or until it has doubled in size.
- Divide and Roll: Punch the dough down to release the air. Divide the dough into 10 to 12 equal-sized portions and roll each into a smooth ball. On a lightly floured surface, use a rolling pin to roll each ball into an oval shape, about 1/4 inch thick.
- Fold and Prep for Steaming: Lightly brush the surface of each oval with vegetable oil (this is crucial—it prevents the bun from sealing shut while steaming!). Place a chopstick horizontally across the middle of the oval and fold the dough over the chopstick to create a half-moon shape. Gently slide the chopstick out. Place each folded bun onto an individual square of parchment paper.
Part 2: Steaming the Buns
- Prepare the Steamer: Set up your bamboo steamer or metal steamer basket over a wok or pot of boiling water. Ensure the water does not touch the bottom of the steamer basket.
- Steam to Perfection: Place the buns (still on their parchment squares) into the steamer, leaving about an inch of space between them as they will expand. Cover with the lid and steam on medium-high heat for 10 to 12 minutes.
- The Golden Rule of Steaming: When the time is up, do not immediately remove the lid! Turn off the heat and let the steamer sit undisturbed for 3 to 5 minutes. Opening the lid too quickly causes a sudden drop in temperature, which can make your beautifully fluffy buns collapse and wrinkle.
Part 3: The Sticky Glaze and Assembly
- Crisp the Protein: Toss your chicken strips (or tofu) in cornstarch until lightly coated. Pan-fry in a skillet with a little oil over medium-high heat until golden brown and crispy on all sides.
- Make it Sticky: In a small bowl, whisk together the soy sauce, hoisin, brown sugar, minced garlic, and ginger. Pour this sauce over the crispy protein in the skillet. Reduce the heat and simmer for 2-3 minutes until the sauce reduces, thickens, and coats the meat in a thick, glossy glaze.
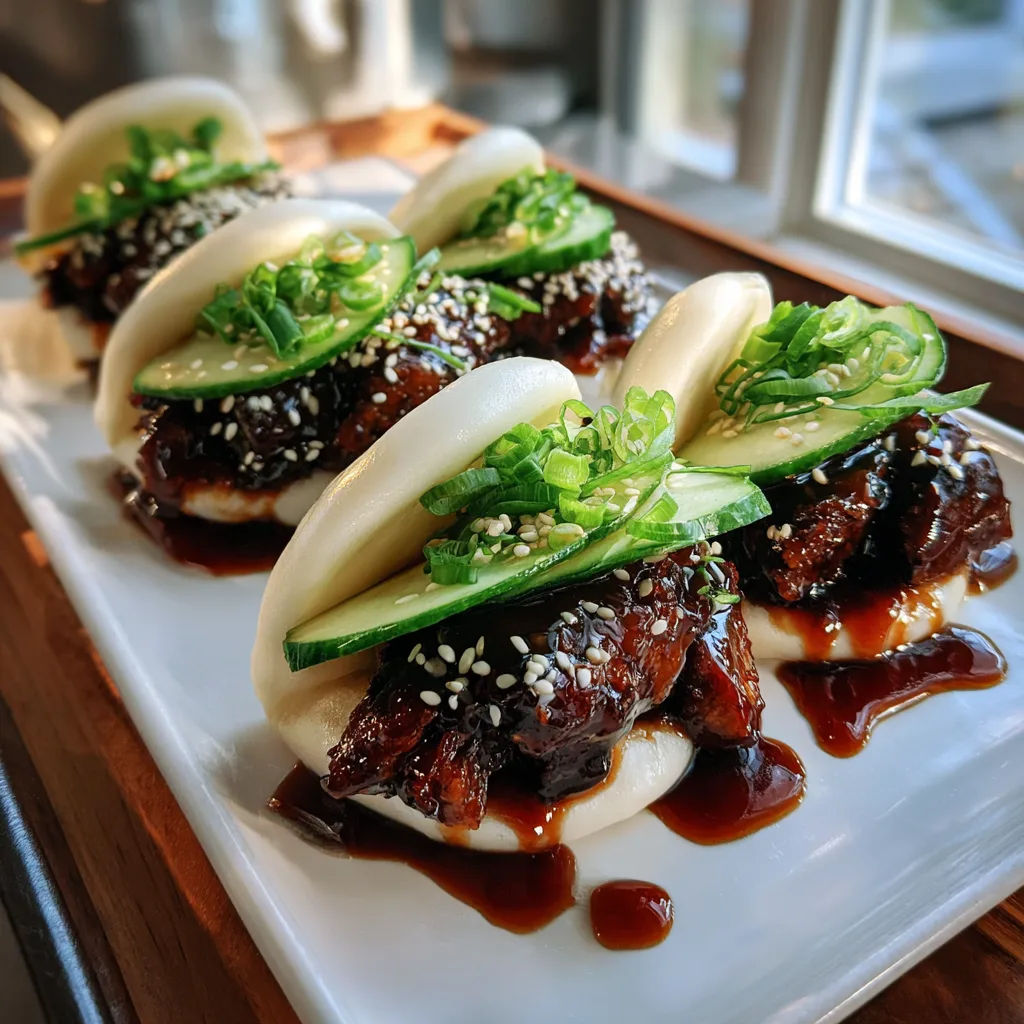
- Assemble: Gently open your warm, steamed bao buns. Tuck a few slices of fresh cucumber into the bottom crease. Pile in a generous portion of the sticky glazed meat. Top immediately with chopped scallions and a sprinkle of sesame seeds.
Expert Tips for Foolproof Fluffy Buns
Even though this recipe is easy, working with yeasted dough and steam can sometimes be tricky. Keep these pro-tips in your back pocket to ensure success every single time:
Use Bamboo if Possible: While a metal steamer works fine, a bamboo steamer is highly recommended for bao. Bamboo absorbs excess condensation, preventing water droplets from falling down onto the buns and causing ugly, soggy spots on your perfectly smooth dough.
Don’t Over-Proof: In a warm kitchen, dough can rise very quickly. If you let the dough proof for too long, the yeast will exhaust itself, and the buns will actually deflate and become dense during the steaming process. Keep an eye on it; once it has doubled in size, it is ready to work with.
The Chopstick Trick: Using a chopstick to help fold the dough isn’t just for aesthetics. It creates a perfect, uniform crease that helps the bun hold its shape and makes it much easier to open up and stuff once it is fully cooked.
Creative Filling Variations
The beauty of the bao bun is its versatility. Once you have a batch of these fluffy clouds ready, you can let your imagination run wild. Here are a few fantastic variations to try:
The Classic Pork Belly: Slow-braise thick slices of pork belly in a broth of soy sauce, star anise, cinnamon, and sugar until it is meltingly tender. Serve with crushed roasted peanuts, pickled mustard greens, and fresh cilantro.
Spicy Crispy Mushroom: For a spectacular vegetarian option, take large clusters of oyster mushrooms or maitake mushrooms, dip them in a light tempura batter, and deep fry until crispy. Toss them in a spicy gochujang and maple syrup glaze.
Korean BBQ Beef (Bulgogi): Thinly sliced ribeye marinated in pear juice, soy sauce, sesame oil, and garlic, seared quickly over high heat. Pair this in the bun with some quick-pickled carrots and a smear of spicy mayonnaise.
Storing, Freezing, and Reheating
One of the best things about making bao buns from scratch is that they freeze incredibly well, making them the ultimate make-ahead meal or quick snack.
To Freeze: After steaming the buns, allow them to cool completely to room temperature on a wire rack. Place the empty buns (still on their parchment squares) into a large ziplock freezer bag. Squeeze out as much air as possible. They will keep in the freezer for up to 3 months.
To Reheat: You do not need to thaw them! Simply place the frozen buns back into your steamer over boiling water and steam for about 5 to 7 minutes until they are piping hot and pillowy soft again. Alternatively, for a quick fix, wrap a frozen bun loosely in a damp paper towel and microwave on high for 30 to 45 seconds.
Frequently Asked Questions (FAQ)
Can I make the dough ahead of time?
Yes! You can make the dough, let it complete its first rise, and then punch it down and store it in an airtight container in the refrigerator overnight. The cold temperature will slow down the yeast. The next day, let the dough sit at room temperature for about 30 minutes before dividing and shaping.
Why did my buns turn out yellow or speckled?
If your buns aren’t perfectly white, it is usually due to the flour. Unbleached all-purpose flour will naturally yield a slightly cream-colored bun. If there are yellow speckles, it means the baking powder wasn’t mixed thoroughly into the dry ingredients before the wet ingredients were added.
Can I bake these instead of steaming?
While you technically can bake this dough, it will completely change the texture. Baking will create a crusty exterior and turn them into standard dinner rolls. Steaming is absolutely mandatory to achieve the signature soft, skinless texture of a bao bun.
Conclusion
Creating beautiful, restaurant-quality Quick and Easy Bao Buns at home is an incredibly rewarding culinary project. The magic of transforming basic flour and yeast into these fluffy, folded pockets of perfection is a joy every home cook should experience. Whether you stuff them with sticky chicken, rich pork belly, or crispy vegetables, these buns are guaranteed to be a massive hit at your next dinner table. So, fire up the steamer, prepare your favorite fillings, and get ready to enjoy the best homemade bao you have ever tasted!
Quick and Easy Bao Buns
Ingredients
Equipment
Method
- In a small bowl, mix warm water, warm milk, yeast, and 1 tbsp sugar. Let sit for 5-10 minutes until frothy.
- In a large bowl, whisk together flour, remaining sugar, baking powder, and salt. Add the yeast mixture and 1 tbsp oil. Knead for 8-10 minutes until smooth and elastic.
- Place dough in an oiled bowl, cover, and let rise in a warm place for 1 hour or until doubled in size.
- Punch dough down, divide into 10-12 pieces. Roll each into a ball, then flatten into an oval shape.
- Brush the top of each oval lightly with oil. Fold in half crosswise (like a taco) and place on a small square of parchment paper.
- Set up a steamer over boiling water. Steam the buns in batches for 10-12 minutes. Turn off heat and wait 3-5 minutes before opening the lid to prevent collapsing.
- While buns steam, toss chicken strips in cornstarch. Pan-fry in oil over medium-high heat until crispy. Whisk soy sauce, hoisin, brown sugar, garlic, and ginger, then pour over chicken. Simmer until sauce is thick and sticky.
- Assemble buns by gently opening the steamed bao, adding a few slices of cucumber, the sticky glazed chicken, and topping with scallions and sesame seeds. Serve immediately.