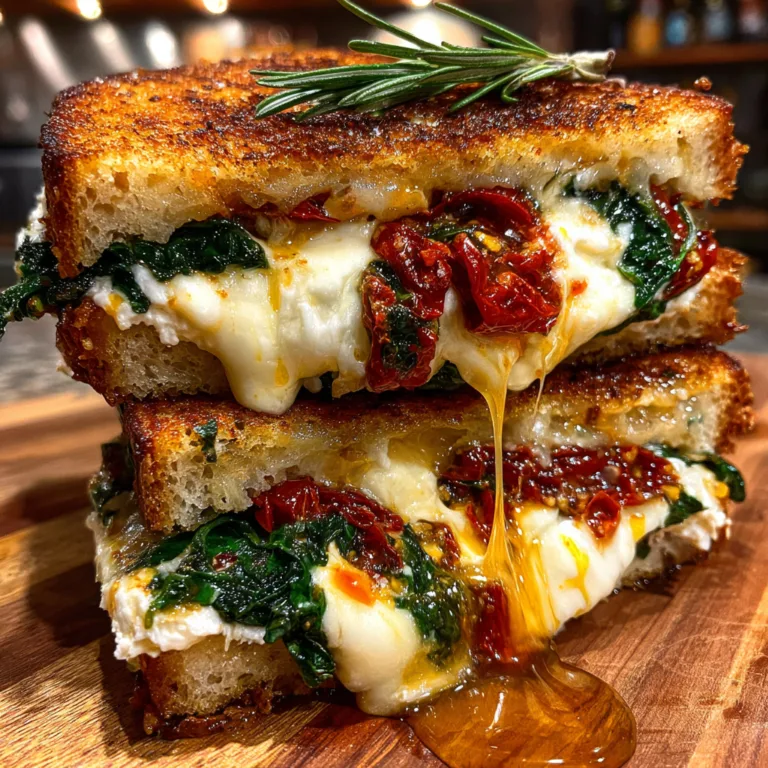
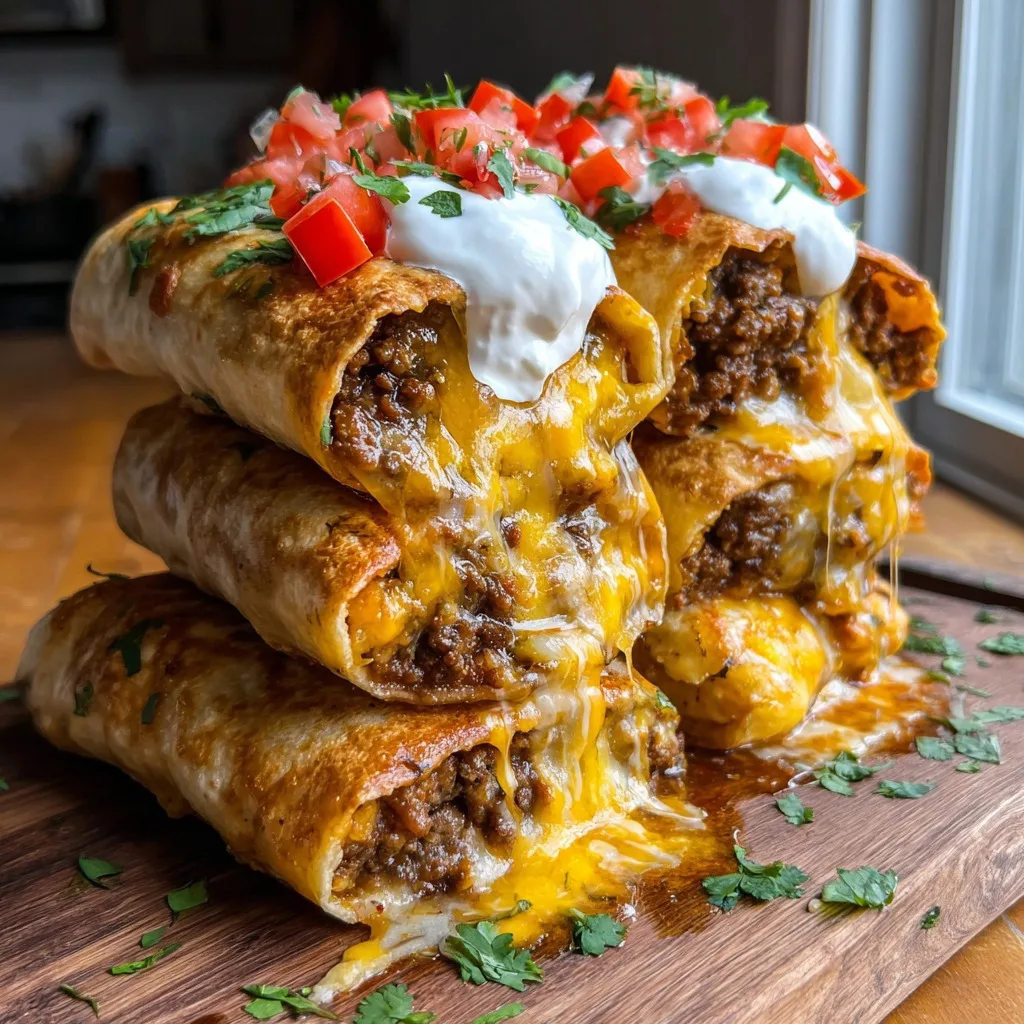
Beef Cheese Chimichangas
The Ultimate Crispy Beef and Cheese Chimichangas Recipe
Welcome to the ultimate guide on making the most incredible, mouth-watering, and perfectly crispy Beef and Cheese Chimichangas right in your own kitchen. If you have ever been to a Mexican-American restaurant and marveled at the golden, blistered exterior of a deep-fried burrito filled with savory, seasoned ground beef and gooey, melted cheese, you know exactly why this dish is an absolute favorite for families everywhere. Today, we are going to dive deep into the art of creating these masterpieces from scratch, ensuring that every single bite is packed with robust flavors and satisfying textures.
Chimichangas are the epitome of comfort food. They take the beloved components of a classic beef burrito—soft flour tortillas, seasoned meat, and plenty of cheese—and elevate them through the magic of frying. The result is a texturally contrasting delight: a shatteringly crisp outer shell giving way to a rich, warm, and highly seasoned interior. Whether you are hosting a festive dinner party, looking for a reliable weeknight meal that will have the kids begging for seconds, or simply treating yourself to an indulgent weekend feast, this recipe is guaranteed to deliver exceptional results.
What Exactly is a Chimichanga? A Brief History
Before we get our hands dirty in the kitchen, it is fascinating to understand the origins of the dish we are about to prepare. A chimichanga is essentially a deep-fried burrito that is common in Tex-Mex and Southwestern U.S. cuisine. While the exact origins are a subject of friendly debate, most culinary historians agree that the chimichanga was invented in the state of Arizona, specifically in the city of Tucson.
Legend has it that in the early to mid-20th century, a restaurant owner accidentally dropped a prepared meat and bean burrito into a deep fryer. Not wanting to waste the food or curse in front of young relatives who were present, she allegedly exclaimed “chimichanga!”—a mild Spanish expletive or nonsense word akin to saying “thingamajig” or “whatchamacallit.” The happy accident resulted in a profoundly delicious creation that quickly became a staple on her menu and soon spread throughout the Southwest and beyond.

Today, chimichangas can be filled with a wide variety of ingredients, including shredded chicken, pulled pork (carnitas), barbacoa, or even strictly vegetarian bean and cheese mixtures. However, the ground beef and cheese combination remains one of the most accessible, beloved, and universally appealing variations. It is straightforward, incredibly flavorful, and requires ingredients that are readily available in almost any grocery store.
Why You Will Fall in Love With This Recipe
There are countless reasons why this specific Beef and Cheese Chimichangas recipe will become a permanent fixture in your culinary rotation. First and foremost is the incredible balance of flavors. The ground beef is cooked down with a robust blend of spices—including chili powder, cumin, garlic, and oregano—that infuse the meat with deep, earthy, and slightly smoky undertones. When this intensely flavored beef mixes with the creamy, rich melt of sharp cheddar and Monterey Jack cheeses, it creates a filling that is truly greater than the sum of its parts.
Secondly, the texture profile is unparalleled. The process of wrapping the filling tightly in a large flour tortilla and frying it creates a barrier that locks in all the moisture and juices of the meat while simultaneously crisping the outside to a perfect golden brown. Every bite provides an audible crunch followed by a lush, savory chew.
Lastly, this recipe is remarkably versatile and forgiving. While deep-frying is the traditional method to achieve that signature crunch, we will also explore alternative cooking methods like baking and air-frying for those who prefer a lighter approach. Furthermore, chimichangas are an excellent make-ahead meal. You can easily prepare a large batch, freeze them before or after frying, and have an instant, high-quality meal ready to go on busy evenings.
Ingredients You Will Need
To create these phenomenal Beef and Cheese Chimichangas, gather the following ingredients. Using high-quality, fresh components will significantly elevate the final dish.
- – 1 pound lean ground beef (80/20 or 90/10 blend works best to balance flavor and grease)
- – 1 medium yellow onion, finely diced
- – 2 cloves garlic, minced
- – 1 packet (about 2 tablespoons) of your favorite taco seasoning, or a homemade blend of chili powder, cumin, paprika, oregano, salt, and pepper
- – 1/4 cup beef broth or water (to help the seasoning coat the meat evenly)
- – 4 ounces diced green chiles (canned, mild or hot depending on your preference)
- – 2 cups freshly grated cheese (a blend of sharp cheddar and Monterey Jack melts beautifully)
- – 6 large burrito-sized flour tortillas (10-inch or larger, warmed so they are pliable)
- – Vegetable oil, canola oil, or peanut oil for frying (enough to fill a skillet to a depth of 1 inch)
- – Garnish: Sour cream
- – Garnish: Freshly diced Roma tomatoes
- – Garnish: Chopped fresh cilantro
- – Optional Add-ins: Refried beans, black beans, or corn kernels
A note on the tortillas: It is absolutely crucial to use high-quality, fresh flour tortillas. Corn tortillas will not work for this recipe as they will crack and break when folded into the required burrito shape. Ensure your flour tortillas are warmed slightly before assembling; this makes them much more pliable and prevents them from tearing, which would allow the precious filling to leak out into the hot oil.
Step-by-Step Instructions
Follow these detailed instructions to ensure your chimichangas turn out perfectly crispy on the outside and deliciously gooey on the inside.
- Prepare the Beef Filling: Place a large skillet over medium-high heat. Add the lean ground beef and the finely diced yellow onion. Cook the mixture, breaking the beef apart with a wooden spoon, until the meat is completely browned and no longer pink, and the onions have softened and become translucent. This usually takes about 6 to 8 minutes. Drain any excess grease from the skillet to prevent your chimichangas from becoming soggy.
- Season the Meat: Reduce the heat to medium-low. Add the minced garlic to the beef and onions, cooking for about 30 seconds until fragrant. Stir in the taco seasoning, the diced green chiles, and the beef broth (or water). Simmer the mixture for 3 to 5 minutes, stirring frequently, until the liquid has mostly absorbed and the beef is coated in a thick, flavorful sauce. Remove the skillet from the heat and allow the mixture to cool slightly.
- Warm the Tortillas: Wrap your large flour tortillas in a slightly damp paper towel and microwave them for about 20 to 30 seconds. This step is vital—warm tortillas are flexible and will fold beautifully without tearing.
- Assemble the Chimichangas: Lay a warm tortilla flat on a clean work surface. Place about 1/2 cup of the seasoned ground beef mixture slightly off-center, toward the bottom half of the tortilla. Top the beef with a generous handful (about 1/3 cup) of the grated cheese blend. Fold the bottom edge of the tortilla up and tightly over the filling. Fold the left and right sides in toward the center, then roll the whole thing upward tightly, creating a sealed cylindrical packet. Secure the seam with a toothpick if necessary. Repeat this process for the remaining tortillas.
- Heat the Oil: In a deep, heavy-bottomed skillet or a Dutch oven, pour about 1 inch of your chosen frying oil. Heat the oil over medium-high heat until it reaches 350 to 375 degrees Fahrenheit (175 to 190 degrees Celsius). If you do not have a thermometer, you can test the oil by dropping a small piece of tortilla into it; if it immediately sizzles and rises to the top, the oil is ready.
- Fry to Golden Perfection: Carefully place 1 or 2 chimichangas into the hot oil, seam-side down. Placing them seam-side down first helps seal the burrito closed so it doesn’t unroll during cooking. Fry for about 1 to 2 minutes until the bottom is golden brown and crispy. Using metal tongs, carefully roll the chimichanga over and fry for another 1 to 2 minutes until all sides are evenly blistered and golden.
- Drain and Cool: Remove the fried chimichangas from the oil and place them on a wire cooling rack set over a baking sheet, or on a plate lined with paper towels, to allow excess oil to drain away. Let them rest for a few minutes before serving, as the interior will be piping hot.
- Garnish and Serve: Plate the warm chimichangas and generously top them with a dollop of cool sour cream, fresh diced tomatoes, and chopped cilantro. Serve immediately for the best crispy texture.
Alternative Cooking Methods: Baking and Air Frying
While deep-frying provides the most authentic and intensely crispy experience, we understand that many home cooks prefer methods that use less oil or are a bit less hands-on. Fortunately, this recipe adapts beautifully to both baking and air frying.
Baked Chimichangas: To bake your chimichangas, preheat your oven to 400 degrees Fahrenheit (200 degrees Celsius). Line a baking sheet with parchment paper or aluminum foil sprayed with non-stick cooking spray. Assemble the chimichangas as directed above and place them seam-side down on the prepared baking sheet. To achieve a crispy exterior in the oven, brush the tops and sides of each chimichanga generously with melted butter or vegetable oil. Bake for 20 to 25 minutes, turning them over halfway through the cooking time, until they are golden brown and crispy to your liking. They won’t have the exact blistered texture of fried chimichangas, but they will still be incredibly delicious and much lighter.
Air Fried Chimichangas: The air fryer is a fantastic tool for getting a nearly deep-fried texture with a fraction of the oil. Preheat your air fryer to 380 degrees Fahrenheit (190 degrees Celsius). Spray the assembled chimichangas lightly on all sides with cooking spray. Place them in the air fryer basket, seam-side down, ensuring they are not touching (you may need to work in batches). Air fry for 8 to 10 minutes, carefully flipping them halfway through, until the exterior is beautifully crisp and golden.
Variations and Substitutions to Customize Your Meal
One of the greatest joys of cooking Mexican-inspired cuisine at home is how easily recipes can be customized to fit your family’s specific tastes or whatever ingredients you happen to have in the pantry. Here are some fantastic ways to change up your Beef and Cheese Chimichangas:
Protein Swaps: If you aren’t in the mood for ground beef, this recipe works wonderfully with shredded cooked chicken, ground turkey, or even cooked chorizo. For a vegetarian option, skip the meat entirely and double up on the beans (black or pinto) mixed with roasted vegetables like bell peppers, zucchini, and corn.
Spice It Up: If you love heat, there are many ways to make these chimichangas spicier. Substitute the mild diced green chiles for hot jalapeños or serrano peppers. Add a pinch of cayenne pepper or red pepper flakes to your taco seasoning. You can also mix a few dashes of your favorite hot sauce directly into the beef mixture before rolling.
Cheese Varieties: While sharp cheddar and Monterey Jack are classic, feel free to experiment. Pepper Jack adds a great kick, while Oaxaca or Asadero cheeses provide an incredible, authentic stringy melt. Even a simple Colby-Jack blend works perfectly.
Expert Tips for the Best Homemade Chimichangas
To ensure your chimichangas rival those from your favorite restaurant, keep these expert tips in mind during your preparation:
1. Do Not Overfill: It can be tempting to stuff as much meat and cheese as possible into your tortillas, but overfilling is the leading cause of chimichangas bursting open in the hot oil. Stick to about 1/2 cup of filling per large tortilla to ensure a tight, secure roll.
2. Seal the Ends Tightly: Pay special attention when folding the sides of your tortilla inward. You want to create a completely enclosed packet. If the tortilla feels loose, use a wooden toothpick to pin the seam closed before frying, but don’t forget to remove it before eating!
3. Manage Your Oil Temperature: If your oil is too cold, the tortillas will absorb the grease and become soggy rather than crispy. If the oil is too hot, the exterior will burn before the cheese inside has a chance to melt completely. Aim for a steady 350 to 375 degrees Fahrenheit, adjusting your stove burner as necessary between batches.
Serving Suggestions to Complete the Feast
A great chimichanga deserves excellent side dishes to round out the meal. To create a full, restaurant-style experience at home, consider serving your crispy beef and cheese creations alongside classic Mexican rice (Arroz Rojo) and creamy refried beans topped with a little extra cotija cheese.
For something lighter, a crisp side salad dressed with a cilantro-lime vinaigrette cuts through the richness of the fried tortilla and savory beef wonderfully. Do not forget the dips! In addition to the sour cream, fresh pico de gallo, homemade guacamole, and warm queso dip are all phenomenal accompaniments that allow everyone to customize their bites.
Storage, Freezing, and Reheating Instructions
If you have leftover chimichangas, they store quite well, making them a great meal prep option.
Refrigerating: Allow the fried chimichangas to cool completely to room temperature. Store them in an airtight container in the refrigerator for up to 3 to 4 days.
Freezing: You can freeze chimichangas either before or after cooking. To freeze un-fried chimichangas, wrap each tightly rolled burrito in plastic wrap and then in aluminum foil. Store in a freezer-safe bag for up to 3 months. Thaw overnight in the fridge before frying. To freeze already cooked chimichangas, let them cool completely, wrap them individually in foil, and freeze. They can be reheated directly from frozen.
Reheating: To restore the crispy texture, avoid the microwave, which will make the tortilla soggy. Instead, reheat cooked chimichangas in an oven preheated to 350 degrees Fahrenheit for 15-20 minutes, or in an air fryer at 350 degrees for 5-8 minutes until heated through and crispy once again.
Enjoying homemade Beef and Cheese Chimichangas is an experience that brings warmth, comfort, and bold flavors to the dining table. By following this comprehensive guide, taking care to wrap them tightly, and frying them to a beautiful golden crisp, you are guaranteed to serve a meal that will be remembered and requested time and time again. Happy cooking!
Beef and Cheese Chimichangas
Ingredients
Equipment
Method
- In a large skillet over medium-high heat, brown the ground beef and diced onion until meat is cooked through (about 6-8 minutes). Drain excess grease.
- Reduce heat to medium-low. Add minced garlic and cook for 30 seconds. Stir in taco seasoning, green chiles, and beef broth. Simmer for 3-5 minutes until liquid absorbs. Remove from heat.
- Warm the flour tortillas in the microwave for 20-30 seconds under a damp paper towel to make them pliable.
- Place about 1/2 cup of the beef mixture and 1/3 cup of shredded cheese near the bottom center of a tortilla.
- Fold the bottom over the filling, fold in the sides, and roll tightly to form a sealed cylinder. Secure with a toothpick if necessary. Repeat for remaining tortillas.
- Heat 1 inch of oil in a deep skillet to 350-375°F (175-190°C).
- Carefully place chimichangas seam-side down in the hot oil. Fry for 1-2 minutes until golden, then flip and fry for another 1-2 minutes until all sides are crispy.
- Remove from oil and drain on a wire rack or paper towels. Top with sour cream, diced tomatoes, and cilantro before serving.