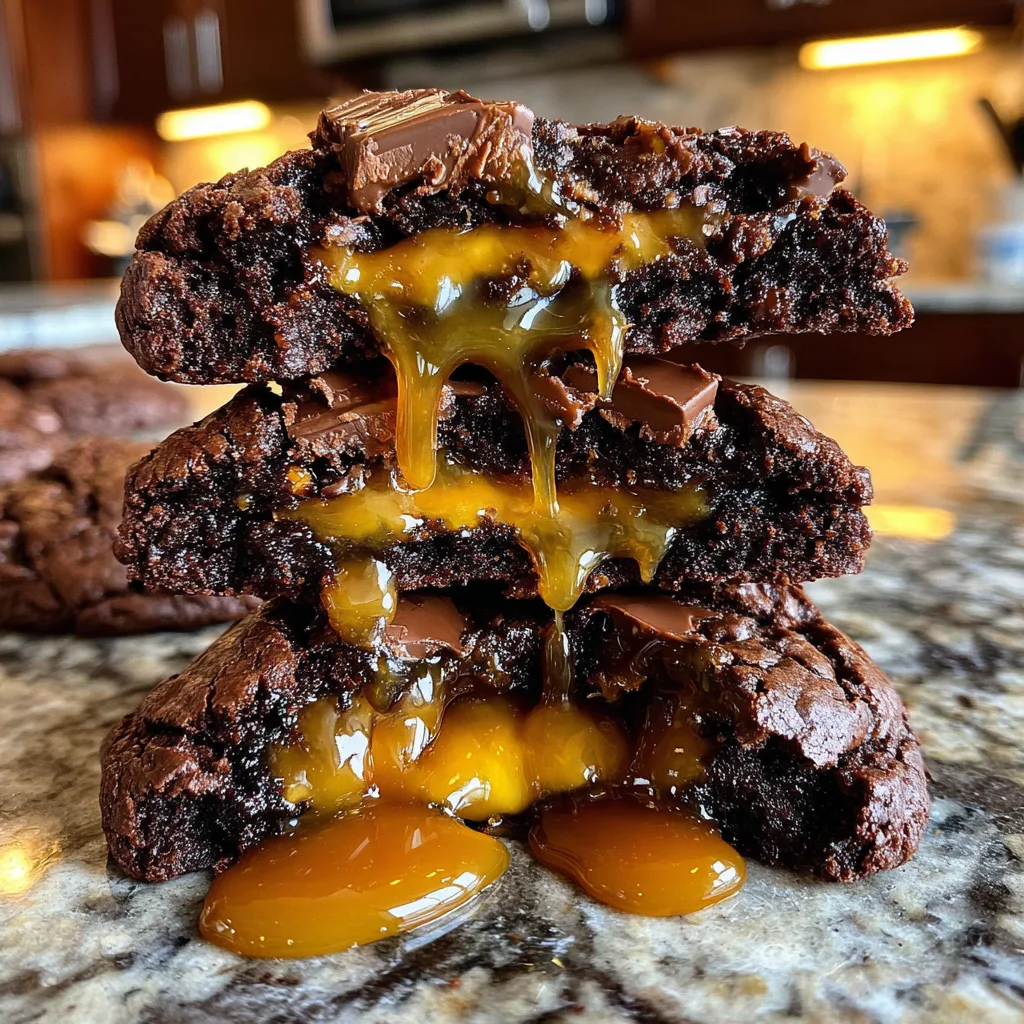
Caramel Chocolate Lava Cookies
The Ultimate Gooey Salted Caramel Chocolate Lava Cookies: A Masterpiece Decade in the Making
Prepare yourself for a journey into the heart of pure, unadulterated decadence. In a world saturated with standard chocolate chip cookies and generic store-bought options, there is a craving that demands something more: something richer, more complex, and fundamentally, more gooey. Enter the Salted Caramel Chocolate Lava Cookie. This isn’t just a cookie; it’s an experience, a perfect symphony of textures and flavors that will redefine your standards for what a dessert can be. This isn’t just a simple dessert; it is a labor of love that balances intense chocolate with a surprising, flowing core of molten salted caramel. Let me guide you through the process of creating this unparalleled treat, step-by-step.
Why You Need These Cookies in Your Life (And in Your Mouth)
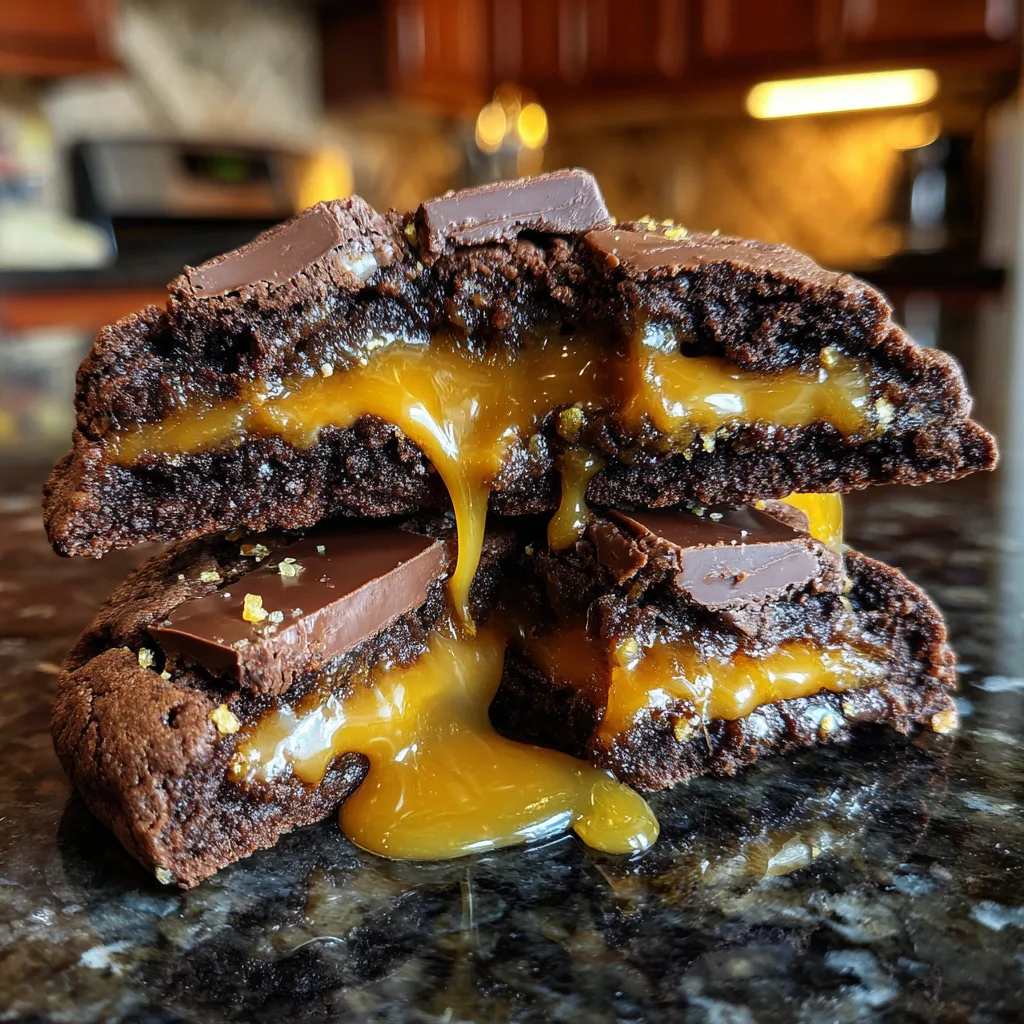
These aren’t your average cookies. They are the cookie that you bake when you need a serious chocolate fix, a moment of true self-indulgence, or a treat that will utterly impress your family and friends. The Salted Caramel Chocolate Lava Cookie is a masterclass in texture. We’re talking about a brownie-cookie dough that is incredibly rich, fudgy, and packed with molten chocolate pools. And the center? Oh, the center. That’s a perfect puddle of flowing, salted caramel that creates a truly irresistible “lava” effect. It is a harmonious marriage of deep, dark chocolate and sweet, buttery caramel with that vital hint of salt to balance it all. Don’t just imagine it; bake it.
The Ingredients: Deconstructing the Perfection
Every element of this cookie has a purpose, from the specific sugars to the type of chocolate. Let’s look at what is needed to build this dessert, deconstructed.
- – 1 cup unsalted butter, softened
- – 3/4 cup packed light brown sugar
- – 3/4 cup granulated sugar
- – 2 large eggs, room temperature
- – 1 tablespoon vanilla extract
- – 2 cups all-purpose flour
- – 1/2 cup unsweetened cocoa powder, sifted
- – 1 tablespoon cornstarch
- – 1 teaspoon baking soda
- – 1/2 teaspoon salt
- – 1 1/2 cups semi-sweet chocolate chunks or chips
- – 1 cup (about 25-30 pieces) soft caramels (like Werther’s Soft Caramels, or homemade, cooled caramel discs)
- – 1-2 teaspoons flaked sea salt (like Maldon), for topping
Understanding Your Elements: Chocolate vs. Caramel
The success of these cookies rests on the quality and handling of your primary ingredients. Here’s what you need to know.
Choosing the Right Chocolate
We’re using a rich cocoa powder for the base and high-quality semi-sweet chocolate chunks or chips for pools of molten chocolate. Semi-sweet (50-60% cocoa) is the ideal balance. Using standard milk chocolate will be too sweet against the caramel, and using a very high cacao content (80%+) can make the cookie too bitter. Chunks provide larger, more defined chocolate puddles, but chips will also work beautifully.
Handling the Caramel: The Ooze Factor
The core issue with making a “lava” cookie with standard caramels is that they can turn into hard toffee after cooling. Soft caramels are key. I recommend Werther’s Soft Caramels as they melt very easily and stay pliable when warm, creating that perfect flow. If you’re ambitious, you can make a rich, buttery homemade caramel (like a standard caramel sauce that is cooked to a soft-ball stage), cool it, and form it into flat discs. This requires more effort but yields an incredibly professional-grade molten center. The crucial part is choosing a caramel that *stays* soft when heated.
Flaked Sea Salt: The Crucial Counterpart
The salt on top is non-negotiable. Without it, the cookie can be overwhelmingly sweet. The flaked sea salt provides a texture and a burst of savory counterpoint that cuts through the sugar and makes the flavor of the caramel and chocolate explode on your palate.
Step-by-Step Instructions: Mastering the Lava
Follow these steps closely to ensure your cookies have a perfectly formed outer dough and a dramatic, gooey molten center.
- Prepare the Caramel Cores: If using soft caramel squares, place them on a small piece of parchment paper and press them slightly flat to form small, consistent discs. This will help them melt more evenly and center them better in the cookie. If you have made homemade caramel discs, ensure they are chilled and manageable. Set aside.
- Cream the Butter and Sugars: In a large mixing bowl (using a hand mixer or a stand mixer with a paddle attachment), beat the softened butter, brown sugar, and granulated sugar together on medium-high speed for 3-4 minutes until the mixture is light, fluffy, and looks like a pale yellow cloud. Don’t rush this step, as it creates the necessary air for a perfect texture.
- Add Wet Ingredients: Add the eggs one at a time, beating well after each addition and scraping down the sides of the bowl. Mix in the vanilla extract. The mixture should look smooth and cohesive.
- Whisk Dry Ingredients: In a separate medium bowl, whisk together the flour, sifted cocoa powder, cornstarch, baking soda, and salt. The cornstarch helps make the cookie incredibly soft.
- Combine and Fold: Gradually add the dry ingredients to the wet ingredients, mixing on low speed only until a soft dough forms. Do not overmix. Using a rubber spatula, gently fold in the chocolate chunks/chips. The dough will be thick and fudgy.
- Form and Stuff the Cookies (The Secret Technique): Line two large baking sheets with parchment paper. Take a large cookie scoop (about 3 tablespoons) and form a portion of dough. Create a deep well in the center of the scoop. Place one caramel disc into the well. Scoop a small amount of dough (about 1 tablespoon) and flatten it to create a “cap” to cover the caramel. Press the two pieces together, ensuring the caramel is completely and thickly encased by dough with no caramel exposed. This prevents the caramel from leaking during baking. Form the completed balls, place them on the baking sheets, and repeat. You should have 12-14 large, substantial cookies.
- CHILL THE DOUGH: This is a mandatory step. Cover the baking sheets with plastic wrap and place them in the refrigerator for at least 3 hours, preferably overnight. Chilling solidifies the butter and prevents the cookies from spreading too quickly, which is critical for maintaining the dome that holds the caramel.
- Bake and Cool: Preheat your oven to 375°F (190°C). Arrange the chilled cookie dough balls 3 inches apart on the baking sheets. Bake one sheet at a time for 11-14 minutes, or until the edges are set but the center still looks slightly soft and cracked. The key is to bake *just* enough that the dough is cooked but the caramel is molten and flowing. When you pull the sheet, the cookies will look dome-like, indicating the lava is safe inside. Do not overbake!
- Salt and Serve: As soon as the cookies come out of the oven, immediately sprinkle a small pinch of flaked sea salt over the top of each cookie. Let them cool on the baking sheet for 10-15 minutes. This cooling time allows the outer cookie to set, making it safe to handle, while the interior caramel remains molten and flowing. Serve warm to experience the true ‘lava’ effect.
The Science of the Cookie Dough: Why Chilling Matters
You might be tempted to skip the chilling, but that would be a catastrophic mistake for these lava cookies. When you bake unchilled dough, the butter melts almost instantly, causing the cookie to spread flat, and often, the caramel center leaks out. The chilling process creates two vital results: first, it hardens the butter, slowing the melting process so the cookie can form a dome; second, it develops the flavors and creates a superior texture that is both chewy and fudgy. Chilling is the bridge between a good cookie and a perfect lava cookie. Accept it.
Serving Suggestions and Pairings
The absolute best way to serve these cookies is warm, fresh from the oven, when the caramel is flowing at its finest. Here are some pairing suggestions:
- – With Milk: A classic. The cold milk is a great contrast to the warm cookie.
- – With Vanilla Ice Cream: Place a warm cookie in a bowl, top with a generous scoop of vanilla bean ice cream, and watch the ice cream melt into the chocolate lava. This is an unparalleled experience.
- – With Coffee or Tea: A rich, dark roast coffee or a strong black tea provides a great counterpoint to the sweetness.
- – With a Dusting of Gold Powder (Optional): For a truly show-stopping dessert, dust the top of the cooled cookies with edible gold luster dust before serving.
Conclusion: The Best Cookie You’ve Ever Made
The Salted Caramel Chocolate Lava Cookie is not a dessert; it is a declaration of culinary indulgence. While it requires precision and the patience to chill the dough, the resulting cookie is a perfect masterpiece. It is the kind of recipe that will change how you think about dessert, proving that the best results come from careful steps and high-quality ingredients. Give yourself the gift of these cookies, and enjoy every single gooey, molten bite.
Salted Caramel Chocolate Lava Cookies
Ingredients
Equipment
Method
- Prepare caramel cores by flattening soft caramel pieces into small, consistent discs.
- Cream softened butter and both sugars in a large bowl until light and fluffy (3-4 min).
- Beat in eggs one at a time, then add vanilla extract.
- In a separate bowl, whisk together the flour, cocoa powder, cornstarch, baking soda, and salt.
- Gradually mix dry ingredients into the wet on low speed just until combined, then fold in chocolate chunks/chips.
- Using scoops, form large balls of dough with a deep well. Insert a caramel disc, then cover completely with more dough and seal well.
- CHILL the stuffed cookie balls on baking sheets, covered, in the refrigerator for at least 3 hours, preferably overnight.
- Preheat oven to 375°F (190°C). Arrange chilled balls 3 inches apart.
- Bake one sheet at a time for 11-14 minutes, until edges are set but center is soft and cracked. Do not overbake!
- Immediately sprinkle flaked sea salt over the warm cookies. Let cool on the sheet for 10-15 minutes before serving to let the cookie set.