Chicken and Waffle Sliders
The Ultimate Chicken and Waffle Sliders Recipe: A Bite-Sized Brunch Sensation
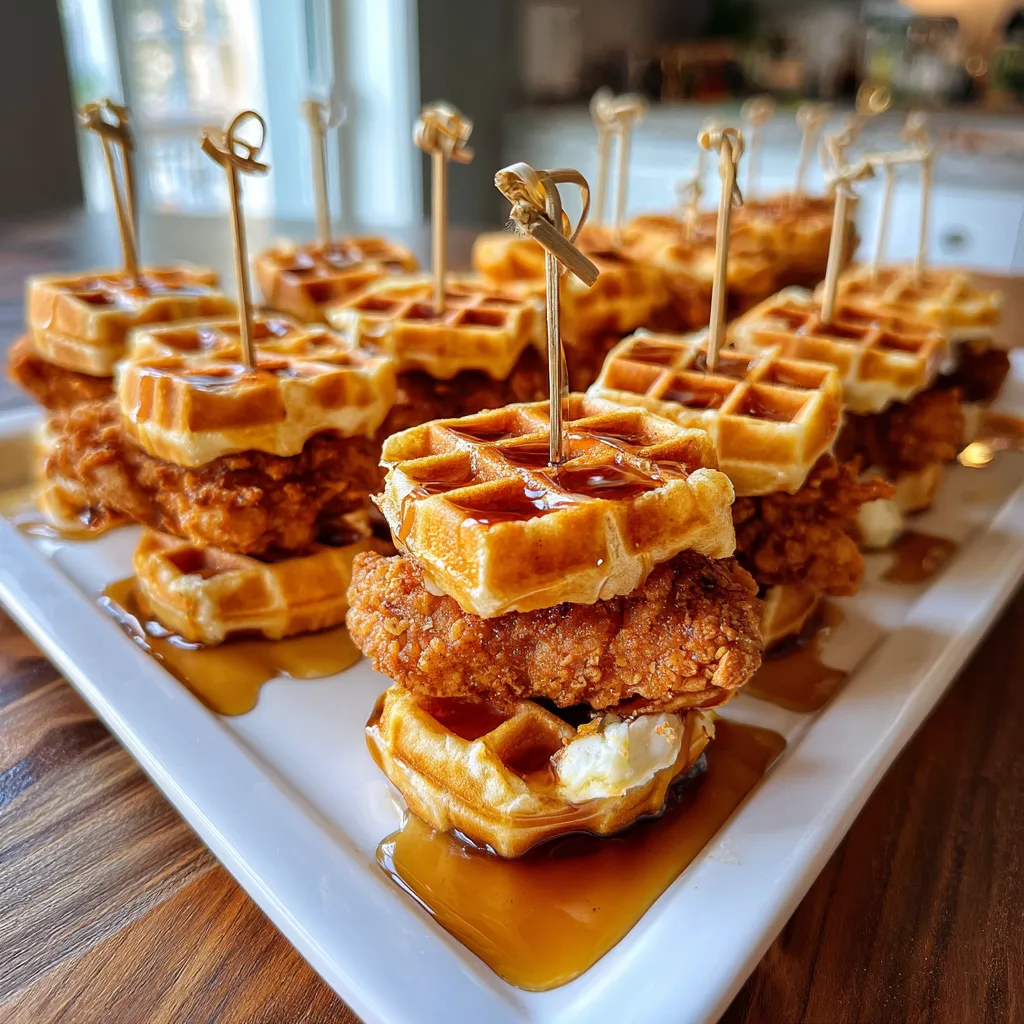
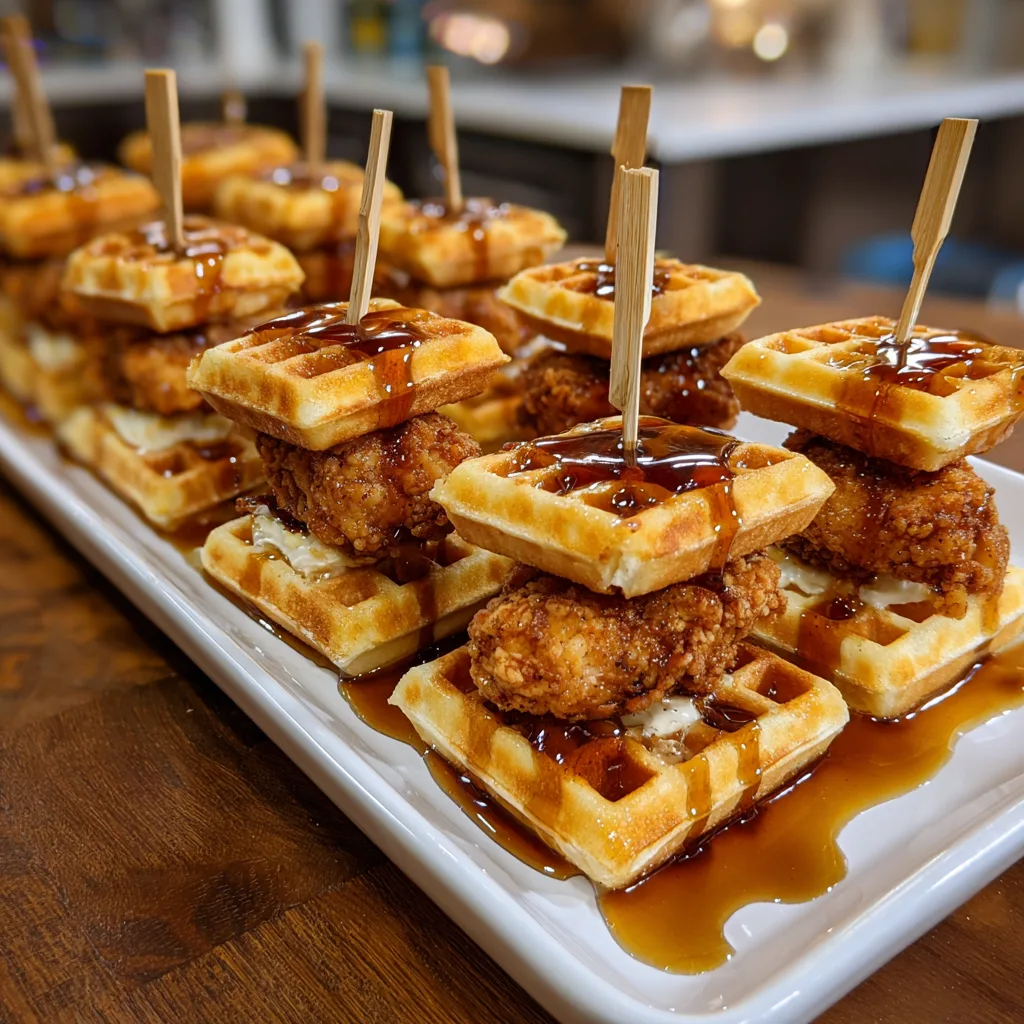
There is something inherently magical about the combination of sweet and savory flavors, and nowhere is this culinary marriage more perfectly executed than in the classic dish of chicken and waffles. However, when you take that iconic comfort food and shrink it down into handheld, bite-sized perfection, you get something truly extraordinary: Chicken and Waffle Sliders. These irresistible little stacks of crispy, seasoned fried chicken nestled between two toasted, fluffy mini waffles and drenched in sticky, sweet maple syrup are the ultimate crowd-pleaser. Whether you are hosting a Sunday brunch, preparing appetizers for a game day tailgate, or simply looking for a fun and creative dinner idea for the family, these sliders are guaranteed to be the star of the show.
In this comprehensive guide, we are going to dive deep into everything you need to know to create the perfect chicken and waffle sliders from scratch. We will explore the fascinating history of this beloved flavor combination, break down the science of achieving the ultimate crispy fried chicken, discuss the best waffle options, and provide you with a wealth of tips, tricks, and variations to elevate your cooking. Get ready to transform your kitchen into the hottest brunch spot in town.
A Brief History of Sweet and Savory: The Origins of Chicken and Waffles
Before we start frying and assembling, it is worth taking a moment to appreciate the rich history behind this dish. The concept of pairing chicken with waffles actually has two distinct historical roots in the United States. The first dates back to the Pennsylvania Dutch in the 1600s, who traditionally served plain waffles with pulled, stewed chicken topped with a savory gravy. It was a hearty, warming meal meant to sustain farmers through long days.
The version we are more familiar with today—crispy fried chicken served with sweet syrup and waffles—gained massive popularity in the 1930s during the Harlem Renaissance. Jazz musicians playing late-night gigs would finish their sets in the early hours of the morning, a time that blurred the lines between dinner and breakfast. Soul food restaurants in Harlem, most notably Wells Supper Club, brilliantly solved this dilemma by offering fried chicken (dinner) alongside waffles and syrup (breakfast). The resulting sweet, salty, crispy, and fluffy combination was an instant hit, quickly spreading across the country and becoming a staple of American comfort food. By miniaturizing this classic into sliders, we are honoring a culinary tradition while making it accessible, shareable, and perfect for modern entertaining.
The Anatomy of the Perfect Chicken and Waffle Slider
Creating the ultimate slider is about balancing textures and flavors. When you take a bite, you want to experience a symphony of sensations. Here is what makes a chicken and waffle slider truly spectacular:
The Waffle: The waffles serve as the “buns” of your slider. They need to be sturdy enough to hold the chicken and syrup without instantly disintegrating into a soggy mess, yet fluffy enough to provide that comforting breakfast texture. Mini waffles, with their deep pockets, are perfect for catching and holding onto the sticky maple syrup.
The Chicken: This is the heart of the slider. The chicken must be incredibly crispy on the outside to provide a textural contrast to the soft waffle, but tender and juicy on the inside. A well-seasoned breading, featuring a blend of savory spices, is crucial. The savory crunch of the chicken skin perfectly counteracts the intense sweetness of the syrup.
The Syrup: The binding agent that ties the whole dish together. High-quality, pure maple syrup is non-negotiable. It sinks into the waffle pockets, glazes the crispy chicken, and provides the essential sweet contrast that makes this flavor profile so famous.
Ingredients You Will Need
To craft these mouth-watering sliders, you will need a balance of pantry staples and fresh ingredients. Here is a detailed breakdown of what goes into the recipe:
For the Chicken:
- – 1 lb boneless, skinless chicken breasts or tenderloins (cut into 2-inch bite-sized pieces to fit the mini waffles)
- – 1 cup buttermilk (tenderizes the meat and helps the breading adhere)
- – 1 tablespoon hot sauce (optional, but adds a great depth of flavor to the marinade)
- – 1.5 cups all-purpose flour (the base of your crispy coating)
- – 1 teaspoon salt
- – 1/2 teaspoon black pepper
- – 1 teaspoon garlic powder
- – 1 teaspoon onion powder
- – 1 teaspoon smoked paprika (adds a beautiful color and subtle smokiness)
- – 1/2 teaspoon cayenne pepper (adjust based on your heat preference)
- – Vegetable oil or peanut oil (for frying; you need an oil with a high smoke point)
For the Waffles and Assembly:
- – 1 box (usually 24-count) of mini frozen waffles (Homestyle or Buttermilk flavor works best)
- – 1/2 cup high-quality pure maple syrup (warmed slightly for easy drizzling)
- – Wooden toothpicks or small skewers (essential for holding the sliders together)
- – 2 tablespoons melted butter (optional, for brushing onto the waffles)
Step-by-Step Instructions
Follow these detailed steps to ensure your chicken and waffle sliders turn out perfectly crispy, tender, and delicious every single time.
- Prepare the Chicken Marinade: Begin by cutting your chicken into small, 2-inch pieces. Remember that these need to fit neatly onto a mini waffle, so size them appropriately. In a medium-sized mixing bowl, whisk together the buttermilk and hot sauce. Add the chicken pieces to the bowl, ensuring they are completely submerged. Cover the bowl with plastic wrap and let it marinate in the refrigerator for at least 30 minutes, or up to 4 hours. The acidity in the buttermilk breaks down the proteins in the chicken, resulting in an incredibly tender bite.
- Prepare the Breading Station: While the chicken is marinating, prepare your seasoned flour. In a wide, shallow dish (a pie pan works perfectly), whisk together the all-purpose flour, salt, black pepper, garlic powder, onion powder, smoked paprika, and cayenne pepper. Mixing the spices thoroughly ensures that every bite of chicken is packed with flavor.
- Dredge the Chicken: Remove the chicken from the refrigerator. Take a piece of chicken out of the buttermilk, letting the excess drip off slightly, and drop it into the seasoned flour mixture. Toss the chicken piece until it is completely coated, pressing the flour into the meat slightly to ensure a thick crust forms. Shake off any excess flour and place the breaded chicken on a wire rack or a clean plate. Repeat this process until all the chicken pieces are coated. Pro Tip: Let the breaded chicken sit for about 10 minutes before frying. This resting period allows the flour to hydrate from the buttermilk, which helps the breading stick to the chicken during the frying process.
- Heat the Frying Oil: In a heavy-bottomed skillet, Dutch oven, or deep fryer, pour in enough vegetable or peanut oil to reach a depth of about 2 inches. Heat the oil over medium-high heat until it reaches a temperature of 350°F (175°C). Use a deep-fry thermometer to monitor the temperature; if the oil is too cold, the chicken will absorb it and become greasy, and if it is too hot, the outside will burn before the inside is cooked through.
- Fry the Chicken: Carefully carefully lower the breaded chicken pieces into the hot oil using tongs. Do not overcrowd the pan; fry the chicken in batches if necessary. Overcrowding lowers the oil temperature and leads to soggy breading. Fry the chicken for about 4 to 6 minutes, turning occasionally, until the crust is a deep, golden brown and the internal temperature of the chicken reaches 165°F (74°C). Use a slotted spoon or a spider skimmer to remove the fried chicken from the oil and transfer it to a wire rack set over a baking sheet to drain. Avoid draining on paper towels, as the trapped steam can make the bottom of the chicken soggy.
- Toast the Waffles: While the last batch of chicken is frying, prepare your mini waffles. You want them to be warm, toasted, and slightly crisp so they can hold up to the chicken and syrup. Toast the mini waffles according to the package directions, either in a toaster or arranged on a baking sheet in a 375°F (190°C) oven for about 5 minutes. If desired, lightly brush the warm waffles with melted butter for extra richness.
- Assemble the Sliders: Now comes the fun part! Lay out half of your toasted mini waffles to serve as the bottom buns. Place a piece of crispy fried chicken on top of each bottom waffle. Place a second mini waffle on top of the chicken to complete the slider. Carefully pierce the center of the stack with a wooden toothpick to hold everything securely in place.
- The Final Touch: Arrange your assembled sliders on a beautiful serving platter. Just before serving, generously drizzle the warm maple syrup over the tops of the sliders. Let the syrup pool into the waffle squares and run down the sides of the crispy chicken. Serve immediately while hot and sticky!
Pro Tips for the Best Chicken and Waffle Sliders
To elevate your sliders from good to gourmet, keep these professional kitchen tips in mind:
- – The Double Dip: If you want an extra thick, shatteringly crisp crust on your chicken, double dip it! After the first coat of flour, dip the chicken back into the buttermilk, and then toss it in the flour mixture a second time before frying.
- – Keep it Warm: If you are making a large batch for a party, place a wire rack on a baking sheet and keep it in a 200°F (90°C) oven. As you finish frying batches of chicken, transfer them to the warm oven. This keeps the chicken hot and crispy while you finish the rest of the cooking.
- – Don’t Skip the Wire Rack: Cooling fried food on a wire rack allows air to circulate around the entire piece of food, preventing the steam from creating a soggy bottom.
- – Waffle Upgrades: While frozen mini waffles are incredibly convenient and work perfectly for this recipe, you can absolutely use a mini waffle maker to create homemade buttermilk waffles from scratch if you have the time!
Exciting Variations to Try
Once you have mastered the classic recipe, feel free to experiment with these delicious twists:
- – Hot Honey Sliders: Instead of traditional maple syrup, drizzle the assembled sliders with a generous amount of spicy hot honey. The chili-infused honey pairs phenomenally well with the savory fried chicken.
- – Bacon-Lovers Edition: Add a crispy half-slice of thick-cut applewood smoked bacon to the slider, placing it right on top of the fried chicken before adding the top waffle.
- – Southern Pecan: Add finely crushed toasted pecans to your seasoned flour mixture for a nutty, crunchy exterior on your chicken, and use a butter-pecan syrup for drizzling.
- – Savory Herb: If making homemade waffles, mix chopped chives, sharp cheddar cheese, and a pinch of black pepper into the waffle batter for a completely savory base.
Serving Suggestions and Pairings
Because these sliders are quite rich and indulgent, they pair beautifully with sides that offer a bit of acidity or freshness to cut through the heavy flavors. If you are serving these at a brunch, consider pairing them with a fresh fruit salad featuring berries, melon, and a squeeze of lime juice. A light, tangy coleslaw or a crisp cucumber salad also makes an excellent side dish. For beverages, you cannot go wrong with classic mimosas, spicy Bloody Marys, or a pitcher of freshly squeezed, ice-cold lemonade.
Make-Ahead and Storage Solutions
While chicken and waffle sliders are undoubtedly best served fresh and hot right out of the fryer, you can do some prep work in advance to make party-day easier. You can cut and marinate the chicken in the buttermilk mixture up to 24 hours in advance. You can also mix your dry breading ingredients and store them in an airtight container for weeks.
If you happen to have leftovers (which is rare!), store the chicken and the waffles separately in airtight containers in the refrigerator for up to 3 days. To reheat, do not use the microwave, as it will make both the chicken and the waffles rubbery. Instead, reheat the chicken in an air fryer at 350°F or in an oven on a wire rack until warmed through and crispy. Re-toast the waffles in a toaster or oven, and assemble with fresh syrup.
Frequently Asked Questions (FAQs)
Can I bake or air fry the chicken instead of deep frying?
Yes, you absolutely can! To air fry, spray the breaded chicken generously with cooking spray and air fry at 380°F (190°C) for about 12-15 minutes, flipping halfway through, until golden and cooked thoroughly. To bake, place the breaded chicken on a wire rack set over a baking sheet, spray with oil, and bake at 400°F (200°C) for 15-20 minutes.
What kind of syrup is best?
Always opt for 100% pure maple syrup (Grade A or B). “Pancake syrup” is often made primarily of high fructose corn syrup and artificial flavorings, which lacks the complex, earthy sweetness of real maple that truly makes this dish shine.
Can I use chicken thighs instead of breasts?
Definitely. Boneless, skinless chicken thighs are actually preferred by many chefs because dark meat is more forgiving, juicier, and packs more flavor than white breast meat. Simply cut the thighs into small, 2-inch chunks just as you would the breast meat.
How do I prevent the waffles from getting soggy before serving?
The key is to assemble them at the very last second. Keep your cooked chicken and toasted waffles separate until your guests are ready to eat. Assemble the towers, pierce them with toothpicks, and either drizzle the syrup over the platter right as you carry it to the table, or serve the syrup on the side in small dipping cups so guests can dunk their own sliders.
Chicken and Waffle Sliders
Ingredients
Equipment
Method
- In a bowl, mix buttermilk and hot sauce. Add chicken pieces, cover, and marinate for at least 30 minutes in the refrigerator.
- In a shallow dish, whisk together flour, salt, pepper, garlic powder, onion powder, paprika, and cayenne.
- Remove chicken from marinade, letting excess drip off. Toss in the seasoned flour until fully coated. Let sit for 10 minutes on a wire rack.
- Heat oil in a deep skillet to 350°F (175°C).
- Fry chicken in batches for 4-6 minutes until golden brown and cooked through (165°F internal temperature). Drain on a clean wire rack.
- Toast the mini waffles according to package instructions until warm and slightly crispy.
- Assemble sliders by placing a piece of fried chicken between two mini waffles. Secure with a toothpick.
- Arrange on a platter and drizzle generously with warm maple syrup right before serving.