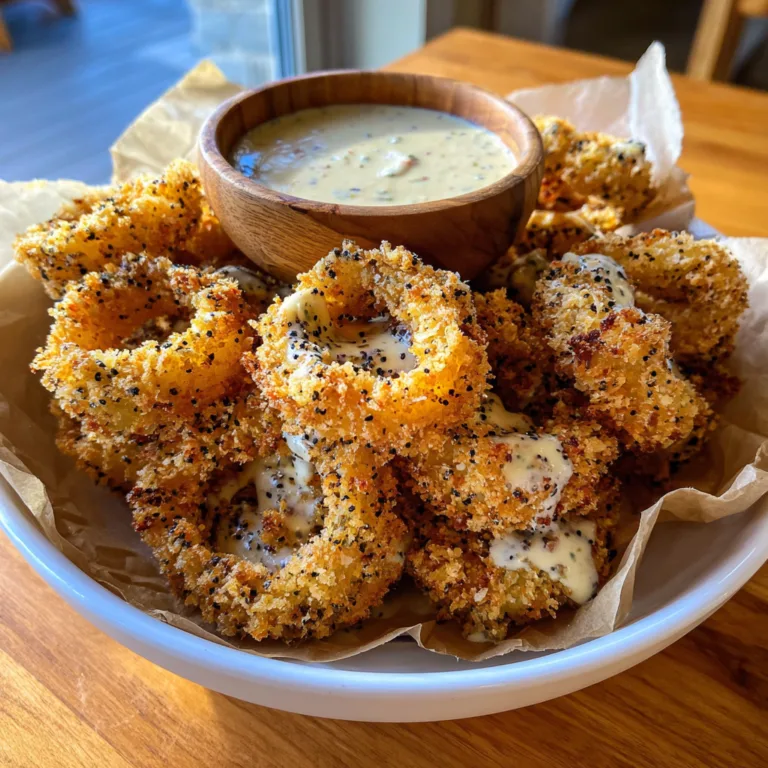
Chicken Bacon Ranch Sliders
The Ultimate Chicken Bacon Ranch Sliders
When it comes to feeding a hungry crowd, whether it is for a weekend game day, a family movie night, or a casual get-together with friends, you need a recipe that is effortlessly delicious, universally loved, and easy to eat with your hands. Enter the glorious, crowd-pleasing phenomenon known as Chicken Bacon Ranch Sliders. This culinary masterpiece takes the legendary flavor trio of savory chicken, smoky bacon, and zesty, creamy ranch dressing, and sandwiches it all between sweet, pillowy Hawaiian rolls. The result is a hot, gooey, flavor-packed bite that perfectly balances savory, salty, and slightly sweet notes in every single mouthful.
If you have been searching for the ultimate party appetizer or a fun twist on a weeknight dinner, look no further. These sliders are incredibly simple to assemble, bake up beautifully in a matter of minutes, and are guaranteed to disappear faster than you can say “seconds, please.” In this extensive guide, we will explore exactly how to make these irresistible mini sandwiches, complete with pro tips to prevent soggy bottoms, ideas for variations, and everything you need to know to achieve absolute slider perfection.
Why This Recipe is an Absolute Winner
There is a reason why the combination of chicken, bacon, and ranch has become a cornerstone of modern American comfort food. The creamy, herbaceous tang of the ranch dressing perfectly cuts through the rich, salty fat of the bacon, while the mild, tender chicken acts as the perfect canvas to carry these bold flavors. But when you transform these ingredients into a slider, something truly magical happens.
First and foremost, the contrast of textures is extraordinary. You have the soft, fluffy interior of the sweet Hawaiian rolls, the satisfying crunch of thick-cut bacon, the tender bite of the chicken, and the molten, gooey stretch of melted cheese. Topping it all off is a savory, buttery glaze brushed over the buns before baking, which toasts up to create a slightly crisp, immensely flavorful golden crown.

Secondly, these sliders are a host’s best friend. They require minimal prep time—especially if you utilize time-saving hacks like rotisserie chicken or pre-cooked bacon. You build them all at once in a single baking dish, meaning you are not standing over a stove flipping individual sandwiches while your guests are mingling. You pop the whole tray in the oven, and out comes a dozen perfect sandwiches ready to be pulled apart and devoured.
Essential Ingredients for the Perfect Sliders
To achieve slider greatness, you will need a lineup of simple, yet flavorful ingredients. Quality matters here, so choose components that you genuinely love.
- – 1 package (12 count) sweet Hawaiian rolls (do not substitute with regular dinner rolls if you want that signature sweet-and-savory contrast)
- – 3 cups cooked chicken, shredded or thinly sliced (rotisserie chicken works beautifully here)
- – 8 slices thick-cut bacon, cooked until crispy and chopped or halved
- – 1 cup thick ranch dressing (or a mix of 1/2 cup cream cheese and 1/2 cup ranch for an ultra-thick sauce that won’t run)
- – 6 to 8 slices of provolone or Monterey Jack cheese
- – 1/4 cup unsalted butter, melted
- – 1 teaspoon garlic powder
- – 1 teaspoon onion powder
- – 1 tablespoon fresh parsley, finely chopped (plus extra for garnish)
- – 1 tablespoon grated Parmesan cheese (optional, for the topping)
Step-by-Step Instructions for Assembly and Baking
Building these sliders is an easy, fun process. The key is in the layering. By strategically placing your ingredients, you ensure that the bread stays perfectly soft without becoming overly saturated and mushy.
- Preheat and Prep: Begin by preheating your oven to 350°F (175°C). Lightly grease a 9×13 inch baking dish with non-stick cooking spray to ensure your sliders are easy to remove later.
- Slice the Rolls: Take the entire package of Hawaiian rolls out of the cardboard tray without pulling the individual rolls apart. Using a large, sharp serrated bread knife, carefully slice the entire slab of rolls in half horizontally, separating the tops from the bottoms in one large, uniform piece. Place the bottom slab of rolls into your prepared baking dish.
- The Cheese Barrier: To prevent the bottom buns from becoming soggy from the ranch and chicken juices, lay down an even layer of your sliced cheese (provolone or Monterey Jack) directly onto the bottom buns. This cheese will melt and form a protective, delicious barrier.
- Layer the Chicken and Sauce: Evenly distribute your cooked, shredded or sliced chicken over the cheese layer. Next, spoon or drizzle your thick ranch dressing over the chicken. If you are using the cream cheese and ranch hack, spread this mixture evenly over the chicken.
- Add the Bacon: Scatter the crispy, chopped bacon evenly over the ranch layer. You want to make sure every single slider gets a good amount of that smoky crunch.
- Top it Off: Carefully place the top slab of the Hawaiian rolls over the bacon layer, pressing down very lightly to compact the sandwiches just a bit.
- Make the Buttery Glaze: In a small microwave-safe bowl, melt the unsalted butter. Whisk in the garlic powder, onion powder, and finely chopped fresh parsley. If desired, stir in a tablespoon of grated Parmesan cheese for extra savory flavor.
- Brush and Bake: Using a pastry brush, generously coat the tops of the Hawaiian rolls with the melted butter mixture, making sure it drips down into the crevices between the rolls. Cover the baking dish tightly with aluminum foil. Bake in the preheated oven for 15 minutes. This allows the sandwiches to heat through and the cheese to melt without the tops burning.
- The Final Toast: Remove the aluminum foil and bake for an additional 5 to 7 minutes, or until the tops of the rolls are deeply golden brown and slightly crispy.
- Serve and Enjoy: Remove the sliders from the oven and let them cool in the pan for just a few minutes. Use a sharp knife to cut along the seams of the rolls, creating individual sliders. Serve hot and watch them disappear!
Pro Tips for Avoiding Soggy Bottoms
The single biggest complaint people have when making sliders is that the bottom buns turn to mush. Here is how to prevent that tragedy and achieve slider perfection every time:
1. The Cheese Shield: As mentioned in the instructions, placing a layer of cheese directly on the bottom bun before adding any moist ingredients (like chicken or sauce) is crucial. As the sandwich bakes, the cheese melts into a waterproof layer.
2. Thicken Your Ranch: Standard bottled ranch dressing can be quite thin and watery, especially when heated. A brilliant chef’s trick is to blend 1/2 cup of softened cream cheese with 1/2 cup of ranch dressing. This creates a deeply flavored, incredibly rich sauce that is thick enough to stay put inside the sandwich rather than soaking immediately into the bread.
3. Drain Your Ingredients: If you are using freshly cooked chicken or chicken that has been stored in broth, make sure it is completely drained and patted dry before adding it to your sliders. Excess moisture is the enemy of a sturdy sandwich.
Creative Variations to Try
Once you master the basic Chicken Bacon Ranch Slider, you can start experimenting with different flavor profiles to suit your cravings.
Spicy Kick: If your crowd loves heat, use a spicy jalapeno ranch dressing instead of regular. You can also add a layer of pickled jalapeno slices or a drizzle of buffalo sauce over the chicken before adding the bacon.
The Club Slider: Turn these into mini club sandwiches by swapping half of the chicken for thinly sliced deli turkey, and adding a layer of sharp cheddar cheese. Serve them with a side of fresh lettuce and tomato to tuck inside after they come out of the oven.
Different Cheeses: While provolone and Monterey Jack melt beautifully and have a mild flavor that doesn’t overpower the ranch, you can absolutely get creative. Pepper Jack adds a great zing, while smoked Gouda pairs phenomenally well with the bacon.
What to Serve Alongside Your Sliders
These rich, savory mini sandwiches demand side dishes that are either exceptionally crispy or bright and refreshing to balance the meal.
If you are serving these at a party, you cannot go wrong with classic finger foods. Think crispy sweet potato fries, loaded potato skins, or a massive platter of fresh celery and carrot sticks (with extra ranch for dipping, of course!).
If you are serving these for a family dinner, pair them with a tangy, vinegar-based coleslaw or a light pasta salad loaded with fresh vegetables. A simple side of roasted broccoli or corn on the cob also rounds out the meal perfectly.
Make-Ahead and Storage Solutions
Making Ahead: You can assemble these sliders up to 4 hours in advance. Follow all the instructions right up until brushing the tops with butter. Cover the unbaked sliders tightly with plastic wrap and store them in the refrigerator. When you are ready to bake, remove the plastic wrap, brush with the freshly made garlic butter glaze, and bake. You may need to add 3-5 extra minutes to the covered baking time since they are starting from a cold temperature.
Storing Leftovers: If you miraculously have leftovers, store them in an airtight container in the refrigerator for up to 3 days. To reheat, it is highly recommended to use the oven or a toaster oven. Wrap them in foil and bake at 350°F until warmed through (about 10 minutes). Microwaving them will result in tough, chewy bread and a mushy texture.
Frequently Asked Questions
Can I use canned chicken for this recipe?
While fresh rotisserie or home-cooked chicken yields the best texture, you can use canned chicken in a pinch. However, you MUST drain it exceptionally well and shred it finely. Squeeze out as much excess water as humanly possible to prevent soggy sliders.

Do I have to use Hawaiian rolls?
Hawaiian rolls are highly recommended because their sweetness pairs so perfectly with the salty bacon and savory ranch. However, if you do not like sweet bread, you can substitute standard slider buns or savory butter rolls. Just make sure they are attached in a slab for easy assembly.
Can I freeze these sliders?
It is not recommended to freeze these sliders after assembly. The mayonnaise or cream cheese base in the ranch dressing can separate and become grainy when frozen and thawed, and the bread will absorb too much moisture during the thawing process.
Conclusion
Chicken Bacon Ranch Sliders are the ultimate fusion of convenience and spectacular flavor. By layering simple, high-quality ingredients and utilizing a few smart techniques to keep the buns perfectly toasted, you can elevate a basic sandwich into a show-stopping dish. Whether you are meal-prepping for a busy family week or hosting a neighborhood tailgate, this recipe is guaranteed to secure your spot as a culinary hero. Grab a pack of rolls, crisp up that bacon, and get ready to enjoy one of the most satisfying bites you will ever make!
Chicken Bacon Ranch Sliders
Ingredients
Equipment
Method
- Preheat oven to 350°F (175°C). Lightly grease a 9×13 inch baking dish.
- Using a serrated knife, slice the entire slab of Hawaiian rolls in half horizontally. Place the bottom half in the prepared baking dish.
- Layer the sliced cheese evenly over the bottom rolls. This creates a barrier to prevent the bread from getting soggy.
- Spread the cooked, shredded chicken evenly over the cheese layer.
- Drizzle or spread the thick ranch dressing evenly over the chicken.
- Sprinkle the chopped crispy bacon over the ranch layer, then place the top half of the rolls on top.
- In a small bowl, whisk together the melted butter, garlic powder, onion powder, chopped parsley, and Parmesan (if using).
- Brush the butter mixture generously over the tops of the rolls.
- Cover the baking dish tightly with aluminum foil and bake for 15 minutes.
- Remove the foil and bake for an additional 5-7 minutes until the cheese is completely melted and the tops are golden brown.
- Let cool slightly, then cut into individual sliders and serve hot.