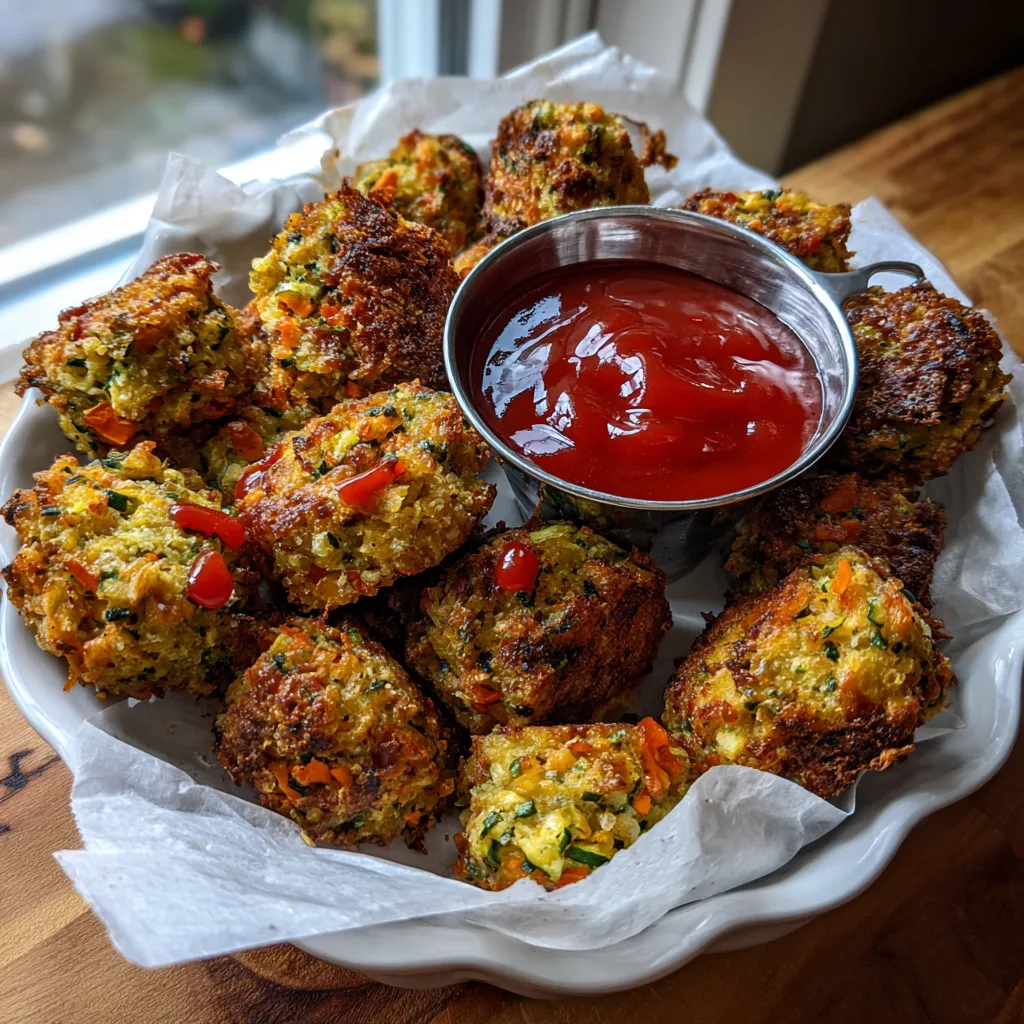
Chickpea Veggie Nuggets
Finding a meal that is healthy, easy to make, allergy-friendly, and universally loved by both kids and adults can feel like searching for a needle in a haystack. Whether you are navigating food allergies, trying to incorporate more plant-based proteins into your family’s diet, or simply searching for a clever way to sneak some extra vegetables onto your toddler’s plate, your search ends here. These Gluten-Free and Dairy-Free Chickpea Veggie Nuggets are an absolute game-changer for weeknight dinners, meal prep lunches, and healthy snacking.
In a world filled with highly processed frozen convenience foods, taking control of what goes into your family’s bodies is an empowering step. Traditional store-bought nuggets are often loaded with refined flours, artificial preservatives, sodium, and low-quality meat or fillers. These homemade chickpea veggie nuggets, on the other hand, are bursting with whole-food nutrition, vibrant vegetables, and high-quality protein, all wrapped up in a familiar, comforting, and dippable shape that kids naturally gravitate toward. Let us dive deep into why this recipe will become a permanent fixture in your weekly meal rotation.
Why You Will Absolutely Love These Chickpea Veggie Nuggets
There are countless reasons to adore this recipe, but it all comes down to convenience, nutrition, and taste. First and foremost, the preparation is incredibly hands-off. By utilizing a food processor, you eliminate the need for tedious chopping, mixing by hand, or creating multiple dirty bowls. You simply toss the ingredients into the processor, pulse until combined, shape, and bake.
Secondly, these nuggets are a “hidden veggie” triumph. If you have a picky eater who balks at the sight of a carrot stick or pushes zucchini to the side of the plate, these nuggets are your secret weapon. The vegetables are finely shredded and seamlessly blended into the chickpea base. Once baked, they add moisture, a subtle sweetness, and a wealth of vitamins without triggering the typical vegetable resistance. The golden-brown exterior and the savory spices make them taste like a savory, comforting treat rather than a plate of vegetables.
Lastly, they are incredibly meal-prep friendly. You can easily double or triple this recipe on a Sunday afternoon, bake a massive batch, and freeze them for later. Having a stash of these in the freezer means you are always only ten minutes away from a wholesome, home-cooked meal, even on the most chaotic weekday evenings. They are naturally gluten-free (using oats or gluten-free flour) and dairy-free, making them safe for school lunchboxes and playdates.
The Nutritional Powerhouse Inside Every Bite
Let’s break down the incredible nutritional profile of these nuggets. Every single ingredient serves a purpose, contributing to a well-rounded, nourishing meal.
Chickpeas: The Plant-Based Protein Star
Chickpeas, also known as garbanzo beans, are the foundational ingredient of this recipe. They are an exceptional source of plant-based protein, which is vital for growing bodies, muscle repair, and maintaining a healthy immune system. Beyond protein, chickpeas are incredibly rich in dietary fiber. This fiber helps regulate digestion, keeps blood sugar levels stable (preventing those dreaded post-meal energy crashes), and promotes a feeling of fullness. They also boast an impressive array of essential vitamins and minerals, including iron, folate, phosphorus, and B vitamins.
Carrots and Zucchini: The Hidden Heroes
The addition of shredded carrots and zucchini transforms these nuggets into a multivitamin disguised as comfort food. Carrots are famously loaded with beta-carotene, which the body converts into vitamin A—an essential nutrient for eye health, immune function, and skin vitality. Zucchini is wonderfully hydrating and low in calories while providing a fantastic source of vitamin C, potassium, and antioxidants. Because zucchini holds a lot of water, it is crucial for keeping the interior of the nuggets soft and tender during the baking process.
Eggs: The Binding Agent
While some nugget recipes rely on heavy flours to hold everything together, this recipe uses eggs as a natural, nutrient-dense binder. Eggs are one of the most nutritious foods on the planet. They provide complete, high-quality protein, meaning they contain all nine essential amino acids. They are also one of the few natural food sources of Vitamin D and contain choline, a nutrient that is incredibly important for brain health and development.
Oats (or Almond Flour): The Gluten-Free Base
To keep these nuggets entirely gluten-free while ensuring they have enough structure to hold their shape, we rely on ground oats or a gluten-free flour alternative like almond flour. Oats provide complex carbohydrates for sustained energy and are a great source of a specific type of soluble fiber called beta-glucan, known for its heart-healthy properties. If you use almond flour, you add an extra boost of healthy fats and vitamin E.
Ingredients You Will Need
To make a batch of these glorious chickpea veggie nuggets, gather the following simple, wholesome ingredients. The beauty of this recipe lies in its accessibility—you likely already have most of these items in your pantry and crisper drawer.
- – 1 can (15 oz) chickpeas (garbanzo beans), thoroughly rinsed and drained
- – 1/2 cup gluten-free rolled oats (or almond flour/gluten-free all-purpose flour)
- – 1/2 cup carrots, finely shredded
- – 1/2 cup zucchini, finely shredded (excess moisture squeezed out)
- – 1/4 cup yellow or white onion, finely diced
- – 2 large eggs
- – 1 teaspoon garlic powder
- – 1 teaspoon smoked paprika
- – 1 teaspoon dried oregano or Italian seasoning
- – 1/2 teaspoon sea salt
- – 1/4 teaspoon black pepper
- – Olive oil spray (for baking)
Step-by-Step Instructions for Perfect Nuggets
Follow these detailed steps to ensure your nuggets are perfectly textured, packed with flavor, and beautifully golden brown.
- Prepare the Oven and Baking Sheet: Preheat your oven to 400°F (200°C). Line a large, rimmed baking sheet with parchment paper or a silicone baking mat. Lightly spray the parchment paper with olive oil spray to ensure absolutely no sticking occurs.
- Process the Oats: If you are using rolled oats instead of pre-ground oat flour, place the oats into your food processor first. Pulse them for about 30 seconds until they break down into a coarse flour consistency.
- Drain and Rinse the Chickpeas: Open the can of chickpeas, pour them into a fine-mesh strainer, and rinse them thoroughly under cold running water until the water runs clear. Shake off as much excess water as possible. Wet chickpeas will result in a mushy nugget.
- Squeeze the Zucchini: This is a crucial step! Place your shredded zucchini in the center of a clean kitchen towel or paper towel. Wrap it up and squeeze vigorously over the sink to remove as much liquid as possible. Skipping this step will make your nugget batter too wet to shape.
- Combine the Ingredients: Add the drained chickpeas, squeezed zucchini, shredded carrots, diced onions, eggs, garlic powder, smoked paprika, oregano, salt, and pepper into the food processor with the oat flour.
- Pulse to the Perfect Texture: Pulse the mixture in the food processor. You do not want to turn it into a smooth puree like hummus. You want to pulse it until the ingredients are well incorporated but still retain some texture and small chunks. It should look like a thick, moldable dough. If the mixture seems too wet, add an extra tablespoon of oat flour; if too dry, add a teaspoon of water.
- Shape the Nuggets: Using a cookie scoop or a measuring tablespoon, scoop out portions of the mixture. Use your hands to roll them into small balls, then gently flatten them into classic nugget shapes (ovals or rounded rectangles). Place them onto the prepared baking sheet, leaving about an inch of space between each nugget.
- Bake to Golden Perfection: Spray the tops of the nuggets lightly with olive oil spray—this helps them achieve a crispy, golden-brown crust in the oven. Bake for 15-20 minutes. For the best texture, carefully flip the nuggets halfway through the baking time using a spatula. They are done when they are firm to the touch and golden brown on the edges.
- Cool and Serve: Remove the baking sheet from the oven and let the nuggets cool for 5 minutes before handling. They will continue to firm up as they cool. Serve warm with your favorite dipping sauces!
Tips for Achieving the Perfect Nugget Texture
The line between a perfect nugget and a mushy patty comes down to moisture control and blending technique. Here are the expert secrets to getting it right every single time.
Moisture is the Enemy: As mentioned in the steps, squeezing the zucchini is non-negotiable. Zucchini is over 90% water. If you dump it straight into the food processor, your batter will turn into soup. Furthermore, ensure your chickpeas are well-drained. You can even pat them dry with a paper towel after rinsing them.
Do Not Over-Blend: The food processor is a powerful tool. If you turn it on and walk away, you will end up with chickpea hummus. Use the ‘Pulse’ function. Pulse 5 or 6 times, scrape down the sides of the bowl with a rubber spatula, and pulse a few more times. You want the chickpeas to break down enough to bind together, but you still want to see tiny flecks of carrot, oat, and chickpea in the final product. This texture is what makes them feel like a “nugget” rather than a soft paste.
The Baking Environment: Baking at a high temperature (400°F) is essential. It cooks the exterior quickly, creating a crust that holds the moisture inside. Do not skip spraying the tops with a little olive oil; it mimics the effect of frying without the excess heavy grease, resulting in that beautiful golden finish.
Flavor Variations and Custom Add-Ins
Once you have mastered the base recipe, these nuggets serve as a wonderful blank canvas for different flavor profiles. Here are a few ways to switch things up to keep dinner exciting:
The Cheesy Vegan Variation
If you want a cheesy flavor without adding dairy, incorporate 2 to 3 tablespoons of nutritional yeast into the food processor along with the spices. Nutritional yeast adds a fantastic, savory, umami flavor that perfectly mimics cheddar or parmesan cheese, while also providing a massive boost of B-vitamins.
The Spicy Southwestern Nugget
For adult palates or adventurous kids, give these nuggets a Tex-Mex twist. Swap the oregano for cumin and chili powder. Add a small handful of fresh cilantro and a finely diced jalapeño (seeds removed) to the food processor. Serve these with a side of guacamole or a spicy chipotle mayo instead of ketchup.
Different Hidden Veggies
Carrots and zucchini are just the beginning. You can easily substitute the vegetables based on what you have in the fridge. Finely chopped broccoli florets, riced cauliflower, finely diced bell peppers, or even a handful of fresh spinach work wonderfully. Just remember the golden rule: if the vegetable has a high water content, squeeze the moisture out before adding it to the batter!
How to Serve and Dip Your Nuggets
Half the fun of eating nuggets is the dipping experience! Because these chickpea veggie nuggets have a savory, earthy flavor profile, they pair beautifully with a wide variety of sauces.
Classic Ketchup: You can never go wrong with the classic. To keep things healthy, look for an organic ketchup that is sweetened with dates or naturally derived sugars rather than high fructose corn syrup.
Honey Mustard: Mix equal parts Dijon mustard, mayonnaise (or vegan mayo), and honey for a sweet and tangy dip that complements the spices in the nuggets perfectly.
Garlic Herb Yogurt Dip: For a refreshing, Mediterranean-inspired side, mix plain dairy-free yogurt with minced garlic, chopped fresh dill, a squeeze of lemon juice, and a pinch of salt.
Pair your nuggets with sweet potato fries, a fresh side salad, or steamed green beans for a complete, balanced, and incredibly satisfying meal.
Storage, Freezing, and Reheating Guide
As mentioned, these nuggets are the ultimate meal-prep superhero. Here is how to handle the leftovers so they stay just as delicious as the day you made them.
Refrigerator Storage: Allow the baked nuggets to cool completely to room temperature. Place them in an airtight container lined with a paper towel (to absorb any excess condensation) and store them in the fridge for up to 4 days.
Freezer Storage: To freeze, let the baked nuggets cool completely. Place them in a single layer on a baking sheet and freeze for 1 hour (this is called “flash freezing” and prevents them from sticking together). Once solid, transfer them to a freezer-safe zip-top bag or airtight container. They will keep perfectly in the freezer for up to 3 months.
Reheating Instructions: Do not microwave them if you want them to remain crispy! Microwaving will result in a soft, soggy nugget. To reheat from the fridge, place them in an air fryer at 350°F for 3-5 minutes, or in the oven for 5-7 minutes. To reheat from frozen, bake them at 375°F for 10-12 minutes, or air fry them for 8-10 minutes until heated through and crispy on the outside.
Frequently Asked Questions (FAQ)
Can I use a different type of bean?
Yes, absolutely! While chickpeas provide a great neutral flavor and firm texture, you can substitute them with white beans (like cannellini or navy beans). White beans are slightly softer, so you may need to add an extra tablespoon of oat flour to help the nuggets hold their shape.
Can I make this recipe completely vegan (egg-free)?
Yes, you can substitute the eggs with “flax eggs” to make the recipe completely vegan. To replace the two eggs, mix 2 tablespoons of ground flaxseed meal with 6 tablespoons of water. Let the mixture sit for 5-10 minutes until it becomes thick and gelatinous, then add it to the food processor just as you would the regular eggs.
Why did my nuggets fall apart?
Nuggets usually fall apart for two reasons: the mixture was either too wet or too dry. If it was too wet (usually due to un-squeezed zucchini or poorly drained chickpeas), the steam in the oven will break them apart. If the mixture is too dry, it won’t bind. Make sure your batter looks like a sticky dough before shaping. Also, ensure you do not make them too thick; keep them to about 1/2 inch thickness for even baking.
Can I pan-fry these instead of baking them?
Yes, you can pan-fry them in a little bit of avocado oil or olive oil over medium heat. Cook them for about 4-5 minutes per side until golden brown and crispy. Baking is recommended simply because it is more hands-off and requires less oil, but pan-frying yields a delicious, crispy exterior as well.
Conclusion
Reclaiming the classic “nugget” from the frozen food aisle and transforming it into a nutrient-dense, plant-forward meal is an incredibly rewarding experience. These Gluten-Free and Dairy-Free Chickpea Veggie Nuggets prove that eating healthy does not mean sacrificing comfort, convenience, or flavor.
By keeping a batch of these in your freezer, you are setting yourself up for success on busy weeknights, ensuring your family is getting their vegetables, and serving up a meal that will genuinely bring smiles to the dinner table. So pull out your food processor, gather your ingredients, and get ready to create your new favorite family meal. Happy cooking!
Gluten-Free Chickpea Veggie Nuggets
Ingredients
Equipment
Method
- Preheat your oven to 400°F (200°C) and line a baking sheet with parchment paper lightly sprayed with oil.
- If using rolled oats, place them in the food processor first and pulse until they resemble a coarse flour.
- Wrap the shredded zucchini in a towel and squeeze vigorously to remove as much liquid as possible.
- Add the drained chickpeas, squeezed zucchini, shredded carrots, onion, eggs, and all spices to the food processor with the oats.
- Pulse the mixture until combined into a moldable dough. Do not over-blend into a smooth puree; keep some texture.
- Scoop tablespoons of the mixture, roll into balls, and flatten into nugget shapes on the prepared baking sheet.
- Spray the tops of the nuggets lightly with olive oil spray.
- Bake for 15-20 minutes, flipping halfway through, until golden brown and firm to the touch.