Deviled Egg Chicks
The Ultimate Guide to Making Adorable Deviled Egg Chicks
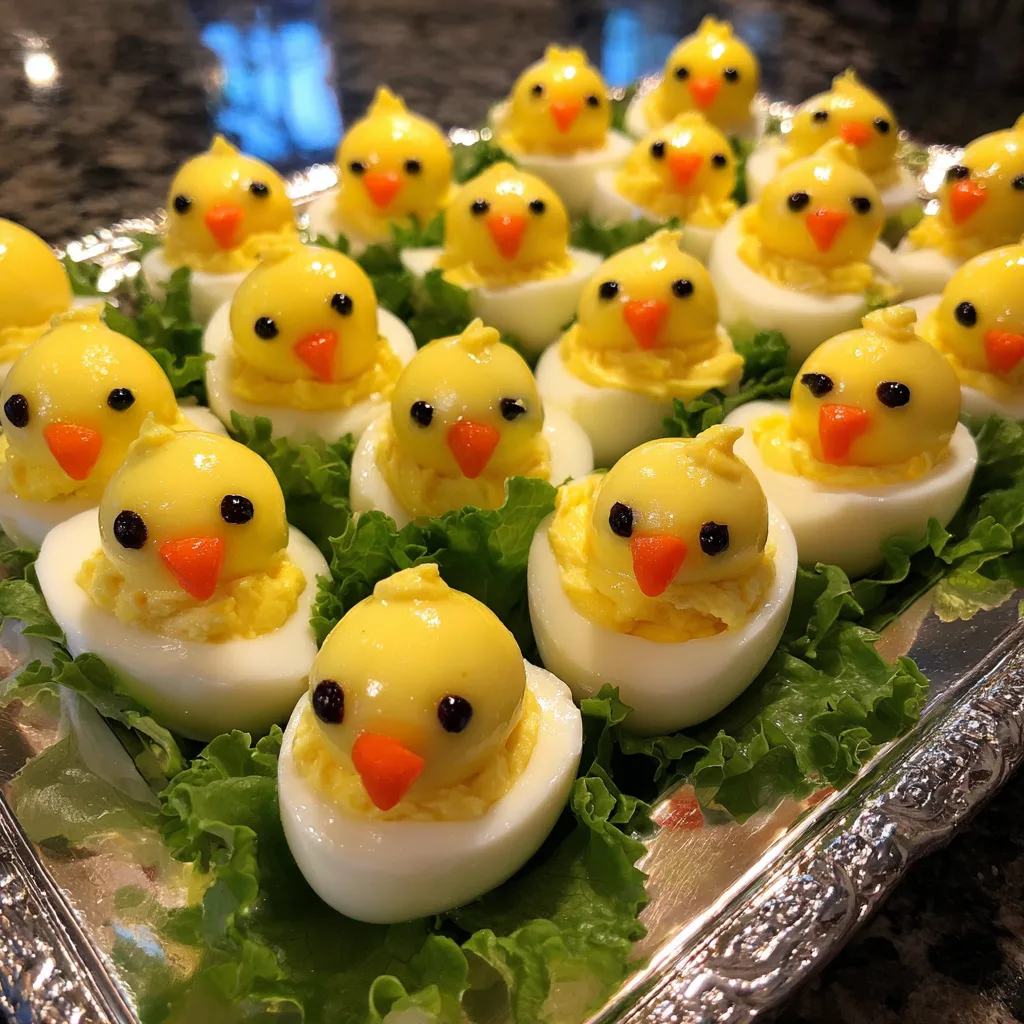
There are few appetizers as universally beloved and instantly recognizable as the classic deviled egg. Creamy, tangy, and perfectly bite-sized, they are a staple at potlucks, family gatherings, and holiday feasts. But what if you could take this traditional favorite and transform it into an absolute showstopper that will have your guests reaching for their cameras before they even take a bite? Enter the deviled egg chicks: a whimsical, incredibly adorable, and downright delicious variation that turns your standard boiled egg into a hatching baby bird.
These cute little creations are not just food; they are an edible craft project that brings joy to any table they grace. Perfect for Easter brunches, baby showers, spring garden parties, or simply a fun weekend project with the kids, deviled egg chicks offer the exact same satisfying flavor profile as a classic deviled egg, but with a presentation that is a hundred times more memorable. In this comprehensive guide, we will walk you through every single step required to master these delightful treats, from boiling the absolute perfect egg to piping the filling and adding those tiny, expressive facial features.
Why You Will Fall in Love With This Recipe
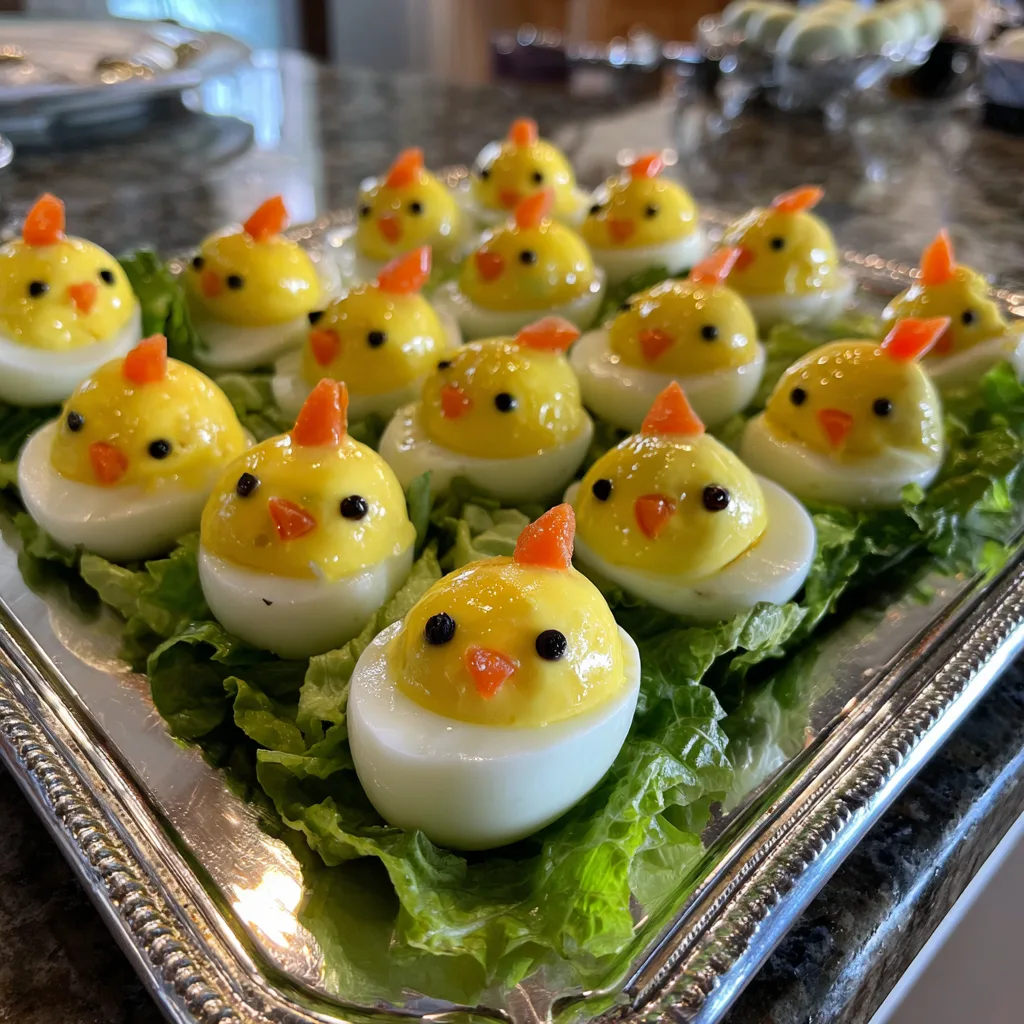
The primary reason you will fall head over heels for this recipe is the undeniable “wow” factor. Food that looks like something else—especially something as universally endearing as a baby animal—sparks a sense of childlike wonder in people of all ages. When you walk into a room carrying a platter of these little yellow chicks peeking out of their egg white “shells,” nestled on a bed of fresh green lettuce, the reaction is guaranteed to be one of pure delight. They are the ultimate conversation starter.
Beyond the aesthetics, you will love this recipe because it relies on familiar, accessible ingredients. You do not need to scour specialty grocery stores for obscure items. Eggs, mayonnaise, a little mustard, and a few basic vegetables for decorating are all you really need. Furthermore, this recipe is incredibly forgiving and customizable. While the assembly takes a little bit of patience and a steady hand, the actual cooking process is foolproof, making it an excellent recipe for cooks of all skill levels. They are also naturally low in carbohydrates, gluten-free, and packed with protein, making them a fantastic option that accommodates a wide variety of dietary restrictions.
The Fascinating Cultural Context and History
To truly appreciate the deviled egg chick, it helps to understand the long and storied history of its predecessor: the deviled egg. The concept of boiling eggs, slicing them, and seasoning them dates back to ancient Rome. Wealthy patricians often began their lavish multi-course banquets with a course called “gustatio,” which frequently featured boiled eggs dressed with spicy sauces. The phrase “ab ovo usque ad mala” (from eggs to apples) was a common Roman saying, signifying the beginning and end of a complete meal.
The term “deviled,” however, did not appear in the culinary lexicon until the 18th century in Great Britain. At the time, “deviling” referred to the process of making food spicy or highly seasoned, often by incorporating mustard, pepper, or other pungent spices. The association with the “devil” was a playful nod to the heat of the dish. By the mid-20th century in the United States, deviled eggs became an absolute staple of suburban entertaining, appearing on every picnic table and holiday spread. The evolution into the “chick” shape is a much more modern phenomenon, born from the internet era’s love for “kawaii” (cute) food and the desire to create highly visual, shareable holiday content, particularly for Easter, where eggs and chicks are enduring symbols of new life and spring.
The Science of the Perfect Hard-Boiled Egg
The foundation of a great deviled egg chick is a perfectly cooked, easily peelable hard-boiled egg. If your eggs are undercooked, the yolks will be too jammy to mash into a stable filling. If they are overcooked, the yolks develop a highly unappetizing powdery texture and a distinct, sulfurous green ring around the edges. To achieve perfection, you need a little bit of culinary science.
First, older eggs actually peel much better than farm-fresh eggs. As an egg ages, the air pocket at the base expands, and the pH of the egg white rises, making it less likely to adhere to the inner shell membrane. If you are making these, try to buy your eggs a week in advance. When it comes to cooking, the “hot start” method is often the most reliable for easy peeling. Lowering your eggs gently into boiling water, rather than starting them in cold water, causes the egg white proteins to set rapidly, pulling away from the shell.
After boiling for exactly 11 to 12 minutes, you must immediately shock the eggs in an ice water bath. This rapid cooling halts the cooking process dead in its tracks, preventing that dreaded green ring (which is a reaction between the iron in the yolk and the sulfur in the white) and slightly shrinking the egg inside the shell, which makes peeling a breeze. Peel the eggs under a gentle stream of cold running water, starting from the wider base where the air pocket resides.
Ingredients
Here is exactly what you will need to bring your flock of deviled egg chicks to life:
– 12 large eggs (preferably about a week old for easier peeling)
– 1/3 cup high-quality mayonnaise
– 1 tablespoon Dijon mustard (or classic yellow mustard, depending on preference)
– 1 teaspoon apple cider vinegar or white vinegar
– 1/4 teaspoon salt (or to taste)
– 1/8 teaspoon freshly ground black pepper
– 1 small carrot, peeled and cut into very thin slices (for the beaks)
– 1 small can of black olives, or black sesame seeds, or black peppercorns (for the eyes)
– Fresh green leaf lettuce or curly endive (for serving and presentation)
Instructions
Follow these detailed, step-by-step instructions to create your adorable appetizer:
1. Bring a large pot of water to a rolling boil over high heat. Using a slotted spoon, carefully lower the eggs into the boiling water one by one to prevent them from cracking on the bottom of the pot. Reduce the heat to a gentle simmer and set a timer for exactly 12 minutes.
2. While the eggs are cooking, prepare a large bowl filled with cold water and ice cubes.
3. Once the 12 minutes are up, immediately transfer the eggs from the hot water into the ice bath using your slotted spoon. Let them sit in the ice bath for at least 10 minutes until they are completely cold to the touch.
4. Gently tap each egg on the counter to crack the shell all over. Peel the eggs, preferably under a slow stream of cold running water to help flush away any tiny shell fragments.
5. Instead of slicing the eggs in half vertically like traditional deviled eggs, you need to cut off the top third of each egg crosswise (horizontally). This smaller top piece will serve as the chick’s “hat” or top shell.
6. Very gently squeeze the bottom, larger portion of the egg white to pop the cooked yolk out into a medium mixing bowl. Use a small spoon to carefully scoop out any remaining yolk, being extremely careful not to tear the delicate egg white “cup.” Do this for all the eggs.
7. If the bottom egg whites are wobbly and will not stand up straight, use a sharp knife to carefully shave a tiny, paper-thin slice off the very bottom to create a flat, stable base. Be careful not to cut too deep, or you will create a hole.
8. Using a fork, thoroughly mash the collected egg yolks in the bowl until no large lumps remain. For a perfectly smooth filling, you can push the yolks through a fine-mesh sieve.
9. Add the mayonnaise, mustard, vinegar, salt, and pepper to the mashed yolks. Stir vigorously until the mixture is incredibly smooth, creamy, and well combined.
10. Transfer the yolk mixture to a piping bag fitted with a large round tip, or a heavy-duty zip-top plastic bag with one bottom corner snipped off.
11. Pipe the filling generously into the larger bottom half of each egg white. You want to overfill them significantly so that the filling mounds up high—this mound will become the chick’s face.
12. Gently place the smaller top third of the egg white (the “hat”) onto the mound of filling, pressing it down slightly at a jaunty angle so it looks like a hatching egg, leaving plenty of the yellow filling exposed in the front.
13. Now for the details: Cut your thin carrot slices into tiny little triangles to serve as the beaks. Gently press one triangle into the center of the exposed yellow filling on each egg.
14. For the eyes, if using black olives, use a plastic straw to punch out tiny circles, or finely chop the olive into small squares. If using black sesame seeds or peppercorns, simply use tweezers to place them. Gently press two “eyes” into the filling above the carrot beak on each chick.
15. Line a decorative serving platter with the fresh green lettuce leaves to resemble a grassy nest. Carefully arrange the finished deviled egg chicks on the bed of lettuce. Keep refrigerated until ready to serve.
Expert Tips for Flawless Execution
Creating these little chicks requires a bit more finesse than your standard deviled egg. Here are some expert tips to ensure success. First, if your yolks are sitting too close to the edge of the white and making one side very thin, this is due to the yolk settling while the egg was in the carton. To prevent this, you can lay your egg carton on its side in the refrigerator the night before you boil them; this helps recenter the yolks.
When mashing your yolks, achieving a silky smooth texture is paramount. If there are chunks of yolk in your filling, they will get stuck in your piping tip and ruin the appearance of your chick’s face. If you do not have a fine-mesh sieve, use a food processor for a few quick pulses to guarantee a velvety smooth filling.
If you find that your filling is a bit too thick or dry, add a tiny splash of pickle juice or a fraction of a teaspoon more mayonnaise. Conversely, if your filling is too runny to hold its shape holding up the “hat,” add a small amount of instant mashed potato flakes or a little bit of finely grated cheddar cheese to stiffen it up without ruining the flavor.
Exciting Flavor Variations
While the classic mustard and mayonnaise base is beloved, you can absolutely elevate the flavor profile of your deviled egg chicks. For a spicy kick, fold in a tablespoon of finely minced jalapeños or a few dashes of your favorite hot sauce, and use a tiny piece of red bell pepper instead of a carrot for the beak. A sprinkle of smoked paprika over the filling before you add the top shell gives it a wonderful smoky depth.
For a sophisticated, herbaceous twist, blend fresh dill, chives, and tarragon into your yolk mixture. You can also incorporate finely crumbled crispy bacon or very finely minced smoked salmon for a luxurious upgrade. If you want to lean into the “green” springtime theme, you can even blend a little bit of avocado into the yolk mixture, which will tint the chicks slightly green but add an incredible buttery richness to the filling.
Serving Suggestions and Presentation
The presentation is where these deviled egg chicks truly shine. Serving them on a bed of fresh, curly green lettuce or crisp endive is highly recommended, as it beautifully simulates a grassy nest or a spring meadow, providing a gorgeous color contrast to the bright white and yellow of the eggs.
If you are serving them for Easter, you can scatter a few pastel-colored candy eggs or edible flowers (like pansies or nasturtiums) around the edges of the platter to enhance the spring theme. They look fantastic served alongside other brunch favorites like glazed ham, asparagus tarts, hot cross buns, and a vibrant fruit salad.
Proper Storage and Make-Ahead Instructions
Like all egg-based appetizers, food safety and proper storage are critical. Deviled egg chicks should never be left out at room temperature for more than two hours. If you are serving them at an outdoor party, consider placing the serving platter over a larger tray filled with crushed ice to keep them properly chilled.
You can certainly prepare the components of this dish ahead of time, which is highly recommended if you are hosting a large event. You can boil and peel the eggs, slice them, and prepare the yolk filling up to two days in advance. Store the hollowed-out egg whites in an airtight container lined with a damp paper towel to prevent them from drying out and becoming rubbery. Store the yolk filling in its sealed piping bag in the refrigerator. Wait until a few hours before your event to pipe the filling, attach the “hats,” and apply the delicate facial features, as the carrot and olive pieces can dry out or bleed color if left on too long in the fridge.
Deviled Egg Chicks
Ingredients
Equipment
Method
- Carefully lower eggs into a pot of gently boiling water. Cook for 12 minutes.
- Transfer the eggs immediately to an ice water bath and let them cool for 10 minutes. Peel the eggs.
- Slice the top third off of each egg crosswise to create a ‘hat’.
- Gently scoop the cooked yolks out of the bottom sections into a mixing bowl. Shave a tiny piece off the bottom of the egg whites if they don’t stand upright.
- Mash the yolks thoroughly with a fork until very fine. Stir in mayonnaise, mustard, vinegar, salt, and pepper until perfectly smooth.
- Transfer the yolk mixture to a piping bag. Pipe generously into the hollowed bottom egg whites, mounding the filling high.
- Place the top egg white pieces onto the filling at an angle to look like hatching shells.
- Use tweezers to place two tiny olive pieces for eyes and a carrot triangle for a beak on the exposed filling of each chick.
- Arrange on a platter lined with lettuce and keep refrigerated until serving.