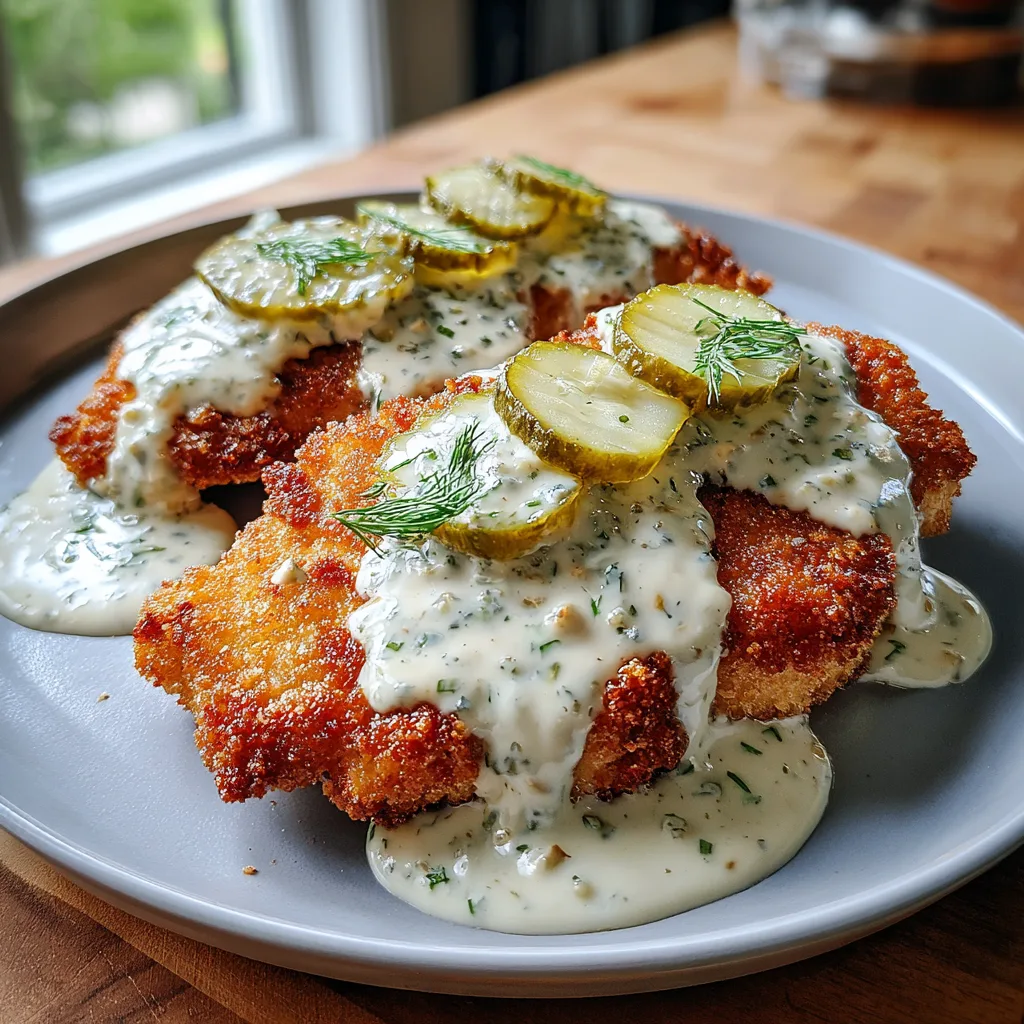
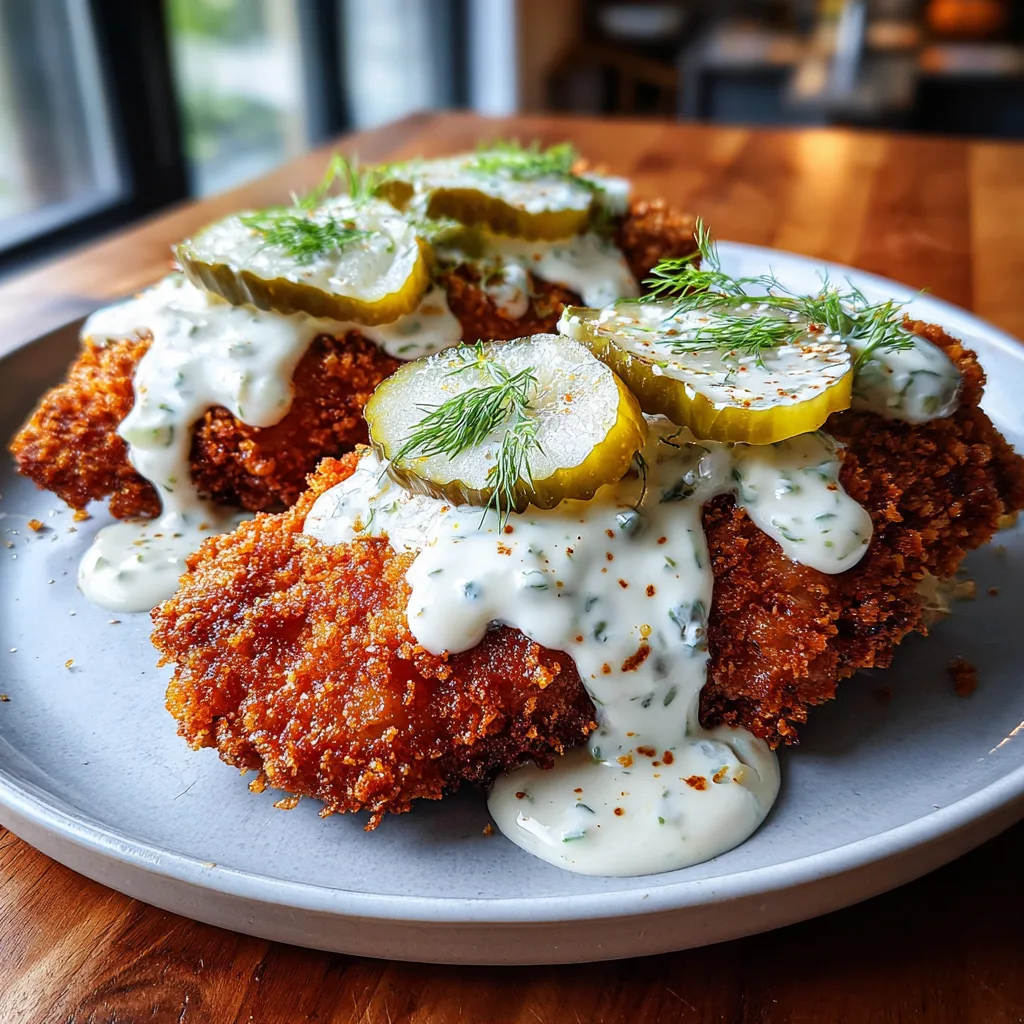
Dill Pickle Parmesan Chicken
The Best Crispy Dill Pickle Parmesan Chicken
If you have ever found yourself staring into the refrigerator wondering what to make with a plain pack of chicken breasts, prepare to have your culinary world rocked. The Best Crispy Dill Pickle Parmesan Chicken is not just another weeknight chicken recipe; it is a flavor-packed, texture-rich experience that will leave your family begging for seconds. By combining the tangy, savory magic of pickle juice with a golden, crunchy parmesan crust and a luscious creamy dill topping, this dish hits every single craving note simultaneously.
For years, fast-food chains have known the secret of using pickle juice to elevate chicken. Now, you can bring that mouth-watering, juicy, and tenderizing technique into your own kitchen. This comprehensive guide will walk you through every step, from the science of the perfect brine to the ultimate crispy breading technique, ensuring that your chicken turns out restaurant-quality every single time.
Why You Will Fall in Love with This Recipe
There are countless chicken recipes on the internet, but this Crispy Dill Pickle Parmesan Chicken stands in a league of its own. First and foremost, the flavor profile is incredibly balanced. The acidity of the pickles cuts through the richness of the fried parmesan crust, while the creamy sauce adds a luxurious finish. Here is why this recipe will become a permanent fixture in your dinner rotation:
- Unbelievably Tender Meat: The secret lies in the pickle juice brine. The natural acids and salts in the juice break down the tough muscle fibers in the chicken breasts, resulting in meat that is incredibly tender and juicy on the inside, preventing the dreaded dry chicken phenomenon.
- Incredible Crunch: The combination of panko breadcrumbs and freshly grated parmesan cheese creates an ultra-crispy, sturdy crust that holds up perfectly under the creamy sauce.
- Tangy, Zesty Flavor: If you are a fan of dill pickles, this dish is a dream come true. The flavor is infused into the meat during the marinade and reinforced with the creamy, herb-packed topping.
- Versatility: While this recipe is perfect for a comforting weeknight dinner, it is also impressive enough to serve to guests at a dinner party. You can slice it over salads, tuck it into a toasted brioche bun for an epic chicken sandwich, or serve it alongside roasted potatoes.
The Science of the Pickle Juice Brine
Before we dive into the cooking process, it is important to understand why the pickle juice brine is the crucial foundation of this recipe. Brining meat is a classic culinary technique used to introduce moisture and flavor. Traditional brines are a simple mixture of water, salt, and sometimes sugar. However, pickle juice is essentially a pre-made, highly flavored brine.
Pickle juice contains water, salt, vinegar, and a blend of spices like garlic, dill, and mustard seed. When you submerge chicken in this liquid, the process of osmosis begins. The salt draws moisture out of the chicken, but then the chicken reabsorbs the liquid, pulling all those incredible flavors and extra moisture deep into the meat. Furthermore, the vinegar acts as a mild tenderizer, gently denaturing the proteins on the surface of the meat. This ensures that when the chicken is exposed to high heat during cooking, it remains succulent and soft rather than seizing up and becoming tough.
Essential Ingredients
To achieve the perfect balance of flavors and textures, you will need a combination of pantry staples and fresh ingredients. Here is exactly what you need:
For the Chicken and Marinade:
- – 2 large boneless, skinless chicken breasts (halved horizontally to make 4 cutlets)
- – 1 cup dill pickle juice (straight from the jar)
- – 1/2 teaspoon black pepper
- – 1/2 teaspoon garlic powder
For the Parmesan Breading Station:
- – 1/2 cup all-purpose flour
- – 2 large eggs
- – 1 tablespoon milk or water
- – 1 cup panko breadcrumbs (do not substitute with regular breadcrumbs if you want maximum crunch)
- – 1/2 cup freshly grated Parmesan cheese (avoid the pre-shredded stuff in bags, as it contains anti-caking agents)
- – 1 teaspoon dried dill weed
- – 1/2 teaspoon paprika (for a beautiful golden color)
- – 1/4 teaspoon salt
- – 1/4 teaspoon black pepper
- – 1/3 cup cooking oil (such as canola, vegetable, or avocado oil for shallow frying)
For the Creamy Dill Pickle Sauce:
- – 1/3 cup mayonnaise (full fat yields the best texture)
- – 1/4 cup sour cream or plain Greek yogurt
- – 2 tablespoons finely chopped dill pickles
- – 1 tablespoon fresh dill, finely chopped
- – 1 teaspoon pickle juice
- – 1/4 teaspoon garlic powder
- – Salt and pepper to taste
- – Thinly sliced fresh cucumbers or extra pickles for garnish
Step-by-Step Instructions
Follow these detailed steps to ensure your chicken comes out perfectly crispy on the outside and wonderfully juicy on the inside.
- Prepare the Chicken Cutlets: Place the chicken breasts on a cutting board. Carefully slice them in half horizontally so you have four thin, even cutlets. If they are still uneven, place them between two sheets of plastic wrap and gently pound them to an even 1/2-inch thickness using a meat mallet. This ensures they cook evenly and quickly.
- Marinate in Pickle Juice: Place the chicken cutlets in a large ziplock bag or a shallow dish. Pour the 1 cup of dill pickle juice over the chicken, ensuring all pieces are submerged. Add the garlic powder and black pepper. Seal the bag or cover the dish and refrigerate for at least 30 minutes, but no longer than 4 hours (leaving them in the highly acidic juice for too long can make the meat mushy).
- Mix the Creamy Dill Sauce: While the chicken is marinating, prepare the sauce. In a small bowl, whisk together the mayonnaise, sour cream, chopped pickles, fresh dill, 1 teaspoon of pickle juice, garlic powder, salt, and pepper. Cover and refrigerate until ready to serve. Allowing the sauce to sit helps the flavors meld together beautifully.
- Set Up the Breading Station: You will need three shallow dishes (pie plates work perfectly). In the first dish, place the all-purpose flour. In the second dish, whisk the eggs with the milk until completely smooth. In the third dish, combine the panko breadcrumbs, grated Parmesan cheese, dried dill, paprika, salt, and pepper. Toss well to combine.
- Bread the Chicken: Remove the chicken from the pickle juice brine and pat each cutlet completely dry with paper towels. This is crucial for the breading to stick! Dredge a cutlet in the flour, shaking off any excess. Next, dip it entirely into the egg wash, letting the excess drip off. Finally, press the chicken firmly into the panko-parmesan mixture, making sure the entire surface is heavily coated. Repeat with the remaining cutlets and set them on a clean plate or wire rack.
- Fry the Chicken: Heat the cooking oil in a large, heavy-bottomed skillet (cast iron is excellent for this) over medium-high heat. Once the oil is shimmering and a breadcrumb dropped in sizzles immediately, carefully add 2 cutlets to the pan. Cook for 3 to 4 minutes per side, or until the crust is deep golden brown and the internal temperature of the chicken reaches 165°F (74°C). Transfer the cooked chicken to a wire rack set over a paper towel to drain. Repeat with the remaining cutlets.
- Plate and Serve: Place a hot, crispy chicken cutlet on a plate. Generously dollop the prepared creamy dill pickle sauce over the top. Garnish with a few fresh sprigs of dill and thin slices of fresh cucumbers or pickles. Serve immediately while hot and crispy!
Pro Tips for the Crispiest, Most Flavorful Chicken
While the recipe is straightforward, there are a few professional kitchen secrets that will take your dill pickle chicken from good to spectacular:
Pat the Chicken Dry: I cannot stress this enough. After removing the chicken from the wet brine, you must dry it thoroughly with paper towels. If the chicken is too wet, the flour will turn into a paste, and the breading will fall right off in the pan.
Use the “One Hand Wet, One Hand Dry” Method: When breading your chicken, use your left hand only for the flour and panko (the dry ingredients) and your right hand only for the egg wash (the wet ingredient). This prevents your fingers from becoming heavily breaded and clumpy.
Do Not Crowd the Pan: Frying too many chicken cutlets at once will drop the temperature of the oil significantly. This leads to greasy, soggy breading instead of a crisp, golden crust. Fry in batches for the best results.
Rest on a Wire Rack: Never place freshly fried chicken directly on a plate or paper towel. The steam trapped underneath will immediately make the bottom soggy. Always use a wire cooling rack to allow air to circulate around the entire piece of chicken.
Creative Variations and Customizations
This recipe is highly adaptable to your personal dietary needs and flavor preferences. Here are some fantastic ways to switch things up:
Spicy Pickle Chicken: If you love heat, substitute spicy pickle juice for the standard dill juice. Add a teaspoon of cayenne pepper or a dash of hot sauce to the egg wash, and sprinkle some red pepper flakes into the panko breading. Serve with a spicy jalapeño ranch instead of the standard dill sauce.
Air Fryer Method: Want to cut down on the oil? You can easily make this in the air fryer. Preheat your air fryer to 380°F (190°C). Spray the breaded chicken generously with cooking spray on both sides. Air fry for 10-12 minutes, flipping halfway through, until golden and cooked through.
Baked Version: To bake in the oven, place the breaded cutlets on a wire rack set over a baking sheet. Spray lightly with oil and bake at 400°F (200°C) for 15-20 minutes, or until cooked through and crispy.
Gluten-Free: Swap the all-purpose flour for a 1-to-1 gluten-free baking flour, and use gluten-free panko breadcrumbs. Always ensure your spices and condiments are certified gluten-free.
What to Serve with Dill Pickle Parmesan Chicken
Because this chicken is deeply savory, tangy, and rich, it pairs beautifully with side dishes that are fresh, light, or comforting. Here are some of the best accompaniments:
- Potatoes: You cannot go wrong with classic mashed potatoes, garlic herb roasted baby potatoes, or crispy French fries to dip into any leftover creamy dill sauce.
- Vegetables: Roasted asparagus with a squeeze of lemon, blistered green beans, or sweet glazed carrots balance the tangy, salty notes of the chicken perfectly.
- Salads: A crisp, refreshing wedge salad with blue cheese dressing, or a simple arugula salad tossed with olive oil and lemon juice, provides a wonderful contrast to the heavy, breaded chicken.
- Sandwich Style: For a casual dinner, place the crispy chicken on a toasted brioche bun, slather both sides with the dill sauce, and add crisp butter lettuce and tomato slices for an unforgettable chicken sandwich.
Storage and Reheating Instructions
If you happen to have leftovers, proper storage and reheating are key to maintaining that delightful crunch.
To Store: Allow the chicken to cool completely to room temperature. Store the chicken and the creamy dill sauce in separate airtight containers in the refrigerator. The chicken will keep for up to 3-4 days, and the sauce will stay fresh for up to a week.
To Reheat: Never microwave crispy breaded chicken, as it will become incredibly rubbery and soggy. Instead, preheat your oven to 375°F (190°C) or your air fryer to 350°F (175°C). Place the chicken on a wire rack and heat for 8-10 minutes in the oven, or 3-5 minutes in the air fryer, until warmed through and re-crisped.
Frequently Asked Questions (FAQ)
Can I use chicken thighs instead of chicken breasts?
Absolutely! Boneless, skinless chicken thighs are naturally juicier and more flavorful than breasts. They work wonderfully in this recipe. Just be aware that thighs may take a minute or two longer to fry depending on their thickness.
Can I use sweet pickle juice instead of dill?
While you technically can, sweet pickle juice will completely change the flavor profile of the dish, resulting in a sweet and savory chicken rather than a tangy, zesty one. If you prefer sweeter flavors, go for it, but the classic recipe relies heavily on the sharp bite of dill pickle brine.
Why did my breading fall off in the pan?
Breading usually falls off for one of three reasons: the chicken was too wet before dredging in flour, the oil was not hot enough before adding the chicken, or the chicken was prodded and flipped too early or too often. Let the chicken form a solid crust before trying to flip it.
Can I freeze the raw, breaded chicken?
Yes! This is a great meal-prep hack. Bread the chicken completely, then lay the raw cutlets on a parchment-lined baking sheet and freeze until solid. Transfer to a freezer-safe bag for up to 2 months. You can fry them straight from frozen, just add a few extra minutes to the cooking time to ensure the internal temperature reaches 165°F (74°C).
The Cultural Rise of Pickle-Flavored Everything
If it feels like dill pickle flavor is suddenly everywhere, you are not imagining it. Over the last decade, the culinary world has seen a massive boom in pickle-flavored products, ranging from potato chips and popcorn to hard seltzers and even ice cream. But utilizing pickle juice as a marinade is not a new gimmick; it is deeply rooted in Southern cooking traditions.
Historically, nothing in a Southern kitchen went to waste. When the last pickle was eaten from the jar, the heavily spiced, acidic brine was repurposed to flavor greens, add zing to potato salads, or, most famously, tenderize cheap cuts of meat. Fast-food giant Chick-fil-A famously popularized the pickle-brined chicken sandwich, introducing the technique to the masses. Today, this recipe honors that tradition of utilizing every drop of flavor while elevating it with an Italian-inspired parmesan crust and a rich, creamy sauce.
Conclusion
This Crispy Dill Pickle Parmesan Chicken is a testament to how a few simple pantry staples can transform a basic protein into a meal worth writing home about. The combination of the tangy, juicy meat, the shatteringly crisp parmesan-panko crust, and the cooling, herbaceous sauce creates a harmony of flavors that will delight your palate. Whether you are cooking for picky eaters or hosting a casual dinner party, this recipe is guaranteed to be a resounding success. Grab your jar of pickles, fire up the skillet, and get ready to experience your new favorite chicken dinner!
Crispy Dill Pickle Parmesan Chicken
Ingredients
Equipment
Method
- Slice chicken breasts in half horizontally to create 4 cutlets. Pound gently to an even 1/2-inch thickness if necessary.
- Place chicken in a bag or dish, cover with 1 cup pickle juice, 1/2 tsp pepper, and 1/2 tsp garlic powder. Refrigerate for 30 minutes to 4 hours.
- In a small bowl, whisk together all ingredients for the Creamy Dill Pickle Sauce. Cover and refrigerate until ready to serve.
- Set up a breading station with three shallow dishes: 1) flour, 2) eggs whisked with milk, 3) panko, Parmesan, dried dill, paprika, salt, and pepper.
- Remove chicken from marinade and pat completely dry with paper towels. Dredge in flour, dip in egg, and press firmly into the panko-parmesan mixture to coat completely.
- Heat oil in a large skillet over medium-high heat. Fry chicken cutlets in batches for 3-4 minutes per side until deeply golden and internal temperature reaches 165°F.
- Transfer cooked chicken to a wire rack to drain briefly.
- Plate the hot chicken, dollop generously with the creamy dill sauce, and garnish with fresh dill and sliced cucumbers or pickles. Serve immediately.