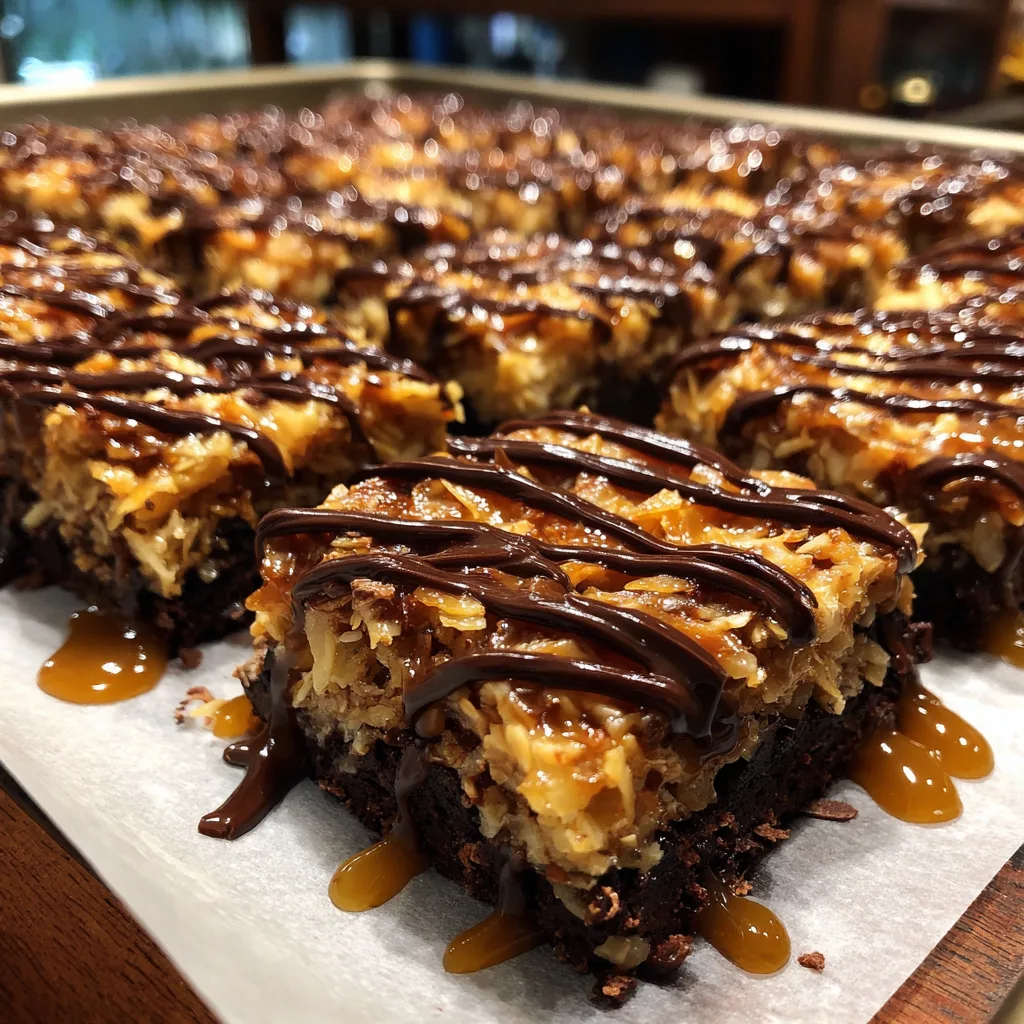
Easy Samoa Brownies
If you have ever found yourself devouring an entire box of Girl Scout Samoa cookies (also known as Caramel deLites) in one sitting, you are certainly not alone. The iconic combination of a tender base, chewy caramel, toasted coconut, and rich dark chocolate is nothing short of legendary. But what if you could take that exact flavor profile and elevate it into a decadent, gooey, fudgy homemade dessert? Enter the Easy Samoa Brownies.
This recipe bridges the gap between a classic, deeply chocolatey brownie and the beloved coconut-caramel cookie. Whether you are baking for a potluck, a holiday gathering, or simply treating yourself on a cozy weekend, these Samoa Brownies deliver an indulgent experience that will have everyone asking for the recipe. In this comprehensive guide, we are going to dive deep into every single element of this dessert—from achieving the perfect fudgy brownie base to mastering the sticky, sweet, and toasted coconut topping.
The Inspiration Behind the Recipe
The Samoa cookie has a rich history, capturing the hearts of dessert lovers for decades. Its signature look—a ring coated in caramel and coconut with chocolate stripes—is instantly recognizable. Translating this into a brownie means swapping out the shortbread cookie base for a dense, chocolate-packed foundation. By using a brownie base, we add a new layer of richness that pairs beautifully with the sweetness of the caramel. The slight bitterness of the cocoa powder in the brownie perfectly balances the sugary topping, preventing the dessert from becoming overly cloying.
The Anatomy of a Perfect Samoa Brownie
To truly understand what makes these brownies so spectacular, we need to break down the three crucial layers that make up the anatomy of this dessert:
1. The Fudgy Brownie Base: Forget cakey brownies; for this recipe, we need a dense, fudgy, and chewy foundation. A fudgy base holds up better against the heavy topping. We achieve this by using a higher ratio of fat (butter and chocolate) to flour, and leaving out leavening agents like baking powder.
2. The Caramel Coconut Layer: This is the star of the show. It requires perfectly toasted coconut folded into a rich, thick caramel sauce. The caramel acts as the glue that binds the coconut flakes together and adheres them to the brownie base.
3. The Chocolate Drizzle: A generous zigzag of melted semi-sweet or dark chocolate across the top not only mimics the look of the classic cookie but adds a final snap of texture and a hit of cocoa that brings the whole flavor profile together.
The Science of Baking: Fudgy vs. Cakey Brownies
A common debate in the baking world is the preference between fudgy and cakey brownies. For Samoa Brownies, fudgy is non-negotiable. Why? Because a cakey brownie would crumble under the weight and moisture of the caramel coconut topping.
The science behind a fudgy brownie comes down to the fat-to-flour ratio. Flour provides structure through gluten formation, which gives cakes their crumb. By reducing the flour and increasing the fat (in the form of butter) and sugar, we create a denser, moister crumb. Additionally, omitting chemical leaveners like baking soda or baking powder ensures the batter doesn’t rise and become airy. Baking time is equally important; pulling the brownies out of the oven just before they are fully set in the center allows them to finish baking in the pan as they cool, resulting in that perfectly gooey center.
Deep Dive: Selecting Your Ingredients
Quality ingredients make a massive difference in simple baking recipes. Here is a look at what you need and why:
Cocoa Powder: Using high-quality Dutch-processed cocoa powder will yield a darker, smoother, and more intense chocolate flavor compared to natural cocoa powder. Dutch-processed cocoa is washed with a potassium carbonate solution that neutralizes its acidity.
Butter: Always use unsalted butter in baking so you can control the sodium level. Butter provides flavor and creates the tender, fudgy texture we are aiming for.
Coconut: Sweetened shredded coconut is ideal here because it toasts beautifully and adds to the chewy texture. Unsweetened can be used if you prefer a less sweet dessert, but sweetened is traditional.
Caramel: You can use high-quality store-bought soft caramel candies melted down with a little heavy cream, or a thick, premium jarred caramel sauce (like dulce de leche). Thin caramel syrups meant for coffee will not work, as they will make the topping too runny.
Mastering the Toasted Coconut
Toasting coconut transforms it from a chewy, one-dimensional ingredient into a nutty, fragrant, and slightly crisp topping. There are a few ways to toast coconut:
Oven Method: Spread the coconut evenly on a baking sheet and bake at 325°F (160°C) for 5-10 minutes. You must watch it like a hawk and stir it every 2 minutes, as the high oil content in coconut causes it to burn rapidly once it starts browning.
Stovetop Method (Preferred for precision): Place the coconut in a large, dry skillet over medium-low heat. Stir continuously with a spatula until the flakes turn a beautiful golden brown. This method gives you total control and prevents sudden burning.
Ingredients
Gather the following ingredients to create your masterpiece.
For the Brownie Base:
– 1/2 cup (1 stick) unsalted butter, melted
– 1 cup granulated sugar
– 2 large eggs, room temperature
– 1 teaspoon pure vanilla extract
– 1/2 cup high-quality cocoa powder
– 1/2 cup all-purpose flour
– 1/4 teaspoon salt
For the Samoa Topping:
– 3 cups sweetened shredded coconut
– 11 oz bag of soft caramel candies (unwrapped)
– 3 tablespoons heavy cream
– 1/4 teaspoon salt (to balance the sweetness)
For the Chocolate Drizzle:
– 1 cup semi-sweet chocolate chips
– 1 teaspoon coconut oil (helps the chocolate melt smoothly and set nicely)
Instructions
Follow these step-by-step instructions for fail-proof Samoa Brownies.
1. Preheat and Prep: Preheat your oven to 350°F (175°C). Line an 8×8-inch square baking pan with parchment paper, leaving an overhang on the sides. This “sling” will make it incredibly easy to lift the sticky brownies out of the pan later. Lightly grease the parchment paper.
2. Mix the Wet Ingredients: In a large mixing bowl, whisk together the melted warm butter and granulated sugar until well combined. Add the eggs one at a time, whisking vigorously after each addition until the batter looks slightly pale and glossy. Stir in the vanilla extract.
3. Fold in the Dry Ingredients: Sift the cocoa powder, all-purpose flour, and salt directly into the bowl with the wet ingredients. Using a rubber spatula, gently fold the mixture together just until no dry streaks of flour remain. Do not overmix, or your brownies will become tough.
4. Bake the Base: Pour the thick batter into the prepared baking pan, spreading it into an even layer. Bake for 20-25 minutes. A toothpick inserted into the center should come out with moist crumbs attached, not wet batter. Remove from the oven and let the brownies cool completely in the pan.
5. Toast the Coconut: While the brownies cool, toast the shredded coconut. Place a large skillet over medium heat. Add the coconut and stir frequently for 5-7 minutes until it becomes beautifully fragrant and golden brown. Transfer immediately to a bowl to stop the cooking process.
6. Melt the Caramel: In a microwave-safe bowl, combine the unwrapped caramel candies, heavy cream, and a pinch of salt. Microwave in 30-second intervals, stirring vigorously between each, until the mixture is completely smooth and melted. Alternatively, do this in a saucepan over medium-low heat.
7. Combine Topping: Reserve about 3 tablespoons of the melted caramel and set it aside. Pour the remaining melted caramel over the toasted coconut and fold until all the coconut is evenly coated in the sticky syrup.
8. Assemble the Layers: Once the brownies are completely cool, spread the reserved 3 tablespoons of plain caramel over the top of the brownies in a thin layer. This acts as a primer. Next, spoon the sticky caramel-coconut mixture over the brownies, pressing it down gently into an even, compact layer.
9. Add the Drizzle: In a small bowl, melt the chocolate chips and coconut oil together in the microwave using 20-second bursts, stirring until smooth. Transfer the melted chocolate to a piping bag or a ziplock bag with the corner snipped off. Drizzle the chocolate in a tight diagonal zigzag pattern over the coconut topping.
10. Set and Slice: Place the pan in the refrigerator for about 30 minutes to allow the caramel and chocolate to firm up. Use the parchment overhang to lift the brownies out of the pan. Using a large, sharp knife, cut into squares. Wipe the knife clean between cuts for neat edges.
Expert Tips for Success
Baking is both an art and a science. Here are a few expert tips to ensure your Samoa Brownies turn out perfect every single time:
– Patience is Key: Do not attempt to spread the warm caramel topping onto warm brownies. The structural integrity of the brownie needs to be firm and cooled, otherwise, the dessert will turn into a messy, crumbly mush when you try to spread the heavy topping.
– Clean Cuts: Because the caramel is sticky and the base is fudgy, getting clean slices can be tricky. Chill the brownies thoroughly before cutting. Run your knife under hot water, wipe it dry, and make a firm slice. Repeat this hot-water-wipe method for every single cut.
– Quality Caramel: If you are making caramel from scratch instead of using store-bought candies, ensure it is cooked to the firm-ball stage so it doesn’t run off the sides of your brownies at room temperature.
Exciting Variations to Try
Once you master the base recipe, feel free to get creative with these fun variations:
– Salted Caramel Samoa Brownies: Double down on the savory-sweet trend by sprinkling flaky sea salt (like Maldon) over the chocolate drizzle before it sets.
– Blondie Base: Not a huge chocolate fan? Swap the brownie base for a brown sugar and vanilla blondie base. The caramel and coconut will shine even brighter.
– Nutty Samoa: Mix half a cup of toasted, chopped pecans or almonds into the coconut-caramel topping for added crunch and depth of flavor.
– Espresso Infusion: Add a teaspoon of instant espresso powder to the brownie batter with the dry ingredients. Coffee enhances the rich flavor of chocolate without making the brownies taste like a latte.
Serving Suggestions
These brownies are incredibly rich, so a little goes a long way. Cut them into smaller squares (a 4×4 grid yielding 16 pieces is usually perfect). Serve them at room temperature so the caramel is soft and chewy.
For an over-the-top dessert experience, briefly warm a brownie in the microwave for 10 seconds, place it in a shallow bowl, and top it with a generous scoop of vanilla bean ice cream. The contrast between the warm, gooey brownie and the cold, creamy ice cream is phenomenal. Pair these treats with a strong cup of black coffee or an unsweetened iced tea to balance the high sugar content.
Storage and Freezing Instructions
Proper storage is essential to keep the brownies fresh and the topping at the right consistency.
Room Temperature: Store the cut brownies in an airtight container at room temperature for up to 4 days. If stacking them, place a layer of wax paper or parchment paper between the layers to prevent the chocolate and caramel from sticking to the bottoms of the brownies above them.
Refrigerator: You can keep them in the fridge for up to a week. They will become quite firm, so it is highly recommended to let them sit on the counter for 15-20 minutes before eating to soften the caramel.
Freezing: These freeze exceptionally well! Wrap individual brownie squares tightly in plastic wrap, then place them all in a heavy-duty freezer bag. They can be frozen for up to 3 months. Thaw overnight in the refrigerator or at room temperature for a couple of hours before serving.
Fun Facts and Cultural Context
Did you know that the original Girl Scout Samoa cookies were introduced in 1975? They quickly became the second best-selling Girl Scout cookie, trailing only behind the Thin Mints. Depending on the bakery that produces them (Little Brownie Bakers or ABC Bakers), they are called either Samoas or Caramel deLites.
The name “Samoa” is widely believed to be a nod to the tropical flavors of coconut, evoking images of the beautiful islands of Samoa in the South Pacific. The combination of chocolate, caramel, and coconut has since transcended the cookie itself, inspiring everything from ice creams and coffee creamers to donuts and, of course, these incredible brownies.
Frequently Asked Questions (FAQs)
Can I use a boxed brownie mix to save time?
Absolutely! While the homemade base is highly recommended for the best flavor and texture, you can absolutely use your favorite 18×13-inch boxed brownie mix. Bake it according to the package directions, let it cool, and then proceed with the topping instructions.
Why is my caramel topping too hard?
If you used store-bought caramels, boiling them or microwaving them for too long can cause the sugars to crystallize or cook to a harder candy stage. Heat the caramels gently just until melted. Adding the heavy cream also ensures the caramel stays soft and chewy rather than turning into hard toffee.
My coconut burned in the oven. What did I do wrong?
Coconut has a very high fat content, which means it goes from toasted to burnt in a matter of seconds. If using the oven, you must stir it frequently and watch it constantly. This is why the stovetop method is often preferred for better control.
Conclusion
There is an undeniable magic that happens when you combine the rich, fudgy depth of a homemade brownie with the sweet, sticky, and toasted notes of a Samoa cookie topping. These Easy Samoa Brownies are more than just a dessert; they are a nostalgic trip wrapped in a decadent, modern package. By following the tips regarding the fat-to-flour ratio, carefully toasting your coconut, and being patient during the cooling phases, you are guaranteed to pull off a dessert that looks like it came straight out of a gourmet bakery. So grab your mixing bowls, fire up the oven, and get ready to enjoy one of the most irresistible treats you will ever bake in your own kitchen!
Easy Samoa Brownies
Ingredients
Equipment
Method
- Preheat oven to 350°F (175°C). Line an 8×8-inch baking pan with parchment paper, leaving an overhang.
- In a bowl, whisk warm melted butter and sugar. Add eggs one at a time, whisking vigorously. Stir in vanilla.
- Sift cocoa powder, flour, and salt into the wet ingredients. Fold gently until just combined. Do not overmix.
- Pour batter into pan and bake for 20-25 minutes. Let cool completely in the pan.
- Toast coconut in a large skillet over medium heat for 5-7 minutes until golden brown. Transfer to a bowl.
- Microwave unwrapped caramels, heavy cream, and a pinch of salt in 30-second intervals until smooth.
- Reserve 3 tablespoons of melted caramel. Pour the rest over the toasted coconut and fold until evenly coated.
- Spread the reserved 3 tablespoons of plain caramel over the cooled brownies. Top with the sticky caramel-coconut mixture, pressing into an even layer.
- Melt chocolate chips and coconut oil together. Drizzle in a diagonal zigzag pattern over the coconut topping.
- Chill for 30 minutes to set, then use the parchment overhang to lift out and cut into squares.