Garlic Parmesan Focaccia
The Ultimate Garlic Parmesan Focaccia Bread Recipe
There are few things in the culinary world more satisfying than pulling a tray of freshly baked bread out of the oven. The crackle of the crust, the steam rising from the center, and the aroma that fills the entire house—it is pure comfort. Among all the bread recipes out there, Garlic Parmesan Focaccia stands out as a champion of flavor, texture, and simplicity.
If you have been intimidated by yeast breads in the past, this recipe is your perfect entry point. Focaccia is forgiving, requires no complex kneading techniques, and actually benefits from a “hands-off” approach. The result is a bread that is crispy and golden on the outside, yet impossibly soft, airy, and chewy on the inside. Topped with a generous amount of garlic butter, savory Parmesan cheese, and fresh herbs, this isn’t just a side dish; it is a showstopper.
In this comprehensive guide, we will walk you through everything you need to know to create the perfect Garlic Parmesan Focaccia at home. From the science behind the bubbles to the best way to store your leftovers, we cover it all. Let’s get baking!
Why You Will Love This Recipe
- No Mixer Required: You don’t need a fancy stand mixer to make this. A sturdy wooden spoon and a bowl are all you need to bring the dough together.
- Incredible Texture: This recipe uses a high-hydration dough, which creates those massive, beautiful air pockets (crumbs) that focaccia is famous for.
- Flavor Bomb: While plain focaccia is delicious, the addition of garlic confit or garlic butter combined with the salty punch of Parmesan takes it to a new level.
- Versatile: It works as a sandwich bread, a side for pasta, a dipper for soups, or a snack all on its own.
The Science of Focaccia: Getting the Perfect “Bubble”
What distinguishes a flat, dense bread from a light, airy focaccia? The secret lies in two main factors: hydration and fermentation.
1. High Hydration
Focaccia dough is wet. Very wet. In baker’s percentages, this recipe hovers around 75-80% hydration. This excess water turns into steam when it hits the hot oven, expanding rapidly to create large air pockets. The wet dough also allows the gluten network to be more extensible, meaning it can stretch easily without tearing when the gas bubbles expand.
2. The Proofing Process
Patience is key. We allow this dough to rise twice. The first rise builds flavor and structure. The second rise, which happens in the baking pan, is where the magic happens. By letting the dough relax and puff up in the pan before we dimple it, we ensure that the air bubbles are preserved.
3. The Dimpling
The most iconic part of making focaccia is the “dimpling.” This isn’t just for aesthetics. Pushing your fingers into the dough prevents the bread from rising too high (like a loaf) and creates little valleys. These valleys are essential vessels for holding the olive oil, melted butter, and toppings, ensuring every bite is infused with flavor.
Ingredients Notes
To make the best Garlic Parmesan Focaccia, ingredients matter. Here is what you will need:
- Bread Flour: While you can use all-purpose flour, bread flour has a higher protein content (usually 12-14%). This protein helps develop a stronger gluten network, giving the focaccia its characteristic chewiness.
- Yeast: Instant yeast is preferred for speed and ease, but active dry yeast works too (just bloom it in warm water first).
- Olive Oil: Use a high-quality extra virgin olive oil. Since the oil is a major flavor component here, you want something that tastes good on its own.
- Parmesan Cheese: Skip the pre-shredded stuff in a tub. Buy a wedge of Parmigiano-Reggiano and grate it yourself. The melting quality and nutty flavor are superior.
- Garlic: Fresh garlic is non-negotiable. We will be using it to create a garlic-infused oil/butter mixture.
- Fresh Herbs: Rosemary is traditional, but for a “Garlic Parmesan” vibe, a mix of chopped parsley, chives, and maybe a hint of thyme works beautifully.
- Flaky Sea Salt: A finish of Maldon or coarse sea salt adds a crucial textural crunch and flavor pop.
Step-by-Step Instructions
Step 1: Make the Dough
In a large mixing bowl, combine your warm water (about 110°F/43°C), instant yeast, and honey (or sugar). Whisk it together and let it sit for a minute. Add the flour and fine sea salt. Mix with a rubber spatula or wooden spoon until no dry flour remains. The dough will be sticky and shaggy—this is normal! Drizzle with a little olive oil to coat the dough ball, cover with plastic wrap or a damp towel, and place in the fridge for at least 12 hours (up to 24) for the best flavor. (Note: If you are in a rush, you can let it rise at room temperature for 3-4 hours until doubled in size, but the cold ferment adds better flavor).
Step 2: Prepare the Pan
Generously butter a 9×13 inch baking pan or a large cast-iron skillet. Then, pour about 2 tablespoons of olive oil into the pan. This dual-fat method prevents sticking and “fries” the bottom of the crust to golden perfection.
Step 3: Second Rise
Remove the dough from the fridge. Deflate it gently and transfer it to your prepared pan. Turn the dough over so it is coated in the oil. Gently stretch it toward the corners. If it snaps back, let it rest for 10 minutes and try again. Cover the pan and let it rise in a warm spot for 2 to 4 hours. It should look puffy, jiggly, and full of bubbles.
Step 4: Prepare the Topping
While the dough rises, mince 3-4 cloves of garlic. Melt 4 tablespoons of butter and mix it with 2 tablespoons of olive oil and the minced garlic. Set aside.
Step 5: The Dimple and Bake
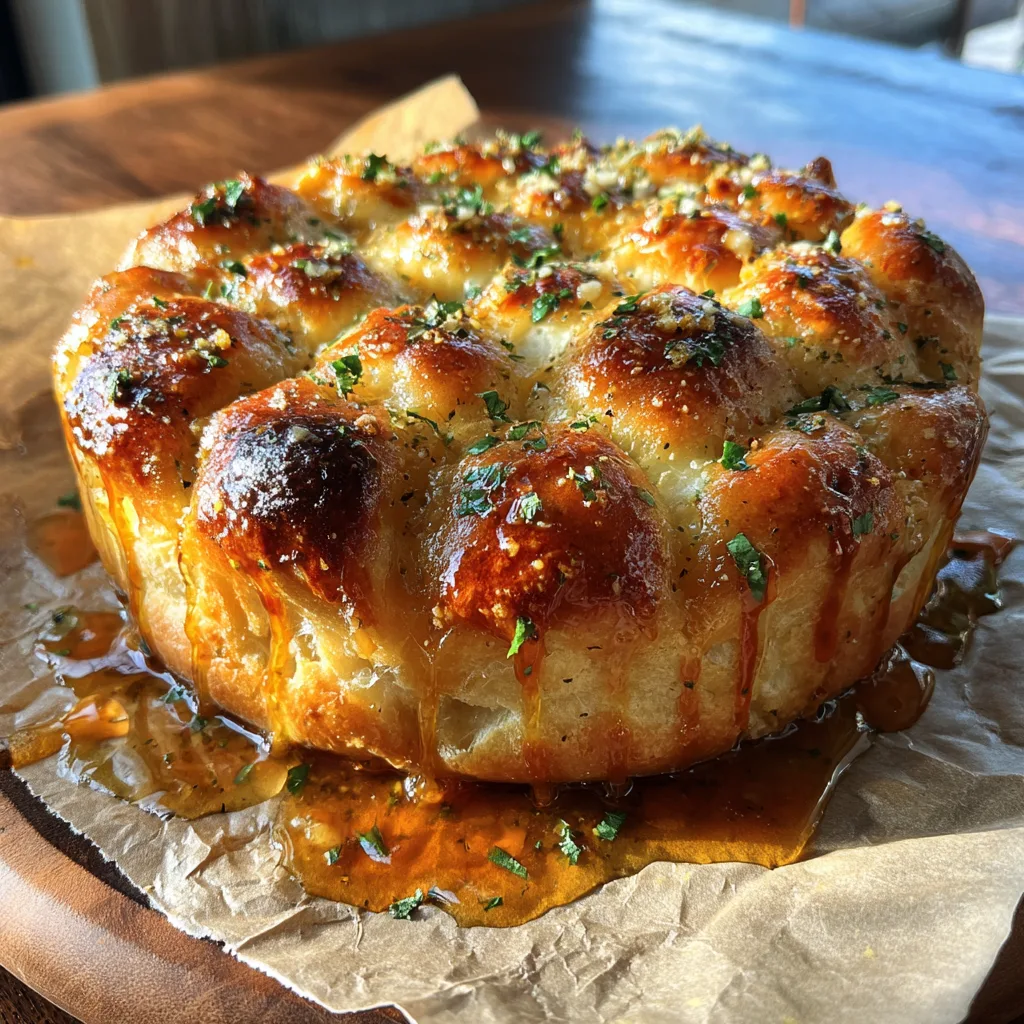
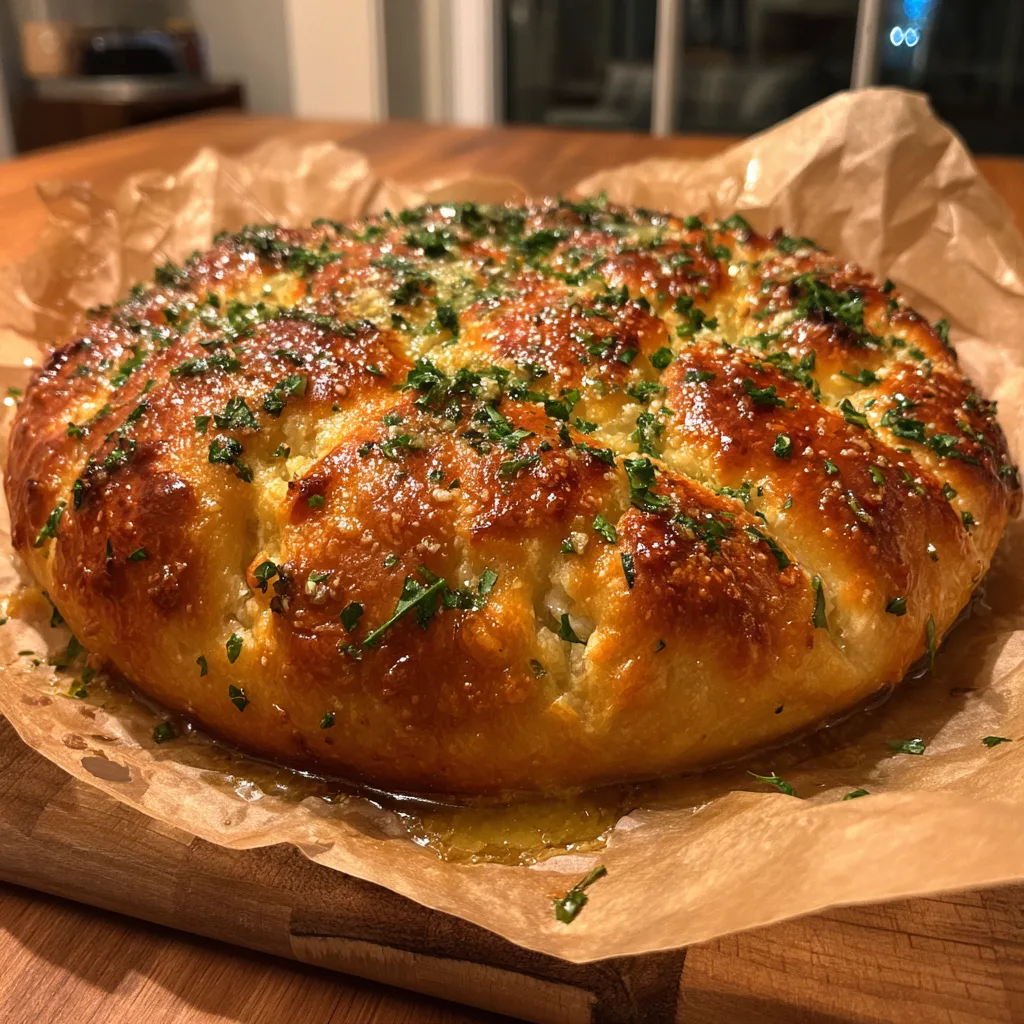
Preheat your oven to 425°F (220°C). Uncover the dough. It should be very bubbly. Pour the garlic butter/oil mixture over the dough. Now, oil your fingers and press straight down into the dough to create deep dimples. Sprinkle generously with grated Parmesan cheese and flaky sea salt.
Bake for 20-25 minutes, or until the top is deep golden brown and the cheese is toasted. If using a glass pan, check the bottom to ensure it is browned.
Step 6: Finish and Serve
Remove from the oven. Immediately sprinkle with fresh chopped parsley or chives while it is hot. Let it cool in the pan for 5 minutes, then transfer to a wire rack to prevent the bottom from getting soggy. Slice and enjoy!
Tips for Success
Don’t Skimp on the Oil: Focaccia is an oil-rich bread. If you reduce the oil, the bread will be dry and won’t have that signature crispy crust. Embrace the olive oil!
The Windowpane Test: Even though this is a no-knead recipe, you can perform a few “stretch and folds” during the first hour of rising if you want to strengthen the dough. This helps if your flour is lower in protein.
Oven Position: Bake your focaccia in the center of the oven. If the top is browning too fast before the inside is cooked, tent it with foil. If the bottom isn’t crispy enough, move the rack to the bottom position for the last 5 minutes.
Variations to Try
Once you master the base recipe, the sky is the limit. Here are some variations on the Garlic Parmesan theme:
- Roasted Garlic Focaccia: Instead of raw minced garlic, roast a whole head of garlic beforehand, squeeze out the cloves, and press them into the dough dimples before baking.
- Spicy version: Add red pepper flakes to your garlic butter mixture for a kick.
- Tomato & Basil: Press cherry tomatoes into the dough along with the garlic and finish with fresh basil after baking.
- Truffle Parmesan: Drizzle a little truffle oil over the baked bread right before serving for an earthy, luxurious aroma.
Serving Suggestions
This Garlic Parmesan Focaccia is robust enough to stand on its own, but it pairs beautifully with many dishes:
- Pasta Night: Serve alongside a creamy Fettuccine Alfredo or a spicy Rigatoni Arrabbiata to soak up the sauce.
- Soup Dipper: It is the perfect companion for Roasted Tomato Basil Soup or a hearty Minestrone.
- Sandwich Base: Slice the focaccia horizontally and use it to make incredible panini sandwiches with prosciutto, mozzarella, and arugula.
- Charcuterie Board: Cut into small squares and serve with olives, cured meats, and cheeses.
Storage and Reheating
Room Temperature: Focaccia is best eaten the day it is made. However, you can store it in an airtight container at room temperature for up to 2 days.
Freezing: Focaccia freezes surprisingly well. Wrap individual slices tightly in plastic wrap, then place them in a freezer bag. Freeze for up to a month.
Reheating: Never microwave focaccia—it will become chewy and rubbery. To reheat, place slices on a baking sheet and warm in a 350°F (175°C) oven or toaster oven for 5-8 minutes until the crust is crispy again.
Frequently Asked Questions
Why is my focaccia dense?
Dense focaccia usually means the yeast was dead, the dough didn’t rise long enough, or you added too much flour during mixing. The dough should be very soft and sticky.
Can I use All-Purpose flour?
Yes, you can. The texture will be slightly softer and more cake-like, rather than chewy. It is still delicious, but Bread Flour is recommended for the authentic texture.
Can I add cheese into the dough?
It is better to keep the cheese on top. Heavy mix-ins can weigh down the dough and inhibit the rise. If you want more cheese flavor, try folding in small cubes of mozzarella during the final shaping step.
Final Thoughts
Making Garlic Parmesan Focaccia is a sensory experience. It connects you to the ancient tradition of bread-making but fits perfectly into a modern, busy lifestyle thanks to the no-knead method. Whether you are hosting a dinner party or just want to treat yourself on a rainy Sunday, this recipe delivers high reward for minimal effort.
Give this recipe a try, and do not forget to take a photo of your beautiful, bubbly creation before it disappears!
Garlic Parmesan Focaccia
Ingredients
Equipment
Method
- In a large bowl, whisk together warm water, honey, and instant yeast. Let sit for 1 minute.
- Add bread flour and kosher salt. Mix with a spatula until a sticky dough forms and no dry flour remains.
- Drizzle dough with olive oil, cover tightly, and refrigerate for 12-24 hours (or rise at room temp for 3-4 hours until doubled).
- Prepare a 9×13 pan with butter and olive oil. Transfer dough to pan and turn to coat in oil.
- Gently stretch dough to corners. If it shrinks back, rest 10 mins and stretch again. Cover and let rise in a warm spot for 2-3 hours until puffy and jiggly.
- Preheat oven to 425°F (220°C). Mix melted butter, olive oil, and minced garlic.
- Pour garlic butter over dough. Use oiled fingers to press deep dimples all over the surface.
- Sprinkle evenly with grated Parmesan and flaky sea salt.
- Bake for 20-25 minutes until golden brown and crispy. Top with fresh herbs immediately upon removing from oven.
- Cool in pan for 5 minutes, then transfer to wire rack before slicing.