Homemade Cheese Bread
The Ultimate Soft and Fluffy Homemade Cheese Bread: A Step-by-Step Guide
There are few things in the culinary world that can rival the intoxicating, comforting aroma of freshly baked bread wafting through a home. When you combine that universal joy with the rich, gooey, savory indulgence of melted cheese, you create something truly extraordinary. This Soft and Fluffy Homemade Cheese Bread is a testament to the magic of simple ingredients coming together to form a masterpiece. Whether you are looking for the perfect savory snack to satisfy a mid-afternoon craving, a hearty accompaniment to a steaming bowl of soup, or a delightful side dish to elevate your weeknight dinners, this cheese bread recipe is guaranteed to become a cherished staple in your household repertoire.
At its core, this recipe relies on a straightforward, enriched yeast dough that yields an incredibly tender crumb. Unlike crusty artisanal loaves that require days of fermentation and complex folding techniques, this dough is forgiving, approachable, and relatively quick to bring together. The addition of milk and a touch of oil ensures the bread remains soft and pillowy for days, while the generous stuffing of cheese—whether you choose the stretchy perfection of mozzarella or the tangy, salty bite of feta—provides a delightful surprise hidden within every single golden-brown bun.

Why This Cheese Bread Recipe is an Absolute Must-Try
In a world filled with countless bread recipes, you might wonder what makes this particular cheese bread stand out from the crowd. The answer lies in its perfect balance of texture, flavor, and sheer versatility. First and foremost, the texture is unparalleled. The use of warm milk instead of water tenderizes the gluten strands, resulting in a crumb that is almost cloud-like in its softness. When you bite into it, there is a gentle resistance from the beautifully browned crust, followed immediately by the pillowy interior.
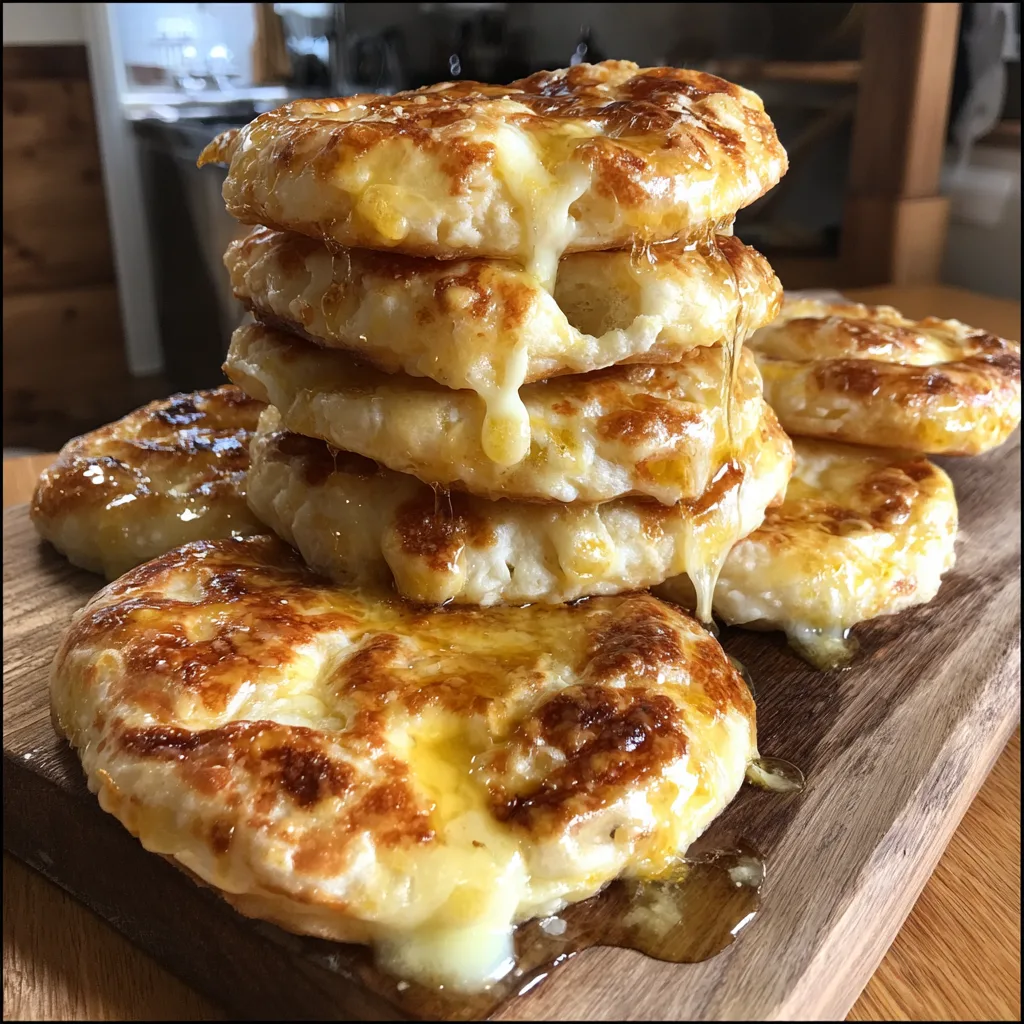
Secondly, the visual appeal of these cheese breads is simply mouth-watering. As they cook, the cheese trapped near the surface bubbles and creates a gorgeous, mottled, golden-brown blistered crust that practically begs to be eaten. It looks rustic, homemade, and incredibly inviting. Furthermore, the dough itself is beautifully pliable and easy to work with. Even if you are a novice baker who is intimidated by the thought of working with yeast, this dough is incredibly forgiving. It comes together quickly and requires only a single, straightforward proofing session before it is ready to be shaped, stuffed, and cooked.
Finally, this recipe is incredibly economical. It utilizes basic pantry staples—flour, yeast, sugar, salt, milk, and oil—alongside whatever cheese you happen to have on hand. It allows you to produce bakery-quality, gourmet-tasting treats at a fraction of the cost of store-bought alternatives. It is the ultimate way to stretch your grocery budget without sacrificing flavor or quality.
Deep Dive into the Essential Ingredients
Understanding the role of each ingredient is the key to mastering any bread recipe. Let us break down the components of this soft and fluffy cheese bread to see exactly how they work together.
- – 500 grams all-purpose flour: All-purpose flour is the perfect foundation for this bread. It contains just the right amount of protein (typically around 10-12%) to develop enough gluten for structure without making the bread dense or tough. Measuring by weight (grams) rather than volume (cups) is highly recommended for accuracy, as tightly packed flour can drastically alter the dough’s hydration.
- – 300 ml warm milk: Milk is an enriching ingredient. The fats and sugars in the milk tenderize the crumb, promote a beautiful golden crust, and extend the shelf life of the baked bread. The temperature is critical: it must be warm (around 105°F to 110°F), but not hot. If it is too cold, the yeast will not activate; if it is too hot, it will kill the yeast entirely.
- – 10 grams dry yeast: This is the leavening agent that brings the dough to life. Active dry yeast needs to be dissolved in the warm liquid first, while instant yeast can be mixed directly with the dry ingredients. Ensure your yeast is fresh and hasn’t expired, as dead yeast will result in dense, flat bread.
- – 1 tsp sugar: Sugar serves two vital purposes here. First, it provides immediate food for the yeast, helping it to activate quickly and produce the carbon dioxide gas needed for the dough to rise. Second, it aids in the browning process (the Maillard reaction) when the bread is cooked.
- – 1 tsp salt: Never underestimate the importance of salt in bread making. Not only does it enhance the overall flavor of the dough, preventing it from tasting flat and bland, but it also regulates the yeast’s activity, ensuring an even, controlled rise. Furthermore, it strengthens the gluten structure.
- – 50 ml oil: A neutral cooking oil (such as canola, vegetable, or a mild olive oil) adds moisture and tenderness to the dough. The fat coats the flour proteins, preventing them from forming overly tough gluten strands, which contributes to the soft, fluffy texture we desire.
- – 200 grams cheese: The star of the show. Mozzarella is the classic choice for that iconic, stringy cheese pull and a mild, milky flavor. However, crumbled feta offers a fantastic, punchy, salty contrast. You can use grated or cubed cheese, depending on whether you want a smooth, integrated melt or distinct pockets of gooey cheese.
Step-by-Step Instructions for Fluffy Cheese Bread Perfection
Creating these delightful cheese stuffed breads is a rewarding process. Follow these detailed steps to ensure success in your home kitchen.
- Activate the Yeast: In a large mixing bowl, combine the 300 ml of warm milk, 10 grams of dry yeast, and 1 teaspoon of sugar. Give it a gentle stir and let it sit undisturbed for about 5 to 10 minutes. You should see a frothy, bubbly layer form on the surface. This indicates that your yeast is alive and active. If it doesn’t bubble, your yeast may be dead or the milk was too hot/cold. You will need to start over with fresh yeast.
- Mix the Dough: Once the yeast is activated, add the 50 ml of oil and the 1 teaspoon of salt to the bowl. Gradually add the 500 grams of all-purpose flour, about a cup at a time. Use a wooden spoon or a silicone spatula to stir the mixture until a shaggy, rough dough begins to form and pulls away from the sides of the bowl.
- Knead to Perfection: Turn the shaggy dough out onto a lightly floured surface. Knead the dough with your hands for about 8 to 10 minutes. Push the dough away from you with the heel of your hand, fold it back over itself, give it a quarter turn, and repeat. You are looking for a dough that is smooth, elastic, and slightly tacky, but not overly sticky. If it is too sticky, add flour a tablespoon at a time. If it is too dry, add a splash of milk.
- The First Rise (Proofing): Lightly oil a large, clean bowl. Place your kneaded dough into the bowl, turning it once so the top is coated with a thin film of oil (this prevents a crust from forming). Cover the bowl with a damp kitchen towel or plastic wrap. Place it in a warm, draft-free spot in your kitchen and let it rise for about 1 hour, or until it has completely doubled in size.
- Divide and Shape: Once the dough has doubled, gently punch it down to release the excess air. Turn it out onto your work surface and divide it into 6 to 8 equal portions, depending on how large you want your breads to be. Roll each portion into a smooth, tight ball. Cover the balls with a towel and let them rest for 10 minutes to relax the gluten, making them easier to roll out.
- Stuff with Cheese: Take one ball of dough and flatten it out with your hands or a rolling pin into a circle about 1/4 inch thick. Place a generous mound of your chosen cheese (grated mozzarella or crumbled feta) squarely in the center of the dough circle.
- Seal the Buns: Carefully gather the edges of the dough circle and pull them up over the cheese, pinching them tightly together in the center to completely seal the cheese inside. It is crucial to pinch firmly so the cheese doesn’t leak out during cooking. Gently flatten the stuffed bun with your hand to create a thick disc shape. Repeat this process with the remaining dough balls.
- Cook to Golden Perfection: Heat a heavy-bottomed skillet (cast iron works wonderfully) over medium-low heat. You can lightly brush the pan with oil or butter if you wish, though the bread can also be dry-toasted. Place the flattened buns in the pan, seam-side down first. Cook for about 4 to 5 minutes per side, until the exterior is deeply golden brown, beautifully blistered, and the dough is cooked through. The cheese inside will be perfectly melted. Serve immediately while warm!
The Science of Dough and Masterful Troubleshooting
Baking is as much a science as it is an art. If your bread turns out dense and heavy, the culprit is usually the yeast. Ensure your milk is merely lukewarm. Think of yeast like a warm bath—if you wouldn’t step into it, it’s too hot for the yeast. Additionally, don’t skimp on the kneading time. Kneading develops the gluten network, which creates the structure necessary to trap the gases released by the yeast. Without strong gluten, the bread cannot rise properly and will remain dense.
If you find that your cheese is bursting through the dough while cooking, there are two potential reasons. Either the dough was rolled too thin in the center, or the seams were not pinched together securely enough. When shaping the dough circles, try to leave the center slightly thicker than the edges. This provides a stronger base for the cheese and makes gathering and pinching the thinner edges much easier.
Creative Variations to Elevate Your Cheese Bread
This basic recipe is a spectacular blank canvas. To create a Garlic Herb variation, brush the freshly cooked, hot bread with melted butter infused with minced garlic, fresh parsley, and a pinch of salt. For a spicy kick, mix finely diced jalapeños or a dash of red pepper flakes directly into the cheese filling before sealing.
You can also experiment wildly with the cheese blends. While mozzarella is great for texture, mixing it with sharp cheddar, nutty Gruyere, or even a pungent blue cheese can create incredible depth of flavor. If you want to incorporate protein, adding crispy crumbled bacon or finely diced ham to the cheese filling turns these breads into a complete, satisfying meal on the go.
Serving Suggestions and Proper Storage
These cheese breads are arguably at their absolute best when eaten fresh out of the pan—warm, soft, and oozing with melted cheese. They make an exceptional side dish for rich, tomato-based soups, hearty beef stews, or crisp, acidic salads. They are also fantastic on their own as an after-school snack or a party appetizer.
If you have leftovers, allow them to cool completely to room temperature before storing them in an airtight container or a large ziplock bag. They will keep at room temperature for up to two days, or in the refrigerator for up to a week. To revive that fresh-baked softness and melt the cheese again, wrap the bread in a damp paper towel and microwave it for 15-20 seconds, or heat it in a 350°F oven for about 5-7 minutes.
Soft and Fluffy Homemade Cheese Bread
Ingredients
Equipment
Method
- In a large bowl, mix the warm milk, dry yeast, and sugar. Let stand for 5-10 minutes until frothy.
- Stir in the oil and salt. Gradually add the all-purpose flour, mixing until a shaggy dough forms.
- Turn the dough onto a floured surface and knead for 8-10 minutes until smooth and elastic.
- Place dough in an oiled bowl, cover with a damp towel, and let rise in a warm place for 1 hour until doubled in size.
- Punch down dough, divide into 6 to 8 equal portions, and roll into balls. Let rest for 10 minutes.
- Flatten each dough ball into a thick circle. Place a generous portion of cheese in the center.
- Pull the edges over the cheese and pinch tightly to seal. Gently flatten into a disc.
- Heat a skillet over medium-low heat. Cook the flatbreads for 4-5 minutes per side until golden brown and blistered. Serve warm.