Homemade Pop Rocks Recipe
The Ultimate Guide to Making Homemade Pop Rocks
There is something undeniably magical about the crackling, popping sensation of Pop Rocks dancing on your tongue. For decades, this iconic novelty candy has captured the imaginations of children and adults alike, offering not just a sweet treat, but an interactive sensory experience. While you might assume that creating such a unique confection requires a high-tech candy factory equipped with pressurized carbon dioxide chambers, you can actually replicate that signature sizzle right in your own kitchen. By harnessing a simple acid-base reaction using common household ingredients, you can whip up a batch of Homemade Pop Rocks that are vibrant, flavorful, and delightfully explosive.
Creating homemade candy is a rewarding culinary adventure that combines the precision of science with the creativity of the culinary arts. In this comprehensive guide, we will explore everything you need to know to master the art of DIY popping candy. From the essential chemistry that makes the candy pop, to step-by-step instructions, troubleshooting tips, and creative ways to use your finished product, you will be fully equipped to bring this nostalgic favorite to life.
The Science Behind the Pop: How Homemade Popping Candy Works
Commercial Pop Rocks are manufactured using a highly specialized process. Sugar syrup is exposed to pressurized carbon dioxide gas at extremely high temperatures. As the candy cools and hardens, tiny bubbles of the gas become trapped within the solid sugar matrix. When you place the candy in your mouth, your saliva dissolves the sugar, releasing the pressurized gas bubbles with a satisfying “pop.”
Because most home kitchens are not equipped with industrial gas pressurization systems, this homemade recipe relies on a different, yet equally fascinating, scientific principle: the classic chemical reaction between an acid and a base. In this recipe, the acid is citric acid, and the base is baking soda (sodium bicarbonate). When these two dry ingredients are combined, nothing happens. However, when they are introduced to moisture—such as the hot sugar syrup during preparation, or later, the saliva in your mouth—they react vigorously to produce carbon dioxide gas.
By quickly stirring the baking soda and citric acid into the hard-crack sugar syrup right before it sets, we trap thousands of tiny carbon dioxide bubbles within the hardening candy. When you eat the homemade pop rocks, your saliva breaks down the sugar, reigniting the acid-base reaction and releasing those trapped bubbles, mimicking the iconic popping sensation of the commercial candy.
Ingredients for Homemade Pop Rocks
To create this dazzling and noisy confection, you will need a few pantry staples and some specific candy-making ingredients. Precision is key in candy making, so ensure you have everything measured and ready to go before you begin cooking the sugar.
- 1 1/2 cups Granulated White Sugar: The foundation of our candy. White sugar provides the necessary structure and clean sweetness without adding molasses flavors that could interfere with your chosen flavorings.
- 1/2 cup Light Corn Syrup: This acts as an interfering agent. Corn syrup prevents the granulated sugar from crystallizing prematurely, ensuring your hard candy has a smooth, glass-like texture rather than a grainy one.
- 1/3 cup Water: Used to dissolve the sugar and corn syrup before the boiling process begins. The water will eventually boil away, leaving behind the hard sugar matrix.
- 2 teaspoons Citric Acid: The essential acidic component for our chemical reaction. Citric acid also provides a sharp, tangy flavor that enhances fruit flavorings. It can usually be found in the canning section of the grocery store or ordered online.
- 1 teaspoon Baking Soda: The alkaline component (base) that reacts with the citric acid to create the carbon dioxide bubbles. Make sure your baking soda is fresh for maximum popping power.
- 1/2 teaspoon Flavoring Extract: You can use any flavor you desire! Popular choices include strawberry, blue raspberry, green apple, watermelon, or cherry. Be sure to use oil-based candy flavorings or high-quality extracts.
- Liquid or Gel Food Coloring: To give your pop rocks that iconic, vibrant appearance. Neon colors like bright pink, electric blue, and lime green work exceptionally well.
- Neutral Oil or Non-Stick Cooking Spray: For greasing your preparation surface so the molten candy does not stick.
Essential Equipment
Working with boiling sugar requires caution and the right tools. Ensure you have the following equipment gathered before you turn on the stove.
- Candy Thermometer: This is non-negotiable. Candy making relies on precise temperatures to achieve the correct final texture. We need to reach the “hard crack” stage (300°F / 149°C).
- Heavy-Bottomed Medium Saucepan: A heavy-bottomed pot distributes heat evenly, preventing the sugar from scorching or burning in hot spots.
- Silicone Baking Mat or Parchment Paper: Crucial for lining your baking sheet. A high-quality silicone mat is ideal because it can easily withstand the heat of molten candy.
- Large Baking Sheet: To hold the silicone mat and provide a large, flat surface for the candy to cool and spread out.
- Whisk and Heatproof Spatula: For quickly incorporating the reactive ingredients and spreading the hot candy.
- Food Processor or Heavy Rolling Pin: For breaking the hardened candy sheet into small, rock-like shards.
Step-by-Step Instructions
Timing is critical in this recipe. Once the sugar reaches the correct temperature, you must work rapidly. Read through all instructions thoroughly before beginning.
- Prepare Your Surface: Begin by lining a large baking tray with a silicone baking mat or high-quality parchment paper. Grease the surface lightly but thoroughly with a neutral oil or non-stick cooking spray. Have your citric acid, baking soda, flavoring, and food coloring measured out in small bowls right next to your prepared baking sheet.
- Combine Sugar Mixture: In your heavy-bottomed medium saucepan, combine the granulated sugar, light corn syrup, and water. Stir the mixture gently over medium heat until the sugar is completely dissolved.
- Boil to Hard Crack Stage: Once the sugar has dissolved, stop stirring. Insert your candy thermometer into the mixture, ensuring the bulb is submerged in the syrup but not touching the very bottom of the pan. Allow the mixture to boil undisturbed until the temperature registers exactly 300°F (149°C). This is known as the hard-crack stage, which ensures the final candy will be brittle and crunchy, not chewy.
- The Rapid Mix: The moment the thermometer hits 300°F (149°C), immediately remove the saucepan from the heat. Working as quickly as possible, whisk in the citric acid, baking soda, flavoring, and food coloring. The mixture will immediately foam and bubble up vigorously—this is the chemical reaction trapping the carbon dioxide gas!
- Pour and Spread: Instantly pour the foaming, colorful mixture onto your prepared, greased baking tray. Use a heatproof spatula to spread it as thin as possible before it begins to set. The thinner the sheet, the easier it will be to break into small pieces later.
- Cool Completely: Allow the candy sheet to cool completely at room temperature. Do not put it in the refrigerator, as the ambient humidity can cause the candy to become sticky. It should take about 30 to 45 minutes to harden into a solid glass-like sheet.
- Crush into Rocks: Once the candy is completely cool and rock-hard, it is time to break it up. You can break it into large shards by hand, place it in a large ziplock bag and gently hit it with a rolling pin, or pulse it briefly in a food processor to achieve those tiny, authentic Pop Rocks-style crystals.
- Store Immediately: Humidity is the enemy of popping candy. Immediately transfer your crushed candy into a strictly airtight container. To maintain the popping effect and prevent clumping, add a food-safe packet of silica gel or a small muslin pouch filled with dry, uncooked rice to absorb any excess moisture in the container.
Expert Tips for Perfect Popping Candy
Making homemade candy can sometimes be finicky. Keep these expert tips in mind to ensure your DIY Pop Rocks turn out perfectly every single time.
- Do Not Walk Away: Boiling sugar can go from perfectly caramelized to burnt in a matter of seconds. Stay by the stove and monitor the candy thermometer closely once it passes 250°F.
- Mis en Place is Essential: Have your baking soda, citric acid, colors, and flavors measured and sitting literally inches away from the pan. You will have less than 5 seconds to mix them in before the candy begins to set too firmly.
- Control the Humidity: Try to make this candy on a dry, clear day. High humidity in the air can cause hard candy to absorb moisture, turning it from a brittle, popping treat into a sticky, chewy mess.
- Safety First: Boiling sugar (300°F) is incredibly dangerous and can cause severe burns. Never touch the hot syrup, keep children and pets out of the kitchen during the boiling process, and be cautious of the steam that releases when you add the liquid flavorings.
Exciting Flavor and Color Variations
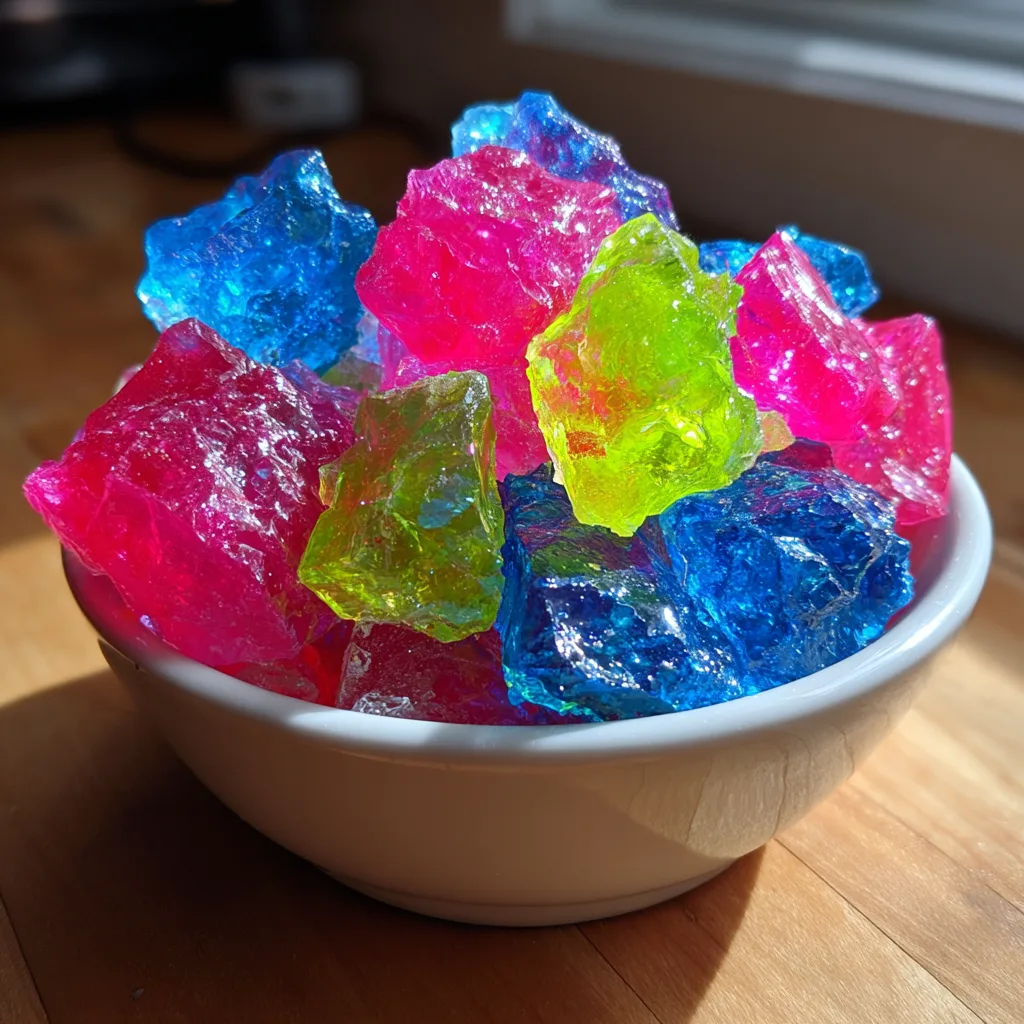
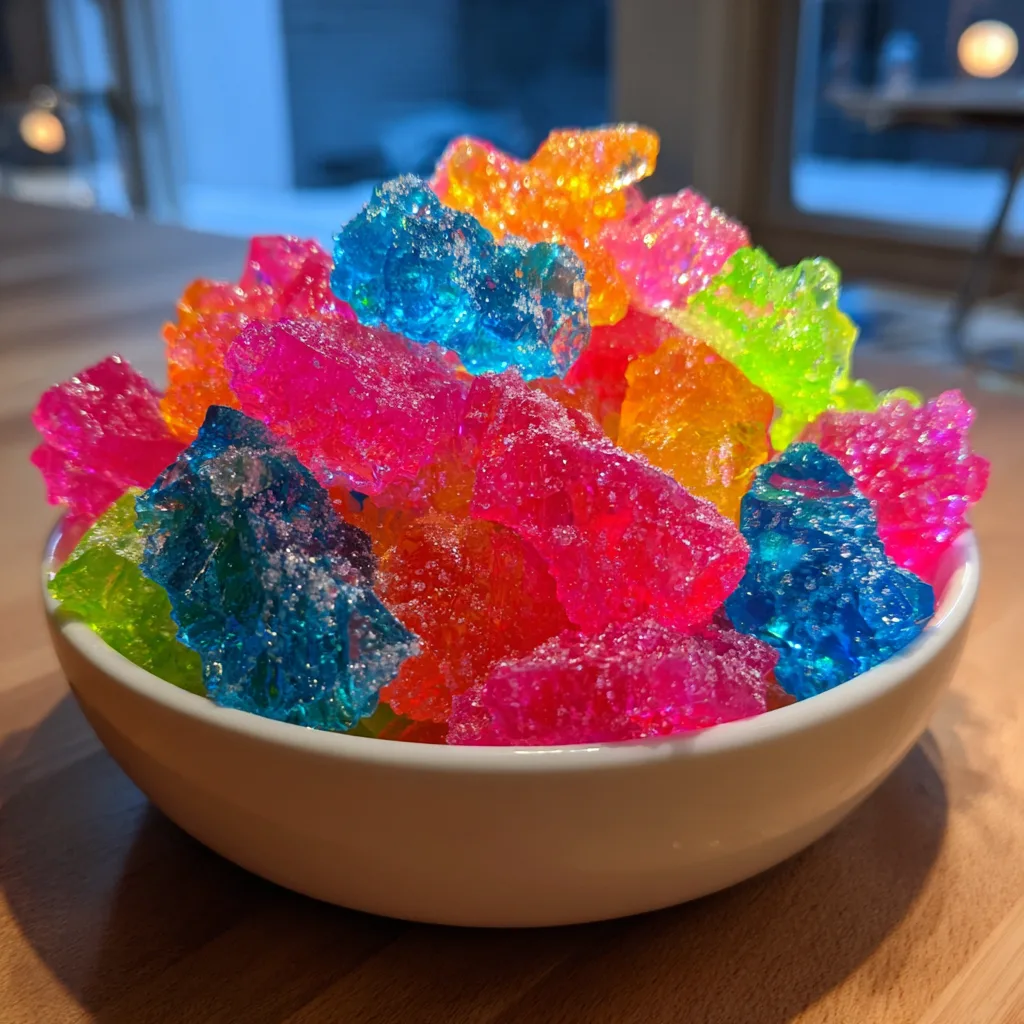
One of the best parts about making Homemade Pop Rocks is the ability to customize them completely. The visual of a bowl filled with different colors is incredibly striking.
The Classics: Create three separate batches to make the classic trio shown in the photo. Make a bright pink batch flavored with strawberry or cherry extract. Make an electric blue batch flavored with blue raspberry or cotton candy extract. Make a neon green batch flavored with sour green apple or lime.
Spicy Volcanic Rocks: For a mature twist, add a pinch of cayenne pepper or a few drops of cinnamon oil to a red-colored batch. The combination of the physical popping sensation with the spicy heat creates a truly mind-bending “volcanic” candy experience.
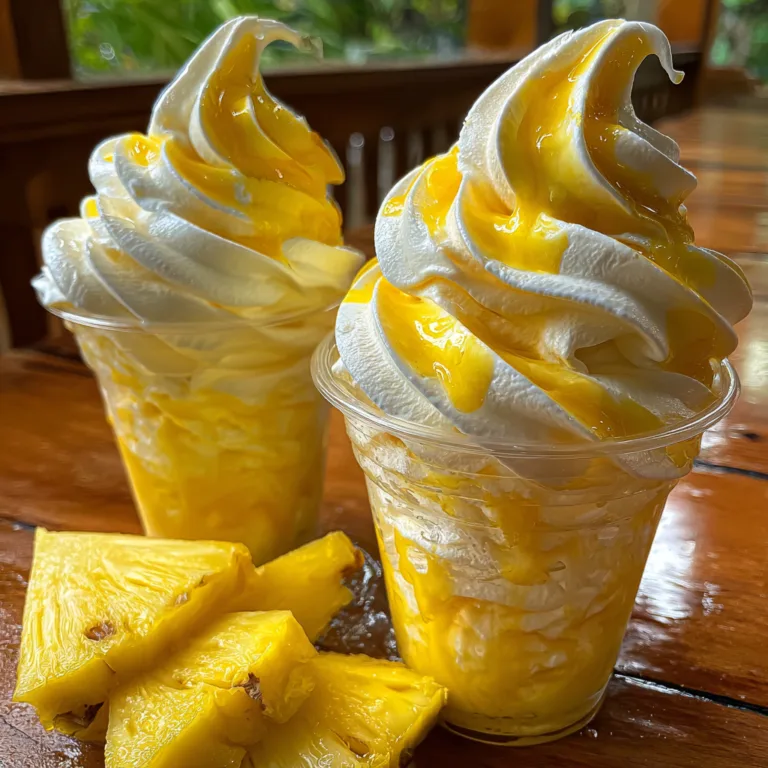
Tropical Paradise: Use yellow and orange food coloring, and flavor the candy with pineapple, mango, or coconut extract. Mix them together for a sunset-colored tropical treat.
Creative Serving Suggestions
While eating them straight out of the bowl by the handful is perfectly acceptable (and highly encouraged), Homemade Pop Rocks can elevate a variety of other desserts.
- Exploding Cupcakes: Sprinkle a generous layer of Pop Rocks over the top of freshly frosted cupcakes just before serving. The moisture from the frosting will eventually dissolve the candy, so only apply them right before eating for maximum pop!
- Ice Cream Sundae Topping: Move over, sprinkles. Pop Rocks add an incredible textural contrast and a surprisingly fun audible crunch when layered over smooth vanilla bean ice cream.
- Cocktail Rim Garnish: For adults, crush the candy slightly finer and use it to rim the glass of a fruity margarita or a sweet martini. It provides a sweet, tart, and crackling surprise with every sip.
- Chocolate Bark: Swirl colorful popping candy into melted white or dark chocolate, spread it out to set, and break it into pieces for a “firecracker” chocolate bark that is perfect for holidays like the Fourth of July or New Year’s Eve.
Fun Facts and Cultural Context
Pop Rocks hold a legendary status in the pantheon of novelty candies. Invented by a chemist named William A. Mitchell in 1956 (who also happened to invent Tang, Cool Whip, and quick-setting Jell-O), the candy was actually an accident! Mitchell was attempting to create an instant carbonated soda by trapping carbon dioxide gas inside candy. While it didn’t work as a soda, it became a massive hit as a candy when it was finally released to the public in 1975.
The candy is perhaps most famous for the widespread 1970s urban legend claiming that eating Pop Rocks while drinking cola would cause your stomach to explode. This rumor became so prevalent that the manufacturer had to take out full-page ads in major publications, send letters to school principals across the country, and even set up a hot-line to reassure panicked parents that the candy was completely safe. While mixing the two might give you a hearty burp, the combination is entirely harmless!
Proper Storage Techniques
We cannot stress this enough: proper storage is the deciding factor between a successful batch of popping candy and a sad, sticky puddle. Because this recipe utilizes an acid-base reaction that triggers upon contact with moisture, any humidity in the air will cause the candy to pre-react and melt.
As soon as you have broken the cooled sheet into pieces, transfer the candy into a glass mason jar or a heavy-duty plastic container with an airtight seal. You absolutely must include a desiccant. A commercially available, food-safe silica gel packet works perfectly. Alternatively, you can create a DIY desiccant pouch by placing a tablespoon of dry, uncooked white rice into a small piece of muslin cloth or a coffee filter, tying it tightly, and placing it in the jar with the candy. Kept perfectly dry, your homemade pop rocks will retain their crackle for several weeks!
Homemade Pop Rocks
Ingredients
Equipment
Method
- Prepare your surface by lining a baking tray with parchment paper or a silicone mat and greasing it lightly with oil or non-stick spray.
- In a medium saucepan, combine sugar, corn syrup, and water over medium heat. Stir until sugar dissolves, then insert a candy thermometer.
- Without stirring, cook until the mixture reaches 300°F (149°C) (hard crack stage). Immediately remove from heat.
- Quickly stir in citric acid, baking soda, flavoring, and food coloring. The mixture will foam up.
- Pour the mixture onto your prepared tray and spread thin with a heatproof spatula.
- Let it cool and harden completely at room temperature (about 30-45 minutes).
- Once cooled, break the candy into small shards or pulse in a food processor for tiny crystals.
- Store immediately in an airtight container with a packet of silica gel or dry rice to keep dry.