Italian Herb Cheese Bread
The Ultimate Italian Herbs and Cheese Bread Recipe
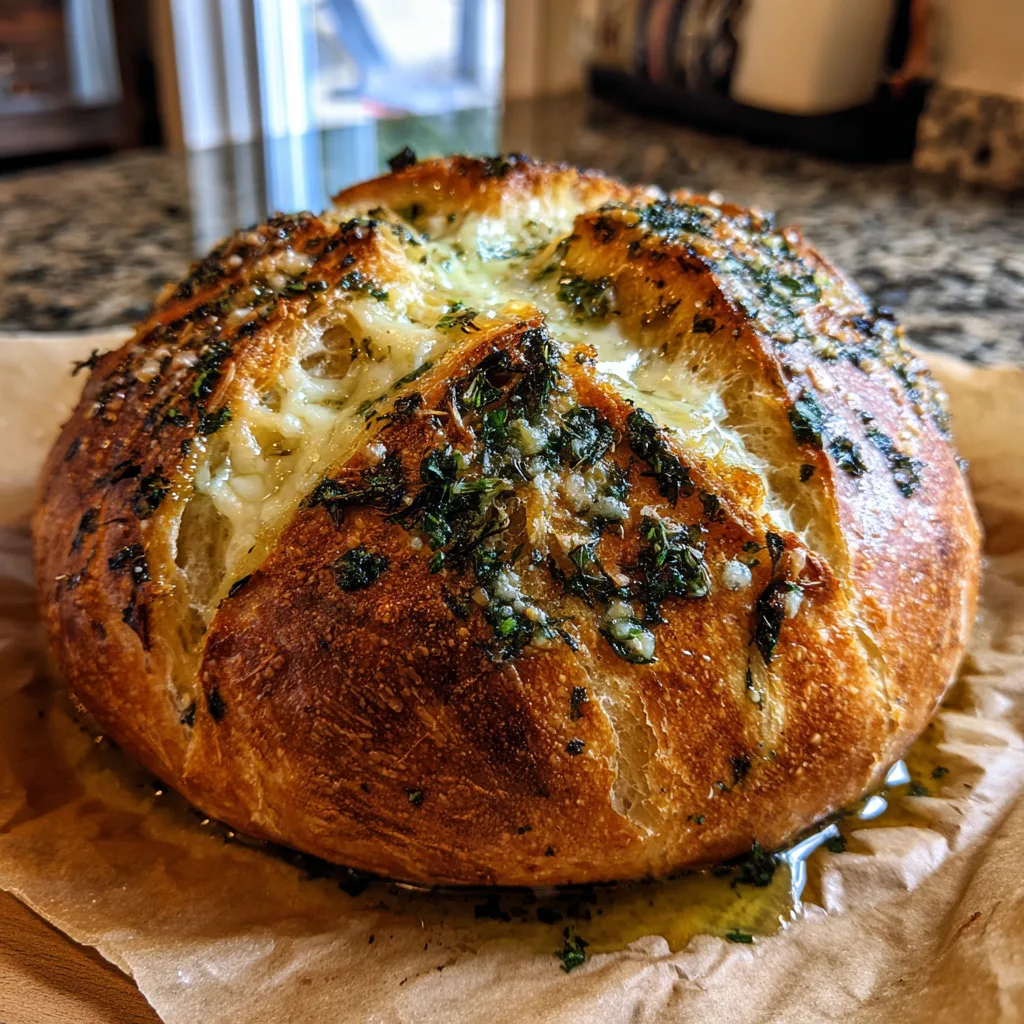
There is absolutely nothing quite like the aroma of freshly baked bread wafting through your home. But when you take that fundamental, comforting smell and elevate it with the savory, mouth-watering notes of toasted Italian herbs, sharp cheeses, and a hint of garlic, you create an experience that transcends the ordinary kitchen routine. This Italian Herbs and Cheese Bread is a masterpiece of home baking, offering a crusty, golden exterior that yields to a soft, airy, and flavor-packed crumb. Whether you are a seasoned baker or someone just starting to dabble in the world of yeast and flour, this comprehensive guide will walk you through every single step, ensuring a perfect loaf every time.
The Magic of Homemade Artisan Bread
For centuries, bread has been a staple of the human diet, acting as the foundation for meals across countless cultures. In today’s fast-paced world, it is incredibly easy to simply grab a plastic-wrapped loaf from the grocery store. However, taking the time to craft your own bread is a deeply rewarding process. It forces you to slow down, engage your senses, and understand the beautiful science of baking.
This Italian Herbs and Cheese Bread recipe brings the rustic charm of an artisan bakery straight to your kitchen counter. Unlike mass-produced alternatives, this bread relies on the slow development of flavors through proper proofing and the inclusion of high-quality, real ingredients. The cheese doesn’t just sit on top; its rich oils seep into the crust, creating a heavenly, savory bite, while the Italian herbs infuse the entire loaf with a bright, earthy aroma.
Why You Will Love This Italian Herbs and Cheese Bread
If you are wondering why this specific recipe deserves a spot in your weekly baking rotation, the reasons are plentiful. First and foremost, the texture is phenomenal. By using a slightly higher hydration dough and baking it at a high temperature (ideally in a Dutch oven or on a preheated baking stone), you achieve that highly sought-after artisan crunch on the outside while maintaining a tender, fluffy interior.
Secondly, the flavor profile is incredibly versatile. The combination of classic Italian herbs—such as oregano, basil, thyme, and rosemary—pairs flawlessly with the sharp, salty punch of Parmesan and the gooey, comforting melt of mozzarella or provolone. It is the perfect companion for a hearty bowl of pasta, a warm, comforting soup on a chilly autumn evening, or simply sliced thick and toasted with a generous smear of high-quality salted butter.
Key Ingredients You Will Need
To achieve bakery-level results at home, the quality and type of your ingredients matter immensely. Here is a detailed breakdown of what you will need for this recipe:
- – Warm Water: Crucial for activating your yeast. It should be warm to the touch (around 105°F to 110°F), but not hot, as excessive heat will kill the yeast.
- – Active Dry Yeast: The leavening agent that will give your bread its beautiful rise and airy texture. You can also use instant yeast; just adjust your mixing method accordingly.
- – Granulated Sugar or Honey: Just a touch is needed to feed the yeast and help it bloom, ensuring a vigorous rise.
- – Bread Flour: While all-purpose flour can work in a pinch, bread flour has a higher protein content. This helps develop a stronger gluten network, resulting in a chewier texture and a better structure to hold the cheese and herbs.
- – Fine Sea Salt: Essential for flavor. Bread without salt is incredibly bland. It also helps regulate yeast activity.
- – Extra Virgin Olive Oil: Adds moisture to the crumb and gives the bread a subtle, rich Mediterranean flavor.
- – Dried Italian Seasoning: A robust blend of oregano, basil, thyme, rosemary, and marjoram. If you only have individual spices, you can easily make your own mix.
- – Garlic Powder: Infuses the dough with a savory depth without the moisture and potential burning issues of raw minced garlic.
- – Shredded Cheese: A blend is best. We recommend a mix of sharp Parmesan or Asiago for flavor, and a good melting cheese like mozzarella, provolone, or even a mild cheddar for texture. You will need some for the dough and extra for the crust.
Step-by-Step Instructions
Follow these steps closely to create your perfect loaf of Italian Herbs and Cheese Bread:
- Proof the Yeast: In a large mixing bowl or the bowl of a stand mixer, combine the warm water, sugar (or honey), and active dry yeast. Give it a gentle stir and let it sit undisturbed for 5 to 10 minutes. It should become frothy and bubbly. If it doesn’t, your yeast may be dead, and you will need to start over with a fresh batch.
- Mix the Wet Ingredients: Once the yeast is activated, pour in the extra virgin olive oil and mix gently to combine.
- Incorporate the Dry Ingredients: Add in the bread flour, salt, garlic powder, and half of your dried Italian seasoning. If you are using a stand mixer, attach the dough hook and mix on low speed until a shaggy dough begins to form.
- Knead the Dough: Turn the speed up to medium-low and knead for about 8 to 10 minutes. If kneading by hand, turn the dough out onto a lightly floured surface and knead vigorously for 10 to 12 minutes. You want the dough to become smooth, elastic, and slightly tacky, but not overly sticky.
- Add the Cheese: During the last minute of kneading, gently fold in half of your shredded cheese blend until it is evenly distributed throughout the dough.
- First Rise (Bulk Fermentation): Form the dough into a tight ball. Lightly oil a large, clean bowl, place the dough inside, and turn it once to coat the top with oil. Cover the bowl tightly with plastic wrap or a damp kitchen towel. Place it in a warm, draft-free spot and let it rise for 1 to 1.5 hours, or until it has doubled in size.
- Punch Down and Shape: Once doubled, gently punch the dough down to release the trapped gas bubbles. Turn it out onto a lightly floured surface. Shape it into a tight, round boule (ball) by pulling the edges into the center and pinching them together. Turn it over so the seam side is down and use your hands to cup the dough, spinning it slightly to build tension on the surface.
- Second Rise: Place the shaped loaf onto a piece of parchment paper. Cover it loosely with a towel and let it rise for another 45 minutes to 1 hour. It should become puffy and visibly larger.
- Preheat the Oven: About 30 minutes before the second rise is done, preheat your oven to 425°F (220°C). If you are using a Dutch oven, place it inside the oven to preheat as well. This is crucial for a great crust.
- Score and Garnish: Right before baking, use a sharp knife, razor blade, or bread lame to make a deep score or cross over the top of the loaf. This allows the bread to expand beautifully in the oven. Brush the top lightly with water or a beaten egg white, then generously sprinkle the remaining Italian seasoning and the rest of the shredded cheese over the top, pressing slightly so it adheres.
- Bake: Using the parchment paper as a sling, carefully transfer the dough into the preheated Dutch oven (or onto a preheated baking sheet). Cover with the lid and bake for 25 minutes. Covering traps the steam, allowing the bread to rise to its full potential and developing a chewy crust.
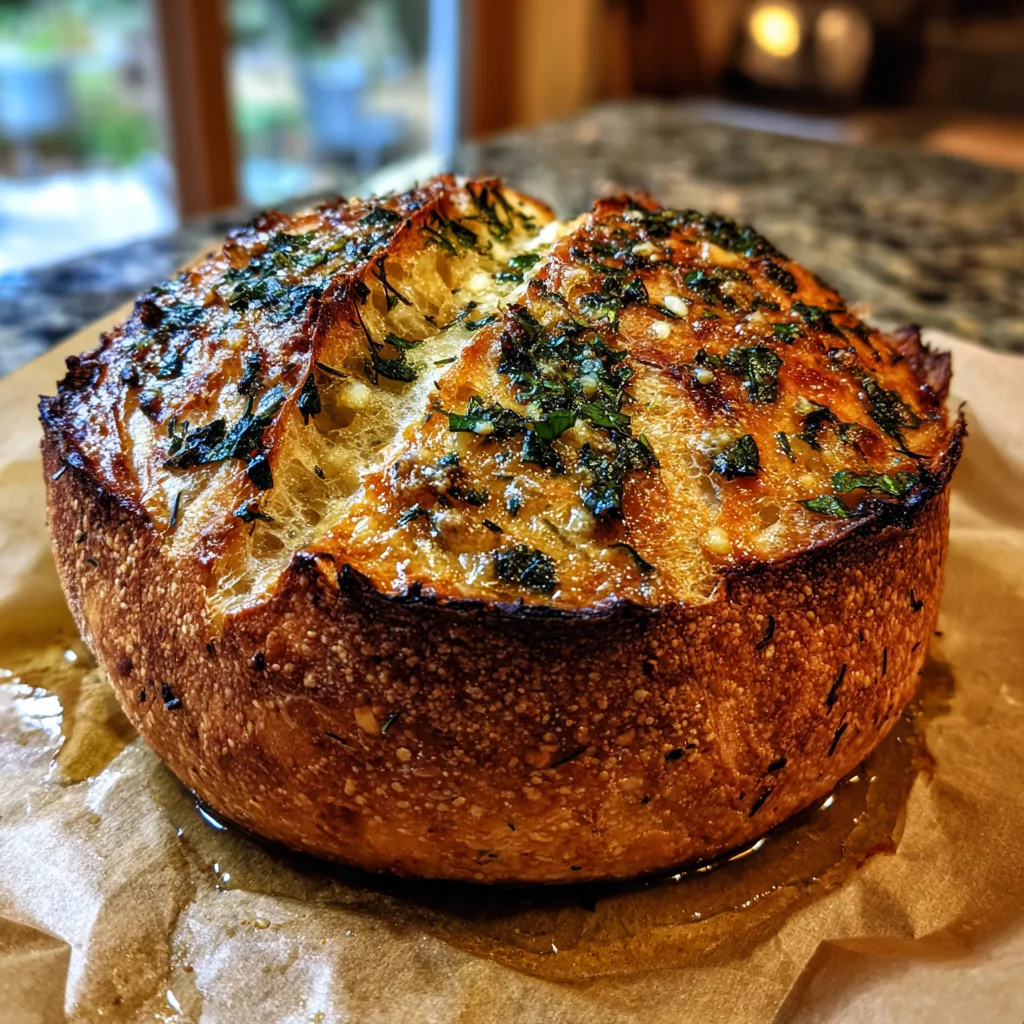
- Uncover and Finish: Remove the lid from the Dutch oven and continue to bake for another 15 to 20 minutes. The cheese should be deeply golden and bubbly, and the crust should be dark and crisp. The bread is done when it sounds hollow when tapped on the bottom, or reaches an internal temperature of 200°F (93°C).
- Cool Completely: This is the hardest part! Transfer the bread to a wire cooling rack and let it cool completely (at least 1 to 2 hours) before slicing. Slicing too early while it is still hot will result in a gummy texture.
Pro Tips for the Perfect Crust and Crumb
Baking is a science, and small adjustments can yield dramatically different results. Here are some professional tips to elevate your bread game:
Weigh Your Ingredients: For the most consistent results, always use a digital kitchen scale to measure your flour and water. Volume measurements (like cups) can vary wildly depending on how tightly the flour is packed.
The Windowpane Test: To check if your dough has been kneaded enough, take a small piece and stretch it gently between your fingers. If you can stretch it thin enough to see light through it without it tearing, gluten has developed sufficiently.
Steam is Key: If you do not have a Dutch oven, you can still get a great crust. Place an empty metal baking pan on the bottom rack of your oven while it preheats. Right after you put your bread in to bake, carefully pour a cup of hot water into the hot metal pan and quickly shut the oven door. This creates a burst of steam that mimics a professional bakery oven.
Flavor Variations and Customizations
Once you have mastered the base recipe, feel free to get creative with your additions!
- Spicy Italian: Add a teaspoon of crushed red pepper flakes to the dough, and mix in some finely diced pepperoni or Calabrian chilies.
- Roasted Garlic and Herb: Instead of garlic powder, roast a whole head of garlic, mash the sweet, caramelized cloves, and fold them into the dough along with the cheese.
- Sun-Dried Tomato and Feta: Swap out the Italian blend for fresh rosemary, and fold in chopped sun-dried tomatoes and crumbled feta cheese for a tangy, Mediterranean twist.
What to Serve with Your Cheesy Herb Bread
This bread is a showstopper and deserves to be paired with meals that complement its robust flavor. It is absolutely phenomenal served alongside traditional Italian dishes like Spaghetti Bolognese, Lasagna, or Chicken Parmesan. It makes an incredible vessel for dipping into hearty soups like Minestrone, Tomato Basil, or a creamy Potato Leek soup. You can also use slices of this bread to make the ultimate grilled cheese sandwich, or cube it up, toast it, and use it as flavorful croutons for a large Caesar salad.
How to Store and Reheat Leftovers
Artisan bread is always best the day it is made, but it can be stored properly to extend its life. Let the bread cool completely, then store it at room temperature in a paper bag or bread box for up to 2 days. Plastic bags will trap moisture and soften the crust.
For longer storage, slice the completely cooled bread, wrap it tightly in plastic wrap, and then place it in a freezer-safe bag. It will keep in the freezer for up to 3 months. To reheat, you can pop individual frozen slices straight into the toaster. If you want to warm up a larger portion, wrap the bread loosely in aluminum foil and warm it in a 350°F (175°C) oven for 10-15 minutes until heated through and the crust re-crisps.
The History of Italian Herb Breads
The tradition of incorporating herbs and cheeses into bread dates back millennia in the Mediterranean region. Ancient Romans were known to bake flatbreads seasoned with olive oil and local herbs, a precursor to modern focaccia. As culinary techniques evolved, so did the breads, with bakers in different regions of Italy incorporating their local cheeses—like Parmigiano-Reggiano in Emilia-Romagna or Pecorino in the south—into their doughs. This modern iteration of Italian Herbs and Cheese Bread pays homage to those rustic traditions, combining Old World flavors with accessible home-baking techniques.
Frequently Asked Questions (FAQ)
Can I make this dough ahead of time?
Yes! You can utilize a cold retard. After the first rise, punch the dough down, shape it, and place it in the fridge overnight. The slow, cold fermentation will actually develop a deeper, more complex flavor. The next day, let it sit at room temperature for about an hour to warm up and finish its second rise before baking.
Why didn’t my bread rise?
The most common culprits are dead yeast (always check the expiration date and ensure your water wasn’t too hot), a drafty or cold rising environment, or adding too much flour, which makes the dough too heavy to rise properly.
Can I use fresh herbs instead of dried?
Absolutely. If using fresh herbs, you will need to use about three times the amount as you would dried, as dried herbs have a much more concentrated flavor. Finely chop fresh rosemary, basil, and oregano before adding them to the dough.
Enjoy the process of making this phenomenal Italian Herbs and Cheese Bread. From the tactile joy of kneading the dough to the mouth-watering scent that will fill your home, it is a culinary project that pays off in every delicious bite.
Italian Herbs and Cheese Bread
Ingredients
Equipment
Method
- In a large bowl, mix warm water, yeast, and sugar. Let sit for 5-10 minutes until frothy.
- Stir in the olive oil, salt, garlic powder, and half of the Italian seasoning.
- Gradually add bread flour, mixing until a shaggy dough forms. Knead for 8-10 minutes until smooth and elastic.
- During the last minute of kneading, fold in half of the mozzarella and half of the parmesan cheese.
- Place dough in an oiled bowl, cover, and let rise in a warm place for 1-1.5 hours until doubled in size.
- Punch down dough, shape into a round boule, and place on parchment paper. Cover and let rise again for 45-60 minutes.
- Preheat oven to 425°F (220°C). If using a Dutch oven, preheat it inside the oven.
- Score the top of the loaf, brush lightly with water, and top with the remaining cheese and Italian seasoning.
- Bake covered in the Dutch oven for 25 minutes. Remove the lid and bake for another 15-20 minutes until crust is golden brown and cheese is bubbly.
- Cool completely on a wire rack before slicing and serving.