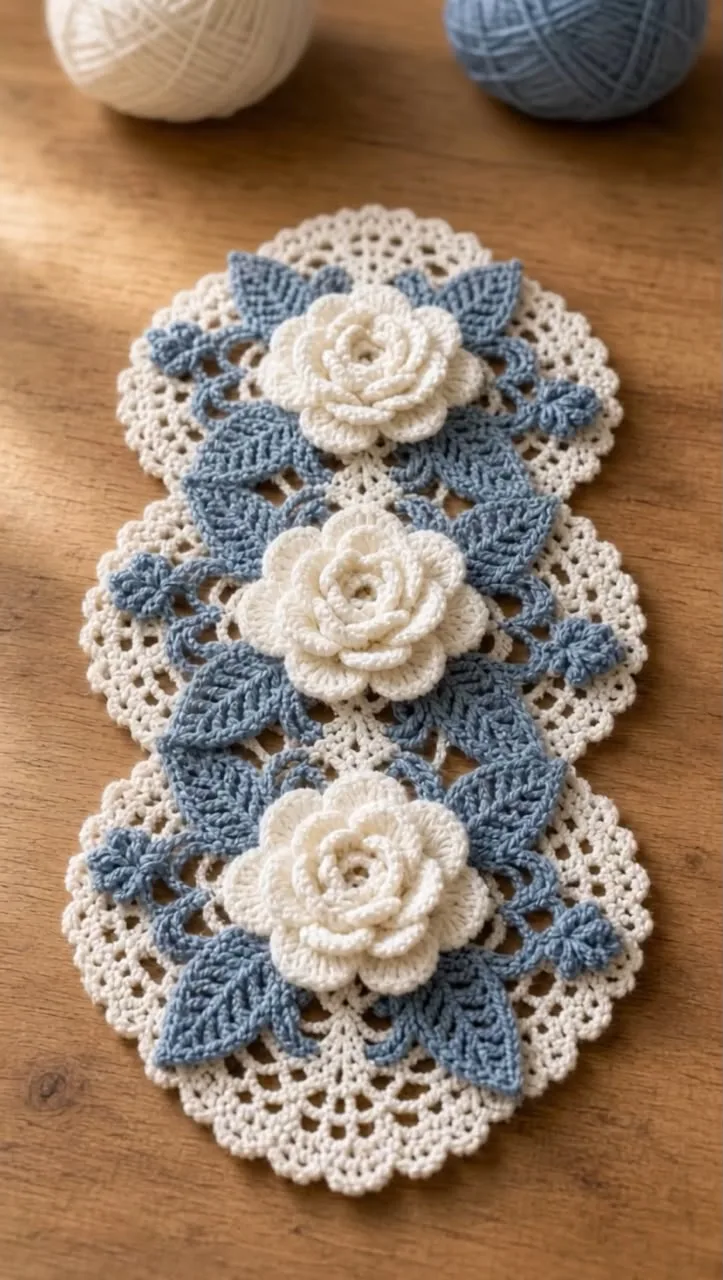
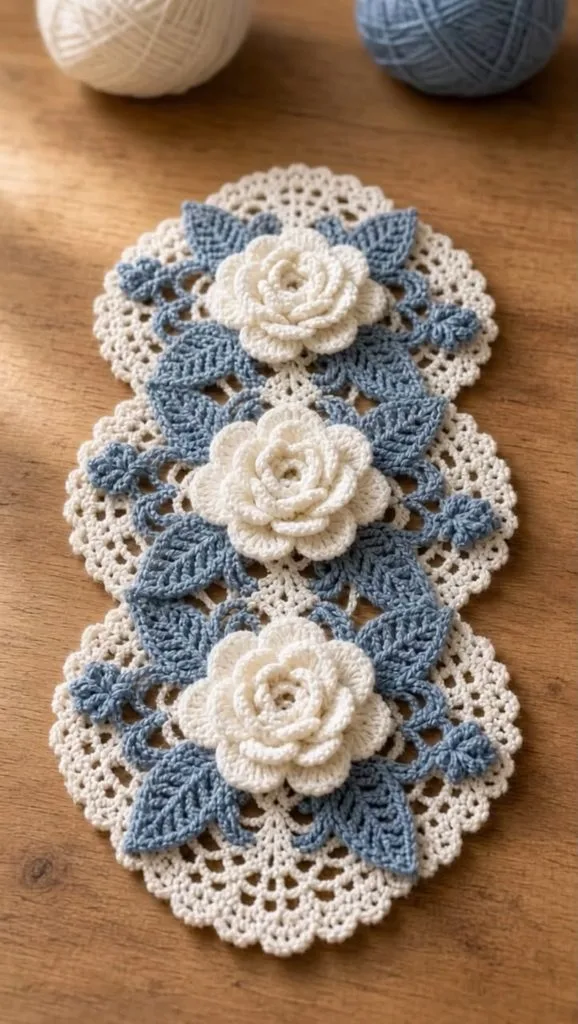
Ivory Rose & Dusty Blue Lace Table Runner 🌹🤍
📖 B. INTRODUCTION
Welcome to the Ivory Rose & Dusty Blue Lace Table Runner pattern! This breathtaking centerpiece brings a touch of romantic, vintage-inspired elegance to any room. Whether you are dressing up your dining room table for a spring brunch, creating handmade wedding decor, or simply adding a timeless keepsake to your dresser, this textured runner is guaranteed to capture attention.
Crocheting home decor is deeply rewarding, especially when it involves rich, three-dimensional elements. The true magic of this design lies in its dimensional contrast: delicate, flat-laying scalloped lace serves as the canvas for robust, multi-layered 3D roses and sprawling dusty blue foliage. The soft, neutral ivory beautifully offsets the muted blue, creating a piece that feels both antique and freshly modern.
Personalizing this runner is wonderfully simple. While the ivory and dusty blue palette offers a classic “shabby chic” or cottagecore aesthetic, you can easily swap the colors to match your seasonal decor—think deep crimson roses for the holidays, or warm gold and rust for autumn. Grab your favorite cotton yarn, and let’s create a beautiful heirloom!
🔍 C. MAIN PATTERN OVERVIEW
This table runner is constructed in a modular, appliqué-style approach to give you maximum control over the final shape and texture.
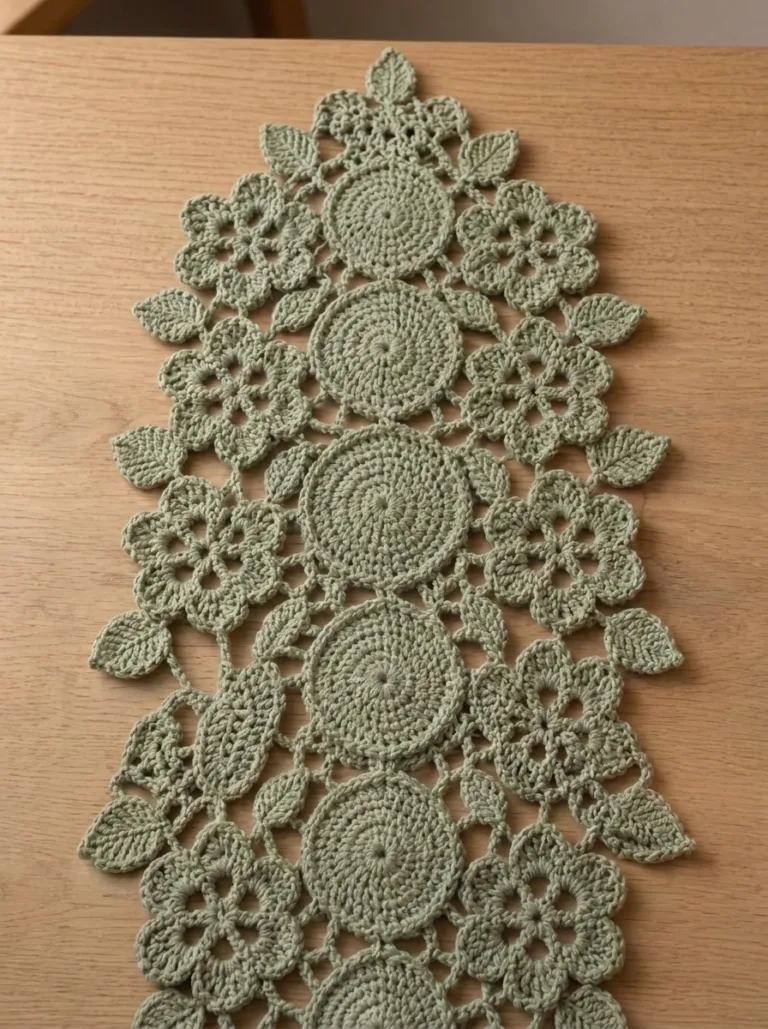
- The Lace Base: You will first crochet three identical lace mandalas in ivory. These feature a solid center, a delicate mesh body, and a scalloped shell border. They are joined in a row to form the foundation of the runner.
- The 3D Roses: Three large, layered roses are crocheted separately in the round, featuring four tiers of curling petals.
- The Foliage: A series of textured leaves and small branching vines are crocheted in dusty blue.
- Assembly: The blue foliage is arranged and sewn directly onto the lace base, bridging the connections between the circular motifs. Finally, the roses are secured to the exact center of each lace mandala.
🎯 D. SKILL LEVEL
Intermediate This pattern uses foundational crochet stitches, but requires confidence in working layered elements, crocheting into front and back loops, and blocking lace.
Techniques Involved:
- Working in joined rounds
- Creating chain-space meshes
- Working in Front Loops Only (FLO) and Back Loops Only (BLO)
- Crocheting 3D floral petals
- Motif joining and appliqué sewing
📏 E. FINISHED SIZE
Measurements:
- Length: Approximately 20 inches (51 cm) from end to end.
- Width: Approximately 8 inches (20 cm) across the widest part of a single motif.
Note: Your finished size will depend heavily on your yarn choice, hook size, and how aggressively you block the final piece. Using worsted weight yarn will result in a much larger, thicker runner, while thread or fingering weight will yield a delicate doily size.
🧮 F. GAUGE
- First 3 rounds of the Base Motif = 2.5 inches (6.3 cm) in diameter.
- Gauge is not strictly critical for this project since it is a decorative home item, not a fitted garment. However, maintaining consistent tension ensures your base motifs are identical in size and your lace lays flat. If your piece is ruffling severely, try going down a hook size.
🧶 G. REQUIRED YARN AMOUNTS
For this pattern, a DK weight (Size 3), 100% mercerized cotton is highly recommended. Mercerized cotton provides excellent stitch definition, prevents pilling, and holds the crisp shape of the lace and leaves beautifully after blocking.
- 🤍 Main Color (MC) – Ivory/Cream: Approximately 175g / 400 yards (Used for the three lace base motifs and the three 3D roses).
- 💙 Accent Color (AC) – Dusty Blue: Approximately 50g / 125 yards (Used for all leaves, stems, and small side floral clusters).
🧰 H. MATERIALS
- Hook: 3.0 mm (US C/2 or D/3) crochet hook
- Yarn: DK weight cotton yarn (see amounts above)
- Needle: Tapestry/yarn needle for weaving in ends and sewing appliqué
- Scissors: Sharp craft scissors
- Pins: Rust-proof T-pins for blocking and assembly
- Blocking Mats: Or a clean, padded surface
- Optional: Fabric stiffener or spray starch (for an extra crisp finish)
🔤 I. ABBREVIATIONS – US TERMS
- MR = Magic Ring
- ch = chain
- st(s) = stitch(es)
- sl st = slip stitch
- sc = single crochet
- hdc = half double crochet
- dc = double crochet
- tr = treble crochet
- inc = increase (2 sc in same st)
- ch-sp = chain space
- sk = skip
- FLO = Front Loop Only
- BLO = Back Loop Only
- ( … ) x = repeat instructions within parentheses the indicated number of times
- [ … ] = all stitches within brackets are worked into the same stitch/space
📝 J. NOTES BEFORE YOU BEGIN
- 🧵 Joining Rounds: All components worked in the round are joined with a sl st to the first stitch of that round. The beginning ch of a round does not count as a stitch unless otherwise explicitly stated.
- ⚠️ Blocking is Mandatory: Lace will look bunched, wavy, or uneven straight off the hook. Do not panic! Wet blocking is required to open up the chain spaces and define the scalloped edges before you sew on the 3D elements.
- 🧵 Sewing Tails: Leave long yarn tails when fastening off your roses and leaves to make assembly easier.
🪡 K. COMPLETE PATTERN
🕸️ Lace Base Motifs (Make 3)
Yarn: Ivory (MC) Note: Make three identical motifs. We will join them during the assembly phase.
R1: Make a MR. Ch 2 (does not count as st), work 16 dc into the ring. Join with a sl st to the first dc. Pull ring tight. (16 dc) R2: Ch 3 (counts as 1 dc + ch 1), [dc in next st, ch 1] around. Join with sl st to the 2nd ch of the starting ch-3. (16 dc, 16 ch-1 sps) R3: Sl st into the first ch-sp. Ch 3 (counts as dc), dc in same ch-sp. Ch 1. *[2 dc in next ch-sp, ch 1]. Repeat from * around. Join to top of starting ch-3. (32 dc, 16 ch-sps) R4: Sl st into next dc, sl st into first ch-1 sp. Ch 1, sc in same sp. Ch 3. *[sc in next ch-1 sp, ch 3]. Repeat from * around. Join to first sc. (16 sc, 16 ch-3 sps) R5: Sl st into first ch-3 sp. Ch 1, sc in same sp, ch 4. *[sc in next ch-3 sp, ch 4]. Repeat from * around. Join to first sc. (16 sc, 16 ch-4 sps) R6: Sl st into first ch-4 sp. Ch 1, sc in same sp, ch 5. *[sc in next ch-4 sp, ch 5]. Repeat from * around. Join to first sc. (16 sc, 16 ch-5 sps) R7: Sl st into first 2 chs of the ch-5 sp to reach the middle of the loop. Ch 1, sc in same sp. Ch 5, sc in next ch-5 sp. Repeat from * around. Join to first sc. (16 sc, 16 ch-5 sps) R8: Repeat R7, but use ch-6 spaces. (16 sc, 16 ch-6 sps) R9 (Scallop Border): Sl st into the first ch-6 sp. Ch 3 (counts as dc), work 8 dc in the same ch-6 sp. Sc in the next ch-6 sp. *[9 dc in the next ch-6 sp, sc in the next ch-6 sp]. Repeat from * around. Join to the top of the starting ch-3. (8 scallops made).Fasten off and weave in ends.
🌹 3D Ivory Roses (Make 3)
Yarn: Ivory (MC) Note: The rose is worked in continuous joined rounds, using FLO to create petals and BLO to create the base for the next tier of petals.
R1: Make a MR. Ch 1, work 6 sc into the ring. Join with sl st to first sc. (6 sc) R2: Ch 1, inc in each st around. Join. (12 sc) R3 (Petal Base 1): Working in FLO for this round. *[sc in front loop, ch 3, sk next st]. Repeat from * 5 more times. Join to first sc. (6 ch-3 loops) R4 (Petals Tier 1): Work [1 sc, 3 hdc, 1 sc] into each ch-3 loop around. Join. (6 small petals) R5 (Petal Base 2): Push the petals forward. Working into the unworked BLO from R2 behind the petals: Sl st into first back loop. *[sc in back loop, ch 4, sk next st]. Repeat from * 5 more times. Join. (6 ch-4 loops) R6 (Petals Tier 2): Work [1 sc, 1 hdc, 3 dc, 1 hdc, 1 sc] into each ch-4 loop around. Join. (6 medium petals) R7 (Petal Base 3): Push petals forward. We need to anchor to the back of R5. Ch 1, sl st around the post of the first sc from R5. *[Ch 5, sl st around the post of the next sc from R5]. Repeat from * around. Join. (6 ch-5 loops) R8 (Petals Tier 3): Work [1 sc, 1 hdc, 5 dc, 1 hdc, 1 sc] into each ch-5 loop around. Join. (6 large petals) R9 (Petal Base 4): Push petals forward. Ch 1, sl st around the post of the first sc from R7. *[Ch 6, sl st around the post of the next sc from R7]. Repeat from * around. Join. (6 ch-6 loops) R10 (Petals Tier 4): Work [1 sc, 1 hdc, 7 tr, 1 hdc, 1 sc] into each ch-6 loop around. Join. (6 extra-large petals) Fasten off, leaving a long 12-inch tail for sewing the rose to the lace base.
🍃 Dusty Blue Leaves (Make 12 large, 6 small)
Yarn: Dusty Blue (AC)
Large Leaf (Make 12):Foundation: Ch 12.Side 1: Working into the 2nd ch from hook: sc, hdc, dc, 2 tr in next st, tr in next 2 sts, dc, hdc, sc, sl st in last ch.Turn the point: Ch 2, sl st into same end ch to create a sharp point.Side 2: Working down the opposite side of the foundation chain: sl st, sc, hdc, dc, tr in next 2 sts, 2 tr in next st, dc, hdc, sc. Join with sl st to first sc.Fasten off, leaving an 8-inch tail.
Small Leaf (Make 6):Foundation: Ch 9.Side 1: 2nd ch from hook: sc, hdc, dc in next 3 sts, hdc, sc, sl st.Turn the point: Ch 2, sl st in same end ch.Side 2: sl st, sc, hdc, dc in next 3 sts, hdc, sc. Join.Fasten off, leaving an 8-inch tail.
🌿 Small Vine & Berry Clusters (Make 6)
Yarn: Dusty Blue (AC) Note: These are small branching accents seen peeking out from beneath the large leaves on the outer edges.
Row 1: Ch 8. Sl st in 2nd ch from hook and next 2 chs. (This is a short stem).Row 2: Ch 4. Work a 3-dc cluster in the 3rd ch from hook. Ch 1 to close. Sl st down the remaining ch of this branch.Row 3: Sl st into the next 2 chs of the original foundation chain.Row 4: Ch 5, sl st in 2nd ch from hook and next 3 chs to make a tiny plain branch.Row 5: Sl st in the remaining foundation chains back to the start.Fasten off, leaving a tail for sewing.
🎨 L. STYLING / ASSEMBLY / STABILITY / FINAL SHAPING
Because this pattern involves flat lace and bulky 3D appliqués, the order of assembly is critical for a polished result.
1. Blocking the Lace (Do this FIRST!)
✅ Do not skip this step! Pin your three lace motifs down on a blocking mat. Spray them generously with water until damp. Pin the scallops outward to stretch the chain spaces. Let them dry completely (usually 12-24 hours).
2. Joining the Base Motifs
✅ Lay the three blocked motifs in a row, slightly overlapping the edges (about 1.5 inches / one scallop deep). ✅ Using Ivory yarn and your tapestry needle, securely whip-stitch the overlapping scallops together. Ensure the centers of all three motifs form a perfectly straight line.
3. Arranging the Foliage
✅ Layout time! Do not sew anything yet. Place one Ivory Rose directly in the solid center (R1/R2) of each lace motif. ✅ Arrange the Dusty Blue Leaves in a starburst pattern radiating out from beneath the roses. Use the reference image as your guide: bridge the gaps between the joined lace motifs using the Large Leaves. Place the Small Leaves and Vine Clusters pointing outward toward the scalloped edges. ✅ Once you are happy with the silhouette, pin all blue foliage flat against the lace base. Set the roses aside for a moment.
4. Sewing the Foliage
✅ Using the dusty blue yarn tails, sew the leaves and vines to the lace base.Tip: You do not need to sew down every single edge of the leaves. Tack them down securely along their center veins. Leaving the very tips of the leaves unsewn adds to the realistic, 3D texture!
5. Attaching the Roses
✅ Thread the long ivory tail from a Rose onto your needle. ✅ Position the rose exactly over the center of the lace motif (covering the inner ends of the blue leaves). ✅ Sew through the sturdy back loops (R1-R3) of the rose down into the solid center of the lace motif. Stitch in a circle several times to ensure it does not wobble. Repeat for all three roses.
💡 M. HELPFUL CROCHET TIPS
- 💡 Crisper Leaves: If your blue leaves are curling up too much, you can lightly steam block them before attaching them to the runner.
- 💡 Invisible Tack: When sewing the heavy roses, pass your needle through the underside of the stitches so your sewing thread is completely hidden from the top view.
- 💡 Stiffening Lace: If you want your table runner to remain rigid (helpful if you plan to move it often or use it under light display items), mix a 50/50 solution of liquid starch and water, lightly spray the back of the runner, and let it dry flat.
- 💡 Color Fastness: When mixing high-contrast colors (like Ivory and a dyed Blue), test your blue yarn for color bleeding before wet blocking everything together. Soak a small scrap of the blue in warm water and press it into a white paper towel.
- 💡 Petal Fluffing: Gently pull and curl the outer edges of the rose petals outward with your fingers. The mercerized cotton will “remember” the shape and hold a beautiful, blooming posture.
🧼 N. CARE INSTRUCTIONS
Handmade home decor requires gentle care.
- Washing: Hand wash only. Submerge gently in cool water with a mild, no-rinse wool/cotton wash (like Soak or Eucalan). Do not scrub, wring, or agitate, as this will crush the 3D roses and distort the lace.
- Drying: Press between two thick towels to remove excess moisture. Lay completely flat on a blocking mat, reshape the scallops and leaves, and allow to air dry away from direct sunlight.
- Maintenance: Use a soft lint roller or a hairdryer on a “cool” setting to gently blow away dust from the rose petals between washings.
❓ R. FAQ
❓ Can I make this runner longer for a large dining table? Absolutely! Simply crochet more of the Lace Base Motifs and join them in a longer continuous line. Make one Rose and an assortment of leaves for every lace motif you add.
❓ Can I use acrylic yarn instead of cotton? While you can crochet this with acrylic, it is not recommended for this specific design. Acrylic does not wet-block well, meaning the lace base won’t achieve that crisp, flat, open-mesh look. Cotton provides the necessary weight and structure.
❓ The center of my lace motif is buckling, what did I do wrong? This usually means your tension is quite tight, or your chain spaces were made smaller than intended. Check your stitch count. A slight buckle is normal and will vanish when you wet-block the motif flat.
❓ Is it safe to put hot plates on this runner? No. Because the center features bulky 3D roses, plates will not sit flat and could tip over. This runner is designed for decorative display purposes only (e.g., placing a lightweight candlestick or vase between the motifs on the flat lace, or simply leaving it bare as a statement piece).