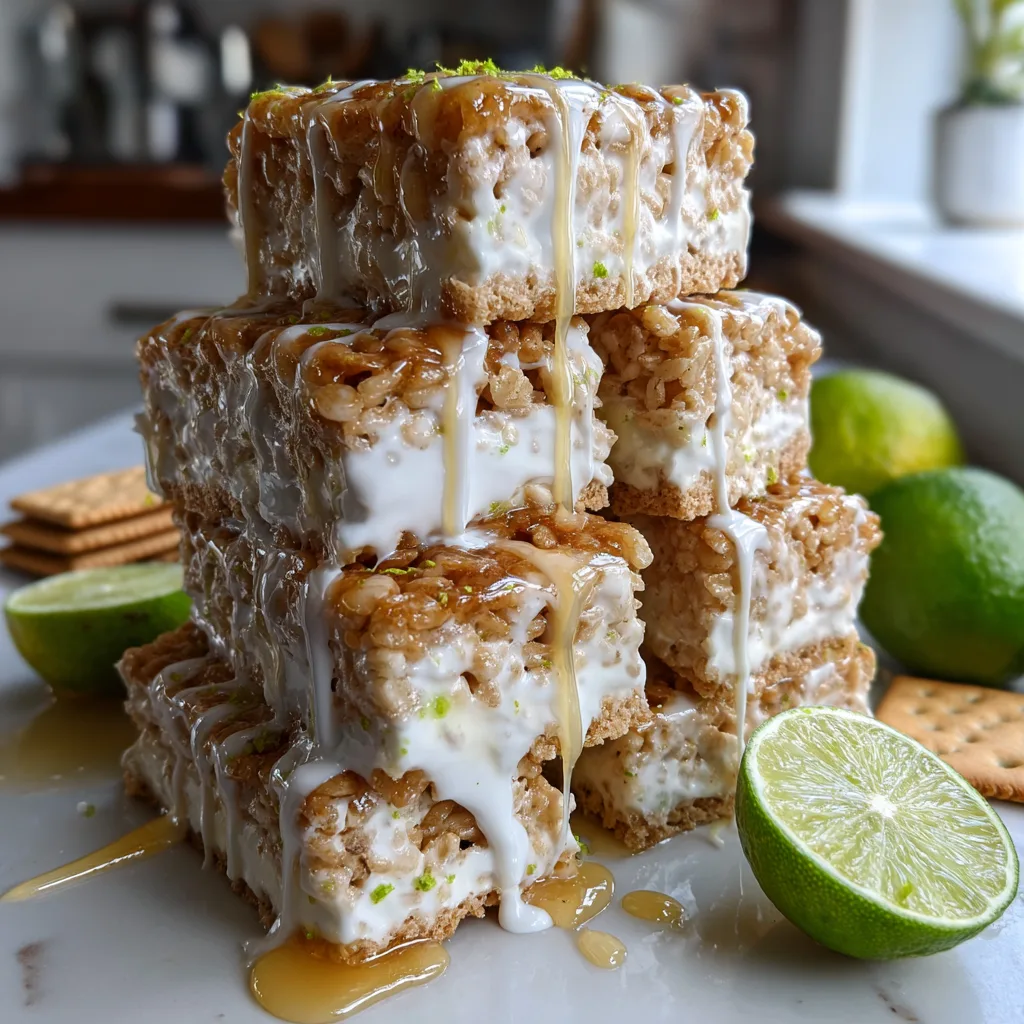
Key Lime Pie Krispies
Key Lime Pie Rice Krispie Treats: A Zesty, Gooey No-Bake Masterpiece
There are few things in the culinary world as universally beloved as a classic, gooey cereal treat. The nostalgic pull of melted marshmallows and toasted rice cereal is undeniable. But what happens when you take that beloved childhood classic and infuse it with the bright, vibrant, and tart profile of a classic Southern dessert? You get Key Lime Pie Rice Krispie Treats. This inventive recipe marries the buttery, marshmallowy perfection of a traditional no-bake bar with the zesty, citrusy kick of a creamy key lime pie, complete with crunchy, golden graham cracker pieces scattered throughout. It is the ultimate fusion dessert that requires absolutely no oven time, making it your new go-to recipe for spring gatherings, summer barbecues, or any time you need a ray of sweet sunshine in your kitchen.
If you are tired of the same old chocolate chip cookies or standard vanilla desserts, this recipe offers a refreshing departure. It dances brilliantly on the palate, perfectly balancing the intense sweetness of the marshmallows with the sharp, acidic bite of real lime juice and fragrant lime zest. Every single bite offers a thrilling textural contrast: the pillowy chew of the marshmallow base, the crispy snap of the toasted rice cereal, and the tender, buttery crunch of the embedded graham crackers. Prepare yourself, because these zesty squares will disappear from your kitchen counter faster than you can say “dessert is ready.”

Why You Will Obsess Over This Citrus Sweet Treat
The brilliance of this dessert lies in its delightful contradictions. Rice Krispie treats are famously sweet—sometimes overly so for adult palates. By introducing the bold, assertive flavor of key limes, that overwhelming sweetness is immediately tamed and beautifully balanced. The citrus acts as a bright spotlight, elevating the rich, buttery notes of the melted marshmallows while keeping the entire dessert tasting light and refreshing.
Furthermore, these treats are incredibly accessible for bakers of all skill levels. Because it is a no-bake recipe, you do not have to worry about finicky oven temperatures, leavening agents, or perfectly timed baking periods. In under fifteen minutes of active prep time, you can have a gourmet-tasting treat ready to set. It is the perfect recipe to make with children, as they will love helping to measure the cereal, crush the graham crackers, and stir the bubbling marshmallow mixture. It looks impressive on a dessert platter but requires a fraction of the effort of a traditional baked pie or complicated layer cake.
The Essential Ingredients for Perfect Flavor
The Magic of Key Limes vs. Regular Limes
To truly capture the essence of a Key Lime Pie, understanding your citrus is crucial. Key limes, also known as Mexican or West Indian limes, are significantly smaller, seedier, and more aromatic than the standard Persian limes commonly found in grocery stores. They boast a higher acidity and a distinctly floral, slightly herbal aroma that regular limes simply cannot replicate. While you can certainly use standard limes in a pinch for this recipe (and the results will still be delicious), taking the time to zest and juice fresh key limes will transport the flavor profile from “good” to “extraordinary.” If fresh key limes are unavailable, high-quality bottled key lime juice is a perfectly acceptable substitute, paired with the zest of a standard lime to ensure you still get those essential fragrant citrus oils.
The Importance of Graham Crackers
A Key Lime Pie is nothing without its signature buttery, crumbly graham cracker crust. To translate this vital element into our cereal treats, we do not just use the graham crackers as a base; we fold them directly into the mixture. By roughly chopping or breaking the graham crackers rather than turning them into fine crumbs, you ensure that distinct pockets of honey-sweetened crunch survive the mixing process. These chunks absorb just a hint of the marshmallow and butter, softening ever so slightly while retaining their structural integrity, mimicking the exact experience of biting into a slice of pie.
Ingredients You Will Need
- – 1/2 cup (1 stick) unsalted butter
- – 1 (10-ounce) bag mini marshmallows (plus 1 extra cup reserved for folding in later)
- – 1 tablespoon fresh key lime zest (about 3-4 small key limes or 1 standard lime)
- – 2 tablespoons fresh key lime juice
- – 1/2 teaspoon pure vanilla extract
- – 1/4 teaspoon fine sea salt
- – 6 cups crisped rice cereal (like Rice Krispies)
- – 1 1/2 cups roughly chopped graham crackers (about 5-6 full rectangular sheets)
- – 1/2 cup white chocolate chips (optional, for folding in or melting as a drizzle)
Step-by-Step Instructions
- Prepare Your Pan: Line a 9×9-inch or 8×8-inch square baking dish with parchment paper, leaving a slight overhang on the sides to easily lift the treats out later. Lightly coat the parchment paper with non-stick cooking spray or a thin layer of butter.
- Crush the Graham Crackers: Break your graham crackers into rough, bite-sized pieces. You want visible chunks, not a fine powder. Set these aside along with your measured crisped rice cereal.
- Melt the Butter: In a large heavy-bottomed pot or Dutch oven, melt the unsalted butter over medium-low heat. Let it melt completely, and if you prefer a nuttier flavor, you can let it cook for an additional 2-3 minutes until it lightly browns.
- Melt the Marshmallows: Reduce the heat to low. Add the 10-ounce bag of mini marshmallows to the melted butter. Stir continuously with a silicone spatula until the marshmallows are completely melted and the mixture is smooth and velvety.
- Add the Flavorings: Remove the pot from the heat immediately. Stir in the fresh key lime zest, fresh key lime juice, vanilla extract, and sea salt. The mixture may bubble up slightly from the acidic juice; simply keep stirring until fully incorporated and fragrant.
- Fold in the Dry Ingredients: Add the crisped rice cereal and the chopped graham crackers to the pot. Gently fold everything together using your spatula, ensuring every piece of cereal and cracker is coated in the lime-marshmallow mixture.
- Add the Extras: Once the cereal is mostly coated but the mixture is slightly cooled, gently fold in the remaining 1 cup of mini marshmallows and the white chocolate chips (if using). This ensures pockets of whole, gooey marshmallows and intact chocolate chips in the final squares.
- Press and Set: Transfer the sticky mixture into your prepared baking dish. Using a lightly buttered spatula or your fingers (lightly coated in butter or water to prevent sticking), gently press the mixture into an even layer. Do not pack it down too hard, or the treats will become dense and tough.
- Cool Completely: Allow the treats to set at room temperature for at least 1 hour before using the parchment paper overhang to lift them out of the pan. Cut into squares and serve.
Pro Tips for the Ultimate Gooey Texture
The tragedy of a bad cereal treat is a rock-hard texture that hurts the roof of your mouth. Achieving that quintessential, bakery-style, pull-apart gooeyness comes down to a few critical techniques.
First, always use fresh marshmallows. Marshmallows that have been sitting in your pantry for months begin to crystallize and lose their moisture. When melted, stale marshmallows create a tough, brittle syrup rather than a soft, stretchy binder. Always buy a fresh bag specifically for this recipe.
Second, manage your heat. The cardinal sin of making marshmallow treats is using high heat to melt the mixture faster. High heat causes the sugars in the marshmallows to cook and harden (the same principle used in candy making). Always melt your butter and marshmallows over low or medium-low heat, and remove the pot from the stove the absolute second the last marshmallow disappears into the mixture.
Finally, respect the press. When transferring your coated cereal into the baking dish, treat it with a gentle hand. If you smash and pack the mixture down with heavy force, you compress the cereal and squeeze out the air pockets that keep the treats light and crispy. Gently coax it into the corners and press just enough to level the top.
Exciting Variations to Try
While this recipe is a knockout as written, the formula is highly adaptable. If you want to lean heavily into the “pie” aspect of the dish, consider topping the set treats with a toasted meringue. Whip up a quick Swiss meringue, spread it over the uncut pan of treats, and hit it with a kitchen torch until beautifully browned. It adds a dramatic flair and authentic pie-topping flavor.
For coconut lovers, mimicking a tropical Key West vacation is easy. Substitute one cup of the crisped rice cereal with one cup of sweetened toasted shredded coconut, and add a drop of coconut extract along with the vanilla.
If you want to elevate the presentation, skip folding the white chocolate chips into the batter. Instead, melt the white chocolate in the microwave and drizzle it generously over the top of the pressed treats. Garnish the wet chocolate with extra graham cracker crumbs and a pinch of fresh lime zest before it sets. This creates a stunning, bakery-worthy finish.
Serving Suggestions for Every Occasion
These Key Lime Pie Rice Krispie Treats are the ultimate portable dessert. Because they are not prone to melting rapidly like chocolate-heavy desserts or frostings, they are brilliant for outdoor events. Pack them into a picnic basket for a day at the park, bring them to a neighborhood potluck, or tuck them into lunchboxes for a delightful midday surprise.
To serve these at a more formal gathering or dinner party, cut them into smaller, bite-sized cubes rather than large squares. Arrange them on a tiered dessert stand alongside fresh berries, lemon bars, and delicate shortbread cookies. The pop of pale green from the zest and the golden graham crackers makes them visually appealing on any dessert table. Pair them with iced tea, a crisp chilled prosecco, or a hot cup of coffee to cut the sweetness.
Fun Facts and Cultural Context
The story of the original cereal treat is a fascinating slice of American culinary history. The recipe was invented in 1939 by Malitta Jensen and Mildred Day, two employees at the Kellogg Company home economics department. They created the recipe as a fundraiser for Camp Fire Girls. Originally, the recipe called for melting a solid block of marshmallows, which was standard for the era, before the invention of the convenient mini marshmallows we use today.
On the other side of this flavor marriage is the Key Lime Pie, the official state pie of Florida. The origins of Key Lime Pie are somewhat contested, but the most prominent theory traces it back to the late 19th century in Key West. Because fresh milk and refrigeration were scarce in the Florida Keys at the time, residents relied heavily on canned sweetened condensed milk. Legend has it that local sponge fishermen, known as “spongers,” would mix this condensed milk with lime juice and local bird eggs. The high acidity of the limes would cause a chemical reaction that “cooked” or thickened the mixture without the need for an oven.
By bringing these two distinct American culinary inventions together, you are serving up a plate of history. You get the ingenuity of 1930s home economics paired with the survivalist-turned-gourmet resourcefulness of 19th-century Florida fishermen. It is a testament to how flavors can evolve, merge, and delight entirely new generations.
How to Store and Freeze for Later
To keep your Key Lime Pie Rice Krispie Treats tasting as fresh and gooey as the day you made them, proper storage is essential. Once they have completely cooled and been cut, store them in an airtight container at room temperature. To prevent them from sticking together, separate layers with sheets of parchment or wax paper. They will stay fresh and delicious for up to 3 days on the counter. Do not refrigerate them, as the cold air will cause the butter and marshmallows to harden, resulting in a brick-like texture.
If you need to make them well in advance, these treats freeze beautifully. Wrap each individual square tightly in plastic wrap, then place all the wrapped squares into a large, heavy-duty freezer zip-top bag. Squeeze out as much air as possible before sealing. They can be frozen for up to 6 weeks. When you are ready to enjoy them, simply remove the desired number of squares from the freezer and let them sit at room temperature for about 15-20 minutes. They will thaw perfectly, regaining all their original chewy, crispy glory.
Frequently Asked Questions
Can I use marshmallow fluff instead of whole marshmallows?
While marshmallow fluff (creme) is delicious, it behaves differently than whole marshmallows when melted with butter because it does not contain gelatin. Using fluff will result in a much softer, stickier treat that may not hold its shape as a square. It is highly recommended to stick to whole mini or large marshmallows for the correct structural integrity.
My treats turned out hard, what did I do wrong?
The two most common culprits for hard cereal treats are using stale marshmallows or using too much heat. If the marshmallows were old, they lacked moisture. If you melted them over medium-high heat, the sugars crystallized. Always use fresh marshmallows, low heat, and stop cooking the moment they are melted.
Can I use a different cereal?
Absolutely! While crisped rice cereal is traditional and provides the perfect blank canvas for the lime flavor, you can experiment. Corn flakes offer a hearty crunch, or you could use a lightly sweetened vanilla cereal to further enhance the dessert profile. Just ensure the volume remains the same.
Conclusion
Creating desserts that are both wildly flavorful and remarkably easy to execute is the ultimate goal for any home cook, and these Key Lime Pie Rice Krispie Treats hit the mark flawlessly. They capture the nostalgic, comforting chew of a beloved childhood snack while delivering the sophisticated, bright, and tangy notes of a bakery-style pie. With the buttery crunch of graham crackers and the fragrant zing of fresh lime zest, this no-bake wonder is destined to become a permanent fixture in your recipe rotation. Grab your marshmallows, zest those limes, and enjoy the ultimate sweet, citrusy bite!
Key Lime Pie Rice Krispie Treats
Ingredients
Equipment
Method
- Line a 9×9-inch baking dish with parchment paper and lightly grease it.
- In a large pot, melt the butter over low heat.
- Add the 10-ounce bag of mini marshmallows to the butter, stirring constantly until completely melted and smooth.
- Remove from heat immediately. Stir in the key lime zest, key lime juice, vanilla extract, and sea salt.
- Fold in the crisped rice cereal and chopped graham crackers until evenly coated with the marshmallow mixture.
- Gently fold in the remaining 1 cup of mini marshmallows and the white chocolate chips (if using).
- Transfer the mixture to the prepared baking dish and gently press it into an even layer using a buttered spatula.
- Allow the treats to cool and set at room temperature for at least 1 hour before cutting into squares.