Oreo Rice Krispies Treats
The Best Oreo Rice Krispies Treats: A Cookies and Cream Dream
There are very few desserts that evoke the pure, unadulterated nostalgia of childhood quite like a classic Rice Krispies treat. They are sticky, sweet, chewy, and universally beloved. But what happens when you take that flawless, buttery, marshmallow-packed foundation and collide it with the world’s most popular sandwich cookie? You get the Best Oreo Rice Krispies Treats—an outrageously decadent, thick, and gooey no-bake dessert that will make you the most popular person in any room you enter.
Also known as “Cookies and Cream Krispies,” this recipe is the ultimate low-effort, high-reward treat. It requires absolutely no baking, zero fancy equipment, and can be pulled together in under 15 minutes. Whether you are whipping up a last-minute after-school snack, contributing to a neighborhood bake sale, or simply satisfying a late-night sweet tooth, these loaded cereal bars deliver incredible texture and flavor. The contrast between the soft, sticky marshmallow, the crispy rice cereal, and the crunchy, slightly bitter chocolate of the Oreo cookies creates a mouthfeel that is completely irresistible.
Why You Will Fall Completely in Love with These Treats
Standard cereal bars are great, but these Oreo-stuffed versions are on an entirely different level. The secret to their success lies in the textures. We aren’t just sprinkling a few cookie crumbs on top; we are aggressively folding crushed Oreos directly into the sticky marshmallow matrix so that every single bite is bursting with cookies and cream flavor.
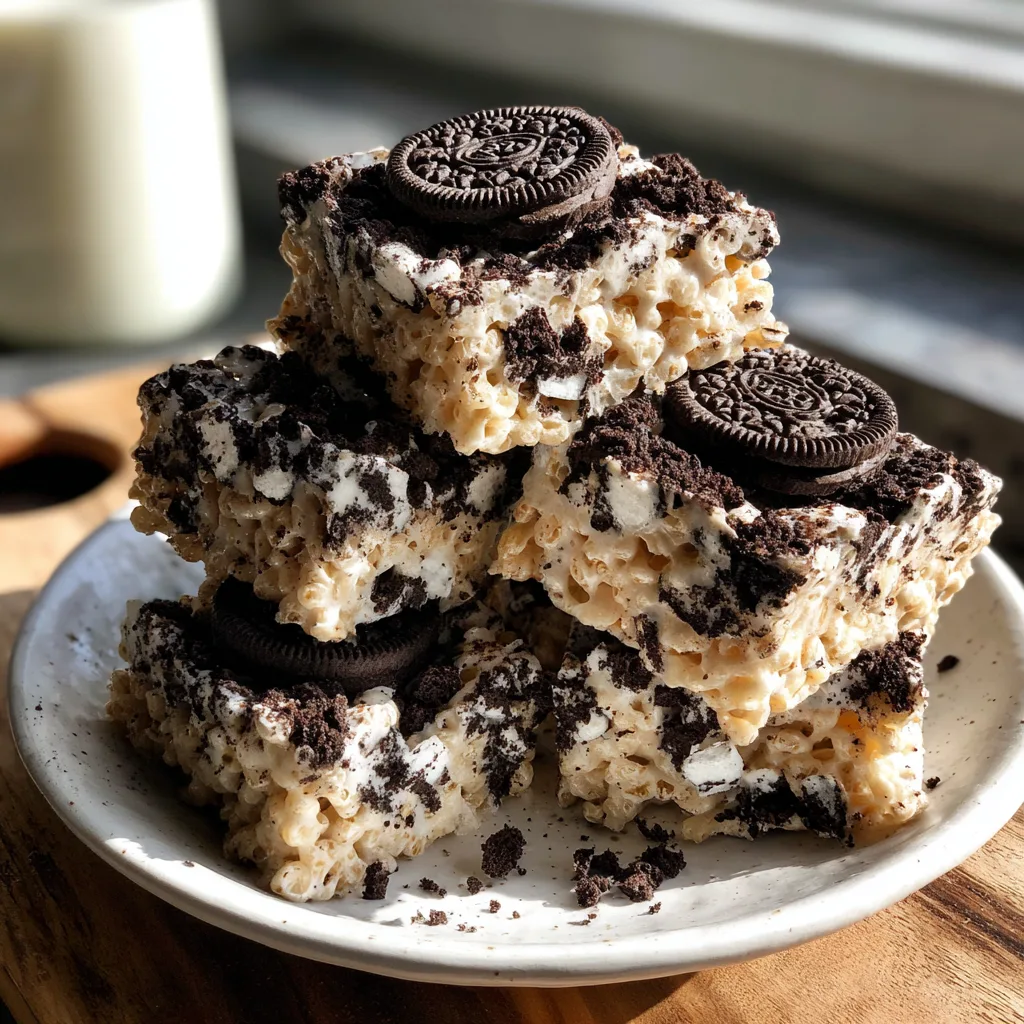
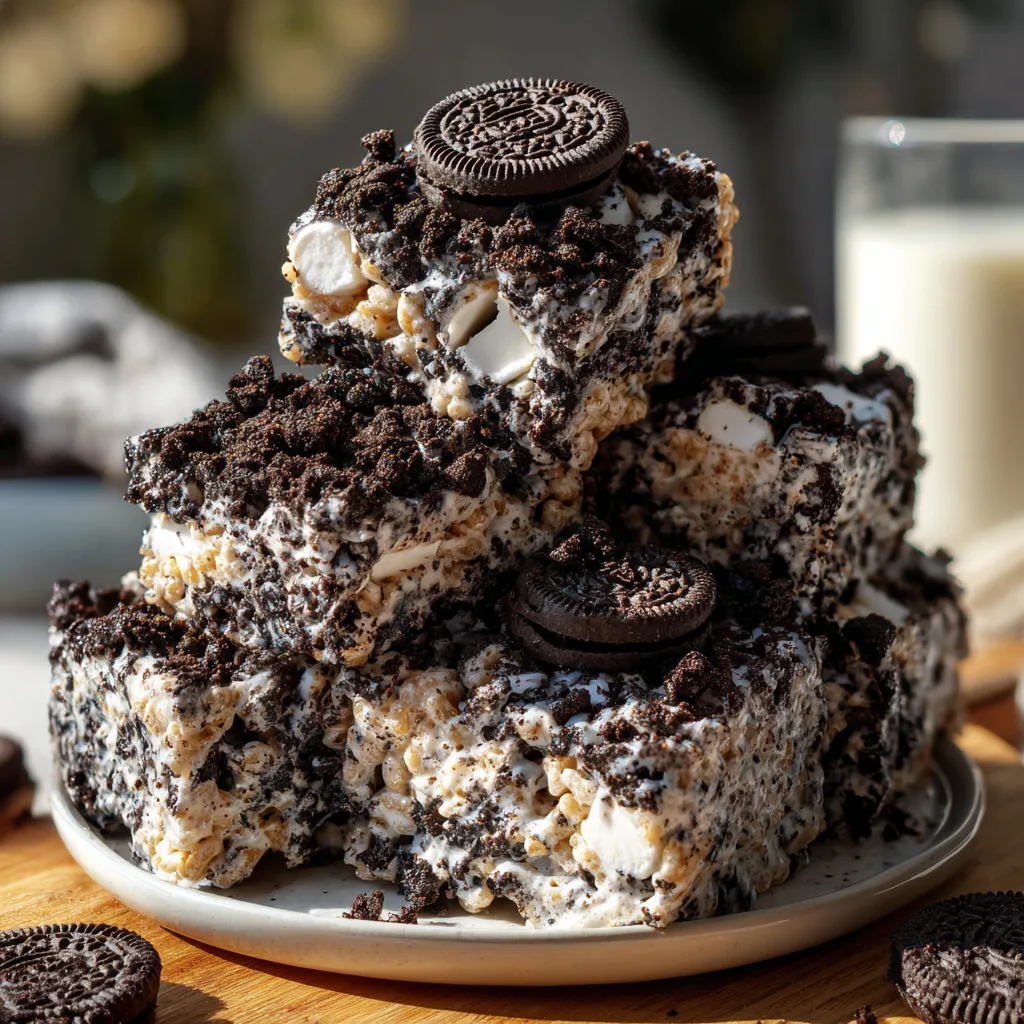
Perhaps the most magical part of this specific recipe is the “double marshmallow” technique. Instead of melting all the marshmallows down into the binding syrup, we reserve a handful of whole mini marshmallows to fold in at the very end, right alongside the crushed cookies. This means that when you bite into the cooled square, you hit pockets of whole, fluffy, un-melted marshmallows that contrast beautifully with the dense, crunchy cereal. It makes the bars look rustic, thick, and bakery-worthy.
Furthermore, these treats are unbelievably thick. By pressing the mixture into a smaller 8×8-inch pan rather than a standard 9×13-inch pan, you achieve towering, coffee-shop-style squares that feel substantial and luxurious. They are rich enough that a single square will satisfy your craving, but delicious enough that you will probably reach for a second.
The Flavor Profile: Elevating a Classic
The flavor profile of a standard Rice Krispies treat is intensely sweet, relying almost entirely on vanilla, sugar, and toasted rice. By introducing Oreos, you are bringing in a much-needed counterpoint.
The dark cocoa powder used in the chocolate wafers of an Oreo provides a slightly bitter, deeply chocolatey crunch that breaks through the intense sweetness of the melted marshmallows. The vanilla cream filling inside the cookies melts slightly when folded into the warm cereal mixture, enriching the butter and marshmallow binder with an extra layer of vanilla flavor. Finally, a crucial pinch of sea salt added to the melted butter enhances all the flavors, preventing the bars from tasting flat or overly cloying.
Key Ingredients for No-Bake Perfection
Because this recipe only calls for a handful of ingredients, quality and proportions matter immensely. Here is what you need to achieve the perfect batch:
- Salted Butter: While many baking recipes call for unsalted butter, Rice Krispies treats thrive on a little extra sodium to balance the massive amount of sugar. If you only have unsalted butter, simply add an extra generous pinch of salt to the melting pot. Using high-quality European butter will yield a richer flavor.
- Mini Marshmallows: You need absolutely fresh marshmallows. Stale, hard marshmallows will not melt smoothly and will result in rock-hard treats. Mini marshmallows are preferred because they melt faster and more evenly than the large ones, and they are the perfect size for folding in whole at the end.
- Crispy Rice Cereal: The classic Kellogg’s Rice Krispies are the standard, but any brand of crispy rice cereal will work. Make sure the cereal is fresh and hasn’t gone stale in your pantry.
- Oreo Cookies: Standard, original Oreos are the best choice here. Double Stuf Oreos can add too much extra cream, making the bars overly greasy and preventing them from setting properly. You want roughly chopped cookies—some large chunks for crunch, and some fine crumbs to flavor the marshmallow mixture.
- Pure Vanilla Extract: A splash of vanilla elevates the “cream” aspect of the cookies and cream flavor profile.
Ingredients List
For the Oreo Krispies Treats:
– 1/2 cup (1 stick) salted butter
– 1 (10 oz) bag mini marshmallows (about 6 cups), PLUS 1 extra cup of mini marshmallows for folding
– 1 teaspoon pure vanilla extract
– 1/4 teaspoon salt
– 5 cups crispy rice cereal
– 20 standard Oreo cookies, roughly chopped (plus extra mini Oreos for topping if desired)
Step-by-Step Instructions
- Prepare the Pan: Line an 8×8-inch square baking pan with parchment paper, leaving an overhang on the sides so you can easily lift the treats out later. Lightly coat the parchment paper with non-stick cooking spray or a thin layer of butter.
- Crush the Cookies: Place the 20 Oreo cookies into a large zip-top bag. Use a rolling pin to roughly crush them. You want a mix of fine crumbs and large, chunky pieces. Set aside.
- Melt the Butter: In a large pot or Dutch oven, melt the salted butter over medium-low heat. Do not let the butter brown; you just want it gently melted.
- Melt the Marshmallows: Reduce the heat to low. Add the 10 oz bag of mini marshmallows (reserving the extra 1 cup for later) to the melted butter. Stir constantly with a rubber spatula until the marshmallows are completely melted and the mixture is smooth. Remove the pot from the heat immediately.
- Flavor the Binder: Stir in the pure vanilla extract and salt until well combined.
- Add the Cereal: Pour the 5 cups of crispy rice cereal into the marshmallow mixture. Gently fold with your spatula until the cereal is mostly coated.
- The Magic Fold: Add the crushed Oreos and the reserved 1 cup of whole mini marshmallows to the pot. Gently fold everything together just until the cookies and marshmallows are evenly distributed. Do not overmix, or the heat will completely melt the extra marshmallows and turn the whole mixture a muddy grey color.
- Press into the Pan: Transfer the sticky mixture into your prepared baking pan. Lightly grease your hands or a piece of wax paper, and very gently press the mixture into an even layer. Pro-tip: Do not pack them down tightly! Pressing too hard will make the treats dense and tough instead of chewy and soft.
- Garnish: If desired, press a few extra whole mini marshmallows and mini Oreos gently into the top surface for a bakery-style presentation.
- Cool and Cut: Let the pan sit at room temperature for at least 1 hour to set completely. Once cooled, use the parchment overhang to lift the block out of the pan. Cut into 9 large squares or 16 smaller squares using a sharp knife.
Pro-Tips for the Best Texture
Low and Slow is the Rule: The biggest mistake people make with Rice Krispies treats is melting the marshmallows over high heat to save time. High heat crystallizes the sugar in the marshmallows, resulting in hard, crunchy bars that tear up the roof of your mouth. Always use low heat and remove the pot from the stove the second the marshmallows are smooth.
Do Not Over-Crush the Oreos: If you turn the Oreos into fine dust in a food processor, your cereal bars will turn an unappetizing cement-grey color and lose all their satisfying crunch. You want distinct chunks of cookie.
The Gentle Press: When transferring the mixture to the pan, resist the urge to compact it flat. Treat it delicately. You want air pockets to remain between the cereal grains to keep the bars light, gooey, and easy to bite into.
Variations and Substitutions
Different Cookies: While Oreos are the classic choice, you can substitute them with almost any crunchy cookie. Nutter Butters, Chips Ahoy, or even Golden Oreos work incredibly well in this base recipe.
Brown Butter: To elevate the flavor profile to gourmet status, brown the butter before adding the marshmallows. Cook the butter over medium heat until it foams and leaves toasted brown specks at the bottom of the pan, releasing a nutty aroma. Then proceed with adding the marshmallows.
Chocolate Drizzle: For the absolute chocoholics, melt a half cup of white chocolate chips or semi-sweet chocolate chips in the microwave and drizzle it generously over the top of the pressed bars before they cool.
Storage and Make-Ahead Instructions
Storing: Store your completely cooled and cut Oreo Krispies Treats in an airtight container at room temperature for up to 4 days. If stacking them in a container, place a sheet of wax or parchment paper between the layers to prevent them from sticking together. Do not refrigerate them, as the cold will make them rock hard.
Freezing: Surprisingly, Rice Krispies treats freeze very well! Wrap each individual square tightly in plastic wrap, then place them in a large freezer-safe zip-top bag. They will keep in the freezer for up to 6 weeks. To eat, let them sit at room temperature for about 15-20 minutes to thaw and soften.
Frequently Asked Questions (FAQ)
Why did my treats turn out hard instead of chewy?
This usually happens for one of three reasons: 1) You used stale marshmallows, 2) You melted the marshmallows over heat that was too high, cooking the sugar into a hard candy state, or 3) You pressed the mixture too firmly into the pan.
Can I use marshmallow fluff instead of regular marshmallows?
It is not recommended. Marshmallow fluff (creme) has a different chemical structure and moisture content than solid marshmallows. It will not set up properly, and your bars will remain a sticky, un-sliceable mess.
Can I double the recipe?
Absolutely. Simply double all the ingredients and press the mixture lightly into a 9×13-inch baking dish instead of an 8×8-inch pan. This is perfect for larger parties or potlucks.
Serving Suggestions and Final Thoughts
These Best Oreo Rice Krispies Treats are a standalone masterpiece, but they are particularly delightful when served alongside a tall, ice-cold glass of milk—a nod to the classic “milk and cookies” pairing.
This recipe proves that sometimes the best desserts don’t require preheating an oven or dirtying a dozen mixing bowls. By simply upgrading a beloved classic with generous chunks of chocolate sandwich cookies and extra pockets of fluffy marshmallows, you create a treat that will have kids and adults alike reaching for seconds. Grab your ingredients, melt that butter, and get ready to enjoy the ultimate gooey, crunchy, no-bake indulgence!
Best Oreo Rice Krispies Treats
Ingredients
Equipment
Method
- Line an 8×8-inch baking pan with parchment paper and lightly grease it.
- Place Oreos in a zip-top bag and crush them with a rolling pin into large chunks. Set aside.
- In a large pot, melt the salted butter over medium-low heat.
- Reduce heat to low. Add the 10 oz bag of marshmallows (save the extra 1 cup for later) and stir constantly until completely smooth. Remove from heat immediately.
- Stir in the vanilla extract and salt.
- Gently fold in the crispy rice cereal until mostly coated in marshmallow.
- Add the crushed Oreos and the reserved 1 cup of whole mini marshmallows. Fold gently just until combined.
- Transfer the mixture to the prepared pan. Using greased hands, very gently press it into an even layer without packing it down tightly.
- Allow to cool at room temperature for at least 1 hour before lifting out of the pan and slicing into thick squares.