Pickled Red Onions
The Ultimate Guide to Quick Pickled Red Onions: Transform Your Meals in Minutes
If there is one secret weapon that professional chefs and savvy home cooks keep in their refrigerators at all times, it is a jar of vibrant, tangy, and crunchy quick pickled red onions. This incredibly simple condiment has the miraculous ability to take a dish from ordinary to extraordinary with just a spoonful. Whether you are building the ultimate weekend taco spread, crafting a gourmet burger, tossing together a grain bowl, or simply making avocado toast for breakfast, a garnish of bright pink pickled onions provides the perfect punch of acidity and crunch that cuts through rich flavors and elevates the entire plate.
The beauty of this recipe lies not only in its spectacular flavor profile but also in its sheer accessibility. You do not need any specialized canning equipment, intimidating water baths, or weeks of patience to achieve pickle perfection. In fact, this process, known as “quick pickling” or “refrigerator pickling,” takes a mere five minutes of active preparation. Within an hour, you will have a beautiful jar of edible ruby-toned jewels ready to consume. In this comprehensive guide, we will explore the fascinating science of pickling, deep-dive into ingredient selection, provide foolproof step-by-step instructions, and share endless ways to customize and serve your new favorite condiment.
The Magic of Acid: Why You Need Pickled Red Onions in Your Fridge
To truly appreciate the power of the pickled red onion, one must understand the role of acidity in cooking. Human palates crave balance. When we eat dishes that are heavy in fats, carbohydrates, or rich, savory umami flavors—think slow-roasted pork carnitas, creamy avocado, or a heavily marbled steak—our taste buds quickly become fatigued. Each bite becomes slightly less exciting than the last. This is where acid comes in. Acidity acts as a palate cleanser. It slices through the richness, resetting your taste receptors and making every subsequent bite taste just as vibrant as the very first.
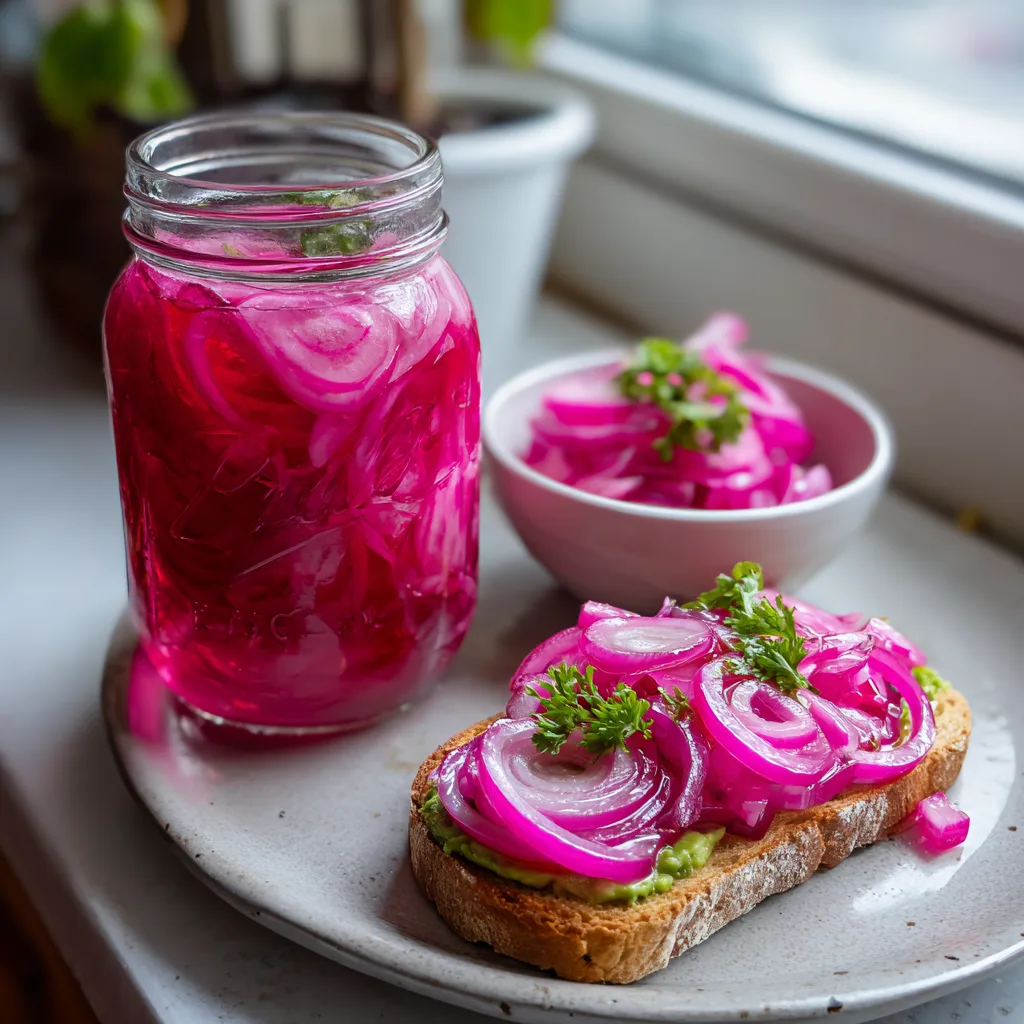
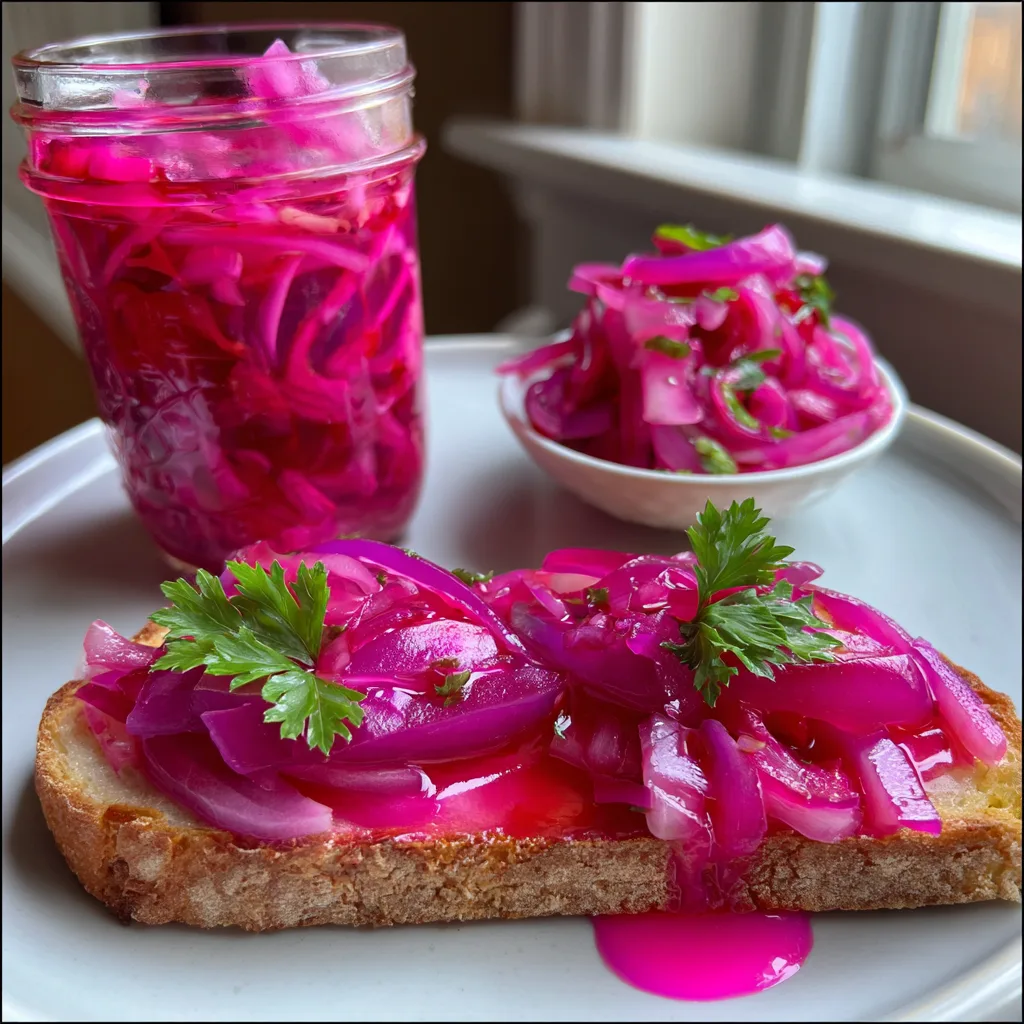
Raw onions can sometimes be too pungent, sulfurous, and overpowering for delicate dishes. They leave a lingering aftertaste that many find unpleasant. However, when you submerge a raw red onion in a perfectly balanced brine of vinegar, water, sugar, and salt, a beautiful transformation occurs. The harsh bite is entirely neutralized and mellowed. The texture softens slightly while retaining a satisfying crunch, and the onion absorbs the sweet-and-sour profile of the brine. Visually, they transform from a purple-skinned, white-fleshed vegetable into a striking, uniformly bright neon pink garnish that makes any plate look like it came from a high-end restaurant.
The Science of Quick Pickling and the Pink Transformation
Have you ever wondered why red onions turn such an electric, vibrant shade of pink when pickled? It is not just culinary magic; it is pure chemistry. Red onions contain natural plant pigments called anthocyanins. These are the exact same compounds that give blueberries, red cabbage, and blackberries their distinct colors. Anthocyanins are highly sensitive to the pH levels of their environment.
In their natural state within the raw onion, these pigments appear purplish-blue. However, when you introduce them to an acidic environment—such as our vinegar-based pickling brine—the pH drops significantly. This acidic shift causes the molecular structure of the anthocyanins to change, reflecting light differently and turning the onions that signature, jaw-dropping shade of magenta or hot pink. The hot water in the brine accelerates this process, breaking down the cell walls of the onion slightly, which allows the acid to penetrate faster and the color to bleed uniformly throughout the slice. Within just 30 minutes, you will witness this stunning chemical reaction right on your kitchen counter.
A Deep Dive into the 5 Core Ingredients
This recipe relies on a very short ingredient list, which means the quality and ratios of each component are essential for achieving the perfect balance of tang, sweetness, and crunch.
1. The Large Red Onion
The star of the show. You want to select a large, firm red onion with tight, dry, papery skin. Avoid any onions that have soft spots, bruising, or are sprouting green shoots from the top, as these are signs of age and will result in a mushy pickle. When slicing the onion, you have a choice to make regarding the cut. For salads and sandwiches, slicing the onion into thin rings (crosswise) is beautiful. However, if you are using them for tacos or bowls, slicing them “pole-to-pole” (from the root to the stem) yields strips that hold their crunchy structure a bit better over time in the brine.
2. White Vinegar (or Apple Cider Vinegar) (1/2 Cup)
The acid is what preserves the onions and provides the necessary tang. Standard distilled white vinegar is fantastic for this recipe because it has a clean, sharp, neutral profile that allows the pure flavor of the onion to shine. It also produces the brightest pink color. If you prefer a slightly fruitier, more complex, and milder flavor, unfiltered apple cider vinegar is an outstanding substitute. You can even mix the two, doing 1/4 cup of white and 1/4 cup of apple cider vinegar. Avoid dark vinegars like balsamic, as they will completely ruin the beautiful pink hue.
3. Hot Water (1 Cup)
Unlike traditional canning where you must boil the brine on the stove, this quick method simply utilizes hot water. You can heat it in a kettle or the microwave. The hot water serves two purposes: first, it dissolves the sugar and salt instantly, creating a homogenous brine without needing a saucepan. Second, pouring hot liquid over the raw onions lightly blanches them, softening their raw bite just enough so they pack easily into the jar while still retaining their signature crispness.
4. Sugar (1 Tablespoon)
Do not skip the sugar! While you are not making a sweet pickle or a relish, a small amount of sugar is absolutely vital. The sugar rounds out the harsh, astringent edges of the vinegar. It acts as a flavor balancer. If you are avoiding refined cane sugar, you can substitute this with equal amounts of pure maple syrup, honey, or agave nectar. Each alternative sweetener will bring its own subtle background notes to the final product.
5. Salt (1 1/2 Teaspoons)
Salt is the final pillar of flavor. It enhances the natural savory qualities of the onion and helps draw out the onion’s natural moisture through osmosis, replacing it with the flavored brine. Fine sea salt or kosher salt is highly recommended. If you are using standard iodized table salt, you may want to reduce the amount to 1 teaspoon, as its fine grain means it packs more densely and can make the brine overly salty.
Essential Equipment for Quick Pickling
One of the best aspects of refrigerator pickling is the lack of specialized gear required. You will need:
- A Glass Jar with a Tight-Fitting Lid: A 16-ounce (pint-sized) glass mason jar is the gold standard. Glass is non-reactive, meaning it will not leach chemicals or metallic flavors into your highly acidic brine. Never pickle in plastic or metal containers.
- A Sharp Chef’s Knife or Mandoline: Achieving uniformly thin slices is key to ensuring the onions pickle at the same rate. A mandoline slicer is brilliant for this, but a sharp knife and a steady hand work just as well.
- A Kettle or Measuring Cup: For heating your water.
Ingredients List
- – 1 large red onion
- – 1/2 cup white vinegar (or apple cider vinegar)
- – 1 cup hot water
- – 1 tablespoon sugar
- – 1 1/2 teaspoons salt
Step-by-Step Instructions
- Prepare the Onion: Begin by cutting the top and bottom off the red onion. Peel away the dry, papery outer skin. Using a sharp knife or a mandoline, slice the onion as thinly as you prefer. About 1/8-inch thickness is ideal for a perfect balance of flexibility and crunch.
- Pack the Jar: Take your clean, empty glass mason jar and pack the sliced onions inside. Do not be afraid to press them down firmly. You want the jar to be quite full so that the brine covers them efficiently. If there is a little extra space at the top, that is perfectly fine.
- Create the Brine: In a liquid measuring cup or a small bowl, combine the 1/2 cup of white vinegar, 1 tablespoon of sugar, and 1 1/2 teaspoons of salt. Pour in the 1 cup of hot water. Stir the mixture vigorously with a spoon or whisk until the sugar and salt are completely dissolved and the liquid is clear.
- Submerge the Onions: Carefully pour the hot brine over the packed red onions in the mason jar. Use a butter knife or a chopstick to poke down into the sides of the jar to release any trapped air bubbles. Ensure that all the onions are fully submerged in the liquid. If the onions are poking out the top, press them down with the back of a spoon.
- Rest and Chill: Let the jar sit uncovered on your kitchen counter for about 30 to 45 minutes, or until it has cooled to room temperature. You will notice the color changing to bright pink almost immediately! Once cooled, secure the lid tightly and place the jar in the refrigerator.
Exciting Flavor Variations and Customizations
The base recipe provided is a blank canvas. Once you have mastered the classic version, you can start treating your pickling jar like a flavor laboratory. By adding aromatics to the jar along with the onions before pouring the brine over them, you can create bespoke condiments tailored to your meals.
- Spicy Mexican Taqueria Style: This is a must for Taco Tuesday. Add one sliced jalapeño or habanero pepper (seeds included for extra heat, removed for milder heat) to the jar with the onions. Add a pinch of dried oregano and a whole peeled garlic clove.
- The Classic Deli Style: To mimic the flavor of pickles found in classic New York delis, add 1 teaspoon of whole black peppercorns, 1/2 teaspoon of mustard seeds, and a sprig of fresh dill to the jar.
- Citrus and Herb: For a bright, summery twist that pairs wonderfully with grilled fish or Mediterranean grain bowls, add a few strips of orange or lemon peel (avoiding the bitter white pith) and a sprig of fresh thyme or rosemary.
- Asian-Inspired: Add three thin slices of fresh, peeled ginger, a star anise pod, and substitute a portion of the white vinegar with rice vinegar. This variation is phenomenal on banh mi sandwiches, ramen, or Asian cabbage salads.
Serving Suggestions: How to Use Pickled Red Onions
Once you have a jar of these in the fridge, you will find yourself reaching for them at every single meal. They are truly the duct tape of the culinary world—they fix and enhance almost everything.
Breakfast: Elevate your morning routine by draping a generous forkful of bright pink onions over classic avocado toast. The acidity cuts right through the fatty richness of the avocado. They are equally spectacular folded into a breakfast burrito, scattered over a spinach and feta omelet, or served alongside a rich, runny eggs benedict to cut the heaviness of the hollandaise sauce.
Lunch: Upgrade any sandwich or wrap. They are a mandatory addition to a pulled pork sandwich, a smoked turkey club, or a classic falafel pita. If you are having a simple leafy green salad, adding pickled onions negates the need for a heavy dressing—a drizzle of olive oil is all you need, as the onions provide all the necessary tangy flavor.
Dinner: They are arguably the most essential topping for authentic street tacos, rich beef barbacoa, or slow-cooked carnitas. Try them on top of a grilled hamburger instead of raw onions for a gourmet pub-style burger. They are also brilliant sprinkled over rich curries, roasted root vegetables, or hearty grain bowls made with quinoa, roasted sweet potatoes, and tahini dressing.
Frequently Asked Questions (FAQ)
How long do quick pickled red onions last in the fridge?
Because they are fully submerged in an acidic vinegar brine, they have an excellent shelf life. Stored in an airtight jar in the refrigerator, they will easily keep for up to 3 to 4 weeks. However, they are so delicious, they rarely last that long. Note that they will lose a tiny bit of their crispness as the weeks go by, but the flavor will only deepen.
Do I need to boil the jars and process them in a water bath?
No! This is a “quick pickle” or refrigerator pickle recipe. It is not meant for long-term pantry storage at room temperature. Because we are bypassing the tedious and strict sterilization process of traditional canning, these must be kept refrigerated at all times once they have cooled down.
Why did my onions turn mushy?
Mushy onions are usually the result of two things: either the onion was too old and soft to begin with, or the water you used was completely boiling rather than just hot, which essentially cooked the delicate onion slices. Aim for very hot water (like you would use for a cup of tea), but not a rolling, aggressive boil.
Can I reuse the leftover pink pickling liquid?
Absolutely! The leftover bright pink brine is liquid gold. You can drop another batch of freshly sliced onions right into the leftover liquid (they might just take a day longer to pickle since the brine is cold). Alternatively, use the flavorful pink vinegar to make a stunning vinaigrette for salads, or splash a little bit into a Bloody Mary cocktail for a tangy kick.
Conclusion
Mastering how to make quick pickled red onions is a culinary rite of passage that yields maximum rewards for minimal effort. With just a single red onion, some basic pantry staples, and five minutes of your time, you can create a condiment that brings restaurant-quality acidity, crunch, and visual appeal to your home cooking. Whether you are spicing up your morning toast, building the perfect taco, or looking to add a pop of color to a dinner party platter, these vibrant pink pickles will never let you down. Grab a jar, start slicing, and get ready to elevate your meals to a whole new level of deliciousness.
Pickled Red Onions
Ingredients
Equipment
Method
- Peel the red onion and slice it thinly using a sharp knife or a mandoline.
- Pack the sliced red onions tightly into a clean glass mason jar.
- In a measuring cup or small bowl, combine the white vinegar, sugar, salt, and hot water. Stir until the sugar and salt are completely dissolved.
- Pour the hot pickling liquid over the onions in the jar, ensuring they are completely submerged. Push them down slightly if necessary.
- Let the jar sit uncovered at room temperature for 30 to 45 minutes until the liquid cools and the onions turn bright pink.
- Secure the lid tightly and store in the refrigerator for up to 3 to 4 weeks.