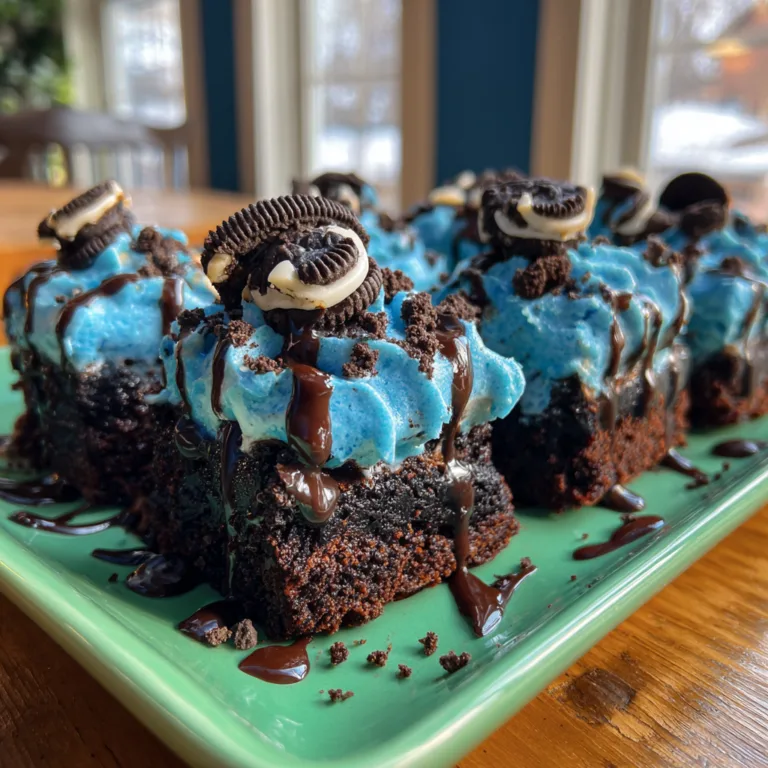
Red Velvet Lava Cakes
Cookies & Cream Red Velvet Molten Lava Cakes: The Ultimate Indulgence
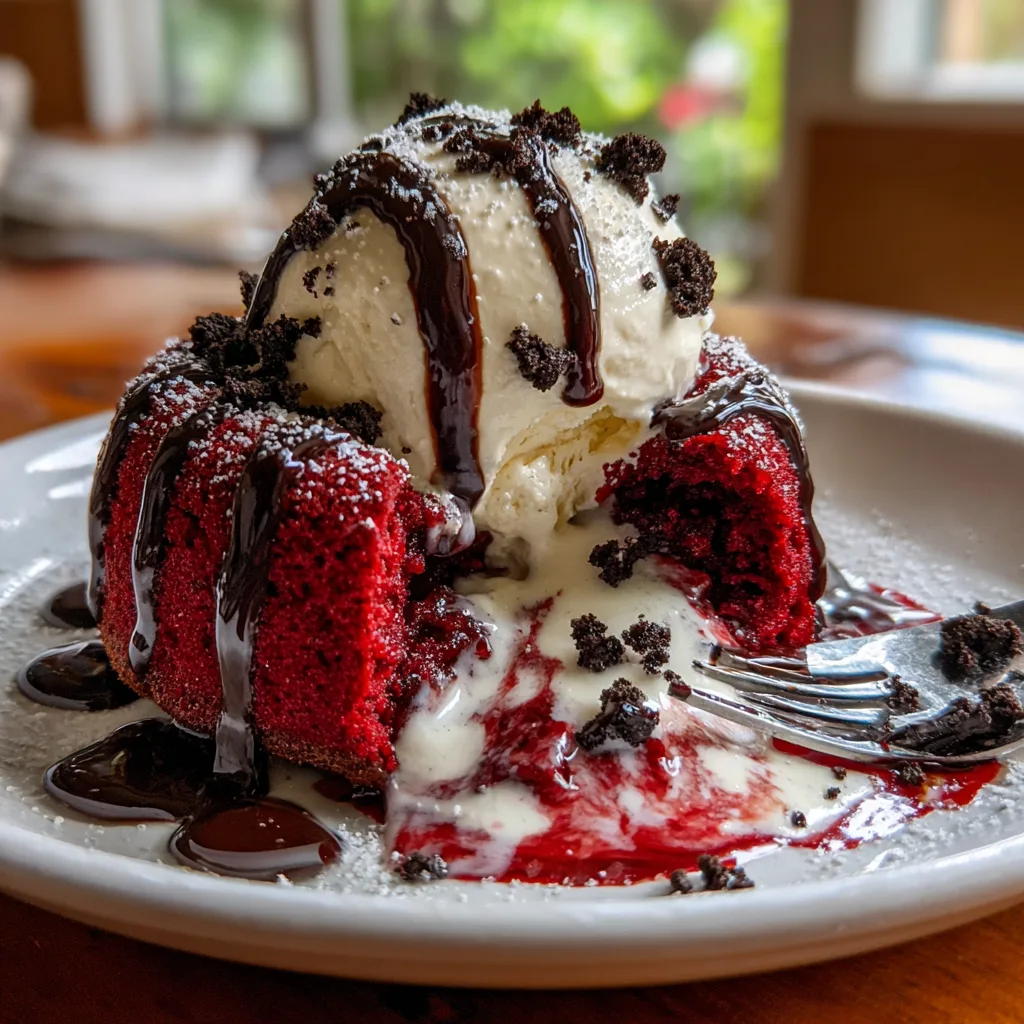
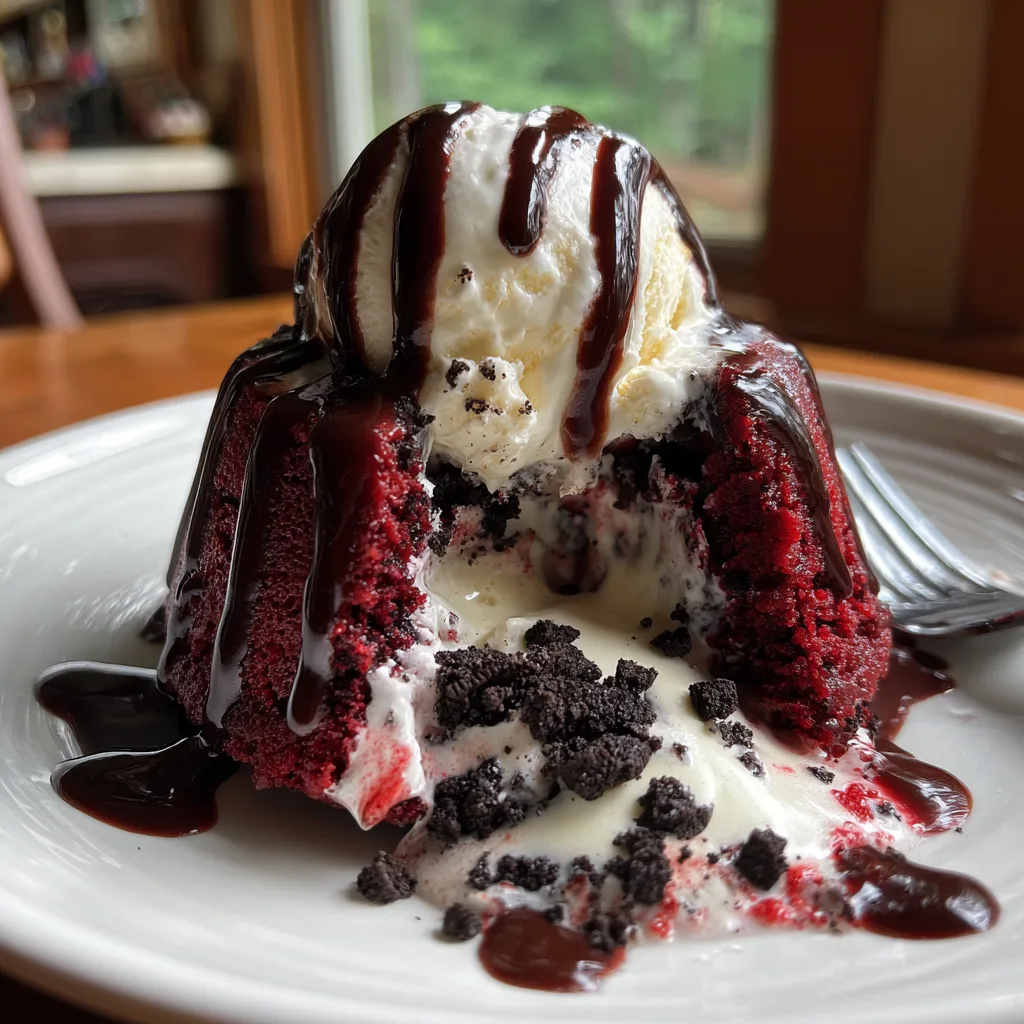
There are desserts, and then there are experiences. The Cookies & Cream Red Velvet Molten Lava Cake falls firmly into the latter category. Imagine the dramatic presentation of a classic chocolate fondant, but reimagined with the striking visual allure of red velvet and the nostalgic, creamy crunch of cookies and cream. As your fork breaks through the tender, crimson sponge, a hot, gooey river of white chocolate and cookie crumbs flows out, creating a contrast of temperatures and textures that is nothing short of mesmerizing.
This dessert is the culinary equivalent of a magic trick. It looks incredibly sophisticated—something you would expect to pay a premium for at a high-end steakhouse or a French bistro—yet it is surprisingly achievable in a home kitchen. Whether you are planning a romantic Valentine’s Day dinner, a festive holiday meal, or simply want to treat yourself to something extraordinary, these lava cakes are guaranteed to steal the show. In this comprehensive guide, we will break down the science behind the “lava,” the secrets to the perfect red velvet crumb, and how to master the cookies and cream filling.
Why This Recipe Works
Most lava cakes rely on undercooking the center of a batter to create the molten effect. While delicious, that method limits you to one flavor profile throughout. This recipe uses the ganache truffle method. By freezing a core of white chocolate and crushed cookies (the “cookies and cream” component) and baking the red velvet cake batter around it, we guarantee two things:
- A Perfectly Cooked Cake: You don’t have to worry about eating raw flour or eggs. The cake fully bakes while the frozen center gently melts.
- Distinct Layers: You get a beautiful visual contrast between the red cake and the white-and-black speckled filling.
Ingredients You Will Need
To achieve the perfect balance of flavor and structure, precise ingredients are key. Here is what you will need:
For the Cookies & Cream “Lava” Core
- White Chocolate: 4 oz (115g) high-quality white chocolate bar, chopped. Do not use chips if possible, as they contain stabilizers that prevent smooth melting.
- Heavy Cream: 1/4 cup. This creates the ganache texture that stays gooey even as it cools slightly.
- Chocolate Sandwich Cookies (Oreos): 3 cookies, finely crushed. This provides the classic “cookies and cream” flavor and speckles.
For the Red Velvet Cake Batter
- Unsalted Butter: 1/2 cup (1 stick), melted. Butter provides the rich, tender crumb typical of lava cakes.
- Sugar: 1/2 cup granulated sugar.
- Eggs: 2 large eggs plus 2 egg yolks. The extra yolks add richness and help emulsify the batter for a silky texture.
- Vanilla Extract: 1 tsp.
- Red Food Coloring: 1-2 tsp gel coloring. Gel is preferred over liquid as it provides a vibrant color without watering down the batter.
- All-Purpose Flour: 6 tbsp. Just enough to hold the structure without making it cakey.
- Cocoa Powder: 2 tbsp unsweetened cocoa powder. This gives the subtle chocolate note essential to red velvet.
- Salt: A pinch to balance the sweetness.
For Serving
- Vanilla Ice Cream: The cold creaminess cuts through the richness of the hot cake.
- Chocolate Sauce: For drizzling.
- Extra Crushed Cookies: For garnish.
Step-by-Step Instructions
Phase 1: Make the Lava Cores
1. Melt the Chocolate: In a small microwave-safe bowl, combine the chopped white chocolate and heavy cream. Microwave in 20-second intervals, stirring in between, until completely smooth.
2. Add the Crunch: Stir in the finely crushed chocolate sandwich cookies.
3. Freeze: Let the mixture cool slightly until it thickens, then scoop 4 equal dollops onto a parchment-lined plate or into a small silicone ice cube tray. Freeze for at least 1 hour until solid. This step is non-negotiable!
Phase 2: Prepare the Ramekins
4. Grease and Dust: Preheat your oven to 400°F (200°C). Generously butter four 6-ounce ramekins. Dust them with cocoa powder or flour, tapping out the excess. This ensures the cakes slide out easily.
Phase 3: Make the Red Velvet Batter
5. Whisk Wet Ingredients: In a medium bowl, whisk together the melted butter, sugar, eggs, egg yolks, and vanilla extract until pale and slightly thickened (about 2 minutes).
6. Color it Red: Whisk in the red food coloring until you reach your desired shade of deep crimson.
7. Fold Dry Ingredients: Sift the flour, cocoa powder, and salt directly into the wet mixture. Gently fold with a spatula just until no streaks of flour remain. Do not overmix.
Phase 4: Assemble and Bake
8. Fill: Spoon a small amount of batter into the bottom of each prepared ramekin (about 1/4 full).
9. Insert Core: Remove the frozen ganache balls from the freezer and place one in the center of each ramekin.
10. Cover: Top with the remaining batter, ensuring the ganache ball is completely covered and the batter is even.
11. Bake: Place ramekins on a baking sheet and bake for 13–15 minutes. The edges should look set and firm, but the center should still have a slight jiggle when you gently shake the pan.
Phase 5: Serve
12. Unmold: Let the cakes cool in the ramekins for 1 minute. Run a small knife around the edge to loosen. Place a dessert plate upside down over the ramekin, then carefully flip both over. Lift the ramekin off.
13. Garnish: Immediately top with a scoop of vanilla ice cream, a drizzle of chocolate sauce, and extra cookie crumbles. Serve while hot.
Tips for Success
The “Jiggle” Test: Knowing when to pull lava cakes out of the oven is an art. If the center wobbles like Jell-O, it’s perfect. If it ripples like liquid, give it another minute. If it doesn’t move at all, you’ve made a delicious muffin, but not a lava cake.
Room Temperature Eggs: Use room temperature eggs to prevent the melted butter from seizing up when you mix them. This creates a smoother emulsion.
Don’t Skip the Strainer: Sifting the cocoa powder and flour is crucial. Cocoa powder is notorious for clumping, and you don’t want dry pockets of powder in your smooth lava cake.
Prep Ahead: You can assemble these cakes (batter + frozen core in the ramekin) and store them in the fridge for up to 4 hours before baking. You may need to add 1-2 minutes to the baking time if they are coming straight from the fridge.
Creative Variations
Once you master this technique, the possibilities are endless.
- Cream Cheese Core: Swap the white chocolate ganache for a frozen ball of sweetened cream cheese to mimic a cheesecake-stuffed red velvet cake.
- Dark Chocolate Lovers: Use dark chocolate for the ganache core for a “double chocolate” red velvet experience.
- Peanut Butter Twist: Use peanut butter chips instead of white chocolate for the filling.
Common Troubleshooting
My cake stuck to the ramekin!
This usually happens if the ramekin wasn’t greased enough. Be aggressive with the butter, and don’t forget the dusting step. If it sticks, you can serve it directly in the ramekin—it tastes just as good!
The filling didn’t flow.
This means the cake was overbaked. Every oven is different. Do a “test cake” first if you are making this for a dinner party to dial in the exact timing for your oven.
The filling leaked out the side.
This happens if the frozen ball wasn’t perfectly centered or if there wasn’t enough batter on the bottom. Make sure to create a solid “nest” of batter before adding the core.
Serving Suggestions
This dish is rich, so keep the sides simple. Fresh berries—strawberries or raspberries—add a nice acidity that cuts through the sweetness. A sprig of fresh mint adds a pop of green color that contrasts beautifully with the red cake. For a beverage pairing, a glass of cold milk is classic, but a glass of ruby port wine or a hot espresso makes for a sophisticated finish to the meal.
Cookies & Cream Red Velvet Molten Lava Cakes
Ingredients
Equipment
Method
- Combine white chocolate and heavy cream in a bowl. Microwave in 20-second bursts until melted and smooth.
- Stir in crushed cookies. Freeze mixture in 4 dollops for at least 1 hour until solid.
- Preheat oven to 400°F (200°C). Generously butter four 6-oz ramekins and dust with cocoa powder.
- Whisk melted butter, sugar, eggs, egg yolks, and vanilla until pale. Whisk in red food coloring.
- Sift in flour, cocoa powder, and salt. Fold gently until just combined.
- Pour a little batter into each ramekin. Place a frozen filling ball in the center. Top with remaining batter to cover.
- Bake 13-15 minutes until sides are set but center jiggles slightly. Cool 1 minute.
- Invert onto plates and serve immediately with ice cream.