Salted Caramel Cookies
The Ultimate Guide to Baking Chewy Salted Caramel Cookies
There is a unique kind of magic that happens when you combine the rich, buttery sweetness of caramel with the sharp, crisp bite of flaky sea salt. It is a flavor profile that has completely taken the culinary world by storm over the last two decades, elevating everything from ice cream to coffee. But perhaps the most magnificent vessel for this beloved flavor pairing is a freshly baked, perfectly chewy cookie. Welcome to the ultimate guide to creating Salted Caramel Cookies that you will want to bake again and again.
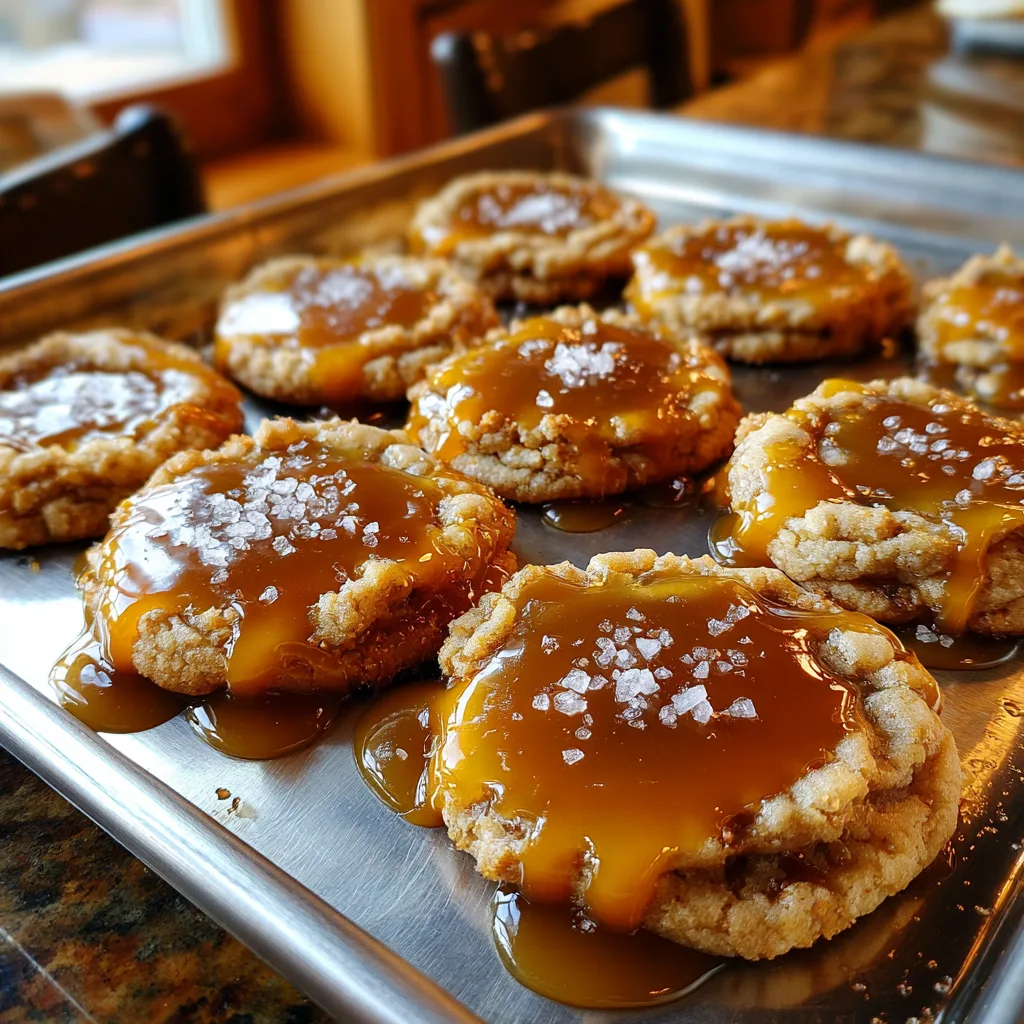
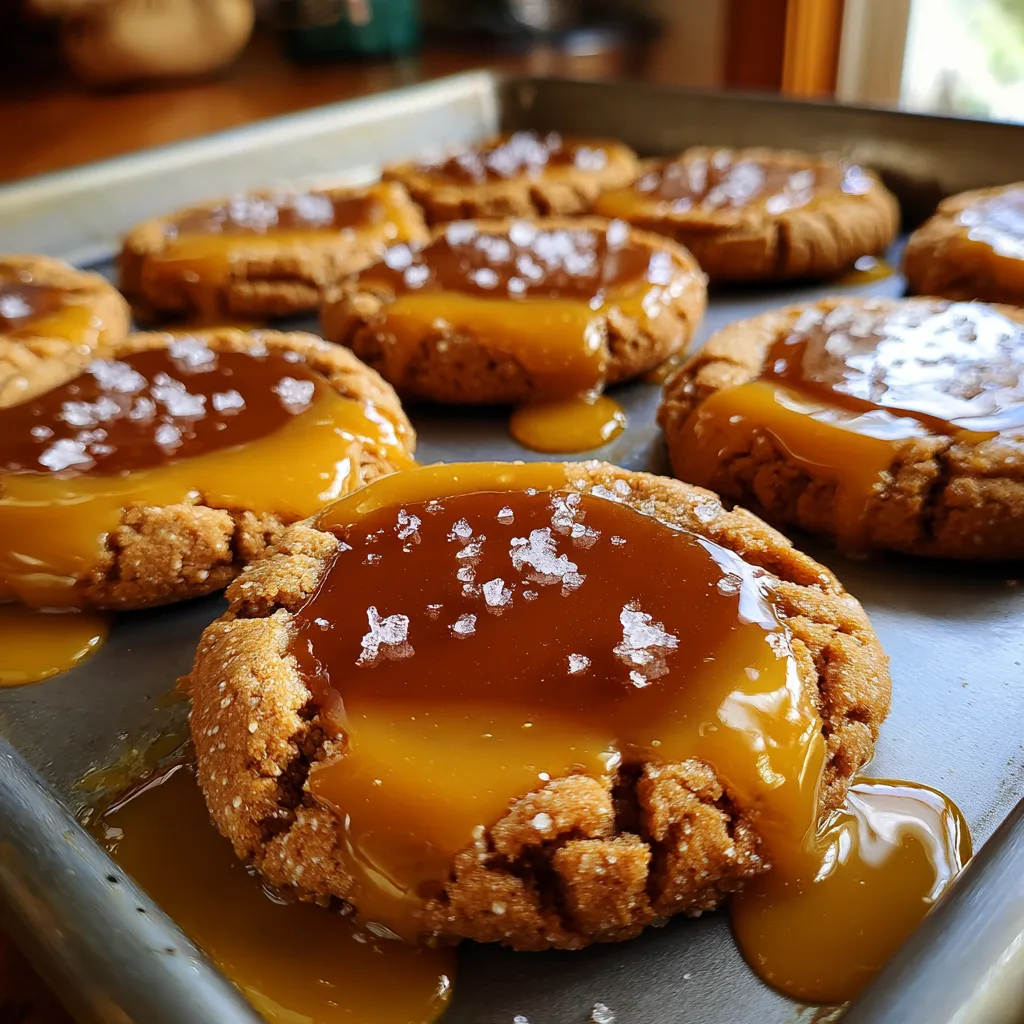
These are not your average chocolate chip cookies minus the chips. These are meticulously crafted treats designed to deliver a specific textural experience. Imagine sinking your teeth into a cookie with crisp, buttery, crinkly edges that give way to a deeply soft, dense, and chewy center. Now, imagine that center holding a generous, gooey pool of rich, melted caramel, finished with a sprinkling of sparkling sea salt crystals that crunch between your teeth. It is a masterpiece of taste and texture. In this comprehensive, deep-dive article, we will explore the science of the sweet-and-salty phenomenon, the exact ingredients you need for bakery-level results, and the foolproof techniques to ensure your cookies come out flawlessly every single time.
The Science Behind Sweet and Salty: Why We Crave It
To truly appreciate a salted caramel cookie, you have to understand why our brains go absolutely wild for the combination of sugar and salt. For a long time, desserts were strictly sweet affairs. However, food scientists and pastry chefs know that salt is a universal flavor enhancer. It does not just make things taste salty; it actually makes things taste more like themselves.
When you add salt to a sweet element like caramel, two incredible things happen on a biological level. First, the salt suppresses our perception of bitterness. Caramel, by its very nature, is burnt sugar. It has inherent bitter notes underneath all that sweetness. A touch of salt masks that bitterness, allowing the rich, buttery, toffee-like notes of the caramel to shine through even brighter. Second, we have sweet receptors on our tongues that only activate in the presence of sodium. This means that adding a pinch of salt to a sweet treat actually registers as *sweeter* and more complex in our brains. This phenomenon is known as “flavor layering,” and it is the exact reason why a plain caramel cookie might seem cloying after one bite, but a salted caramel cookie keeps you reaching back into the cookie jar for more.
The Anatomy of the Perfect Cookie Dough
The foundation of this masterpiece is the cookie dough itself. To support a gooey pool of caramel, the cookie cannot be too cakey or too thin and crispy. It needs to be sturdy yet chewy, acting as the perfect textural contrast to the soft caramel center.
Achieving this specific texture relies heavily on the ratio of sugars and the manipulation of butter. In this recipe, we lean heavily on dark brown sugar. Brown sugar contains molasses, which adds incredible moisture and depth of flavor. This moisture is what gives the cookie its chewy, dense interior. Granulated white sugar is still necessary, however, as it helps the cookies spread perfectly in the oven and creates those desirable, crisp, crinkly edges. The butter must be softened—not melted, and not cold. Softened butter creamed together with the sugars creates tiny air pockets, giving the cookie just enough lift to hold its shape while wrapping around that precious caramel center.
Mastering the Caramel Pool
The defining feature of this recipe is the glorious, glossy puddle of caramel in the center of each cookie. There are a few different ways to achieve this, and the route you choose depends entirely on your time and preference.
For the ultimate, show-stopping look and texture, we recommend using high-quality, soft caramel candies melted down with a splash of heavy cream. This creates a thick, luxurious caramel that will set up nicely once the cookie cools, remaining soft and chewy rather than turning rock-hard or completely soaking into the dough. Alternatively, you can use a very thick, homemade caramel sauce. The key is ensuring the caramel is viscous enough to hold its shape in the center indentation of the cookie. If you use a thin ice cream syrup, it will simply dissolve into the dough and bake away into a sticky mess.
Ingredients
Gather these high-quality ingredients to ensure your cookies turn out perfectly. Because this recipe has relatively few components, the quality of your butter, vanilla, and salt will shine through prominently.
For the Cookie Dough:
- – 2 and 1/4 cups all-purpose flour (spooned and leveled)
- – 1 teaspoon baking soda
- – 1/2 teaspoon fine table salt
- – 3/4 cup (1.5 sticks) unsalted butter, softened to room temperature
- – 3/4 cup packed dark brown sugar
- – 1/2 cup granulated white sugar
- – 1 large egg, at room temperature
- – 1 large egg yolk, at room temperature
- – 2 teaspoons pure vanilla extract
For the Caramel Filling & Topping:
- – 14 soft caramel candies (unwrapped)
- – 1 tablespoon heavy whipping cream (or milk)
- – 1 tablespoon coarse flaky sea salt (Maldon or Fleur de Sel preferred)
Instructions
Follow these steps carefully, paying special attention to the chilling time, which is mandatory for achieving the perfect thickness and texture.
- Mix the Dry Ingredients: In a medium-sized mixing bowl, whisk together the all-purpose flour, baking soda, and fine table salt. Set this bowl aside.
- Cream the Butter and Sugars: In the bowl of a stand mixer fitted with the paddle attachment (or in a large bowl using a hand mixer), beat the softened butter, dark brown sugar, and granulated white sugar together on medium-high speed for about 2 to 3 minutes. The mixture should become light, fluffy, and visibly paler in color. Scrape down the sides and bottom of the bowl with a rubber spatula.
- Add the Wet Ingredients: Add the whole egg, the egg yolk, and the pure vanilla extract to the creamed butter mixture. Beat on medium speed until completely combined and smooth. Scrape down the bowl once more.
- Incorporate the Dry Ingredients: Turn your mixer down to low speed. Gradually add the flour mixture to the wet ingredients in two or three additions. Mix just until the flour disappears. Do not overmix, or your cookies will become tough. The dough will be quite thick and slightly sticky.
- Chill the Dough: Cover the bowl tightly with plastic wrap and place it in the refrigerator to chill for at least 2 hours (or up to 3 days). This step is absolutely crucial. Chilling solidifies the butter, which prevents the cookies from spreading too thin in the oven, and it allows the flour to hydrate fully, creating a chewier texture.
- Prepare for Baking: Once the dough has chilled, preheat your oven to 350°F (175°C). Line two large baking sheets with parchment paper or silicone baking mats.
- Scoop and Shape: Remove the dough from the refrigerator. Using a large cookie scoop (about 2 tablespoons of dough per cookie), scoop the dough and roll it into smooth balls. Place the dough balls onto the prepared baking sheets, leaving about 2 inches of space between each one.
- Make the Indentation: Using the back of a teaspoon, a measuring spoon, or your thumb, gently press a deep indentation into the center of each dough ball. This is where the caramel will go later. Do not press all the way through to the baking sheet; leave a sturdy base.
- Bake: Bake the cookies for 10 to 12 minutes, or until the edges are golden brown and set. The centers will still look slightly underbaked and soft. Remove from the oven. If the indentations puffed up during baking, gently press them down again with a spoon while the cookies are still piping hot. Allow the cookies to cool on the baking sheet for 5 minutes.
- Prepare the Caramel: While the cookies are cooling, unwrap the soft caramel candies and place them in a microwave-safe bowl along with the heavy cream. Microwave in 30-second increments, stirring well after each one, until the caramel is completely melted, smooth, and glossy.
- Fill and Salt: Carefully spoon about a teaspoon of the melted caramel directly into the center indentation of each warm cookie. Immediately sprinkle the glossy caramel pools generously with the coarse flaky sea salt.
- Cool Completely: Transfer the finished cookies to a wire cooling rack to cool completely. The caramel will firm up slightly as it cools, creating the perfect chewy, sticky bite.
Pro Tips for Baking Success
Baking is a science, and small adjustments can make a massive difference in your final product. Keep these professional tips in mind when tackling this recipe.
Measure Your Flour Correctly: The number one reason cookies turn out dry, cakey, or fail to spread is too much flour. Never scoop your measuring cup directly into the flour bag. This packs the flour down, resulting in up to 25% more flour than you actually need. Instead, fluff the flour with a spoon, spoon it gently into your measuring cup, and level off the top with the straight edge of a knife.
Do Not Skip the Chill: It can be tempting to skip the chilling phase when you want cookies immediately. However, chilling the dough is non-negotiable for this recipe. Warm dough will spread into flat, greasy puddles in the hot oven, leaving you with no structure to hold the caramel pool. If you are in a rush, you can place the dough in the freezer for 45 minutes instead.
The Importance of the Egg Yolk: You will notice this recipe calls for one whole egg and one extra egg yolk. The extra egg yolk adds richness, tenderness, and chewiness to the dough without adding the extra water content found in egg whites. This secret baker’s trick is the key to achieving that dense, bakery-style texture.
Choosing the Right Sea Salt
When a recipe title features an ingredient as prominently as “Salted Caramel,” the quality of that ingredient matters immensely. The salt you use to garnish these cookies will make or break the final flavor.
Do not use standard iodized table salt to top your cookies. Table salt has tiny, uniform crystals that dissolve instantly, creating a harsh, overwhelmingly salty flavor. Instead, you must use a finishing salt. Maldon sea salt flakes are the gold standard. They are large, pyramid-shaped crystals that provide a delicate, satisfying crunch and a clean, mild burst of salinity that perfectly complements the rich caramel without overpowering it. Fleur de Sel, a moist sea salt hand-harvested in France, is another exceptional, though slightly more expensive, choice.
Exciting Variations to Try
Once you have mastered the base recipe, the possibilities for customization are endless. Here are a few ways to put a unique spin on these Salted Caramel Cookies:
Brown Butter Caramel Cookies: Elevate the dough by browning your butter before making the recipe. Browning the butter toasts the milk solids, adding a deeply nutty, complex, and aromatic flavor that pairs beautifully with caramel. Simply melt the butter in a saucepan over medium heat, swirling constantly, until it foams and turns a deep golden brown with a nutty aroma. Let it cool until it returns to a softened, spreadable state before proceeding with the recipe.
Chocolate and Caramel (Turtle Style): If you believe that chocolate makes everything better, you can easily turn these into Turtle-style cookies. Fold one cup of semi-sweet chocolate chips and half a cup of finely chopped, toasted pecans into the dough before chilling. Proceed with the recipe as normal, adding the caramel and salt at the end.
Spiced Caramel: For a warm, autumnal twist, add 1 teaspoon of ground cinnamon and a pinch of cardamom to your dry ingredients. The warm spices cut through the sweetness and add a cozy, bakery-fresh aroma to your kitchen.
Serving and Storing Suggestions
These cookies are an absolute revelation when served slightly warm. The caramel pool is gooey and stringy, and the buttery cookie melts in your mouth. If serving them a day or two after baking, pop them in the microwave for 5 to 10 seconds to reawaken the caramel.
To store baked cookies, place them in an airtight container at room temperature for up to 5 days. Because the caramel remains slightly sticky, it is best to store them in a single layer. If you must stack them, place a piece of wax paper or parchment paper between each layer to prevent them from fusing together into one giant cookie block.
Freezing Instructions: This dough freezes exceptionally well. After you have rolled the dough into balls and made the indentations, place the baking sheet in the freezer for an hour until the dough balls are rock solid. Transfer the solid dough balls to a zip-top freezer bag and freeze for up to 3 months. When the craving strikes, you can bake them directly from frozen. Just add 1 to 2 minutes to your baking time, then fill with caramel and salt as instructed.
Fun Facts: The History of Salted Caramel
While salted caramel feels like a distinctly modern obsession, its origins trace back to the 1970s in Brittany, a region in the northwest of France. Brittany has long been famous for its incredibly high-quality salted butter. A French chocolatier named Henri Le Roux wanted to create a unique candy that highlighted this regional specialty. He combined crushed nuts, sugar, and the famous Breton salted butter to create a salted butter caramel (caramel au beurre salé). It was an instant hit, eventually winning him the award for Best Sweet in France in 1980.
However, it was not until the late 1990s that Parisian pastry chef Pierre Hermé invented a salted caramel macaron, catapulting the flavor combination into the stratosphere of high-end culinary trends. By the late 2000s, the flavor had crossed the ocean, making its way into mainstream American coffee chains and ice cream brands, solidifying its place as one of the most beloved flavor pairings of the 21st century.
Conclusion
Baking the perfect Salted Caramel Cookie is a rewarding endeavor that yields a truly spectacular dessert. By understanding the importance of dough structure, honoring the mandatory chilling time, and selecting the right finishing salt, you can easily replicate this bakery-level treat in your own home kitchen. Whether you are baking them for a holiday exchange, a special dinner party, or simply a cozy night in, these cookies offer an unparalleled combination of textures and flavors. Prepare to be asked for the recipe every time you serve them. Happy baking!
Chewy Salted Caramel Cookies
Ingredients
Equipment
Method
- Whisk together the flour, baking soda, and fine table salt in a bowl. Set aside.
- In a mixer, beat the softened butter, brown sugar, and white sugar until light and fluffy (2-3 minutes).
- Add the whole egg, egg yolk, and vanilla extract. Mix until completely combined.
- Gradually add the dry ingredients to the wet ingredients, mixing on low just until the flour disappears. Do not overmix.
- Cover the dough tightly and chill in the refrigerator for at least 2 hours.
- Preheat oven to 350°F (175°C). Line baking sheets with parchment paper.
- Scoop the dough into 2-tablespoon sized balls. Place on the baking sheet and use your thumb or a spoon to press a deep indentation into the center of each.
- Bake for 10-12 minutes until edges are golden. Re-press the indentations gently if they puffed up during baking. Let cool on the pan for 5 minutes.
- Microwave the caramel candies and heavy cream in 30-second bursts, stirring until smooth and completely melted.
- Spoon the warm melted caramel into the center of each cookie and immediately sprinkle with flaky sea salt. Cool completely.