Shamrock Shake Pudding Cups
The Ultimate Shamrock Shake Pudding Cups Recipe: A Mint Chocolate Dream
When the days start getting just a little bit longer and the hint of spring is in the air, there is one iconic flavor combination that takes the culinary world by storm: the legendary Shamrock Shake. For decades, this beloved mint-flavored treat has signaled the approach of St. Patrick’s Day, offering a sweet, creamy, and vibrantly green experience that people eagerly wait all year to enjoy. But what if you could capture that exact same nostalgic magic in a spectacular, spoonable, make-ahead dessert? Enter the dazzling, completely irresistible Shamrock Shake Pudding Cups.
These breathtakingly gorgeous layered desserts take everything you adore about the classic drive-thru shake and elevate it into a stunning, no-bake treat that is perfect for entertaining, family dinners, or simply treating yourself on a Tuesday evening. Featuring a luscious, vibrant green layer of peppermint-infused vanilla pudding, followed by a rich, decadent layer of velvety chocolate pudding, and crowned with a towering cloud of freshly whipped cream and chopped chocolate shavings, these cups are a textural and visual masterpiece. In this comprehensive guide, we are going to dive deep into every single aspect of making these perfect Shamrock Shake Pudding Cups, ensuring your results are nothing short of spectacular.
Why You Will Absolutely Love This Shamrock Shake Pudding Cups Recipe
There are countless reasons why this particular dessert is destined to become a regular fixture in your recipe rotation, far beyond just the month of March. First and foremost is the undeniable ease of preparation. This is a purely no-bake dessert. You do not need to preheat an oven, you do not need to worry about water baths, and you certainly do not need advanced pastry chef skills. Whether you are a novice in the kitchen or a seasoned home cook looking for a quick win, this recipe delivers maximum impact with minimal effort.
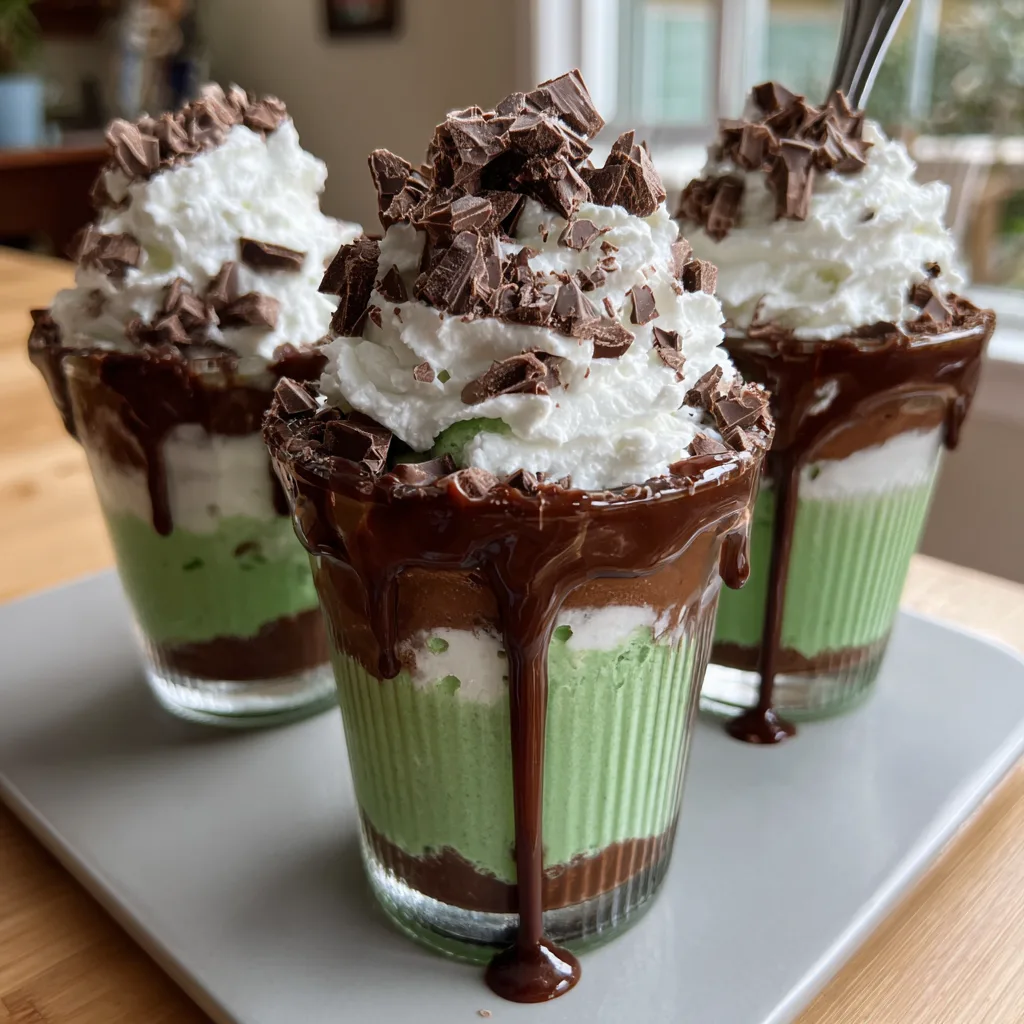
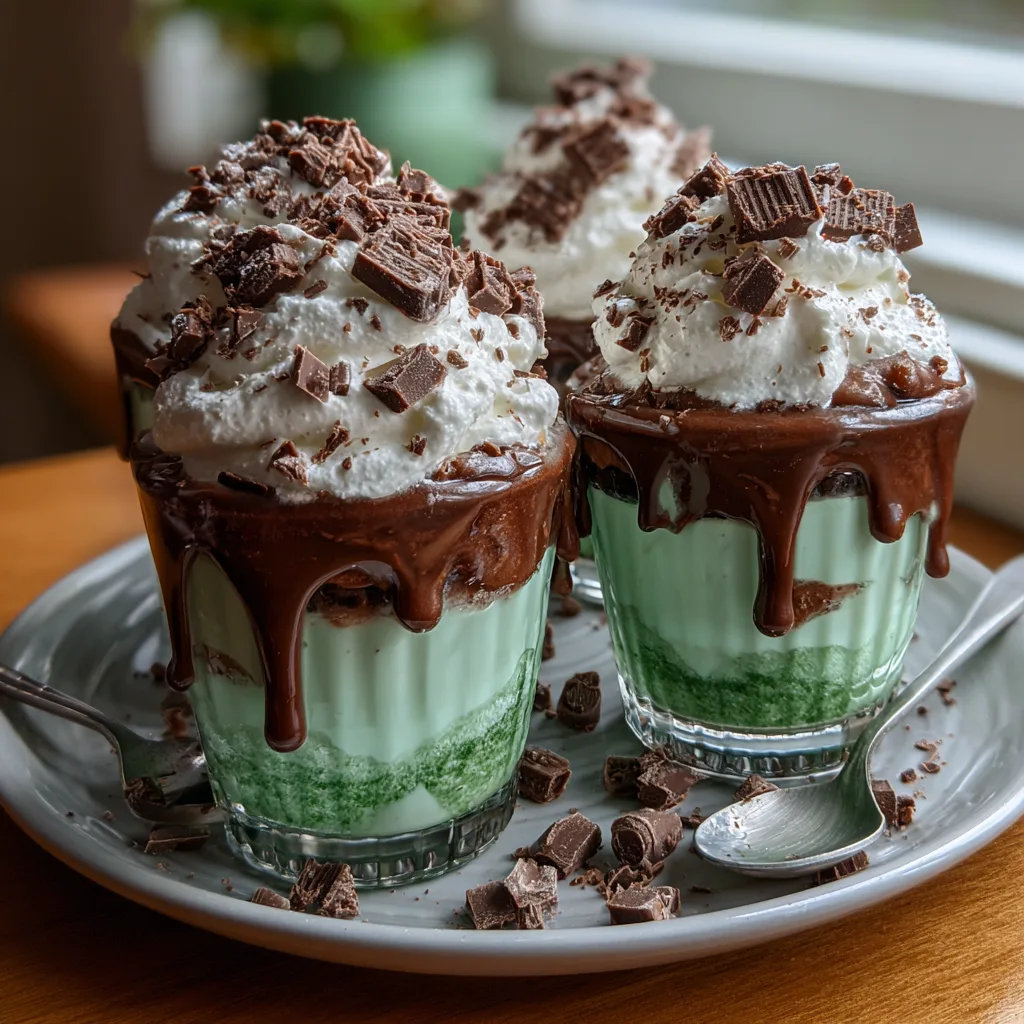
Furthermore, the visual appeal of these cups is off the charts. We eat with our eyes first, and the stark, beautiful contrast between the vivid, lucky-green mint layer, the deep, dark chocolate layer, and the snowy white whipped cream creates a show-stopping presentation. Placed in clear glass cups or jars, they look like they came straight out of a high-end bakery or a trendy dessert boutique. They are practically begging to be photographed and shared.
Finally, the flavor profile is perfectly balanced. Sometimes mint desserts can taste overpowering, almost like toothpaste, if not handled correctly. By using the right kind of extract and balancing it with the rich, slightly bitter notes of chocolate pudding and the light, airy sweetness of homemade whipped cream, you achieve a harmony of flavors that is incredibly refreshing yet deeply indulgent.
The Magic of Mint and Chocolate: A Match Made in Dessert Heaven
To truly appreciate the Shamrock Shake Pudding Cup, we must first pay homage to the legendary flavor pairing that makes it possible: mint and chocolate. This combination has been a favorite for generations, appearing in everything from ice cream and truffles to brownies and hot cocoa. But why do they work so incredibly well together?
It all comes down to the science of flavor contrasting. Chocolate, particularly cocoa, is rich, complex, and coats the palate with a heavy, luxurious mouthfeel. It brings warmth and depth. Mint, on the other hand, contains menthol, a compound that literally triggers the cold-sensitive receptors in your mouth, creating a cooling, refreshing sensation. When you combine the heavy richness of chocolate with the bright, palate-cleansing coolness of mint, you create a dynamic sensory experience. Each bite feels refreshing, preventing the dessert from feeling too heavy, which inevitably makes you want to keep going back for more.
Understanding Your Mint Extracts: Peppermint vs. Spearmint
A crucial detail in recreating the authentic “Shamrock Shake” flavor is knowing which extract to reach for in the baking aisle. You will typically see two main options: peppermint extract and mint (or spearmint) extract.
For this recipe, you strongly want to lean towards Peppermint Extract. Peppermint has a sharper, cooler, and more pronounced flavor that perfectly mimics the classic fast-food shake and pairs beautifully with chocolate. Spearmint, which is often just labeled as “mint extract,” has a sweeter, more herbaceous flavor profile that is more commonly associated with chewing gum or savory dishes. To get that iconic, nostalgic flavor, pure peppermint extract is your best friend.
Ingredients You Will Need
Gathering your ingredients is a breeze. Most of these items are pantry staples, making this an incredibly accessible dessert to whip up on a whim.
- – 1 box (3.4 oz) instant vanilla pudding mix
- – 1 box (3.4 oz) instant chocolate pudding mix
- – 4 cups cold whole milk (divided, 2 cups for each pudding flavor)
- – 1 teaspoon pure peppermint extract
- – 5 to 6 drops green liquid food coloring (or a small amount of green gel food coloring)
- – 1 cup heavy whipping cream (very cold)
- – 2 tablespoons powdered sugar
- – 1/2 teaspoon pure vanilla extract
- – 1/4 cup finely chopped milk chocolate or chocolate shavings for garnish
Step-by-Step Instructions
Follow these simple, detailed steps to create flawless layered pudding cups every single time.
- Prepare the Chocolate Pudding Layer: In a medium-sized mixing bowl, combine the 3.4 oz box of instant chocolate pudding mix with 2 cups of cold whole milk. Using a wire whisk, beat the mixture vigorously for about 2 minutes until it is completely smooth and begins to thicken.
- Chill the Chocolate Pudding: Place the bowl of chocolate pudding in the refrigerator for about 5 to 10 minutes to allow it to set up slightly. You want it firm enough to support the next layer without mixing together.
- Prepare the Mint Green Pudding Layer: In a separate, clean mixing bowl, whisk together the 3.4 oz box of instant vanilla pudding mix and the remaining 2 cups of cold whole milk. Whisk for 2 minutes until it begins to thicken.
- Flavor and Color the Mint Pudding: To the vanilla pudding, add 1 teaspoon of pure peppermint extract and 5 to 6 drops of green food coloring. Whisk thoroughly until the color is completely uniform and vibrant, and the extract is well incorporated. Adjust the coloring if you desire a deeper green.
- Layering the Cups: Set out 4 to 6 clear glass serving cups (ribbed glasses look especially beautiful). Spoon or pipe the green mint pudding evenly into the bottom of each cup, filling them about one-third of the way full. Gently tap the cups on the counter to level the pudding.
- Add the Chocolate Layer: Carefully spoon or pipe the chilled chocolate pudding directly on top of the green mint layer, filling the cups to the two-thirds mark. Smooth the tops gently with the back of a spoon. Place the cups in the refrigerator to chill while you prepare the topping.
- Whip the Cream: In a chilled mixing bowl, pour in the 1 cup of very cold heavy whipping cream. Add the 2 tablespoons of powdered sugar and 1/2 teaspoon of vanilla extract. Using a hand mixer or stand mixer fitted with a whisk attachment, beat the cream on medium-high speed until stiff peaks form. Be careful not to over-beat, or it will turn into butter!
- Garnish and Serve: Remove the pudding cups from the refrigerator. Generously dollop or pipe a high swirl of the freshly whipped cream onto the top of each cup. Sprinkle generously with the chopped milk chocolate or chocolate shavings. Serve immediately or return to the fridge until ready to eat.
Expert Tips for the Perfect Layered Pudding Cup
While this recipe is incredibly straightforward, a few professional tips can elevate your dessert from good to absolutely breathtaking.
Use Whole Milk: When making instant pudding, the fat content of your milk matters significantly. Skim or 1% milk will result in a thin, watery pudding that will not hold its layers well. Whole milk provides the necessary fat to create a thick, luscious, and velvety texture that sets up perfectly.
The Piping Bag Trick: If you want perfectly clean, distinct lines between your green and brown layers without any smudging on the sides of the glass, skip the spoon. Transfer your puddings into large zip-top bags or disposable piping bags, snip off the corner, and pipe the pudding directly into the center of the cups. This allows the pudding to naturally spread to the edges, keeping the sides of your glassware pristine.
Chill Your Beaters and Bowl: When it is time to make the homemade whipped cream, place your metal mixing bowl and the beaters in the freezer for about 15 minutes beforehand. Heavy cream whips up much faster and holds its volume much better when everything it touches is ice cold.
Choosing the Right Glasses for Presentation
Because this dessert is highly visual, the vessel you serve it in is almost as important as the dessert itself. You absolutely must use clear containers to show off the beautiful St. Patrick’s Day inspired layers.
Small, clear ribbed glass cups add a wonderful vintage, soda-shop aesthetic that perfectly matches the “shake” theme. Small mason jars are another fantastic rustic option, and they come with lids, making them exceptionally easy to store in the fridge. Stemless wine glasses or even clear plastic cocktail cups work wonderfully for larger parties where you want an elegant but easy-to-handle presentation.
Fun Variations and Customizations
The beauty of this base recipe is how easily it can be adapted to suit different tastes and occasions. Here are a few incredible ways to customize your Shamrock Shake Pudding Cups:
The Oreo Crunch: Mint and cookies are a phenomenal pairing. Crush up a sleeve of regular or mint-flavored Oreo cookies. Add a layer of cookie crumbs between the green pudding and the chocolate pudding, and sprinkle extra crumbs on top of the whipped cream. This adds a deeply satisfying textural crunch that contrasts beautifully with the smooth pudding.
The Adult “Boozy” Version: If you are hosting an adults-only St. Patrick’s Day gathering, you can easily spike these cups. Whisk a tablespoon of Irish Cream liqueur (like Baileys) or Crème de Menthe into the pudding layers before setting. It adds a sophisticated, warming kick that adults will absolutely love.
White Chocolate Mint: Not a fan of dark or milk chocolate? Swap the instant chocolate pudding mix for an instant white chocolate pudding mix. This will give you a stunning pastel green and creamy white layered dessert that is softer in flavor but equally delicious.
The Importance of Homemade Whipped Cream
It can be tempting to reach for a tub of frozen whipped topping or a can of spray cream from the supermarket to save a few minutes. While those will work in a pinch, we strongly urge you to take the extra three minutes to make homemade whipped cream.
Store-bought whipped toppings are often loaded with oils and artificial stabilizers that leave a greasy film on the palate. Canned spray cream, while fun, deflates within minutes, ruining the majestic presentation of your cups. Homemade whipped cream made from pure heavy cream, a touch of powdered sugar, and vanilla is infinitely richer, tastes cleaner, and will hold its gorgeous, fluffy shape for days in the refrigerator.
Preparing Ahead and Storage Instructions
One of the greatest benefits of this dessert is that it is a make-ahead dream, making it perfect for dinner parties and holiday gatherings where you want to minimize day-of stress.
Make Ahead: You can completely assemble these pudding cups, minus the whipped cream and chocolate shavings, up to 48 hours in advance. Simply cover each cup tightly with plastic wrap to prevent a skin from forming on the pudding, and store them in the refrigerator.
Adding the Topping: While homemade whipped cream is surprisingly stable, it is best to add the whipped cream and the chopped chocolate garnish just a few hours before you plan to serve them. This ensures the cream is at its peak fluffiness and the chocolate pieces remain crisp.
Leftovers: If you happen to have any leftovers (which is rare!), fully assembled cups can be stored in the refrigerator, loosely covered, for up to 3 days. The whipped cream may weep slightly after the second day, but the dessert will still taste incredibly delicious.
Frequently Asked Questions (FAQs)
Can I use a homemade pudding recipe instead of boxed mix?
Absolutely! If you have a favorite recipe for scratch-made vanilla and chocolate pudding, you can certainly use it. Just make sure to stir the peppermint extract and green food coloring into the vanilla pudding while it is still warm, and allow both puddings to cool completely before attempting to layer them.
Can I use plant-based milk?
This is tricky. Most instant pudding mixes rely on a specific enzyme reaction with dairy milk to thicken and set. Standard almond, soy, or oat milk will often leave you with a runny soup. If you must use a dairy-free alternative, look for a pudding mix specifically formulated for plant-based milks, or use less liquid than the box calls for, though the texture will not be as thick and creamy as the whole milk version.
Is gel food coloring better than liquid?
Gel food coloring is highly concentrated, meaning you need significantly less of it to achieve a bold, vibrant color without adding extra liquid to your pudding. Liquid drops work perfectly fine for this recipe, but if you have gel, just use a tiny toothpick swirl to start, as it is very potent.
Conclusion
St. Patrick’s Day celebrations, spring gatherings, or even just regular weeknight cravings deserve a dessert that is as fun to look at as it is to eat. These Shamrock Shake Pudding Cups capture the essence of the beloved seasonal treat in a format that is easy, accessible, and completely decadent. With their contrasting layers of cool mint, rich chocolate, and airy cream, they are a guaranteed crowd-pleaser that will have everyone asking for the recipe. So grab your mixing bowls, embrace the luck of the Irish, and whip up a batch of these spectacular layered treats today!
Shamrock Shake Pudding Cups
Ingredients
Equipment
Method
- In a medium bowl, whisk together the instant chocolate pudding mix and 2 cups of cold milk for 2 minutes until smooth and beginning to thicken. Chill in the refrigerator.
- In a separate bowl, whisk together the instant vanilla pudding mix and the remaining 2 cups of cold milk for 2 minutes.
- Add the peppermint extract and green food coloring to the vanilla pudding mixture. Whisk well until the color is uniform.
- Spoon or pipe the green mint pudding into the bottom of 4-6 clear glasses, filling them about one-third full.
- Carefully spoon or pipe the chilled chocolate pudding over the green layer, filling to the two-thirds mark. Chill cups while making the topping.
- In a chilled bowl, beat the heavy cream, powdered sugar, and vanilla extract until stiff peaks form.
- Top each pudding cup with a generous swirl of whipped cream and sprinkle with chopped milk chocolate. Serve immediately or keep chilled.