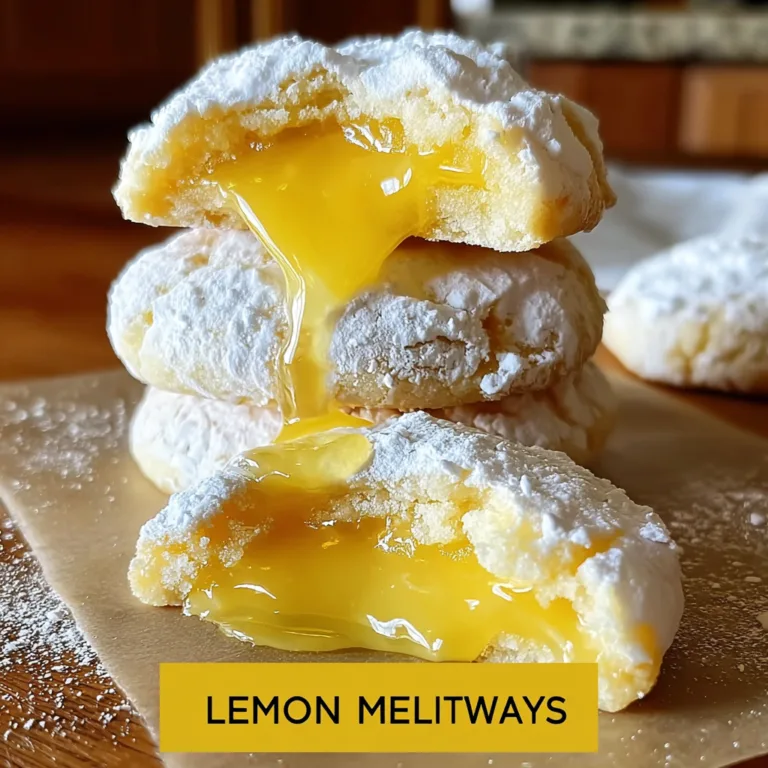
Shark Macarons
Bite-Sized Terror: How to Make Adorable Shark Macarons
Whether you are gearing up for the annual phenomenon of Shark Week, planning a spectacular ocean-themed birthday party for your little ones, or just looking to test your pastry skills with something incredibly fun, these Shark Macarons are guaranteed to make a massive splash. French macarons are notorious for their elegance and delicate nature, but who says they can’t be fierce, playful, and a little bit terrifying?

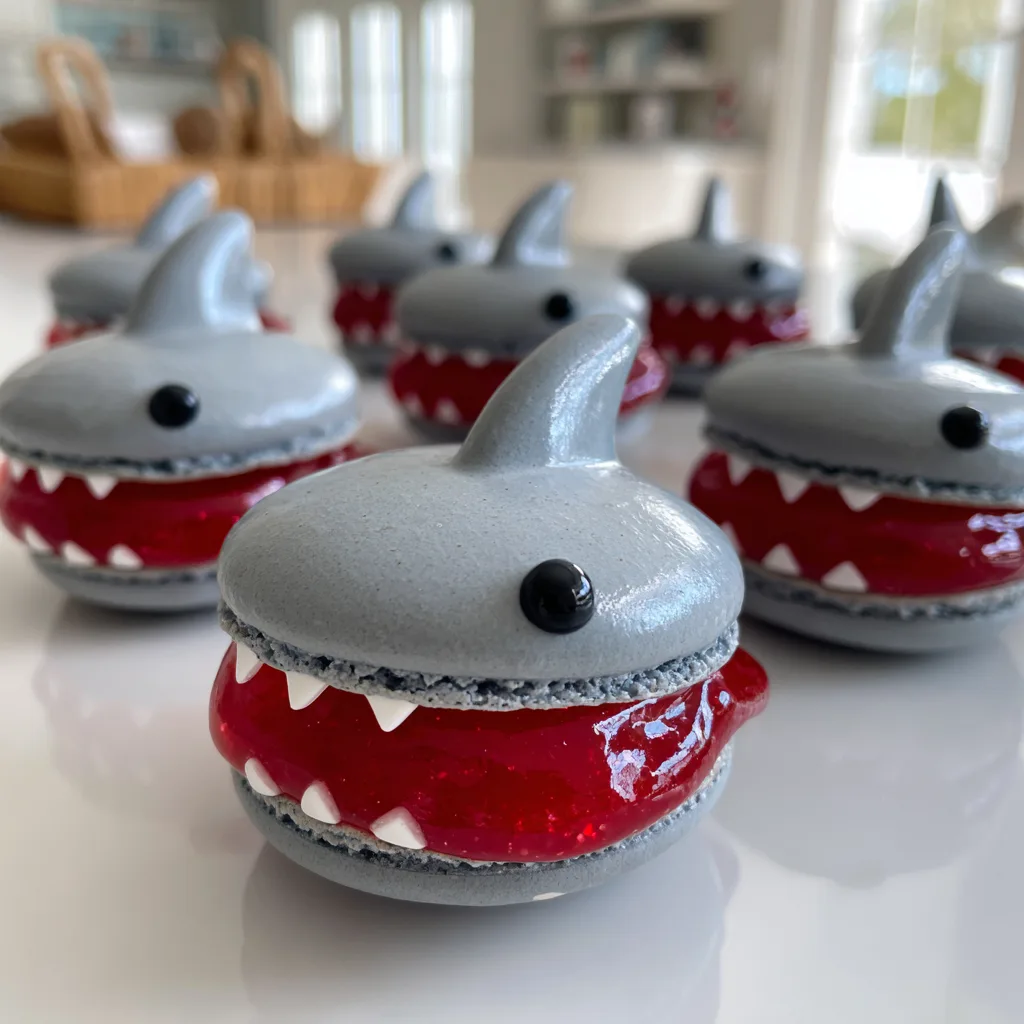
These adorable apex predators feature a classic, melt-in-your-mouth almond meringue shell tinted a perfect stony gray. But the real magic happens in the details: a tiny dorsal fin breaching the top, sharp white teeth piped along the edges, and a vibrant, “bloody” red center made from sweet strawberry jam or cherry ganache. They are a brilliant juxtaposition of sophisticated French pastry techniques and pure, unadulterated childhood fun. In this guide, we will walk you through exactly how to bring these delicious little monsters to life.
Why You Will Be Obsessed With These Ocean Treats
Macarons are often viewed as intimidating, reserved only for high-end patisseries. While they do require precision, decorating them opens up a world of creative freedom. These shark macarons take a standard recipe and elevate it through simple, clever design choices that absolutely anyone can master with a little patience.
The visual impact of these cookies is unmatched. When you set a platter of these little gray sharks on a dessert table, complete with their jagged teeth and bright red centers, they instantly become the centerpiece of the event. They are highly photogenic, infinitely shareable, and elicit gasps of delight from both kids and adults alike.
Beyond the novelty, the flavor profile is a classic, crowd-pleasing combination. The subtle, nutty sweetness of the gray almond shell pairs beautifully with the bright, tart acidity of the red jam or the rich creaminess of a red-tinted buttercream. The textural contrast between the crisp outer shell, the chewy interior, the soft fondant fin, and the sticky filling is an absolute dream for the palate.
Deconstructing the Shark: How It All Comes Together
Creating these sharks involves a few distinct components. Breaking the process down makes it much more manageable, even for novice bakers.
1. The Gray Shells: The foundation is a standard French or Italian macaron recipe, tinted with a few drops of black or slate-gray gel food coloring. Achieving that smooth, matte gray finish gives the sharks their authentic, leathery look. You will pipe standard circles, but the magic happens after they bake.
2. The Dorsal Fin: A shark isn’t a shark without its menacing fin. The easiest way to achieve this is by rolling out a small amount of gray fondant (tinted to match the shells) and cutting out small triangles. These are attached to the top shell using a tiny dab of edible glue or royal icing.
3. The Eyes and Gills: Simplicity is key here. Once the shells and fins are set, an edible black ink marker is your best friend. Two tiny dots for the soulless shark eyes, and three quick, sweeping lines on the side for the gills are all you need to bring the face to life.
4. The Sharp Teeth: The teeth are what make the shark! You can use stiff white royal icing piped through a very small round tip to create a jagged row of triangles along the bottom edge of the top shell. Alternatively, you can use tiny snips of white fondant or even mini marshmallows cut into points.
5. The “Bloody” Filling: The filling needs to be a vibrant, striking red to contrast with the gray and white. A high-quality strawberry or raspberry preserve works beautifully and gives a great shiny, wet look. If you prefer frosting, a white chocolate ganache tinted with intense red gel coloring is incredibly stable and delicious.
Step-by-Step Instructions
Ready to brave the waters? Here is how to create your own school of shark macarons.
- Prep the Macaron Batter: Sift your almond flour and powdered sugar together. Whip your egg whites and granulated sugar to stiff peaks. Gently fold the dry ingredients into the meringue (the macaronage process) while adding a few drops of black gel food coloring until the batter reaches a wet sand or slate gray color. The batter should flow off the spatula like a ribbon.
- Pipe and Rest the Shells: Pipe 1.5-inch circles onto a silicone mat or parchment paper-lined baking sheet. Tap the tray firmly on the counter to release air bubbles. Let the shells sit at room temperature for 30-45 minutes until a dull skin forms on the surface and they are no longer sticky to the touch.
- Bake and Cool: Bake the shells at 300°F (150°C) for about 14-16 minutes until they have developed “feet” and do not wobble when touched. Let them cool completely on the tray before attempting to remove them.
- Craft the Fins: While the shells cool, knead a small piece of white fondant with a tiny drop of black coloring until it matches your baked shells. Roll it out and cut small, curved triangles for the dorsal fins. Let them dry slightly so they stand up straight.
- Decorate the Top Shells: Pair up your completely cooled macaron shells by size. On the top shells, use a tiny dab of royal icing to affix the fondant fin to the top center. Use an edible black marker to draw two small eyes near the front and three small lines for gills on the side.
- Pipe the Teeth: Turn the top shells upside down. Using stiff white royal icing, pipe a continuous jagged zigzag line around the inner edge of the shell to look like a row of teeth. Let this icing set completely hard.
- Add the Filling and Assemble: Pipe a generous mound of your red filling (jam or red-tinted ganache) onto the center of the bottom shell. Gently press the decorated top shell onto the filling, pushing down just enough so the red filling oozes slightly out to meet the white teeth, creating a terrifyingly delicious mouth.
- Mature the Macarons: Place the assembled sharks in an airtight container in the refrigerator for 24 hours. This resting period allows the filling to soften the shells perfectly. Bring to room temperature before serving!
Expert Tips for Macaron Perfection
Macarons can be finicky. Keep these tips in mind to ensure your sharks are flawless:
- Use Gel Food Coloring: Liquid food coloring will add too much moisture to your delicate macaron batter and ruin the consistency. Always use highly concentrated gel pastes.
- Do Not Skip the Resting Phase: Allowing the piped shells to form a skin before baking is what creates those beautiful, signature ruffled “feet” at the bottom of the cookie. If you bake them wet, they will crack.
- Wipe Your Bowls with Vinegar: When whipping egg whites, even a speck of grease can ruin the volume. Wipe your mixing bowl and whisk attachment with white vinegar or lemon juice before starting to ensure a perfect meringue.
Conclusion
These Shark Macarons are a brilliant example of how baking can be both an art form and a source of incredible fun. By combining the delicate, refined texture of a classic French macaron with playful, creative decorations, you create a dessert that is as memorable to look at as it is to eat. Gather your piping bags, tint your batter gray, and dive into a baking project that will absolutely steal the show at your next summer party or Shark Week viewing!
Great White Shark Macarons
Ingredients
Equipment
Method
- Sift almond flour and powdered sugar together. Whip egg whites to soft peaks, gradually add granulated sugar, and whip to stiff glossy peaks.
- Fold dry ingredients into the meringue, adding black gel color to reach a gray shade. Fold until batter falls off the spatula in a continuous ribbon.
- Pipe 1.5-inch circles onto a silicone mat. Tap the tray to release air bubbles and let sit for 30-45 minutes until a skin forms.
- Bake at 300°F (150°C) for 14-16 minutes. Let cool completely before removing from the mat.
- Tint fondant gray and cut out small triangles for dorsal fins. Attach to the top shells using a tiny dab of royal icing.
- Use an edible black marker to draw eyes and gills on the top shells.
- Turn top shells over and pipe a jagged zigzag of stiff white royal icing around the inner rim to form teeth. Let dry completely.
- Pipe red jam or ganache onto the bottom shells. Gently press the decorated top shells onto the filling so the red shows through the teeth.
- Store assembled macarons in an airtight container in the fridge for 24 hours to mature before eating.