Smores Rice Krispie Treats
Ultimate S’mores Rice Krispie Treats: A Gooey, Crispy No-Bake Dessert
When it comes to nostalgic, crowd-pleasing desserts, few things can rival the classic, buttery goodness of a traditional cereal treat. But what happens when you take that beloved childhood staple and combine it with the campfire magic of a summertime s’more? You get the Ultimate S’mores Rice Krispie Treats—a ridiculously gooey, chocolate-packed, graham-cracker-infused masterpiece that requires absolutely no baking and comes together in just fifteen minutes. If you are looking for the perfect treat to bring to a potluck, a summer barbecue, or just a cozy movie night at home, this recipe is guaranteed to become your new obsession.
The beauty of this recipe lies in its contrasting textures and harmonious flavors. You get the airy, familiar crunch of traditional crisped rice cereal, married perfectly with the sturdy, honey-kissed snap of square graham cereal. Bind all of that together with copious amounts of rich, browned butter and ultra-gooey melted marshmallows, and then fold in pockets of semi-melted milk chocolate, and you have a dessert experience that is truly unparalleled. In this comprehensive guide, we will walk you through every single step, expert tip, and fun variation to ensure your S’mores Rice Krispie Treats turn out perfectly soft, stretchy, and irresistible every single time.
Why You Will Fall in Love With This Recipe
There are countless reasons why this specific recipe stands head and shoulders above standard cereal bars. First and foremost is the convenience factor. Because this is a no-bake dessert, you do not have to worry about preheating an oven or heating up your kitchen on a hot summer day. It utilizes just a single pot and a baking dish, making cleanup an absolute breeze.
Secondly, the flavor profile is incredibly balanced. Traditional cereal treats can sometimes lean towards being one-dimensionally sweet. By introducing graham cereal and a hint of salt (or using salted butter), you add a depth of flavor that cuts through the intense sweetness of the marshmallows. The pockets of milk chocolate provide a creamy, rich contrast to the crispy cereals, mimicking the exact sensation of biting into a freshly made s’more right off the campfire stick.
Finally, the texture of these treats is designed to remain soft for days. By using a specific ratio of butter to marshmallows, and by holding back a portion of the mini marshmallows to stir in at the very end, you create distinct pockets of fluffy marshmallow fluff throughout the bars, ensuring they never become rock-hard or overly dense.
Key Ingredients You Will Need
To achieve the ultimate gooey texture and authentic s’mores flavor, gathering the right ingredients is crucial. Here is exactly what you need:
- – 1/2 cup (1 stick) salted butter (Using salted butter balances the sweetness beautifully. If you only have unsalted, simply add 1/4 teaspoon of fine sea salt).
- – 16 ounces (about 1 large bag plus a little extra) mini marshmallows, divided. (Freshness is key here! Stale marshmallows will melt poorly and result in hard treats).
- – 4 cups crisped rice cereal (Classic Rice Krispies or a generic equivalent work perfectly).
- – 4 cups graham cracker square cereal (Such as Golden Grahams. These provide the essential honey-graham flavor without turning into soggy mush like crushed graham crackers would).
- – 1.5 cups chopped milk chocolate bars or high-quality milk chocolate chips. (Using chopped chocolate bars often yields better, more authentic gooey pockets than chips, which contain stabilizers that prevent them from melting fully).
- – 1 teaspoon pure vanilla extract (This elevates the marshmallow flavor).
Step-by-Step Instructions
Follow these detailed instructions to guarantee your S’mores Rice Krispie Treats turn out perfectly soft, chewy, and visually stunning.
- Prepare Your Pan: Begin by lining a 9×13-inch baking dish with parchment paper. Leave a little overhang on the sides—this will act as a sling, making it incredibly easy to lift the entire batch out of the pan for clean, even slicing later. Lightly grease the parchment paper with non-stick cooking spray or a thin coat of butter.
- Mix the Dry Ingredients: In a massively large mixing bowl, combine the 4 cups of crisped rice cereal and the 4 cups of graham cracker cereal. Toss them together so they are evenly mixed. Doing this beforehand ensures the melted marshmallow coats everything uniformly later on.
- Melt the Butter: Place a large pot or Dutch oven over medium-low heat. Add the 1/2 cup of salted butter. Allow it to melt completely. For an extra depth of flavor, you can let the butter cook for an additional 2-3 minutes until it begins to brown and give off a nutty aroma (this is called brown butter), but standard melted butter works wonderfully too.
- Melt the Marshmallows: Once the butter is melted, reduce the heat to the lowest possible setting. Add the vanilla extract, and then add about 12 ounces of the mini marshmallows (reserve the remaining 4 ounces for later). Stir constantly with a silicone spatula or wooden spoon until the marshmallows are completely melted and the mixture is smooth, glossy, and homogeneous. Do not rush this step with high heat, or the sugar will harden!
- Combine Wet and Dry: Immediately remove the pot from the heat. Pour the hot marshmallow mixture over the prepared cereal mixture in your large bowl (or add the cereals directly into the pot if it is large enough). Using a greased spatula, gently fold the mixture together until all the cereal pieces are thoroughly coated in the sticky marshmallow goodness.
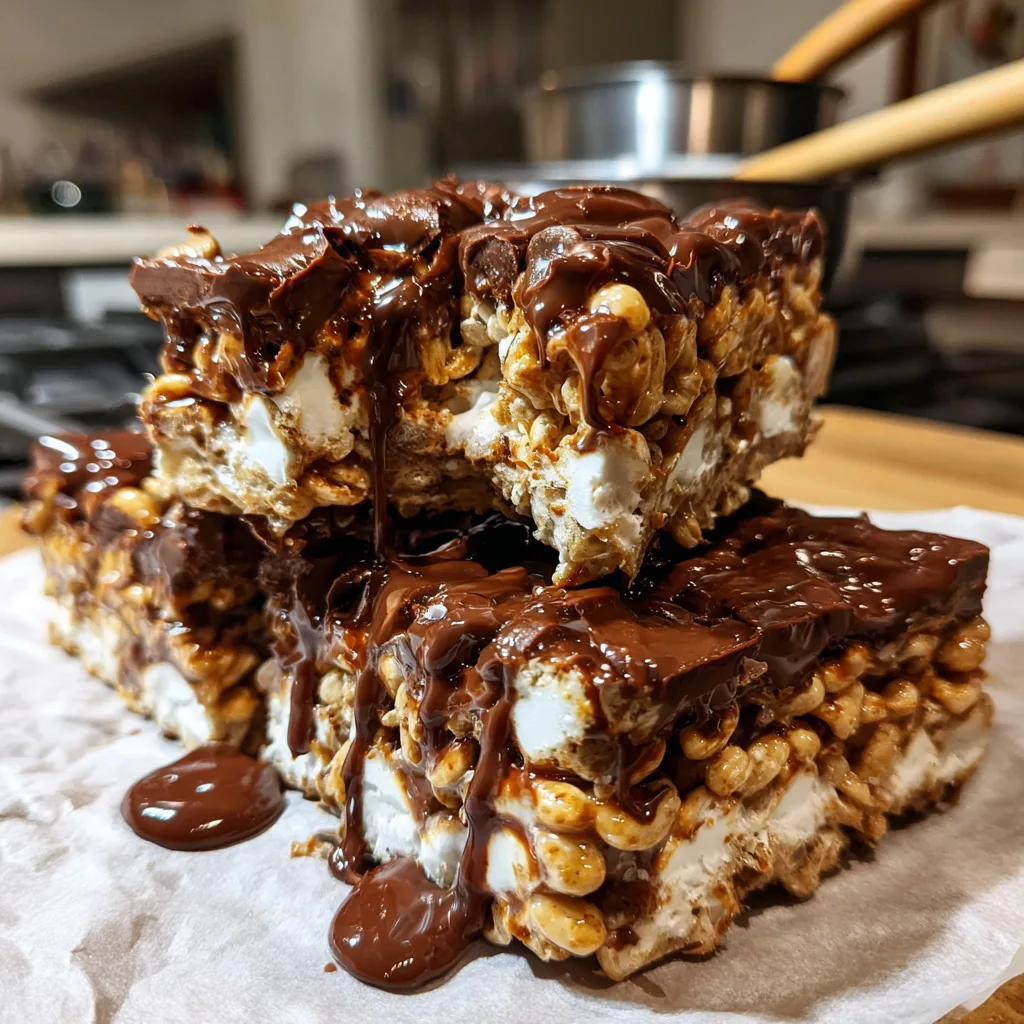
- Add the Mix-Ins: Once the cereal is mostly coated, let the mixture cool for just about 60 seconds. Then, quickly and gently fold in the reserved 4 ounces of whole mini marshmallows and the 1.5 cups of chopped milk chocolate. Waiting a brief moment prevents the chocolate from melting entirely into a brown puddle, allowing it to retain distinct, gooey chunks, while the whole marshmallows will soften but keep their shape.
- Press into the Pan: Transfer the sticky mixture into your prepared 9×13-inch pan. Here is the most important rule: DO NOT pack it down hard! Using lightly greased hands or a greased piece of wax paper, gently press the mixture evenly into the pan. Pressing too firmly will compress the cereal and result in tough, dense treats.
- Cool and Serve: Allow the treats to set at room temperature for at least 1 hour. Once they are firm enough to hold their shape, use the parchment paper overhang to lift them out of the pan. Place on a cutting board and slice into generous squares.
Expert Tips for the Perfect Gooey Texture
Creating the perfect cereal treat is an art and a science. Here are some expert secrets to ensure yours are the absolute best.
Low and Slow is the Way to Go: When melting your butter and marshmallows, patience is your best friend. Using high heat to speed up the process causes the sugars in the marshmallows to crystallize. This leads to treats that are rock-hard once they cool. Always use low heat and remove the pot from the stove the exact second the last marshmallow lump disappears.
The Freshness Factor: Never use a bag of marshmallows that has been sitting open in your pantry for six months. Stale marshmallows have lost their moisture content, which means they will not melt smoothly and will yield dry, brittle treats. Always purchase a fresh bag specifically for this recipe.
The Gentle Press: As mentioned in the instructions, pressing the mixture too tightly into the pan is the most common mistake people make. You want to coax the mixture into the corners, not compact it like you are paving a driveway. A light touch keeps the pockets of air intact, keeping the treats soft and chewy.
Grease Everything: Melted marshmallow is incredibly sticky. Save yourself a massive headache by lightly coating your mixing bowl, your spatula, and your hands with non-stick cooking spray before you begin mixing and pressing. It makes the entire process incredibly smooth.
Exciting Variations to Try
While this recipe is phenomenal as written, it also serves as a fantastic canvas for your culinary creativity. Here are some fun ways to switch up the flavor profile:
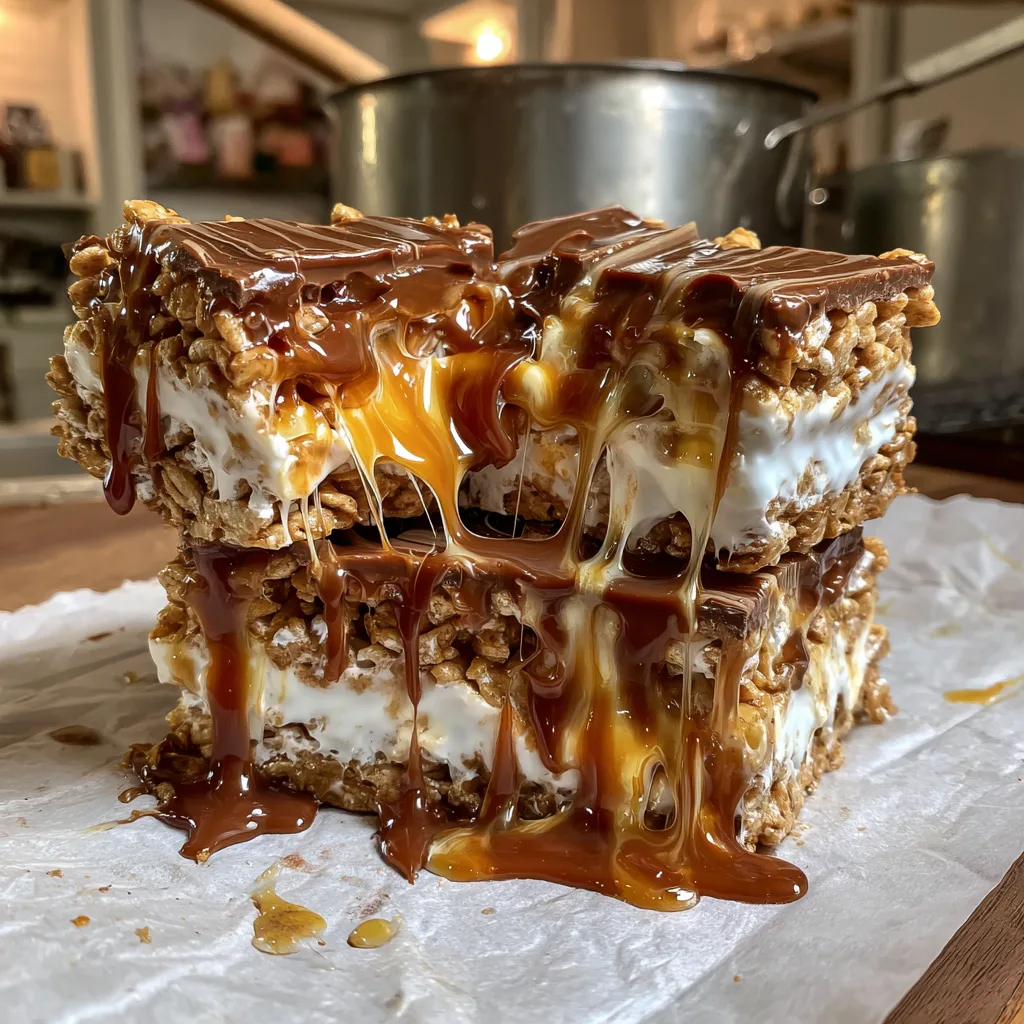
Peanut Butter S’mores: Peanut butter and chocolate are soulmates. Try swirling 1/3 cup of creamy peanut butter into the melted marshmallow mixture right before you add the cereals. You can also toss in half a cup of peanut butter chips along with the chocolate chunks.
Dark Chocolate Sea Salt: If you prefer desserts that are less cloyingly sweet, swap the milk chocolate for high-quality dark chocolate chunks (60% cacao or higher). Once you have pressed the treats into the pan, sprinkle the top generously with flaky Maldon sea salt. The contrast between sweet, bitter, and salty is extraordinary.
Campfire Toasted: For a true campfire flavor, take a culinary blowtorch and lightly toast the top layer of the treats after you have pressed them into the pan. The slightly charred, caramelized flavor takes these to a whole new level.
Nutty S’mores: Fold in a cup of toasted, chopped pecans, walnuts, or sliced almonds for an added crunch and a roasted, earthy flavor that pairs beautifully with the chocolate and graham.
Storage and Make-Ahead Instructions
If you somehow manage to have leftovers, proper storage is crucial to maintaining that perfect, soft texture.
Room Temperature: Store the cut squares in an airtight container at room temperature for up to 3 days. To prevent them from sticking together, place layers of parchment paper or wax paper between the treats. Do not store them in the refrigerator, as the cold temperatures will harden the butter and marshmallows, making the treats difficult to eat.
Freezing: Yes, you can freeze cereal treats! Wrap each individual square tightly in plastic wrap, then place all the wrapped squares into a large, heavy-duty freezer bag. They can be frozen for up to 6 weeks. When you are ready to enjoy one, simply let it sit at room temperature for about 15-20 minutes to thaw and soften.
Fun Facts and Cultural Context of S’mores and Cereal Treats
Did you know that the original recipe for “S’mores” (short for “Some Mores”) first appeared in a 1927 Girl Scout guidebook titled *Tramping and Trailing with the Girl Scouts*? The recipe was credited to Loretta Scott Crew, who reportedly made them for Girl Scouts by the campfire. The combination of graham crackers, chocolate, and toasted marshmallow quickly became a camping staple across North America.
On the other hand, the iconic Rice Krispies Treat was invented slightly later, in 1939, by Kellogg Company employees Mildred Day and Malitta Jensen. They created the recipe for a Camp Fire Girls bake sale. The brilliant combination of butter, marshmallows, and puffed rice was an instant hit, and Kellogg’s soon began printing the recipe directly on the cereal boxes.
By combining these two historically significant mid-century American desserts, you are partaking in a rich tradition of sweet, simple, and utterly comforting culinary history. The Ultimate S’mores Rice Krispie Treat is more than just a snack; it is a celebration of childhood joy.
Frequently Asked Questions
Can I use marshmallow fluff instead of marshmallows?
While marshmallow fluff (creme) is delicious, it does not contain the same gelatin structure as regular marshmallows. It will not set up properly, and your treats will be far too sticky and fall apart. Stick to standard or mini marshmallows for this recipe.
Why did my treats turn out hard?
This is usually caused by two things: cooking the marshmallow/butter mixture on heat that is too high, or pressing the mixture too firmly into the pan. Remember: low heat and a gentle touch!
Can I make these gluten-free?
Absolutely! Simply ensure that you purchase a gluten-free brand of crisped rice cereal (standard Rice Krispies contain malt flavoring, which is not gluten-free) and a certified gluten-free graham-style cereal. Ensure your marshmallows and chocolate are also certified gluten-free.
Can I use regular-sized marshmallows instead of mini?
Yes, you can use regular-sized marshmallows for the melting process. You will need about 40 standard marshmallows to equal 10 ounces. However, for the extra mix-ins at the end, mini marshmallows work much better as they distribute evenly throughout the treats without creating massive, unwieldy pockets of plain marshmallow.
Enjoy crafting these phenomenal treats. The Ultimate S’mores Rice Krispie Treats are sure to bring smiles, sticky fingers, and requests for the recipe wherever you take them!
S’mores Rice Krispie Treats
Ingredients
Equipment
Method
- Line a 9×13-inch baking pan with parchment paper and lightly grease with non-stick spray.
- In a very large bowl, toss together the crisped rice cereal and graham cracker cereal.
- In a large pot over medium-low heat, melt the butter completely.
- Reduce heat to low. Add vanilla extract and 12 ounces of the mini marshmallows. Stir constantly until completely melted and smooth.
- Remove from heat immediately and pour the marshmallow mixture over the cereals. Gently fold until coated.
- Let cool for 60 seconds, then gently fold in the remaining 4 ounces of mini marshmallows and the chopped milk chocolate.
- Transfer the mixture into the prepared pan. Using greased hands or a spatula, very lightly press the mixture into an even layer. Do not pack firmly.
- Allow to set at room temperature for at least 1 hour before slicing into squares and serving.