Strawberry Cheesecake Dump Cake
The Ultimate Strawberry Cheesecake Dump Cake Recipe
There are few desserts that can rival the sheer comfort, indulgence, and simplicity of a classic dump cake. But when you elevate that humble concept by introducing the rich, tangy flavors of cheesecake and the bright, fruity sweetness of summer strawberries, you create something truly extraordinary. This Strawberry Cheesecake Dump Cake is a revelation in home baking. It delivers all the complex flavor profiles of a labor-intensive, multi-layer dessert, yet it requires only a fraction of the time, effort, and cleanup. Whether you are baking for a busy weeknight family dinner, preparing a dish for a weekend neighborhood potluck, or simply satisfying a sudden, intense craving for something sweet, this recipe is guaranteed to become a permanent fixture in your culinary repertoire.
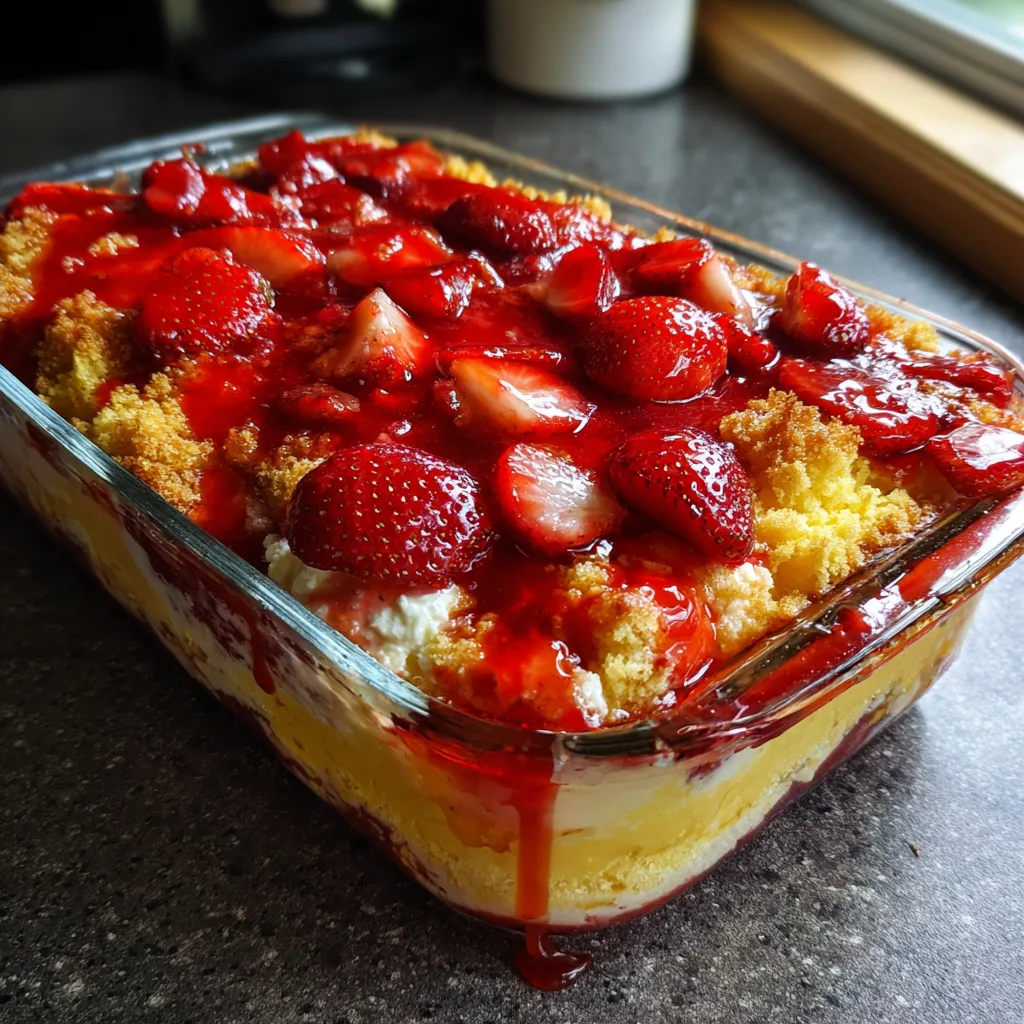
Imagine pulling a bubbling, golden-brown casserole dish out of the oven. The edges are caramelized and sticky with concentrated fruit juices, the top is a crispy, buttery crust that shatters delightfully under a spoon, and beneath that crust lies a molten layer of sweet strawberry filling interspersed with rich, creamy pockets of sweetened cream cheese. It is a textural masterpiece that requires absolutely no mixing bowls for the cake batter and no intricate pastry skills. In this comprehensive guide, we will explore everything you need to know to achieve dump cake perfection, from the science behind the buttery crust to creative variations that will keep this recipe feeling fresh and exciting all year round.

What Exactly is a Dump Cake?
If you are new to the world of dump cakes, the name might sound a little unconventional, perhaps even unappetizing. However, the term refers purely to the wonderfully simplistic method of preparation. The concept originated in the mid-20th century in the United States, rising to prominence alongside the popularization of boxed cake mixes and canned fruit fillings. The core philosophy of a dump cake is that you literally “dump” the ingredients into a baking dish in specific layers, without stirring them together, and let the magic of the oven do the heavy lifting.
Traditionally, a dump cake consists of a fruit base (often cherry or crushed pineapple), topped with a dry layer of boxed cake mix, and finally crowned with pats of butter or melted butter. As the dessert bakes, the juices from the fruit bubble up, and the butter melts down into the dry cake mix. These elements combine to create a remarkable topping that lands somewhere between a fruit cobbler crust, a buttery crumble, and a dense, chewy cake. It is baking alchemy at its finest. By adding a cream cheese layer to this traditional structure, we are bridging the gap between a standard fruit cobbler and a rich, decadent cheesecake.
Why You Will Fall in Love With This Strawberry Cheesecake Version
While standard dump cakes are delicious in their own right, the addition of the cheesecake element transforms this dessert from a simple, sweet treat into a sophisticated indulgence. Strawberry and cheesecake are a classic flavor pairing for a reason. The natural acidity and bright, fruity notes of the strawberries perfectly cut through the heavy, rich density of the cream cheese.
Furthermore, the textures in this specific recipe are phenomenal. You get the jammy, syrupy consistency of the baked strawberry filling, the soft, velvety smoothness of the baked cream cheese dollops, and the satisfying crunch of the buttery cake mix topping. Because you are using a combination of canned pie filling and fresh strawberries, you get both the concentrated, reliable sweetness of the preserve and the fresh, vibrant pop of real fruit. It is a dessert that looks delightfully rustic and messy but tastes like it came from a high-end bakery.
Ingredients You Will Need
One of the greatest appeals of this recipe is its short, accessible ingredient list. Most of these items can be kept in your pantry or fridge for weeks, meaning you can whip this dessert up on a whim. Here is what you will need to gather:
- – 2 cans (21 ounces each) strawberry pie filling
- – 1 cup fresh strawberries (hulled and sliced or quartered)
- – 1 package (8 ounces) cream cheese (softened to room temperature)
- – 1/4 cup powdered sugar (confectioners’ sugar)
- – 1 teaspoon pure vanilla extract
- – 1 box (15.25 ounces) yellow cake mix or white cake mix
- – 1 and 1/2 cups (3 sticks) unsalted butter (cold and sliced into thin pats)
A Deep Dive into the Key Ingredients
The Fruit Base: Using two cans of strawberry pie filling provides a thick, syrupy, and reliable base that guarantees a gooey dessert. However, relying solely on canned filling can sometimes taste a bit one-dimensional. That is why we incorporate a cup of fresh, sliced strawberries. The fresh berries break down during baking, releasing their natural juices and adding a bright, tart freshness that balances the heavy syrup of the canned filling.
The Cheesecake Layer: It is absolutely crucial that your cream cheese is softened to room temperature before you begin. If you try to mix cold cream cheese with powdered sugar, you will end up with a lumpy mixture that will not distribute well in the cake. We sweeten the cream cheese slightly with powdered sugar rather than granulated sugar to ensure a perfectly smooth, grit-free texture. A dash of pure vanilla extract adds warmth and depth to the cheese mixture, mimicking the flavor profile of a traditional baked New York cheesecake.
The Cake Mix: Yellow cake mix is the gold standard for this recipe. It contains slightly more fat (often simulating egg yolks) than white cake mix, resulting in a richer, more buttery crumble topping. However, if you prefer a lighter, more vanilla-forward flavor, a white cake mix or even a French vanilla mix will work beautifully. For a fun twist, you could even experiment with a strawberry cake mix to double down on the berry flavor!
The Butter: The butter is arguably the most important component of the topping. You must use unsalted butter so you can control the sodium level of the dessert. More importantly, the method of application matters. Slicing cold butter into thin squares and placing them evenly over the dry cake mix ensures that as the oven heats up, the butter slowly melts and saturates the powder. This prevents those dreaded “dry spots” of unbaked flour that can sometimes plague poorly executed dump cakes.
Step-by-Step Baking Instructions
Preparing this dessert is an exercise in delightful simplicity. Follow these steps for foolproof results every single time.
- Preparation: Preheat your oven to 350°F (175°C). Lightly grease a 9×13 inch glass or ceramic baking dish with non-stick cooking spray or a light coating of butter. This will make serving and cleanup much easier later on.
- Create the Fruit Layer: Open the cans of strawberry pie filling and pour them evenly into the bottom of your prepared baking dish. Use a spatula to spread the filling out so it reaches all the corners. Scatter the sliced fresh strawberries evenly over the top of the pie filling.
- Mix the Cheesecake Dollops: In a medium-sized mixing bowl, combine the softened room-temperature cream cheese, the powdered sugar, and the vanilla extract. Using a hand mixer on medium speed, beat the mixture until it is completely smooth, fluffy, and free of any lumps. This should take about 1 to 2 minutes.
- Add the Cheesecake Layer: Using a spoon or a small cookie scoop, drop dollops of the cream cheese mixture evenly across the top of the strawberry layer. Do not attempt to spread the cream cheese flat; leave it in distinct dollops. As the cake bakes, these will turn into glorious, distinct pockets of cheesecake goodness hiding beneath the crust.
- Apply the Cake Mix: Open the box of dry yellow cake mix and sprinkle it evenly over the entire dish, covering both the strawberry filling and the cream cheese dollops. Try to ensure the layer is relatively even, paying special attention to the corners and edges of the dish. Do not stir or mix the powder into the wet ingredients below!
- The Butter Topping: Take your cold sticks of butter and slice them into thin pats, roughly 1/8 to 1/4 inch thick. Lay these butter slices in a single layer over the top of the dry cake mix, covering as much surface area as humanly possible. If there are large gaps of dry powder showing, the butter will not reach them during baking.
- Bake to Perfection: Place the baking dish in the center rack of your preheated oven. Bake for 40 to 45 minutes. You will know the dessert is done when the fruit filling is actively bubbling up around the edges of the dish, and the cake mix topping has turned a deep, golden brown and looks crispy.
- Cool and Set: This is the hardest part. Remove the dump cake from the oven and let it sit on a wire cooling rack for at least 15 to 20 minutes before serving. The filling will be molten hot right out of the oven, and allowing it to rest gives the fruit juices time to thicken and the cream cheese time to set up slightly, making it much easier to scoop.
The Science of the Butter and Cake Mix Layer
A common debate in the dump cake community is whether to use melted butter or thinly sliced cold butter. While pouring melted butter over the dry mix is certainly faster, it often pools in specific areas, leaving large, dusty patches of dry cake mix that are unpleasant to eat.
Using thinly sliced, cold butter is highly recommended. As the butter slowly melts in the oven, it acts like a self-basting system for the cake mix. The water content in the butter creates steam, which helps cook the flour, while the milk solids and butterfat coat the sugar and flour particles, encouraging caramelization and creating that signature buttery crunch. Taking the extra three minutes to slice the butter ensures a perfectly uniform, crispy topping that is essentially a giant shortbread cookie baked right on top of your fruit.
Exciting Variations and Flavor Tweaks
The dump cake formula is incredibly forgiving and begs for experimentation. Once you master this Strawberry Cheesecake version, try mixing things up with these ideas:
Berry Medley Cheesecake Dump Cake: Instead of just strawberries, use one can of strawberry pie filling and one can of blueberry or blackberry pie filling. Toss in a handful of fresh raspberries. The mixed berry flavor profile is complex and stunning.
Chocolate Covered Strawberry Dump Cake: Use a devil’s food or chocolate fudge boxed cake mix instead of yellow. The rich, dark cocoa flavors pair wonderfully with the sweet strawberries and the tangy cream cheese, creating a dessert reminiscent of a chocolate-dipped fruit platter.
Nutty Crunch Addition: Before adding the butter layer, sprinkle a half cup of chopped pecans, walnuts, or sliced almonds over the dry cake mix. The nuts will toast beautifully in the oven, adding an earthy flavor and an incredible crunch that contrasts perfectly with the soft fruit beneath.
Serving Suggestions for a Crowd
While this dessert is phenomenally delicious on its own, serving it warm requires a creamy accompaniment to provide a temperature contrast and cut through the intense sweetness.
The absolute best way to serve Strawberry Cheesecake Dump Cake is warm, scooped generously into a wide bowl, and topped with a large scoop of premium vanilla bean ice cream. As the cold ice cream hits the hot cobbler crust, it begins to melt, creating a rich, creamy sauce that mingles with the strawberry juices.
Alternatively, a dollop of freshly whipped cream, lightly sweetened and flavored with a dash of vanilla or even a splash of almond extract, is a lighter but equally delicious topping option. If you are serving this at a summer barbecue, a garnish of a fresh, bright green mint sprig on top of the whipped cream adds a beautiful visual pop of color and a refreshing aroma.
Storage and Reheating Instructions
Because this dessert contains dairy (the cream cheese), any leftovers must be stored in the refrigerator. Cover the baking dish tightly with plastic wrap or aluminum foil, or transfer the leftovers to an airtight storage container. It will keep well in the fridge for up to 4 days.
While you can certainly eat it cold straight from the fridge (the cream cheese layer gets deliciously dense and fudgy when chilled!), it is best enjoyed warm. To reheat a single serving, place it in a microwave-safe bowl and heat on high for 30 to 45 seconds until warmed through. Be careful, as the fruit filling can become incredibly hot very quickly. If you want to reheat the entire pan and revive the crispy crust, cover the dish with foil and place it in a 350°F oven for about 15-20 minutes until bubbling.
Conclusion
The Strawberry Cheesecake Dump Cake is a testament to the fact that spectacular desserts do not need to be complicated or stressful. By layering convenient pantry staples with a touch of fresh fruit and rich cream cheese, you create a rustic, deeply comforting dessert that is guaranteed to elicit smiles and requests for the recipe. The textural interplay between the crispy, buttery cake topping, the molten strawberry filling, and the creamy pockets of cheesecake is nothing short of addictive. So the next time you need a stunning dessert with minimal effort, remember this recipe, grab your 9×13 pan, and get ready to enjoy one of the easiest, most satisfying baking projects you will ever undertake.
Strawberry Cheesecake Dump Cake
Ingredients
Equipment
Method
- Preheat your oven to 350°F (175°C). Lightly grease a 9×13 inch baking dish.
- Spread the strawberry pie filling evenly into the bottom of the prepared baking dish. Scatter the sliced fresh strawberries over the top.
- In a medium bowl, beat the softened cream cheese, powdered sugar, and vanilla extract until smooth and creamy.
- Drop spoonfuls of the cream cheese mixture evenly over the strawberry layer.
- Sprinkle the dry yellow cake mix evenly over the entire dish, covering the fruit and cream cheese layers completely.
- Arrange the cold, thinly sliced butter pats in a single layer over the dry cake mix, covering as much surface area as possible to prevent dry spots.
- Bake for 40 to 45 minutes, or until the topping is golden brown and the fruit filling is bubbling around the edges.
- Remove from the oven and let cool for at least 15-20 minutes before serving. Serve warm with vanilla ice cream.