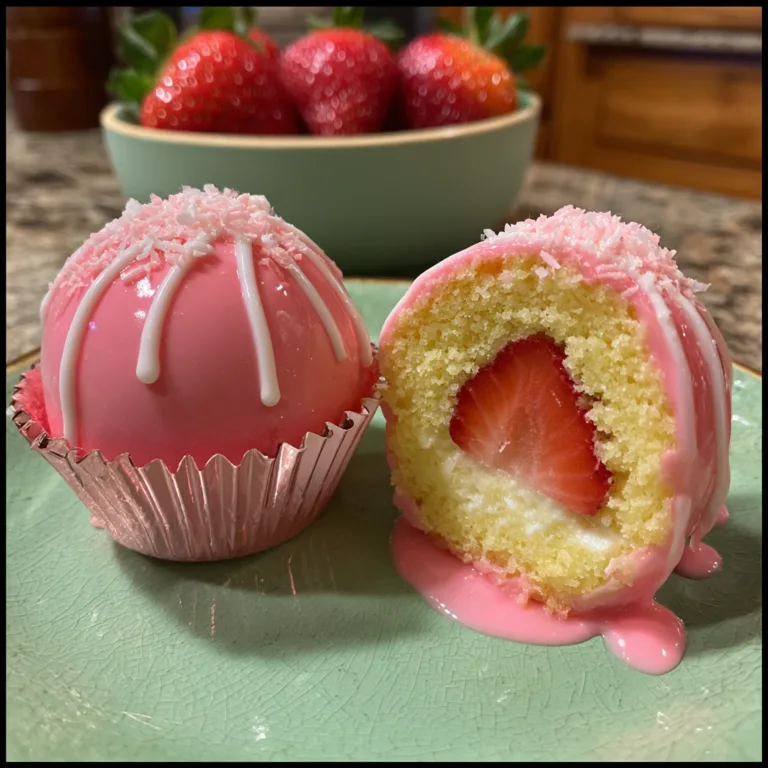
Strawberry Crunch Cups
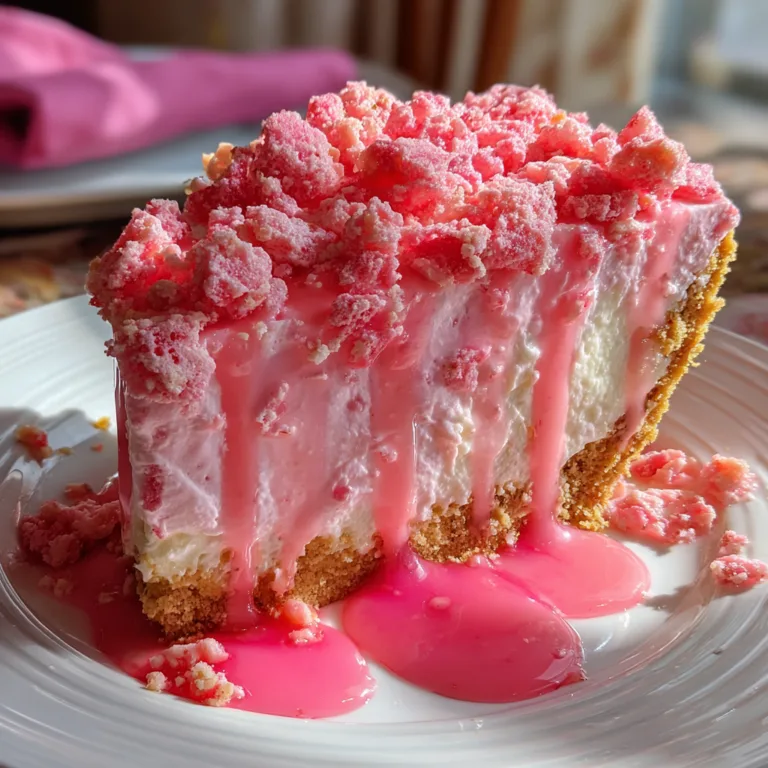
The Ultimate No-Bake Strawberry Crunch Cheesecake Cups
If you grew up chasing the ice cream truck for those iconic strawberry shortcake bars, get ready for a wave of nostalgia. These Strawberry Crunch Cheesecake Cups take all those beloved flavors—the creamy vanilla center, the sweet strawberry glaze, and that irresistible pink-and-gold crunchy coating—and deconstruct them into a stunning, portable parfait. They are the perfect no-bake treat for summer picnics, baby showers, or just a Tuesday night when you need something indulgent.
There is something incredibly satisfying about a dessert you can see before you eat. The clear cups showcase beautiful layers of bright red macerated strawberries, velvety smooth cheesecake mousse, and a buttery, sandy crunch that adds the perfect texture to every bite. Best of all? You don’t even have to turn on the oven. This recipe is all about assembly, making it a stress-free option for entertaining.
Whether you call them strawberry shooters, parfaits, or dessert cups, one thing is certain: they disappear fast. The combination of tangy cream cheese, sweet fluffy cream, and fresh fruit is timeless, but it’s that signature “crunch” layer that elevates these cups from simple to spectacular.
Why You’ll Love This Recipe
- No Baking Required: Keep your kitchen cool; this is entirely a mix-and-assemble dessert.
- Make-Ahead Friendly: These cups actually taste better after sitting for an hour or two, making them perfect for party prep.
- Portion Controlled: Individual cups mean no messy slicing or serving during your event.
- Customizable: You can easily swap the fruit or the cookie base to suit your pantry.

Ingredients
For the Strawberry Crunch
- Golden Oreos – 20 cookies (crushed). These form the buttery vanilla base of the crunch.
- Unsalted Butter – 4 tablespoons (melted). This binds the crumbs together.
- Strawberry Gelatin Powder – 3 tablespoons (like Jell-O brand). This provides that signature pink color and concentrated strawberry flavor.
For the Cheesecake Filling
- Cream Cheese – 8 oz (softened to room temperature). Full fat works best for structure.
- Powdered Sugar – 1 cup. Dissolves instantly for a smooth texture.
- Vanilla Extract – 1 teaspoon.
- Heavy Whipping Cream – 1 ½ cups (very cold). This lightens the mixture into a mousse.
For the Strawberry Layer
- Fresh Strawberries – 1 lb (washed, hulled, and diced).
- Granulated Sugar – 2 tablespoons. Helps draw the juices out of the berries to create a natural syrup.
- Lemon Juice – 1 teaspoon (optional). Keeps the berries bright and adds a little zing.
Instructions
Step 1: Prepare the Strawberry Crunch
1. Place the Golden Oreos in a food processor or a sealed zip-top bag. Pulse or crush them until you have coarse crumbs. Avoid turning them into fine dust; you want some texture.
2. Transfer the crumbs to a medium bowl. Sprinkle the strawberry gelatin powder over the crumbs and toss to distribute evenly.
3. Pour the melted butter over the mixture and stir with a fork until the crumbs look like wet sand and start to clump together. The mixture should be a speckled pink and gold. Set aside.
Step 2: Macerate the Strawberries
4. In a small bowl, combine the diced fresh strawberries with the granulated sugar and lemon juice.
5. Stir well and let them sit for at least 15 minutes while you make the filling. This process (maceration) draws out the liquid, creating a glossy, natural strawberry syrup.
Step 3: Make the Cheesecake Mousse
6. In a large mixing bowl, beat the softened cream cheese, powdered sugar, and vanilla extract until completely smooth and creamy. There should be no lumps.
7. In a separate cold bowl, whip the heavy whipping cream until stiff peaks form.
8. Gently fold the whipped cream into the cream cheese mixture using a spatula. Do this carefully to keep the mixture light and airy. Transfer the filling to a piping bag (or a ziplock bag with the corner snipped) for neat layering.
Step 4: Assemble the Cups
9. Grab your 9 oz or 12 oz clear plastic cups. Start with a spoonful of the Strawberry Crunch at the bottom of each cup.
10. Pipe a swirl of the Cheesecake Mousse over the crumbs.
11. Spoon a layer of the Macerated Strawberries on top of the cream.
12. Repeat the layers: another sprinkle of crunch, another swirl of cheesecake mousse, and top with more strawberries and a final dusting of crunch.
13. Refrigerate for at least 1 hour before serving to let the layers set. Serve chilled with a spoon!
Tips for Success
Room Temperature Cream Cheese: This is the most critical step. If your cream cheese is cold, your filling will be lumpy. Leave it out on the counter for at least an hour before starting.
The Crunch Factor: If you want your crunch to be extra crispy, you can spread the crumb mixture on a baking sheet and bake at 350°F for 5-8 minutes. Let it cool completely before using. This creates a crunchier texture that holds up longer against the moisture of the cream.
Piping vs. Spooning: While you can spoon the filling into the cups, using a piping bag ensures clean layers that look professional through the clear plastic. It also keeps the sides of the cups smear-free.

Variations
- Lemon Crunch: Swap the strawberry gelatin for lemon gelatin and use lemon zest in the cream cheese mixture for a citrus twist.
- Lighter Version: You can substitute the heavy cream for whipped topping (Cool Whip) and use low-fat cream cheese, though the texture will be slightly softer.
- Jar Desserts: Instead of plastic cups, assemble these in small mason jars. Screw on the lids, and they become the perfect portable treat for picnics or lunchboxes.
Storage
These cups are best enjoyed within 24 hours while the crunch is still crispy. However, they can be stored in the refrigerator for up to 3 days. Cover the tops with plastic wrap or lids to prevent them from absorbing fridge odors. Note that the cookie layer will soften into a cake-like texture over time, which is equally delicious!
Enjoy these Strawberry Crunch Cheesecake Cups at your next gathering—they are a guaranteed crowd-pleaser that looks as good as it tastes!
Strawberry Crunch Cheesecake Cups
Ingredients
Equipment
Method
- Crush Golden Oreos into coarse crumbs using a food processor or rolling pin.
- Mix crushed Oreos with strawberry gelatin powder and melted butter until combined and crumbly. Set aside.
- In a small bowl, toss diced strawberries with granulated sugar and let sit for 15 minutes to release juices.
- In a large bowl, beat softened cream cheese, powdered sugar, and vanilla until smooth.
- In a separate bowl, whip heavy cream until stiff peaks form, then gently fold into the cream cheese mixture.
- To assemble, place a spoonful of crunch mixture into the bottom of each cup.
- Pipe a layer of cheesecake filling, followed by a layer of strawberries.
- Repeat layers until the cup is full, finishing with a sprinkle of crunch topping.