The Ultimate No-Bake Grasshopper Pie Recipe
The Ultimate No-Bake Grasshopper Pie Recipe: A Minty Masterpiece
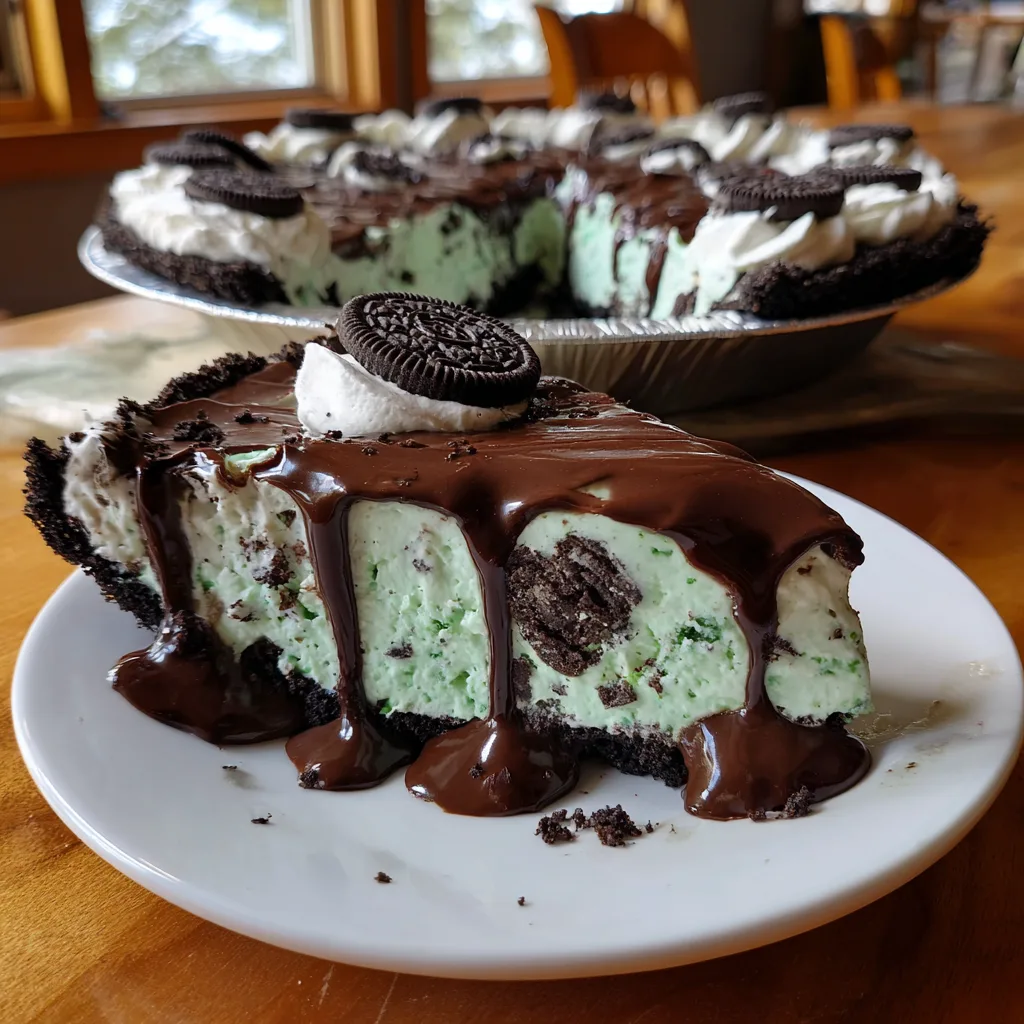
There are few desserts that capture the essence of retro nostalgia quite like the Grasshopper Pie. With its vibrant mint-green hue, deep chocolate Oreo crust, and silky ganache topping, it is a showstopper that demands attention on any dessert table. But beyond its stunning looks, this pie offers a flavor combination that has stood the test of time: cool, refreshing mint perfectly balanced with rich, dark chocolate. Whether you are looking for a refreshing summer treat to beat the heat or a festive green dessert for St. Patrick’s Day or Christmas, this no-bake marvel is the answer.
This comprehensive guide will walk you through everything you need to know to create the perfect No-Bake Grasshopper Pie. We will cover the science behind the fluffy filling, the secrets to a crust that doesn’t crumble, and how to achieve that glossy, professional-looking ganache topping without a fuss. Get ready to impress your friends and family with a dessert that looks like it came from a high-end bakery but was made right in your home kitchen.
Why You Will Fall in Love With This Recipe
The beauty of this recipe lies in its simplicity and texture. Unlike baked cheesecakes or fruit pies that require precise oven temperatures and water baths, this pie relies on the magic of chilling. It is a stress-free dessert that actually benefits from being made ahead of time, freeing you up to focus on dinner while dessert sets in the fridge.
The texture is a cross between a mousse and a cheesecake—light and airy, yet creamy and decadent. The addition of chopped Oreos or chocolate chips inside the green filling adds a delightful crunch that contrasts with the smoothness of the cream. Topped with a layer of rich chocolate ganache, every bite is a symphony of textures and flavors.
The History of the Grasshopper
The name “Grasshopper” comes from the classic cocktail made with crème de menthe and crème de cacao. The drink, known for its bright green color, was a staple in the 1950s and 60s. It wasn’t long before home cooks and chefs realized that these flavors translated beautifully into dessert form. While the original pie recipes often used marshmallows melted with milk as a stabilizer, modern versions—like the one we are making today—often utilize cream cheese and whipped cream for a richer, more stable consistency that doesn’t require standing over a double boiler.
Ingredients Breakdown
To make the best pie, you need the best components. Here is what you will need:
For the Oreo Crust
- Oreo Cookies: You will use the whole cookie, filling and all. This provides the sweetness and structural integrity for the crust.
- Unsalted Butter: Melted butter acts as the glue. We use unsalted to control the sodium, as the cookies are already salty enough.
For the Mint Filling
- Cream Cheese: Use full-fat brick style cream cheese. Tub varieties have too much air and water, which can prevent the pie from setting firm.
- Granulated Sugar: For sweetness. You can also use powdered sugar if you want an even smoother texture, but granulated works fine if beaten well.
- Peppermint Extract: This is crucial. Make sure you use peppermint extract, not spearmint. Spearmint tastes like toothpaste; peppermint tastes like dessert.
- Green Food Coloring: Totally optional, but it gives the pie its signature look. Gel food coloring is preferred as it doesn’t water down the filling.
- Heavy Whipping Cream: This gets whipped to stiff peaks and folded in to create the airy “mousse” texture.
- Chocolate Chips or Crushed Oreos: Folded into the filling for texture. Semi-sweet chocolate chips cut through the sweetness nicely.
For the Topping & Garnish
- Semi-Sweet Chocolate Chips: High-quality chips melt better for the ganache.
- Heavy Cream: Heated and poured over the chocolate to create the ganache.
- Whipped Cream & Oreo Halves: For that bakery-style finish.
Step-by-Step Instructions
1. Prepare the Crust
Start by placing your Oreos in a food processor. Pulse them until they are fine crumbs. If you don’t have a food processor, a zip-top bag and a rolling pin work wonders—plus, it’s great stress relief! Pour the crumbs into a bowl and mix with the melted butter until the mixture resembles wet sand. Press this firmly into the bottom and up the sides of a 9-inch pie dish. Use the bottom of a measuring cup to pack it down tight. Pop it in the freezer while you make the filling.
2. Make the Filling Base
In a large mixing bowl, beat the softened cream cheese and sugar until it is completely smooth and creamy. There should be no lumps. This usually takes about 3 minutes on medium speed. Scrape down the sides of the bowl to ensure everything is incorporated.
3. Add Flavor and Color
Add the peppermint extract and a few drops of green food coloring. Mix on low speed until the color is uniform. Taste it! This is your chance to adjust the mintiness. Remember, the flavor will mellow slightly once the whipped cream is added, so it should be quite minty at this stage.
4. Lighten the Mixture
In a separate chilled bowl, whip the heavy cream until stiff peaks form. This means when you lift the beaters, the cream stands straight up without flopping over. Gently fold the whipped cream into the green cream cheese mixture using a rubber spatula. Use a “cut and fold” motion to keep the air in. Finally, fold in the chocolate chips or crushed Oreos.
5. Assemble and Chill
Pour the filling into your chilled crust. Smooth the top with an offset spatula. Place the pie in the refrigerator for at least 6 hours, or preferably overnight. It needs this time to firm up so you can get clean slices.
6. The Ganache Topping
Once the pie is set, make the ganache. Heat the heavy cream until it just begins to simmer (do not boil). Pour it over the chocolate chips in a heat-proof bowl. Let it sit for 5 minutes, then whisk until smooth and glossy. Pour this over the cold pie, spreading it to the edges. Chill for another 10-15 minutes to set the ganache.
7. Garnish
Pipe swirls of sweetened whipped cream around the border and insert half of an Oreo cookie into each swirl. Serve cold.
Tips for Success
Room Temperature Ingredients: Ensure your cream cheese is completely at room temperature before you start. If it’s cold, it will be lumpy, and no amount of beating will fix it once the other ingredients are added.
Chill the Bowl: When whipping heavy cream, chill your metal bowl and beaters in the freezer for 15 minutes beforehand. Cold cream whips faster and higher.
Clean Slices: To get those perfect, sharp slices seen in photos, dip your knife in hot water and wipe it dry before every single cut. The heat melts the ganache and butter in the crust slightly, allowing the knife to glide through.
Variations to Try
- The “Frozen” Grasshopper: Instead of refrigerating, freeze the pie! It eats like an ice cream cake. Just let it thaw for 10 minutes before slicing.
- Alcoholic Kick: For an adult version, replace half of the peppermint extract with 2 tablespoons of crème de menthe and 1 tablespoon of crème de cacao.
- White Chocolate Mint: Use white chocolate chips inside the filling instead of dark chocolate for a sweeter, creamier profile.
Serving Suggestions
This pie is rich, so small slices go a long way. Serve it with a cup of hot coffee or espresso to balance the sweetness and the cold temperature of the pie. It is the perfect end to a heavy holiday meal because the mint flavor acts as a palate cleanser.

Storage Instructions
Refrigerator: Store the pie loosely covered with plastic wrap or in a pie carrier in the fridge for up to 5 days. The crust will soften slightly over time.
Freezer: This pie freezes beautifully. Wrap it tightly in plastic wrap and aluminum foil. It can be frozen for up to 2 months. Thaw in the fridge overnight before serving.
Conclusion
The No-Bake Grasshopper Pie is more than just a dessert; it’s a celebration of texture and flavor. It combines the crunch of cookies, the creaminess of cheesecake, and the silkiness of ganache into one unforgettable bite. Whether you are a novice baker or a seasoned pro, this recipe delivers maximum impact with minimal effort. So grab your mixer, unleash your inner artist with that green food coloring, and get ready to enjoy the most refreshing dessert of the season.
No-Bake Grasshopper Pie
Ingredients
Equipment
Method
- Place Oreos in a food processor and pulse into fine crumbs. Mix with melted butter.
- Press mixture firmly into the bottom and sides of a 9-inch pie dish. Freeze for 10 minutes.
- In a large bowl, beat softened cream cheese and sugar until smooth. Add peppermint extract and food coloring; mix well.
- In a separate cold bowl, whip 1.5 cups heavy cream to stiff peaks. Gently fold whipped cream into the green cream cheese mixture.
- Fold in the mini chocolate chips or crushed Oreos.
- Pour filling into crust and smooth the top. Refrigerate for at least 6 hours to set.
- Make ganache: Pour hot heavy cream over semi-sweet chocolate chips. Let sit for 5 mins, then whisk until smooth.
- Pour ganache over the chilled pie and spread evenly. Chill for 15 more minutes.
- Garnish with swirls of whipped cream and Oreo halves before serving.