Salted Caramel Chocolate Pretzels: The Ultimate Sweet & Salty Treat
There is a specific kind of magic that happens when you combine salt, sugar, and crunch. It hits every pleasure point on the palate simultaneously. If you are looking for the easiest, most crowd-pleasing treat for the holiday season—or just a Tuesday night craving—look no further than these Salted Caramel Chocolate Pretzels. These bite-sized wonders, often affectionately known as “pretzel bites” or “pretzel turtles,” require zero baking skills, minimal ingredients, and yet they vanish from dessert tables faster than elaborate cakes that take three days to make.
This comprehensive guide will walk you through everything you need to know to perfect these treats. We aren’t just giving you a recipe; we are giving you the masterclass on melt consistencies, chocolate tempering hacks for beginners, and how to store these so they stay fresh for weeks. Whether you are prepping for a cookie exchange, a movie marathon, or a festive party, this recipe is your new secret weapon.
Why This Recipe Wins Every Time
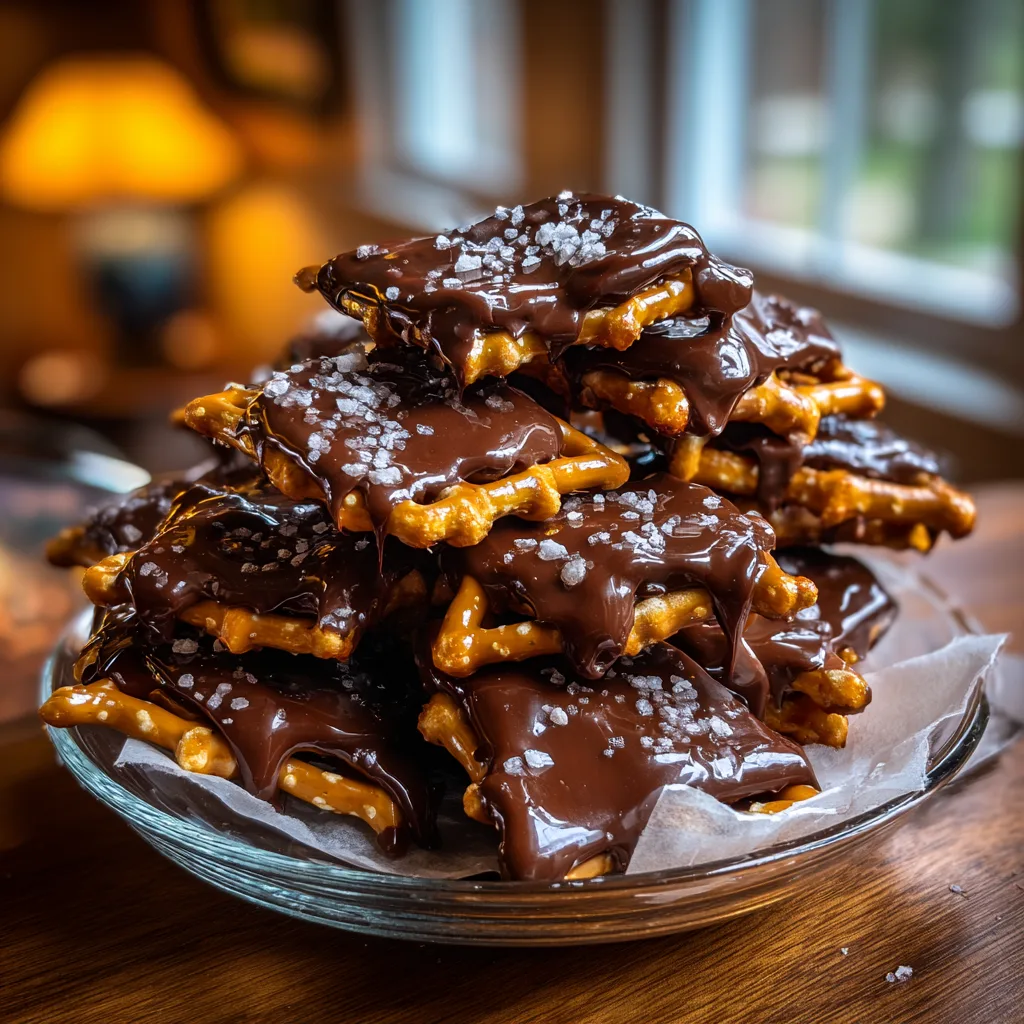
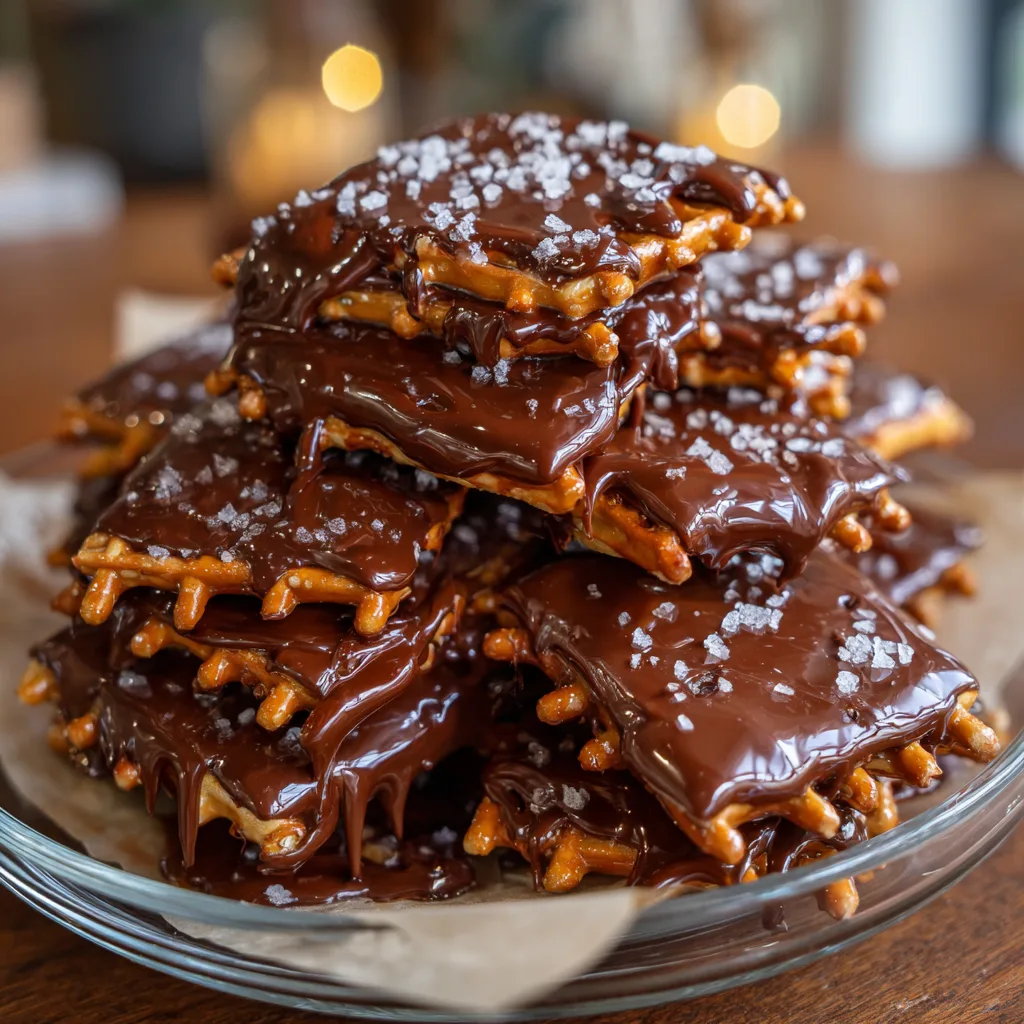
The beauty of the Salted Caramel Chocolate Pretzel lies in its texture profile. You start with the snap of a waffle pretzel—sturdy, salty, and savory. You sandwich a soft, chewy caramel inside, which provides a buttery sweetness and a texture that lingers. Finally, the half-dip in silky milk chocolate seals the deal, adding a creamy finish that bridges the gap between the cracker-like pretzel and the dense caramel. Topped with a sprinkle of coarse sea salt, it is a gourmet experience made in a microwave or toaster oven.
Unlike cookies that can spread too much or cakes that can fall flat, this recipe is virtually fail-proof. It is an assembly job more than a baking project, making it perfect for getting kids involved in the kitchen. Plus, the visual appeal of a glossy chocolate dip with sparkling salt crystals makes them look like they came from a high-end chocolatier.
Ingredients
The ingredient list is short, which means quality matters. Here is what you will need to assemble these salty-sweet masterpieces:
- Square Waffle Pretzels (Snaps): You need the grid-style square pretzels (often called “snaps”). These hold the caramel better than twists and provide the perfect surface area for sandwiching.
- Soft Chewy Caramels: Look for the standard square wrapped caramels (like Kraft) or soft caramel bits. Avoid hard candies; you need something that softens into a gooey adhesive.
- Melting Chocolate: You can use high-quality milk chocolate chips, melting wafers (like Ghirardelli), or almond bark. Milk chocolate offers the classic sweetness, but dark chocolate provides a sophisticated bitterness that pairs well with sea salt.
- Heavy Cream or Milk (Optional): A teaspoon is sometimes needed if you are melting block caramel down to make a dip, but for the sandwich method, you rely on the heat of the oven to soften the caramel squares.
- Coarse Sea Salt: This is non-negotiable. Table salt will just taste salty and dissolve. You want big, crunchy flakes (like Maldon or fleur de sel) for that burst of texture and visual pop.
- Holiday Sprinkles (Optional): As seen in the photos, adding red and green confetti sprinkles turns these into instant Christmas favorites.
Step-by-Step Instructions
Phase 1: Preparation and Assembly
- Preheat and Prep: Preheat your oven to 200°F (95°C). This low temperature is crucial. We aren’t baking the pretzels; we are gently encouraging the caramel to relax. Line a large baking sheet with parchment paper or a silicone baking mat. Do not use foil, as the caramel will stick aggressively to it.
- The First Layer: Arrange half of your square pretzels in a single layer on the baking sheet. Give them a little breathing room, about an inch apart.
- The Caramel Core: Unwrap your caramels. Place one unwrapped soft caramel square directly in the center of each pretzel on the baking sheet.
- The Softening: Place the baking sheet in the preheated oven for 4 to 5 minutes. Watch them closely. You do not want the caramel to melt into a puddle. You only want it to soften enough that it looks glossy and yields to pressure.
- The Sandwich Press: Remove the tray from the oven. Immediately place a second pretzel on top of each soft caramel. Gently press down until the caramel squishes out slightly toward the edges, adhering the two pretzels together. If the caramel is too hard, put them back in the oven for another minute. Let these cool completely until the caramel is firm again. You can speed this up by placing the tray in the fridge for 15 minutes.
Phase 2: The Chocolate Dip
- Melt the Chocolate: While the sandwiches are setting, prepare your chocolate. Place your chocolate chips or melting wafers in a microwave-safe bowl. Microwave in 30-second intervals, stirring vigorously between each burst. Stop when the chocolate is 90% melted and stir until completely smooth to prevent scorching.
- The Dip: Hold a cooled pretzel sandwich by one corner. Dip it halfway (diagonally looks best) into the melted chocolate. Tap the pretzel gently against the side of the bowl to shake off excess chocolate—this ensures a clean look and prevents a pool of chocolate forming at the bottom of the treat.
- The Garnish: Place the dipped pretzel back on the parchment paper. While the chocolate is still wet (this is critical!), sprinkle a pinch of coarse sea salt or festive sprinkles over the chocolate section.
- The Set: Allow the chocolate to harden completely at room temperature, or pop the tray back in the fridge for 20 minutes to set them quickly.
Tips for Perfection
Temperature Control is Key:
When softening the caramels, stay near the oven. If they melt too much, they will run through the holes of the pretzel and stick to the pan, making a mess. You are looking for a “slump,” not a melt.
Avoid the “Bloom”:
If using real chocolate (containing cocoa butter) rather than compound coating (almond bark), be careful not to overheat it, or your chocolate might streak with gray lines (bloom) as it cools. If you want a professional snap and shine without the hassle of tempering, “coating wafers” or “melting wafers” are the safest bet for beginners.
The “Squish” Technique:
When pressing the top pretzel down, apply even pressure. If you press too hard on one side, the caramel will shoot out the other side. A gentle, firm press is all you need to bond the layers.
Variations to Try
Once you master the basic technique, the variations are endless. Here are a few creative twists to keep things exciting:
- The Peanut Butter Lover: Instead of a solid caramel square, use a caramel-filled chocolate (like a Rolo) or smear a little peanut butter on the pretzel before adding the caramel.
- Dark & Stormy: Use dark chocolate (70% cocoa or higher) and top with smoked sea salt for a more adult, sophisticated flavor profile.
- White Christmas: Dip the pretzels in white chocolate and use crushed candy canes as a topping instead of salt. The peppermint-white chocolate combo is a holiday classic.
- The “Turtle” Effect: Tuck a single pecan half inside the sandwich along with the caramel for a true turtle-style treat.
Serving and Storage Suggestions
Serving:
These look beautiful piled high in a glass jar or arranged in concentric circles on a holiday platter. Because they are finger food, they are excellent for mingling parties. If you are gifting them, place 5-6 in a clear cellophane bag and tie it with a rustic ribbon.
Storage:
Store your Salted Caramel Chocolate Pretzels in an airtight container.
Room Temperature: They will stay fresh for up to 2 weeks (if they last that long!).
Freezer: You can freeze these for up to 3 months. The caramel becomes quite hard when frozen, so allow them to thaw on the counter for an hour before eating to save your teeth.
The Science of Sweet and Salty
Why do we crave this specific combination? It is a phenomenon known as “flavor layering.” Our taste buds have specific receptors for sweet and salt. When both are activated, the salt actually suppresses bitterness and enhances the perception of sweetness, making the caramel taste richer and the chocolate taste deeper. The crunch of the pretzel adds “hedonic escalation”—essentially, the varying textures (crunchy, chewy, creamy) keep our brains interested in the food, making us want to take “just one more bite.”
Troubleshooting Common Issues
Caramel is too hard to eat:
This usually happens if the caramels used were old or stale before baking. Ensure you buy fresh soft caramels. Alternatively, if you cooked them too long in the oven, they might harden upon cooling. Stick to the low temperature and short duration.
Chocolate is too thick:
If your melted chocolate is sludgy and hard to dip, stir in a teaspoon of coconut oil or vegetable shortening. This thins the chocolate out and adds a nice gloss to the final shell.
Pretzels are stale:
The oven time usually crisps up the pretzels, but always start with a fresh bag. There is no saving a soggy pretzel.
Fun Facts and Cultural Context
The pretzel has a long history, dating back to European monks in the early Middle Ages who shaped dough to look like arms crossed in prayer. They were originally soft breads. The hard pretzel “snap” we use today is a Pennsylvania Dutch invention, created by accident when a baker over-baked his batch, removing all the moisture. Today, dipping pretzels in chocolate is an American holiday tradition, bridging the gap between a candy bar and a savory snack.
These treats are incredibly cost-effective. A single bag of pretzels and a bag of caramels can yield dozens of treats, making this one of the most budget-friendly ways to fill out a holiday dessert table or create bulk gifts for teachers and neighbors.
Conclusion
The Salted Caramel Chocolate Pretzel is a testament to the idea that simple is often best. It doesn’t require a stand mixer, flour, or eggs. It respects the busy schedule of the home cook while delivering a product that looks and tastes luxurious. Whether you are dipping them in dark, milk, or white chocolate, the result is always a smile-inducing crunch. So, grab your pretzels, unwrap those caramels, and get ready to be the most popular person at the potluck.
Salted Caramel Chocolate Pretzel Bites
Ingredients
Equipment
Method
- Preheat oven to 200°F (95°C). Line a baking sheet with parchment paper.
- Arrange half of the pretzels (24) flat on the baking sheet.
- Top each pretzel with one unwrapped soft caramel square.
- Place in oven for 4-5 minutes, until caramel is soft and glossy but not fully melted.
- Remove from oven and immediately press a second pretzel onto each caramel to create a sandwich. Let cool completely until firm.
- Melt the chocolate in a microwave-safe bowl in 30-second intervals, stirring until smooth.
- Dip each pretzel sandwich halfway into the chocolate, shaking off excess.
- Place back on parchment paper and immediately sprinkle with sea salt or sprinkles while chocolate is wet.
- Allow chocolate to set at room temperature or in the fridge before serving.