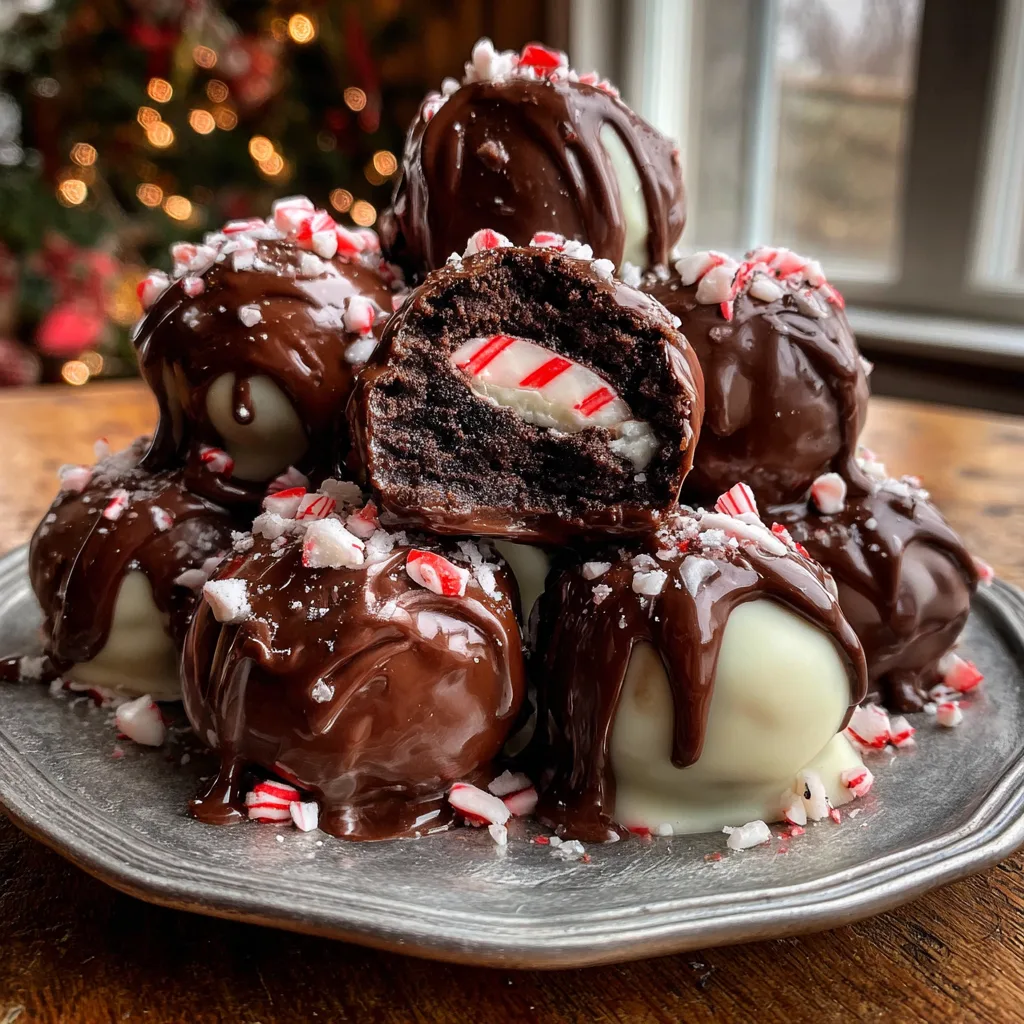
Peppermint Kiss Oreo Balls Recipe
Peppermint Kiss Oreo Balls: The Ultimate Holiday Surprise
When the holiday season rolls around, the kitchen becomes the heart of the home. There is something undeniably magical about the scent of peppermint and chocolate wafting through the air. If you are looking for the perfect addition to your Christmas cookie exchange, or simply a decadent treat to enjoy while watching your favorite holiday movies, look no further than these Peppermint Kiss Oreo Balls. These aren’t your average Oreo truffles; they hide a delightful, minty surprise inside that elevates them from a standard snack to a gourmet experience.
These festive bites are the definition of “low effort, high reward.” They require no baking, use only a handful of ingredients, and look absolutely stunning on a dessert platter. The combination of dense, fudgy Oreo cheesecake filling, a solid Peppermint Hershey’s Kiss center, and a crisp chocolate shell topped with crushed candy canes creates a symphony of textures and flavors. In this comprehensive guide, we will walk you through every step of creating these masterpieces, ensuring your holiday season is as sweet and stress-free as possible.
Why This Recipe Is a Holiday Essential
There are countless reasons why this specific recipe deserves a permanent spot in your recipe binder. First and foremost, it is a no-bake dessert. During the holidays, oven space is at a premium. Between the turkey, the casseroles, and the pies, it can be impossible to find a rack to bake cookies. These truffles are prepared entirely on the countertop and set in the refrigerator or freezer, freeing up your oven for other dishes.
Secondly, the flavor profile is universally loved. The classic combination of chocolate and mint is synonymous with winter holidays. The slight tang of the cream cheese cuts through the sweetness of the chocolate and the Oreo cookies, creating a balanced bite that isn’t cloyingly sweet. Furthermore, the visual appeal of the contrasting white and dark chocolates, speckled with vibrant red peppermint bits, makes them look professionally made, even if it is your first time making truffles.
The Science of the Perfect Truffle
While this recipe is simple, understanding the role of each ingredient helps ensure perfection every time. The base of an Oreo ball is essentially a “cookie truffle.” By crushing the cookies and mixing them with cream cheese, you are hydrating the dry crumbs with fat and moisture. This transforms the crumbly cookie into a moldable, fudge-like dough.
The Peppermint Kiss in the center adds a structural element. It provides a satisfying “snap” when you bite into the soft truffle, offering a textural contrast that keeps the eating experience interesting. The outer coating of almond bark or melting wafers acts as a seal. It locks in the moisture of the cheesecake center, preventing the truffle from drying out and extending its shelf life significantly.
Ingredients Needed
To make these delicious treats, you will need the following ingredients. We recommend using high-quality brands for the best flavor payoff.
The Core Components
- 36 Golden or Original Oreo Cookies – (One standard package). Do not remove the cream filling; use the whole cookie.
- 8 oz Cream Cheese – (One block). It must be softened to room temperature to blend smoothly without lumps.
- 1 bag Hershey’s Peppermint Kisses – These are the white chocolate kisses with red stripes/candy cane bits inside.
- 12 oz White Chocolate Melting Wafers – (Or almond bark). This melts smoother than chocolate chips.
- 12 oz Dark or Milk Chocolate Melting Wafers – For variety in your platter.
- 3 Candy Canes – Crushed into fine bits for garnish.
- 1 tsp Coconut Oil or Shortening – (Optional). Used to thin the chocolate if it is too thick for dipping.
Step-by-Step Instructions
Follow these detailed steps to create the perfect Peppermint Kiss Oreo Balls. Read through all instructions before beginning.
Phase 1: Preparing the Dough
1. Crush the Cookies:
Place the entire package of Oreo cookies (filling included) into a food processor. Pulse until the cookies are turned into fine crumbs. If you do not have a food processor, place the cookies in a large gallon-sized zip-top bag and crush them with a rolling pin until fine.
2. Mix with Cream Cheese:
In a large mixing bowl, combine the cookie crumbs and the softened block of cream cheese. Use a hand mixer or a stand mixer on medium speed to blend them until a dark, sticky dough forms. You can also do this by hand with a spatula, but it will require some elbow grease. The mixture should be uniform in color with no streaks of white cream cheese.
3. Chill the Dough (Optional but Recommended):
If your kitchen is warm or the dough feels too sticky to handle, place the bowl in the refrigerator for 20 minutes. This makes the rolling process much cleaner.
Phase 2: Shaping and Stuffing
4. Portion the Dough:
Use a small cookie scoop or a tablespoon to scoop out about 1 tablespoon of the Oreo mixture.
5. Insert the Kiss:
Flatten the scoop of dough slightly in the palm of your hand. unwrapped Peppermint Kiss in the center. Carefully fold the Oreo dough up and around the Kiss, sealing it completely. Roll it between your palms to form a smooth sphere. Repeat this process until all the dough is used.
6. The Crucial Chill:
Place the formed balls onto a baking sheet lined with parchment paper or wax paper. Place the baking sheet in the freezer for at least 20 to 30 minutes. This step is non-negotiable. If the balls are warm, they will fall apart when dipped in the hot chocolate.
Phase 3: Dipping and Decorating
7. Melt the Chocolate:
Place your white melting wafers in a microwave-safe bowl. Microwave in 30-second intervals, stirring vigorously in between, until completely smooth. Repeat with the dark/milk chocolate in a separate bowl. Tip: Do not overheat, or the chocolate will seize and become grainy.
8. Dip the Truffles:
Remove the balls from the freezer. Working quickly, drop one ball into the melted chocolate. Use a fork to roll it around until coated. Lift the ball out with the fork and tap the handle of the fork against the edge of the bowl to shake off excess chocolate. This ensures a thin, even shell rather than a thick, gloopy one.
9. Garnish Immediately:
Place the dipped truffle back onto the parchment paper. While the chocolate is still wet, immediately sprinkle crushed candy canes on top. If you wait too long, the chocolate will harden, and the topping won’t stick.
10. Set and Serve:
Allow the chocolate to harden completely at room temperature or in the refrigerator. Once set, they are ready to serve!
Expert Tips for Success
Avoid the “Oreo Foot”:
When you place the dipped truffle onto the paper, a pool of chocolate often forms at the bottom (the “foot”). To minimize this, wipe the bottom of the fork against the bowl rim before placing the truffle down. You can also use a toothpick to gently push the ball off the fork.
Cream Cheese Temperature:
Do not try to microwave your cream cheese to soften it quickly, as this can make it oily. Let it sit on the counter for an hour before starting. If the cream cheese is too cold, it won’t mix with the crumbs; if it’s melted, the dough will be greasy.
Chocolate Seizing:
Ensure not a single drop of water gets into your melting chocolate. Water is the enemy of melted chocolate and will cause it to seize instantly into a clumpy mess. Ensure your bowls and utensils are completely dry.
Variations to Try
While the peppermint version is a classic, this recipe is incredibly versatile. Here are a few twists you can try:
- The Golden Grinch: Use Golden Oreos instead of chocolate ones, and use green candy melts for the coating. Top with a red heart sprinkle.
- Double Chocolate: Use Chocolate Creme Oreos and a Dark Chocolate Kiss in the center for the ultimate chocolate lover’s dream.
- Peanut Butter Bliss: Use Peanut Butter Oreos and a Peanut Butter Cup Mini in the center, coated in milk chocolate.
- Snowballs: Coat the truffles in white chocolate and immediately roll them in sweetened shredded coconut.
Storage and Freezing Instructions
Refrigerator:
Because these contain cream cheese, they must be stored in the refrigerator. Place them in an airtight container with layers separated by wax paper. They will stay fresh for up to 2 weeks.
Freezer:
These freeze beautifully! Place the set truffles in a freezer-safe bag or container. They can be frozen for up to 3 months. Thaw them in the refrigerator overnight before serving to prevent condensation from affecting the chocolate shell, or enjoy them frozen for a cold treat!
Gift Giving Ideas
Peppermint Kiss Oreo Balls make for an elegant and thoughtful homemade gift. Here are some ways to package them:
- Mini Truffle Boxes: Buy small candy boxes with dividers. Place each truffle in a mini cupcake liner for a professional look.
- Mason Jars: Stack them gently in a wide-mouth mason jar tied with a red ribbon and a sprig of fresh rosemary.
- Cookie Tins: Mix them in with other holiday cookies. The distinct shape and color of the truffles add visual variety to a cookie tin.
Fun Facts About the Ingredients
Did you know that the “Oreo” was first introduced in 1912? It has since become the best-selling cookie in the United States. The pattern on the Oreo wafer consists of 12 flowers, dots, and dashes, and its origin remains a mystery to food historians. When combined with the Hershey’s Kiss, introduced in 1907, you are essentially combining over a century of American confectionery history into one bite-sized treat!

Conclusion
The Peppermint Kiss Oreo Ball is more than just a recipe; it is a holiday tradition waiting to happen. It perfectly captures the spirit of the season with its festive colors and nostalgic flavors. Whether you are a seasoned baker or a kitchen novice, this recipe is foolproof and guaranteed to impress. The creamy interior, the minty crunch, and the smooth chocolate shell come together to create a bite of pure bliss.
So, grab your ingredients, put on your favorite holiday playlist, and get rolling! These treats are sure to disappear from the dessert table faster than you can say “Happy Holidays.”
Peppermint Kiss Oreo Balls
Ingredients
Equipment
Method
- Place Oreos in a food processor and pulse until fine crumbs form.
- Mix Oreo crumbs and softened cream cheese until well combined and a dough forms.
- Scoop about 1 tablespoon of dough and flatten slightly.
- Place an unwrapped Peppermint Kiss in the center and wrap the dough around it, rolling into a ball.
- Place formed balls on a parchment-lined baking sheet and freeze for 20-30 minutes.
- Melt the chocolate wafers in the microwave in 30-second intervals until smooth.
- Dip cold truffles into melted chocolate, tap off excess, and place back on parchment.
- Immediately sprinkle with crushed candy canes before chocolate sets.