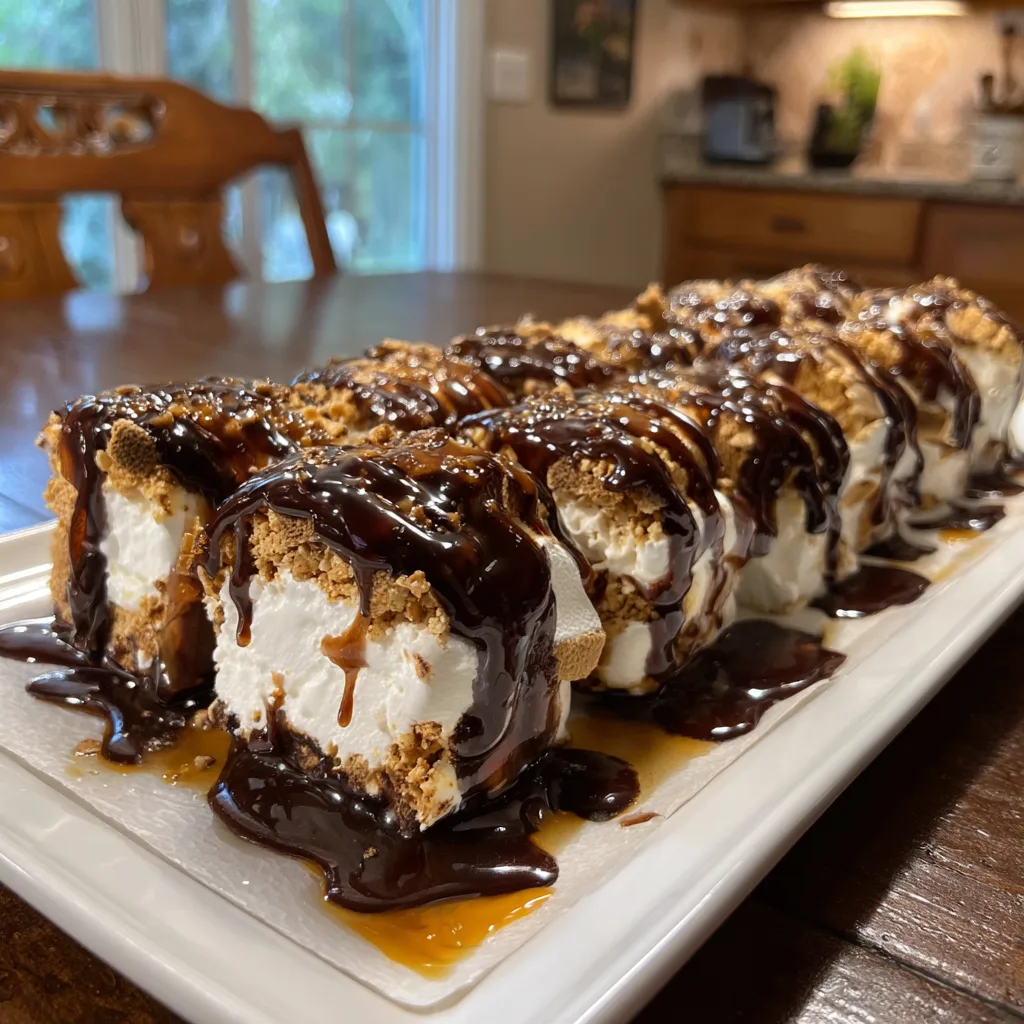
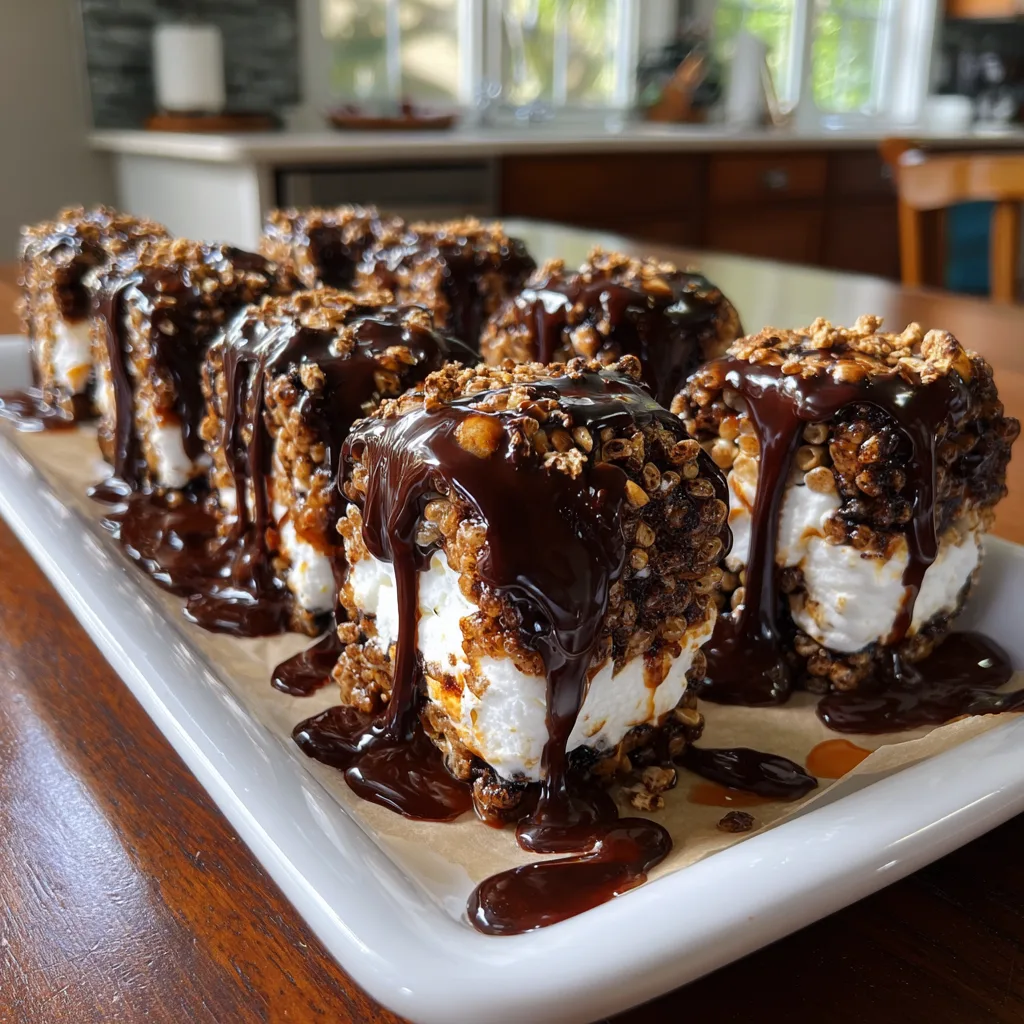
S’mores Sushi Rolls
Whether you are looking for a show-stopping treat for a birthday party, a unique addition to a holiday dessert spread, or simply a fun weekend project to do with the kids, this S’mores Sushi recipe is the answer. It combines the gooey, nostalgic texture of a Rice Krispie treat with the creamy sweetness of marshmallow fluff and a decadent chocolate finish. In this comprehensive guide, we will walk you through everything you need to know to master the art of dessert sushi, from getting the perfect roll to customizing your fillings.
Why S’mores Sushi is the Ultimate Crowd-Pleaser
The magic of this recipe lies in its texture and presentation. Traditional s’mores are delicious but notoriously messy. You have the soot from the fire, the crumbling graham crackers, and the molten chocolate that inevitably ends up on your shirt. S’mores Sushi solves the “mess factor” while retaining all the flavor. By using a cereal treat base as the “nori” (the outer wrap) and marshmallow fluff as the “rice,” you create a stable, sliceable dessert that looks as good as it tastes.
Furthermore, it appeals to our love for “tiny food.” There is something inherently satisfying about a dessert that looks like a savory dish. It sparks conversation and looks incredible on social media. But beyond the aesthetics, the flavor profile is a guaranteed hit. You have the salty-sweet balance from the butter and marshmallows, the crunch of the Rice Krispies, and the smooth, melting chocolate drizzle that ties it all together.
The Essential Ingredients
To create the perfect S’mores Sushi, you only need a handful of high-quality ingredients. Because this is a no-bake recipe, the quality of your components really shines through.
- – 1/4 cup salted butter (the salt helps balance the sugar)
- – 10 oz. mini marshmallows (freshness is key for the best melt)
- – 5 cups Rice Krispies cereal (or any puffed rice cereal)
- – 2 cups marshmallow fluff (this acts as the creamy interior)
- – 1/2 cup semi-sweet chocolate chips or a chocolate bar (for the center and drizzle)
- – Optional: Crushed graham crackers for added authentic flavor
Step-by-Step Instructions to Perfect Dessert Sushi
- Prepare Your Surface: Line a large baking sheet with parchment paper or a silicone mat. Lightly grease the parchment with a bit of butter or non-stick spray. This is crucial because the marshmallow mixture is incredibly sticky.
- Melt the Base: In a large pot over low heat, melt the 1/4 cup of butter. Once melted, add the 10 oz. bag of mini marshmallows. Stir constantly until the marshmallows are completely smooth and combined with the butter. Do not rush this step with high heat, or the marshmallows will become tough.
- Mix the “Nori”: Remove the pot from the heat and immediately fold in the 5 cups of Rice Krispies cereal. Stir until every piece of cereal is evenly coated in the marshmallow mixture.
- Press and Flatten: Transfer the warm cereal mixture onto your prepared baking sheet. Using a greased spatula (or greased hands), press the mixture into a large, even rectangle about 1/4 to 1/2 inch thick. Try to make the edges as straight as possible.
- The “Rice” Layer: Once the cereal base has cooled slightly but is still flexible, spread the 2 cups of marshmallow fluff evenly over the top, leaving a small 1-inch border at the top edge. This fluff represents the white rice in traditional sushi.
- The Filling: Place a line of chocolate pieces (or a thick line of melted chocolate) along the edge closest to you. If you want extra crunch, sprinkle some crushed graham crackers over the fluff layer.
- The Roll: Carefully lift the edge of the parchment paper closest to you and begin rolling the cereal base over the filling, just like a sushi roll. Use the parchment to help you keep the roll tight. Once you reach the end, press the seam down to seal it.
- Chill and Set: Wrap the long roll in the parchment paper and place it in the refrigerator for at least 30-45 minutes. This allows the marshmallow fluff to firm up so you can get clean slices.
- The Finishing Touch: Melt your remaining chocolate in 30-second intervals in the microwave. Remove the roll from the fridge and drizzle the chocolate in a zig-zag pattern across the top.
- Slice and Serve: Using a sharp, greased knife, slice the roll into 1-inch thick pieces. Wipe the knife between slices for the cleanest look. Serve immediately and watch them disappear!
Pro-Tips for Success
Making dessert sushi is an art form, but these tips will help you avoid common pitfalls:
1. Don’t Overcook the Marshmallows: When melting your butter and marshmallows, stop as soon as the last lump disappears. Overheating sugar leads to a rock-hard treat once it cools. You want your sushi to be chewy, not crunchy enough to break a tooth!
2. Grease Everything: Marshmallow fluff and melted marshmallows are nature’s glue. Grease your hands, your spatula, and your knife. It will make the process infinitely more enjoyable and much less frustrating.
3. The “Tight Roll” Secret: Much like real sushi, a loose roll will fall apart when sliced. Use the parchment paper to exert gentle, even pressure as you roll. If the roll feels too soft, let it sit for five minutes before finishing the roll-up.
Creative Variations to Try
Once you have mastered the basic S’mores Sushi, you can experiment with different “fillings” and “toppings” to keep things exciting:
- The Peanut Butter Powerhouse: Swirl some creamy peanut butter into the marshmallow fluff layer before rolling. Peanut butter and chocolate are a match made in heaven.
- The Fruity Roll: Add thin slices of strawberry or a spread of raspberry jam inside the roll for a “fruit sushi” vibe that cuts through the sweetness of the marshmallow.
- Dark Chocolate Sea Salt: For a more “adult” version, use 70% dark chocolate and sprinkle a tiny bit of Maldon sea salt over the final drizzle.
- Graham Cracker Crust: Roll the finished, chocolate-drizzled sushi roll in crushed graham cracker crumbs before slicing to give it a “tempura” look.
The Cultural Fun of “Dessert Sushi”
While this recipe is firmly rooted in American snack culture, the concept of “sweet sushi” or Kashi has roots in creative kitchen play across the globe. By using the visual language of Japanese cuisine—the rolls, the fillings, the slicing technique—we create a bridge between traditional culinary forms and modern, playful ingredients. It’s a great way to introduce children to the concept of sushi in a flavor profile they already know and love.
Serving and Storage Suggestions
S’mores Sushi is best served at room temperature after it has been chilled to set. If you serve it straight from the fridge, the cereal might be a bit too firm. Letting it sit out for 10 minutes allows the marshmallow fluff to regain its signature “gooeyness.”
Storage: Store any leftovers in an airtight container at room temperature for up to 3 days. We do not recommend freezing this recipe, as the texture of the Rice Krispies can become stale and the marshmallow fluff may change consistency upon thawing. If you live in a very humid environment, you can store them in the fridge, but be sure the container is truly airtight to prevent the cereal from softening.
Final Thoughts
This S’mores Sushi is more than just a recipe; it is an experience. It brings a sense of wonder to the table and proves that you don’t need a kitchen full of fancy equipment to create something truly “gourmet” in appearance. The combination of the buttery cereal, the cloud-like fluff, and the rich chocolate creates a symphony of flavors that honors the classic s’more while elevating it to something entirely new.
Next time you are tasked with bringing a dessert to a gathering, skip the standard brownies and go for something that will have everyone reaching for their phones to take a picture. Give this recipe a try, and enjoy the sweet, sticky, and absolutely delicious results!
S’mores Sushi Rolls
Ingredients
Equipment
Method
- Melt butter in a large pot over low heat; add mini marshmallows and stir until smooth.
- Remove from heat and stir in Rice Krispies cereal until well coated.
- Press the mixture into a flat rectangle on a parchment-lined baking sheet.
- Spread marshmallow fluff over the cereal base, leaving a 1-inch border at the top.
- Place a line of chocolate or graham crumbs along the bottom edge and roll tightly using the parchment.
- Refrigerate for 30 minutes to set.
- Drizzle with melted chocolate.
- Slice into 1-inch rolls using a greased sharp knife and serve.