Frozen Yogurt PB Bites
The Ultimate Frozen Greek Yogurt Peanut Butter Bites
In the world of healthy snacking, finding the balance between “good for you” and “actually tastes good” can be a struggle. Enter the Frozen Greek Yogurt Peanut Butter Bite. These bite-sized delights are the perfect solution for anyone craving a creamy, sweet treat without the sugar crash of traditional ice cream or candy bars. Looking remarkably like a gourmet peanut butter cup but packed with probiotics and protein, this recipe has taken the home-cooking world by storm.
Imagine the texture of frozen cheesecake mixed with the rich, nutty flavor of your favorite peanut butter, all topped with a satisfying crunch of chocolate. These bites are not just a summer treat; they are a year-round staple for meal preppers, busy parents, and fitness enthusiasts alike. The magic lies in the simplicity. With no baking required and a flexible ingredient list, you can whip up a batch in minutes, toss them in the freezer, and have a grab-and-go snack ready whenever a craving strikes.
Why This Recipe Will Become Your New Obsession
There are countless reasons why these frozen bites are superior to store-bought frozen yogurt or ice cream bars. Here is why you need to make them immediately:
- Protein-Packed Powerhouse: Thanks to the Greek yogurt base, each bite delivers a significant punch of protein, helping to keep you full and satisfied longer than carb-heavy snacks.
- Texture Heaven: The combination of creamy yogurt and peanut butter creates a texture that, when frozen, mimics the mouthfeel of premium ice cream. As they melt slightly on your tongue, they become incredibly luscious.
- Portion Control Made Easy: By making these in a muffin tin, you have built-in portion control. No more accidentally eating the whole pint of ice cream; just grab one or two bites and you are set.
- Kid-Friendly & Customizable: This is a fantastic recipe to get kids involved in the kitchen. They can help mix the batter and sprinkle the chocolate chips. Plus, it’s a sneaky way to get them to eat yogurt!
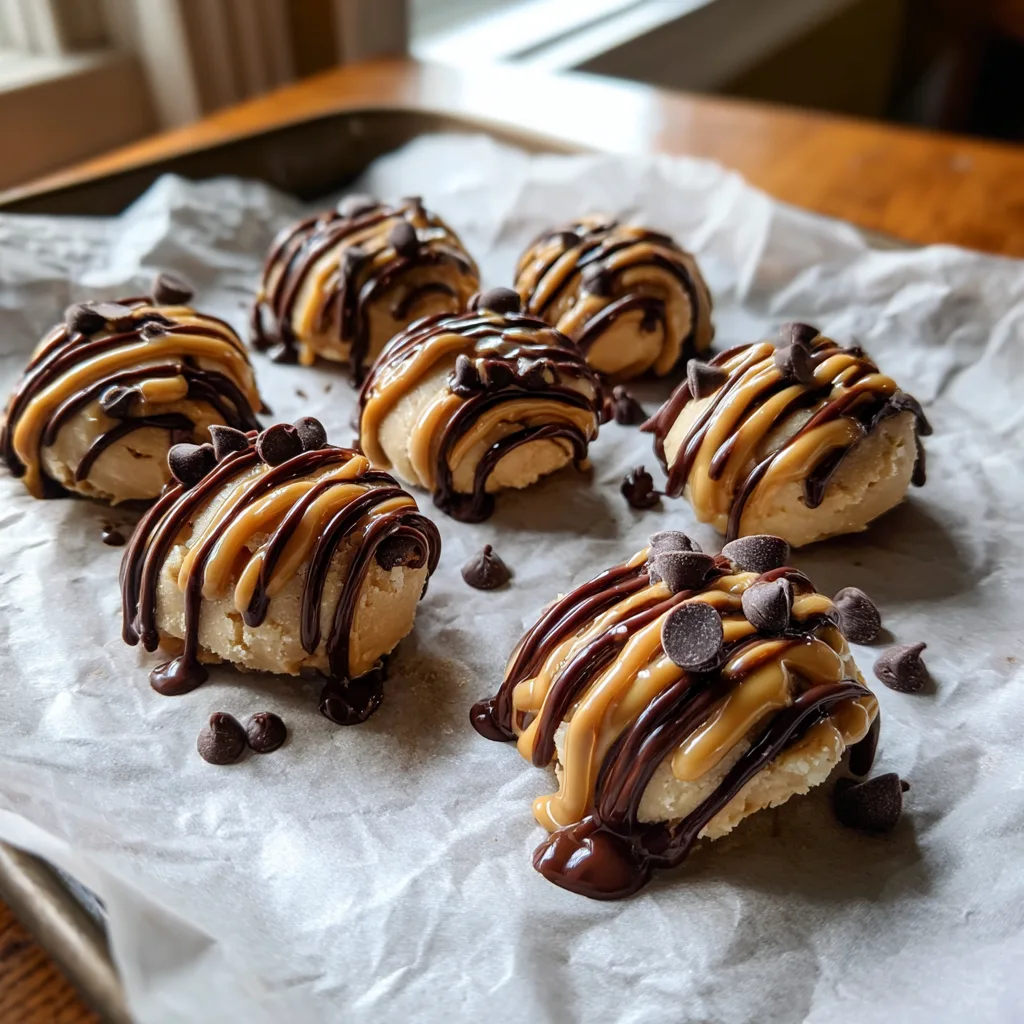
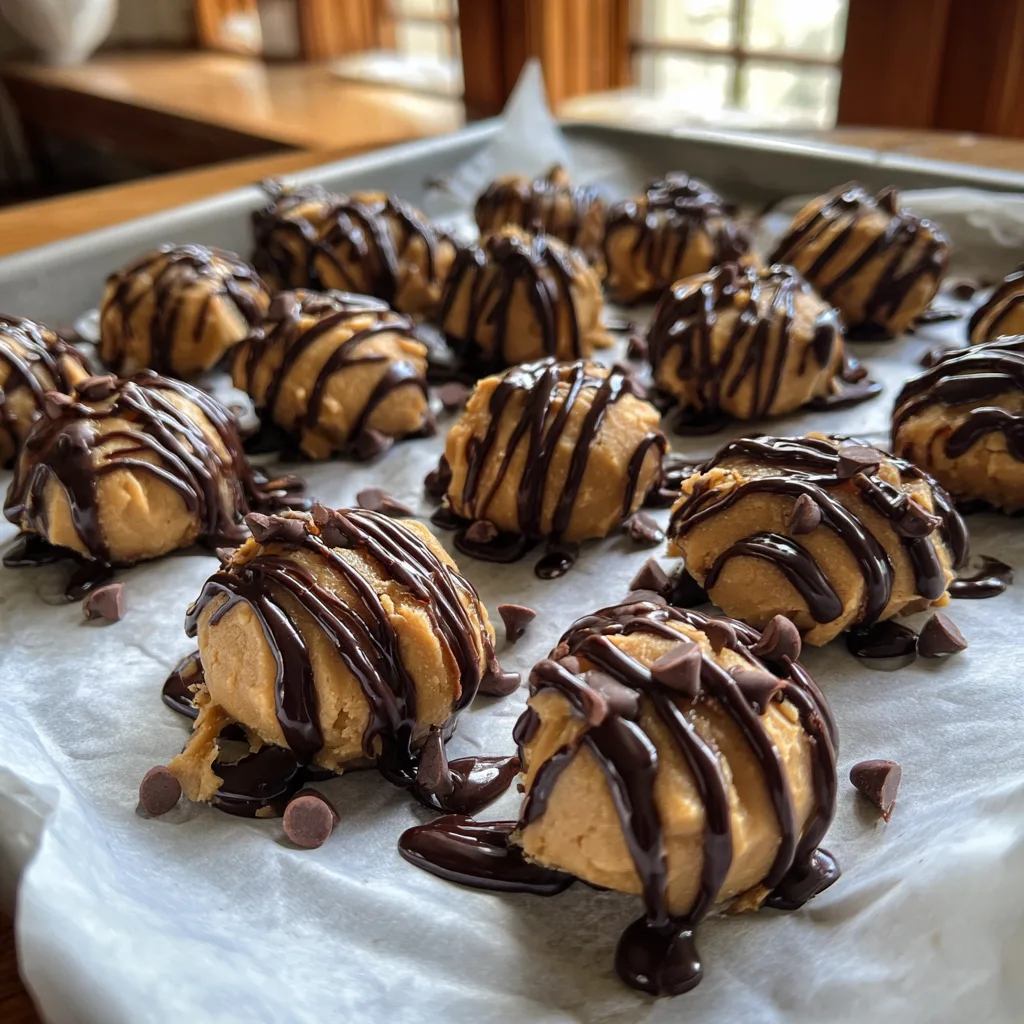
- Visual Appeal: With the glossy chocolate drizzle and the studded chocolate chips, these look like they came from a high-end confectionary shop, making them perfect for serving to guests.
Ingredients
The beauty of this recipe is that you likely have all of these ingredients in your pantry right now. To achieve that glossy, appetizing look and perfect flavor balance, quality matters.
The Creamy Base
- Greek Yogurt: The star of the show. Use plain, full-fat Greek yogurt for the creamiest texture. Non-fat works, but it will be icier. Vanilla flavored yogurt can be used if you want to skip the added sweetener. (1 cup / 245g)
- Creamy Peanut Butter: Use a drippy, natural peanut butter for easier mixing. If using a stabilized commercial brand (like Jif or Skippy), you might need to microwave it for 10 seconds to loosen it up. Crunchy peanut butter works if you want texture inside. (1/2 cup / 125g)
- Honey or Maple Syrup: A natural sweetener that blends seamlessly into the cold mixture. Maple syrup is a great vegan option. (2-3 tablespoons, adjusted to taste)
- Vanilla Extract: Adds a depth of flavor that makes the yogurt taste more like dessert. (1 teaspoon)
The Toppings & Drizzle
- Chocolate Chips: Semi-sweet or dark chocolate chips work best to balance the sweetness of the base. Mini chips are excellent for better distribution. (1/3 cup for mixing/topping)
- Coconut Oil: This is crucial for the chocolate drizzle. It thins the chocolate and helps it harden into a “magic shell” upon contact with the frozen bite. (1 teaspoon)
- Sea Salt (Optional): A flaky sea salt sprinkle on top elevates the chocolate and peanut butter flavors.
Instructions
Follow these simple steps to create your own batch of frozen bliss. No fancy equipment is needed, though a silicone muffin pan makes removal much easier.
Phase 1: Mixing the Base
- Prepare the Pan: Line a standard muffin tin with paper liners. If you are using a silicone muffin pan, you can skip the liners, but placing the silicone mold on a baking sheet will make it easier to move to the freezer later.
- Combine Wet Ingredients: In a medium mixing bowl, add the Greek yogurt, peanut butter, honey (or maple syrup), and vanilla extract.
- Mix Thoroughly: Whisk or stir vigorously until the mixture is completely smooth and uniform in color. It should be a light beige, creamy consistency. Taste the mixture here—if you want it sweeter, add a bit more honey.
- Fold in Chips (Optional): If you want chocolate inside the bites, fold in half of your chocolate chips now. Otherwise, save them all for the top.
Phase 2: Assembly and Freezing
- Fill the Molds: Divide the mixture evenly among the muffin cups. You should get about 10-12 bites depending on the size of your tin. Fill them about 1/3 to 1/2 of the way up—we are making “bites,” not full muffins.
- Top it Off: Sprinkle the remaining chocolate chips on top of each bite. Press them down slightly so they adhere to the wet mixture.
- The First Freeze: Place the tray in the freezer on a flat surface. Freeze for at least 1 hour until they are semi-set.
Phase 3: The Glossy Drizzle (The “Liquid Glass” Step)
- Melt the Chocolate: While the bites are freezing, melt about 2 tablespoons of chocolate chips with 1 teaspoon of coconut oil in the microwave. Heat in 15-second intervals, stirring in between, until silky smooth and glossy.
- Drizzle: Remove the bites from the freezer. Using a spoon or a small piping bag, drizzle the melted chocolate over the cold bites. Because the bites are cold, the chocolate will begin to set almost immediately, creating that beautiful contrasting stripe.
- Final Freeze: Return the tray to the freezer for another 1 to 2 hours, or until the bites are completely solid.
- Serve: Remove from the liners (or pop out of silicone mold) and enjoy!
Expert Tips for Perfection
While this recipe is simple, a few tricks can take it from “good” to “gourmet.”
Choosing the Right Yogurt
The water content in your yogurt determines the iciness of the final product. Full-fat Greek yogurt (5% fat or higher) has the least water and the most creaminess. Regular non-Greek yogurt has too much whey and will freeze into a hard, icy block that is difficult to bite into. If you only have regular yogurt, strain it through a cheesecloth for an hour to remove excess liquid.
Thawing is Key
These are best enjoyed after sitting at room temperature for about 3 to 5 minutes. This brief thawing period softens the yogurt and peanut butter just enough to make it creamy rather than rock-hard, allowing the flavors to bloom.
Peanut Butter Texture
If you use natural peanut butter (the kind with oil separation), make sure it is stirred very well before measuring. If you use the dry, crumbly stuff at the bottom of the jar, your bites will be chalky. You want the oily, runny peanut butter for the best mouthfeel.
Variations to Try
Once you master the base recipe, the sky is the limit for flavor combinations.
- Berry Swirl: Mash up some fresh raspberries or strawberries and swirl them into the yogurt mixture before freezing. It tastes like a classic PB&J!
- Protein Boost: Stir a scoop of your favorite vanilla or chocolate protein powder into the yogurt mixture. You may need to add a splash of milk to adjust the consistency if the powder thickens it too much.
- Almond Joy Style: Swap peanut butter for almond butter, add shredded coconut to the mix, and top with a whole almond and chocolate drizzle.
- Chunky Monkey: Add small diced banana pieces into the batter. (Note: Bananas freeze quite hard, so dice them small!).
Storage and Nutrition Fun Facts
Storage: Once fully frozen, transfer the bites to an airtight freezer-safe container or a Ziploc bag. They will keep well for up to 2 months. Separating layers with parchment paper prevents them from sticking together if condensation forms.
Nutrition Check: Greek yogurt provides calcium, potassium, and probiotics which support gut health. Peanut butter offers healthy monounsaturated fats and Vitamin E. Dark chocolate (if used) is rich in antioxidants. This is a “dessert” that actually works for your body, not against it.
Whether you are looking for a post-workout recovery snack or a late-night treat to satisfy your sweet tooth, these Frozen Greek Yogurt Peanut Butter Bites check every box. They are cold, creamy, crunchy, and absolutely irresistible.
Frozen Greek Yogurt Peanut Butter Bites
Ingredients
Equipment
Method
- Line a muffin tin with cupcake liners or use a silicone mold.
- In a mixing bowl, whisk together Greek yogurt, peanut butter, honey, and vanilla extract until smooth and creamy.
- Spoon the mixture evenly into the muffin cups (fill about halfway).
- Sprinkle chocolate chips on top of each bite.
- Place in the freezer for 1 hour to semi-set.
- Melt remaining chocolate chips with coconut oil in the microwave in 15-second intervals.
- Drizzle melted chocolate over the semi-frozen bites.
- Freeze for an additional 1-2 hours until completely solid. Serve cold.