Cranberry Puppy Chow
The Ultimate White Chocolate Cranberry Puppy Chow: A Festive Holiday Addiction
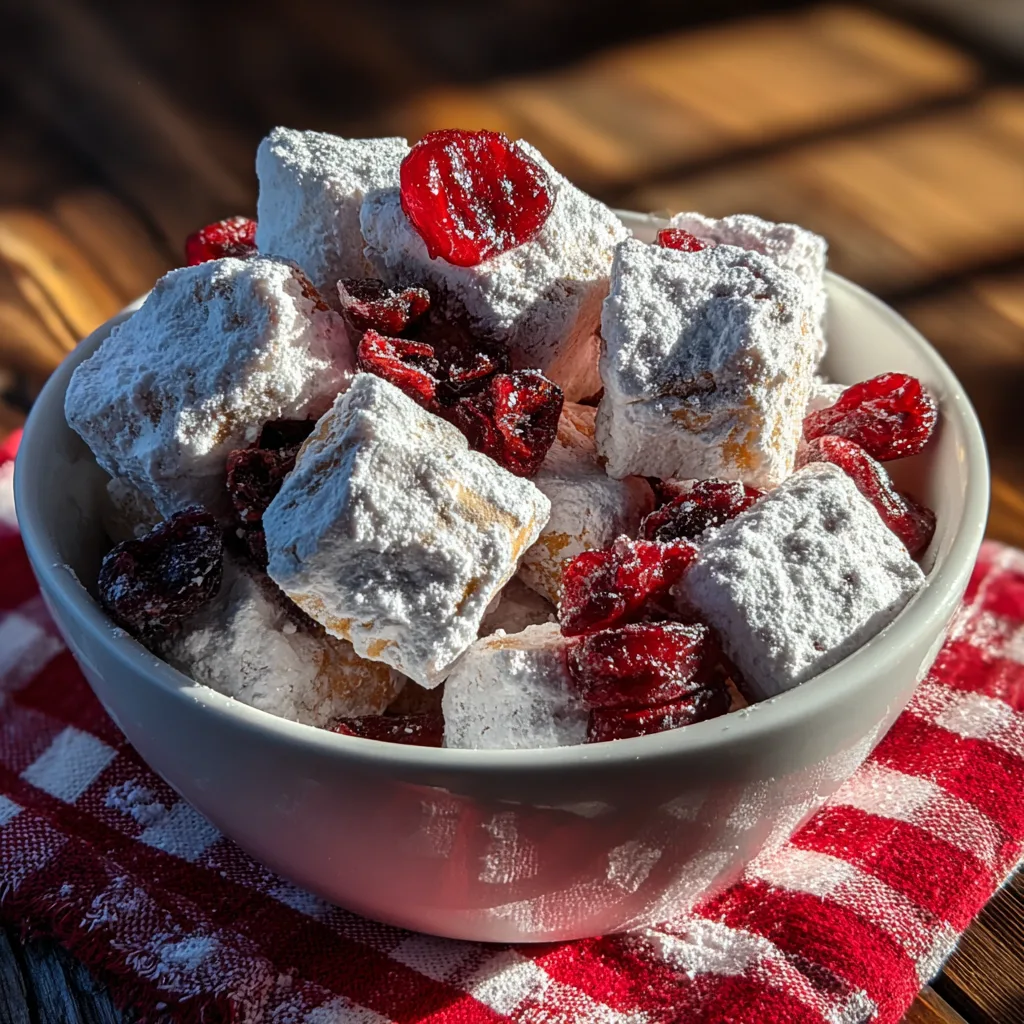
When the holiday season rolls around, the kitchen becomes the heart of the home, and the aroma of sweet treats fills the air. Among the cookies, cakes, and pies, there is one snack that stands out for its sheer addictiveness and ease of preparation: White Chocolate Cranberry Puppy Chow. Also known as “Muddy Buddies,” this festive twist on the classic recipe swaps the traditional peanut butter and semi-sweet chocolate for creamy white chocolate and tart dried cranberries. The result is a snowy, sweet, and tangy snack mix that looks as magical as it tastes.
Imagine the crunch of crispy rice cereal coated in a luxurious layer of melted white chocolate and butter, then tossed in a cloud of powdered sugar until every nook and cranny is covered in snowy perfection. Now, add the chewiness of ruby-red dried cranberries, which provide a burst of tartness to cut through the sweetness. It is a texture lover’s dream: crunchy, creamy, powdery, and chewy all in one bite. Presented in a bowl, it looks like little snow-covered gifts dotted with holiday red ornaments.
In this comprehensive guide, we will explore the secrets to making the perfect batch of White Chocolate Cranberry Puppy Chow. From selecting the right cereal to achieving that flawless, clump-free powdered sugar coating, we have got you covered. This recipe is “no-bake,” comes together in under 15 minutes, and is the perfect edible gift for neighbors, teachers, or just a cozy movie night at home.
Why You Will Fall in Love With This Recipe
There are countless reasons why this snack mix deserves a top spot on your holiday baking list (even though no baking is required!). Here is why it is a winner:
- Incredibly Fast: You can go from zero to snacking in about 15 minutes. It is the ultimate last-minute party treat.
- Visual Appeal: The stark white sugar against the deep red cranberries creates a striking, festive look that screams “Christmas” without needing artificial food coloring.
- Perfect Balance: White chocolate can sometimes be overly sweet, but the tartness of the cranberries and the crunch of the cereal provide the perfect counterbalance.
- Gift-Able: Because it is dry and shelf-stable, it packs beautifully in cellophane bags or mason jars for adorable DIY gifts.
- Kid-Friendly: Little hands love to help shake the bag to coat the cereal—it is a fun kitchen activity for the whole family.
Ingredients
The Crunchy Base and Coating
- 9 cups Rice Chex Cereal: This is the gold standard for puppy chow. Corn Chex works too, but Rice Chex has a lighter, crispier texture that pairs perfectly with the white chocolate.
- 1.5 cups White Chocolate Chips: Use high-quality white chocolate (like Ghirardelli or Guittard) for the best melt and flavor. Avoid “almond bark” if possible, as real cocoa butter makes a difference here.
- 0.25 cup Unsalted Butter: This helps thin the chocolate slightly and adds a rich, buttery undertone to the coating.
- 1 tsp Vanilla Extract: Enhances the creamy flavor of the white chocolate.
The “Snow” and Mix-Ins
- 1.5 to 2 cups Powdered Sugar: This is what creates the signature “puppy chow” look. You need enough to fully coat the sticky cereal so it isn’t messy to eat.
- 1.5 cups Dried Cranberries: (Craisins). These add the chewy texture and tart flavor. You can also use dried cherries if you prefer a sweeter fruit note.
- Optional: Zest of 1 Orange: If you want to elevate the flavor, the citrus oils from orange zest pair heavenly with cranberry and white chocolate.
Step-by-Step Instructions
1. Prepare the Cereal
Measure out your cereal into a very large mixing bowl. You want a bowl with plenty of extra room for stirring so you don’t crush the delicate cereal squares. Have your dried cranberries ready nearby.
2. Melt the Chocolate Mixture
In a microwave-safe bowl, combine the white chocolate chips and the butter. Microwave on high for 1 minute, then remove and stir. Continue microwaving in 30-second intervals, stirring vigorously in between, until the mixture is completely smooth and silky. Be careful not to overheat white chocolate, as it can seize and become grainy. Once melted, stir in the vanilla extract (and orange zest, if using).
3. Coat the Cereal
Pour the smooth melted chocolate mixture directly over the cereal in the large bowl. Using a large rubber spatula, gently fold the cereal and chocolate together. Use a “scoop and fold” motion, scraping the bottom of the bowl and bringing it to the top. Take your time here—you want every single square coated evenly, but you don’t want to crush them into dust.
4. The “Shake” Technique
This is the fun part! You have two options here. You can use a 2-gallon Ziploc bag (the easiest method) or a large clean paper bag. Pour the powdered sugar into the bag. Carefully transfer the chocolate-coated cereal into the bag on top of the sugar.
5. Create the Snow
Seal the bag tightly, trapping some air inside so the cereal has room to move. Shake the bag vigorously for about 1 minute. Turn it upside down, side to side, ensuring the sugar coats every sticky surface. When you look inside, the cereal should be completely white and dry to the touch.
6. Add the Jewels
Pour the coated cereal out onto a large baking sheet lined with parchment paper to let it cool and set. This prevents it from steaming in the bag and getting soggy. Once spread out, sprinkle the dried cranberries over the top and toss gently with your hands to distribute them evenly. The cranberries generally don’t get coated in the sugar step (so they stay bright red), but you can add them to the bag if you prefer them “snowy” as well.
7. Cool and Serve
Let the mixture sit for about 15–20 minutes until the chocolate is fully set and firm. Then, transfer to a serving bowl or airtight containers.
Tips for Success
While this recipe is simple, a few tricks ensure perfection every time:
- Don’t Burn the Chocolate: White chocolate burns at a lower temperature than dark chocolate. If it starts to look thick or clumpy, it may have seized. Stirring in a teaspoon of vegetable oil can sometimes save it.
- Sift the Sugar: If your powdered sugar is very lumpy, give it a quick sift before adding it to the bag. Large lumps of sugar are not pleasant to bite into.
- Cool Completely: Don’t seal the finished puppy chow in a container until it is completely cool. Trapped warmth will create condensation, making your crunchy snack soggy and stale.
- Customize the Ratio: If you like a thicker coating of “snow,” use the full 2 cups of sugar. for a lighter dusting, stick to 1.5 cups.
Variations to Try
The “Nutty” Twist: Add 1 cup of pecan halves or chopped pistachios to the cereal before coating with chocolate. Pistachios add a lovely green color that matches the red cranberries for Christmas.
Spiced Version: Add 1 teaspoon of cinnamon or pumpkin pie spice to the powdered sugar before shaking. This gives the treat a warm, cozy flavor profile.
Candy Cane Crunch: Crush 3-4 candy canes and mix them in with the cranberries at the end for a peppermint bark vibe.
Gluten-Free: Rice Chex is generally gluten-free (check the box to be sure), making this a fantastic gluten-safe dessert option for parties.

Serving Ideas
This White Chocolate Cranberry Puppy Chow looks stunning when served in:
- Glass Jars: Layer the mix in mason jars and tie with a red ribbon for a rustic, homemade gift.
- Holiday Tins: Line a cookie tin with festive parchment paper and fill it to the brim.
- Party Cones: Fill clear plastic cone bags for individual servings at a school party or holiday buffet.
Storage Instructions
Room Temperature: Store in an airtight container or Ziploc bag at room temperature for up to 1 week. (If it lasts that long!)
Freezing: Yes, you can freeze puppy chow! Place it in a freezer-safe bag and freeze for up to 2 months. Thaw on the counter before eating. It is actually delicious right out of the freezer for an extra-cold crunch.
White Chocolate Cranberry Puppy Chow
Ingredients
Equipment
Method
- Measure Rice Chex cereal into a large bowl. Set aside.
- In a microwave-safe bowl, combine white chocolate chips and butter.
- Microwave in 30-second intervals, stirring after each, until completely smooth and melted.
- Stir vanilla extract into the melted chocolate mixture.
- Pour chocolate mixture over cereal and gently fold until evenly coated.
- Add powdered sugar to a large Ziploc bag.
- Transfer coated cereal to the bag, seal, and shake vigorously until coated in sugar.
- Spread mixture onto a baking sheet to cool. Sprinkle dried cranberries over top and mix gently.
- Store in an airtight container once fully cooled.