Caramel Pretzel Turtles
The Ultimate Guide to Irresistible Salted Caramel Pretzel Turtles
There is a specific kind of magic that happens when you combine the crunch of a salty pretzel with the buttery chew of caramel and the smooth richness of chocolate. It is a sensory experience that hits every pleasure point on the palate. Enter the Salted Caramel Pretzel Turtle. This isn’t just a piece of candy; it is a bite-sized masterpiece of texture and flavor contrast. Whether you are looking for the perfect addition to your holiday cookie box, a quick treat for a movie night, or a gift that will make you the most popular person at the office potluck, these turtles are the answer.
In this comprehensive guide, we are going deep into the world of homemade turtles. We aren’t just tossing ingredients together; we are exploring the nuances of the perfect caramel consistency, the snap of the chocolate, and the structural integrity of the pretzel base. By the end of this article, you will be an expert in crafting these glistening, gooey, sweet-and-salty delights.
Why This Recipe Wins Every Time
Why are we so obsessed with this particular combination? The answer lies in the science of taste. The “bliss point” is a term used in food science to describe the perfect ratio of salt, sugar, and fat that optimizes palatability. These Salted Caramel Pretzel Turtles hit that bliss point with aggressive precision.
- Texture Contrast: You have the hard snap of the pretzel, the slow chew of the caramel, and the melting smoothness of the chocolate. This keeps your mouth entertained with every bite.
- Flavor Profile: The salt from the pretzel and the sea salt topping cuts through the intense sweetness of the caramel, preventing flavor fatigue. This makes it dangerously easy to eat more than one.
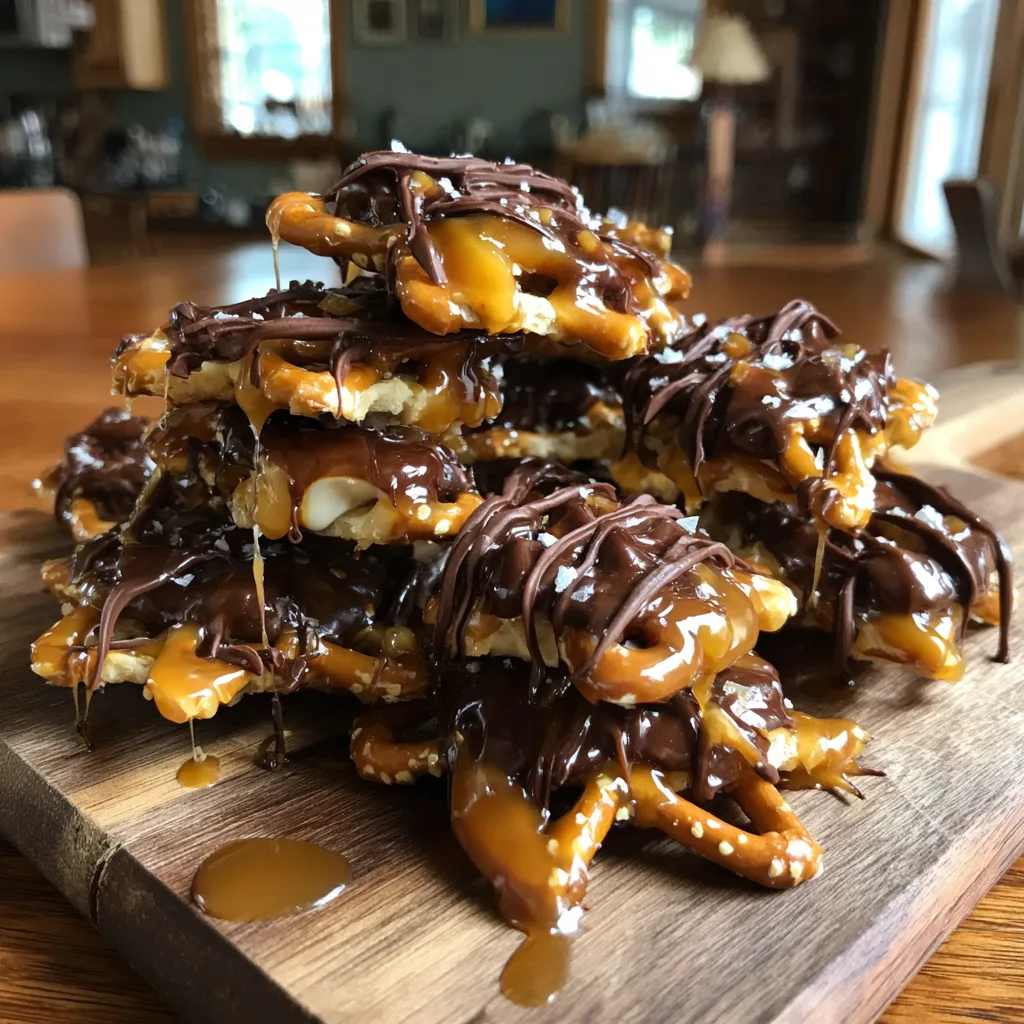
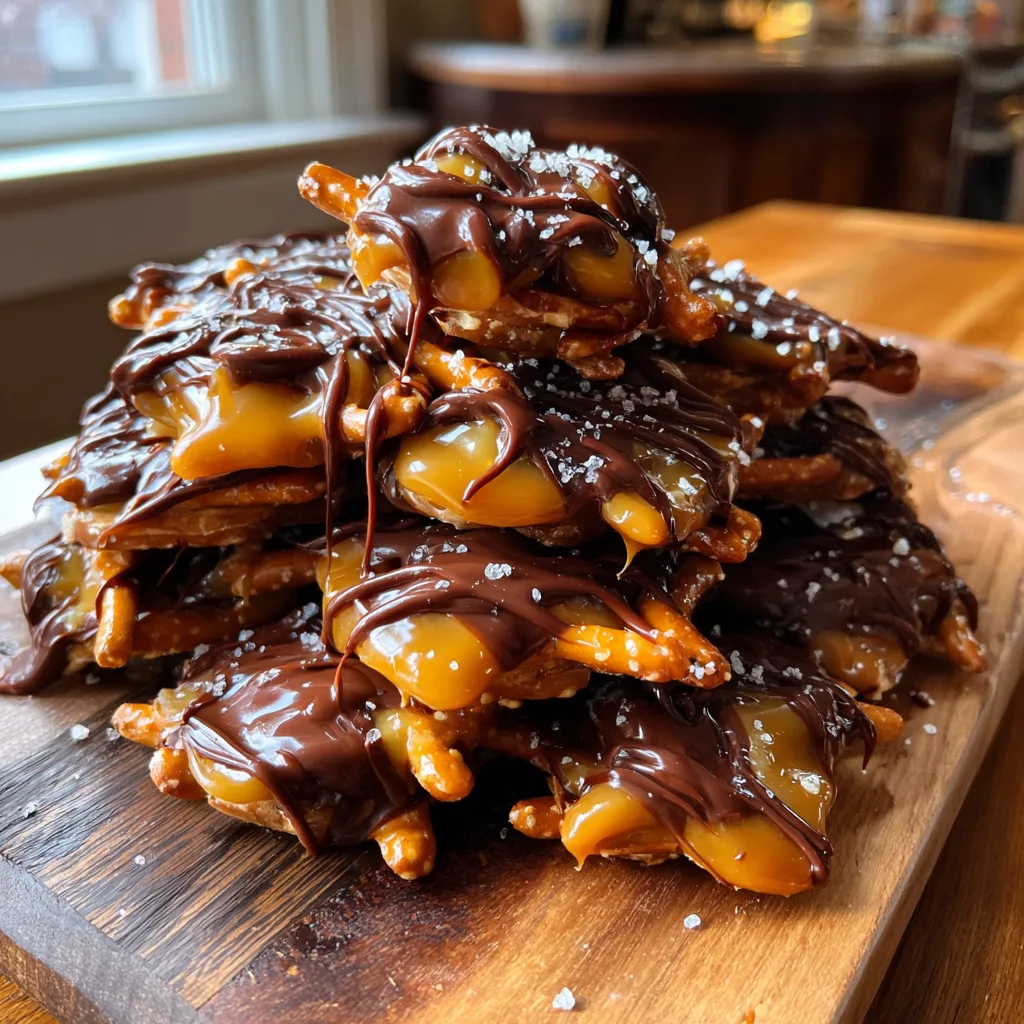
- Visual Appeal: As seen in the photos, the way the light catches the glossy chocolate drizzle and the amber caramel makes these treats look like they came from a high-end chocolatier, despite being incredibly easy to make at home.
The Anatomy of the Perfect Turtle
To create the best Salted Caramel Pretzel Turtles, you need to respect the ingredients. Since there are so few components, the quality of each one matters significantly.
1. The Foundation: The Pretzel
The pretzel serves as the vehicle for the toppings. You want a mini twist or a pretzel snap (grid shape). The mini twist offers a classic look and holds the caramel well within its loops. The snap offers more surface area. Avoid pretzel sticks, as they don’t provide a stable enough base for the heavy caramel and chocolate load. Ensure your pretzels are fresh and crisp; a stale pretzel will ruin the texture profile immediately.
2. The Heart: The Caramel
This is the trickiest part. You have two routes: store-bought soft caramels or homemade. For this recipe, we focus on high-quality soft caramels (like Kraft or Werther’s Chewy) melted down with a touch of heavy cream or butter. This ensures a consistent set that is chewy but won’t pull your fillings out. The caramel needs to be fluid enough to pool over the pretzel but thick enough to not run off completely.
3. The Crown: The Chocolate
Semi-sweet chocolate is the traditional choice because its slight bitterness balances the sugar in the caramel. However, dark chocolate creates a more sophisticated, adult flavor profile, while milk chocolate makes for a super-sweet, nostalgic treat. Use high-quality baking chips or couverture chocolate for the best melt and shine.
4. The Finish: Sea Salt
Do not skip this. A sprinkle of flaky sea salt (like Maldon) is non-negotiable. It adds a final crunch and a burst of salinity that ties the whole room together.
Ingredients
Here is exactly what you will need to create a batch of these glistening beauties. No complicated shopping lists here—just pure, simple indulgence.
- Mini Pretzels: 40-50 mini pretzel twists (about half a standard bag). Look for unbroken pieces.
- Soft Caramels: 1 bag (11 oz) of soft caramel squares, unwrapped.
- Heavy Cream or Butter: 1 tablespoon (this helps the caramel stay soft after cooling).
- Semi-Sweet Chocolate Chips: 1 cup of high-quality chips or a chopped chocolate bar.
- Vegetable Oil or Coconut Oil: 1 teaspoon (to make the chocolate glossy and prevent seizing).
- Pecan Halves (Optional): For a traditional “turtle” experience, you can place a pecan on the pretzel before the caramel.
- Flaky Sea Salt: For garnishing.
Step-by-Step Instructions
Follow these steps to achieve that professional, “confectionery shop” look right in your own kitchen.
Step 1: Prepare Your Station
Line two large baking sheets with parchment paper or a silicone baking mat. This is crucial—caramel is sticky cement. If you skip this, you will never get them off the pan intact. Arrange your pretzels in single layers on the baking sheets. If you are using pecans, place one pecan half on top of each pretzel now.
Step 2: Melting the Caramel
In a medium microwave-safe bowl, combine the unwrapped caramels and the heavy cream (or butter). Microwave in 30-second intervals. Stir vigorously between each interval. It usually takes about 2 to 2.5 minutes total. You want a smooth, molten lava consistency. If it’s too stiff, add another teaspoon of cream. Work quickly once it’s melted.
Step 3: The Caramel Pour
Using a teaspoon, carefully dollop a spoonful of melted caramel onto the center of each pretzel. Let it ooze slightly into the pretzel holes, but try to keep it from running entirely off the pretzel onto the paper. If it does run, don’t worry—those crispy caramel edges are delicious later. Allow the caramel to set at room temperature for about 15-20 minutes until it firms up slightly.
Step 4: The Chocolate Drizzle
While the caramel sets, place your chocolate chips and oil in a small microwave-safe bowl. Microwave in 30-second bursts, stirring in between, until completely smooth and glossy. The oil adds that signature shine you see in professional photos.
Pro Tip for Drizzling: Transfer the melted chocolate into a small Ziploc bag and snip a tiny corner off, or use a spoon. Drizzle the chocolate back and forth over the caramel-topped pretzels in a zig-zag motion. Be generous!
Step 5: The Salty Finish
Immediately after drizzling the chocolate (before it hardens), sprinkle a pinch of flaky sea salt over each turtle. The wet chocolate acts as the glue for the salt.
Step 6: Setting
Place the baking sheets in the refrigerator for about 15-20 minutes to let the chocolate and caramel set completely. Once firm, peel them off the parchment paper.
Expert Tips for Success
Avoid the “Rock Hard” Caramel: If you overcook your caramel, it will turn hard as a rock once it cools. This is why we add cream or butter. It interferes with the crystal structure and keeps the caramel pliable even when cool.
Tempering Chocolate (Optional): If you want these to be shelf-stable at room temperature without the chocolate melting on your fingers, you can temper the chocolate. However, for a quick home recipe, the melt-and-drizzle method with a little oil is perfectly fine, just keep them stored in a cool place.
The “Cluster” Variation: Instead of one pretzel, arrange three pretzels in a star shape (heads in, tails out) to look like actual turtle legs. Drop the caramel in the center to bind them together. This makes for a larger, more substantial treat.
Creative Variations
- White Christmas Turtles: Swap the semi-sweet chocolate for white chocolate and sprinkle with crushed peppermint candy canes instead of sea salt.
- Peanut Butter Lover: Melt peanut butter chips with the chocolate for the drizzle, or place a dollop of peanut butter on the pretzel before adding the caramel.
- The “Loaded” Turtle: Add a layer of toasted coconut on top of the caramel before drizzling the chocolate for a texture reminiscent of a Samoa cookie.
- Dark & Stormy: Use 85% dark chocolate and a pinch of cayenne pepper in the chocolate melt for a spicy-sweet kick.
Serving and Storage Suggestions
These Salted Caramel Pretzel Turtles are best served at room temperature where the caramel is soft and gooey. If you serve them straight from the fridge, the caramel might be a bit chewy.
Storage: Store them in an airtight container between layers of wax paper.
Room Temperature: They will keep for up to 1 week (if it’s not too hot in your kitchen).
Refrigerator: They will last up to 3 weeks.
Freezer: Yes, you can freeze them! They freeze beautifully for up to 3 months. Thaw on the counter for 30 minutes before eating.
Fun Facts and History
The original “Turtle” candy was developed in 1918 by DeMet’s Candy Company. It was named because the combination of pecans and chocolate looked like the shell of a turtle. Over the years, the recipe has evolved. The pretzel variation is a modern twist, replacing the pecan’s crunch with the pretzel’s salty snap, catering to the modern obsession with sweet-and-salty flavor profiles.
Whether you call them Pretzel Delights, Rolo Pretzels, or Caramel Turtles, the result is the same: pure joy. These treats prove that you don’t need a culinary degree or fancy equipment to create something that looks spectacular and tastes even better. Gather your ingredients, clear some counter space, and get ready to make the most addictive snack of the season.
Salted Caramel Pretzel Turtles
Ingredients
Equipment
Method
- Line two large baking sheets with parchment paper or silicone mats. Arrange mini pretzels in a single layer.
- If using pecans, place one pecan half on top of each pretzel.
- In a microwave-safe bowl, combine unwrapped caramels and heavy cream. Microwave in 30-second intervals, stirring vigorously in between, until smooth and melted (approx 2 mins).
- Spoon a dollop of melted caramel onto the center of each pretzel. Allow to set at room temperature for 15 minutes.
- In a separate bowl, melt chocolate chips and coconut oil in 30-second intervals until smooth.
- Drizzle the melted chocolate over the caramel-covered pretzels using a spoon or a small piping bag.
- Immediately sprinkle flaky sea salt over the wet chocolate.
- Refrigerate for 15-20 minutes to set completely before serving.