Swirled Fruit Slushies
The Ultimate Pineapple Strawberry Swirled Slushies: A Taste of Tropical Summer
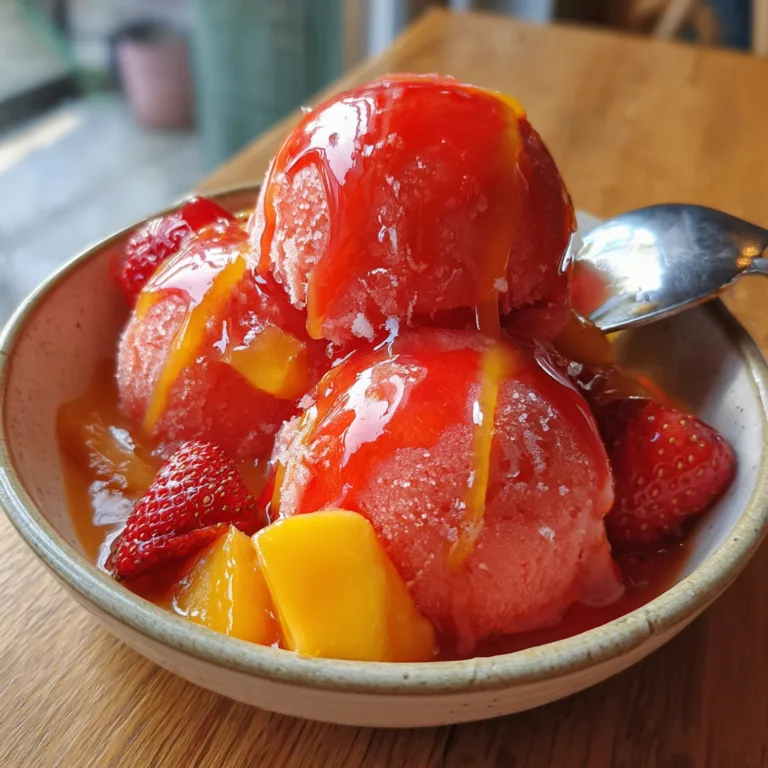
When the temperature rises and the summer sun begins to beat down, there is a universal craving for something icy, sweet, and profoundly refreshing. While store-bought popsicles and ice creams have their place, there is nothing quite as satisfying or visually spectacular as a homemade frozen beverage. Enter the Pineapple Strawberry Swirled Slushie. This magnificent, towering creation is a vibrant celebration of summer fruits, combining the tropical, tangy brightness of pineapple with the sweet, classic lusciousness of ripe strawberries. With its mesmerizing, two-toned swirls and impossibly thick, frosty texture, it is a drink that instantly transports you to a poolside cabana or a sandy beach.
The beauty of the Pineapple Strawberry Swirled Slushie lies not just in its stunning appearance, which is guaranteed to be the centerpiece of any backyard barbecue or patio gathering, but in its absolute simplicity. Unlike complex baked goods or elaborate cocktails, this frosty treat requires no cooking, no esoteric ingredients, and minimal prep time. It is a wholesome, fruit-forward delight that appeals to every generation. Kids will be wide-eyed at the bright colors and towering icy peaks, while adults will appreciate the pure, unadulterated fruit flavors and the guilt-free hydration it provides. In this comprehensive guide, we are going to explore everything you need to know to master this spectacular summer beverage, from selecting the perfect ingredients to achieving that coveted, soft-serve-like slushie consistency.
The Magic of the Swirl: Why Two-Toned Drinks Rule Summer
There is a psychological element to eating and drinking; we feast with our eyes first. A monolithic block of color in a glass is fine, but a dynamic, swirled pattern creates a sense of movement, fun, and indulgence. The contrast between the sunny, golden yellow of the pineapple layer and the deep, romantic ruby red of the strawberry layer creates a striking visual dichotomy. It looks like a drink you would pay a premium for at a high-end smoothie bar or a theme park, yet you are crafting it effortlessly in your own kitchen.
Beyond the aesthetics, the swirl serves a distinct culinary purpose. Instead of blending the two fruits together into a single, uniform (and sometimes muddy-colored) mixture, keeping them separate allows you to experience the distinct flavor profiles of both. As you sip through the layers or use your straw to mix them up in real-time, your palate is treated to alternating waves of tart citrusy pineapple and mellow, sweet berry. It keeps every sip interesting and prevents palate fatigue, making it the ultimate thirst quencher.
The Anatomy of the Perfect Slushie: Ingredient Deep Dive
To achieve a slushie that stands tall above the rim of the cup and does not immediately melt into colored water, you must pay strict attention to your ingredients. The secret to a phenomenal homemade slushie is utilizing frozen fruit as the primary thickening agent, rather than relying heavily on ice cubes.
The Sunny Side: Frozen Pineapple
Pineapple is the undisputed king of tropical fruits. Its natural enzymes and bright acidity give it a refreshing bite that cuts right through the summer heat. For this recipe, you absolutely must use frozen pineapple chunks. While you can certainly buy a fresh pineapple, chop it, and freeze it overnight on a parchment-lined baking sheet, buying pre-frozen, bagged pineapple chunks is a massive time-saver and guarantees peak ripeness, as fruit is typically flash-frozen at the farm. The frozen pineapple acts as the “ice” for the yellow layer, ensuring the flavor remains intense and undiluted.
The Ruby Heart: Frozen Strawberries
Strawberries provide the necessary sweetness and a beautiful floral aroma that rounds out the sharp tang of the pineapple. Just like the pineapple, utilizing frozen strawberries is non-negotiable for the texture we are aiming for. Frozen strawberries break down into a thick, velvety puree when blended with just a splash of liquid. Look for whole frozen strawberries without any added sugar or syrups. The natural sweetness of the berry is all you need.
The Liquid Catalysts: Juices and Alternatives
A blender cannot process rock-hard frozen fruit without a little bit of help. You need a liquid catalyst to get the blades moving and to bring the fruit to a drinkable, slushy consistency. For the most intense flavor, matching the liquid to the fruit is a great strategy. Using a splash of pineapple juice for the yellow layer and a splash of strawberry juice, apple juice, or cranberry juice for the red layer works wonders. However, if you want to keep the calorie count low and the flavors incredibly crisp, simply using filtered water or coconut water is an excellent, hydrating alternative. Coconut water adds an extra layer of tropical flair and is packed with electrolytes, making this slushie an incredible post-workout or hot-weather recovery drink.
Mastering the Equipment: The Path to Frosty Perfection
The only piece of equipment standing between you and slushie heaven is your blender. Because this recipe relies heavily on frozen fruit with very little liquid, you are essentially asking your blender to perform the duties of a food processor and an ice cream maker combined. A high-speed, high-powered blender is your best friend here. It will pulverize the frozen fruit into a smooth, icy puree without burning out the motor.
If you have a standard blender, do not despair! You can still achieve a fantastic Pineapple Strawberry Swirled Slushie, but it will require a bit more patience. You may need to stop the blender frequently, remove the lid, and use a spatula or a designated tamper tool to push the frozen fruit down toward the blades. You might also need to add a tiny bit more liquid to get things moving, but be cautious—add liquid by the tablespoon. It is always easier to thin out a thick slushie than it is to thicken up a watery one.
Ingredients List
Gather these simple ingredients to create two large, spectacular swirled slushies. Ensure your fruit is completely frozen solid before beginning.
- – 3 cups frozen pineapple chunks
- – 1/4 to 1/2 cup pineapple juice (or coconut water/regular water)
- – 3 cups frozen strawberries (hulled)
- – 1/4 to 1/2 cup apple juice, strawberry juice, or water
- – 1-2 tablespoons honey or agave syrup (optional, depending on the sweetness of your fruit)
- – Fresh pineapple wedges (for garnish)
- – Fresh strawberries (for garnish)
Step-by-Step Instructions
Creating the swirled effect requires making the two slushie flavors separately. Work quickly so the first batch doesn’t melt while you prepare the second!
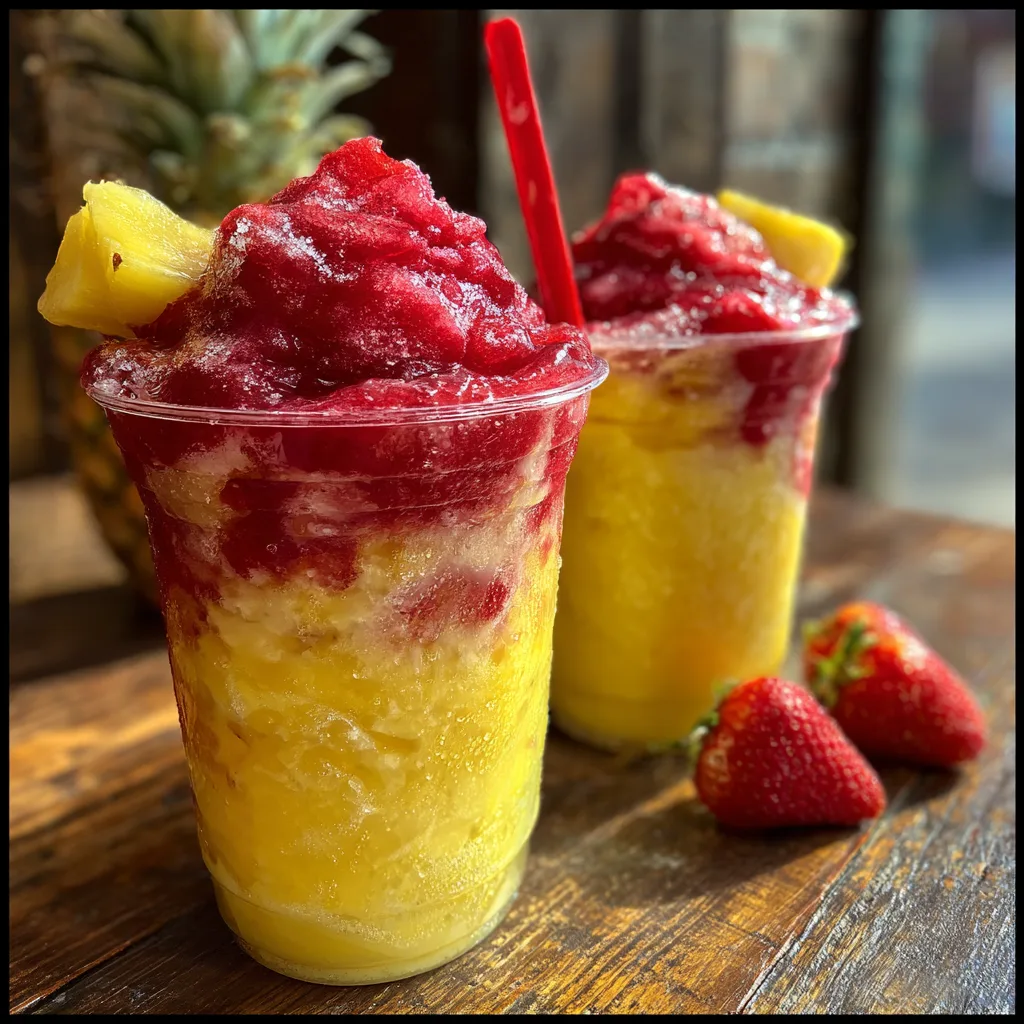
- Prepare Your Glasses: Set out two large, clear plastic cups or tall glass tumblers. Having them ready ensures you can pour and serve immediately while the slushies are at their thickest. If you want to be extra fancy, place the empty glasses in the freezer for 10 minutes beforehand to frost them up.
- Blend the Pineapple Layer: In your blender, combine the 3 cups of frozen pineapple chunks and 1/4 cup of pineapple juice (or your chosen liquid). If your pineapple is not naturally very sweet, add a teaspoon of honey or agave. Blend on high. Use a tamper or stop and scrape down the sides as needed until the mixture is incredibly thick, smooth, and resembles a sunny yellow sorbet. Transfer this thick pineapple slush to a bowl or a large measuring cup and set it aside (or pop it in the freezer briefly while you do the next step).
- Rinse the Blender: Give your blender pitcher a quick rinse under the tap. It doesn’t need to be perfectly clean, but you want to remove most of the yellow color so your red layer stays vibrant.
- Blend the Strawberry Layer: Add the 3 cups of frozen strawberries and 1/4 cup of your chosen liquid (apple juice, water, etc.) to the blender. Add a touch of sweetener if desired. Blend on high, tamping and scraping as necessary, until you achieve a thick, smooth, ruby-red slush.
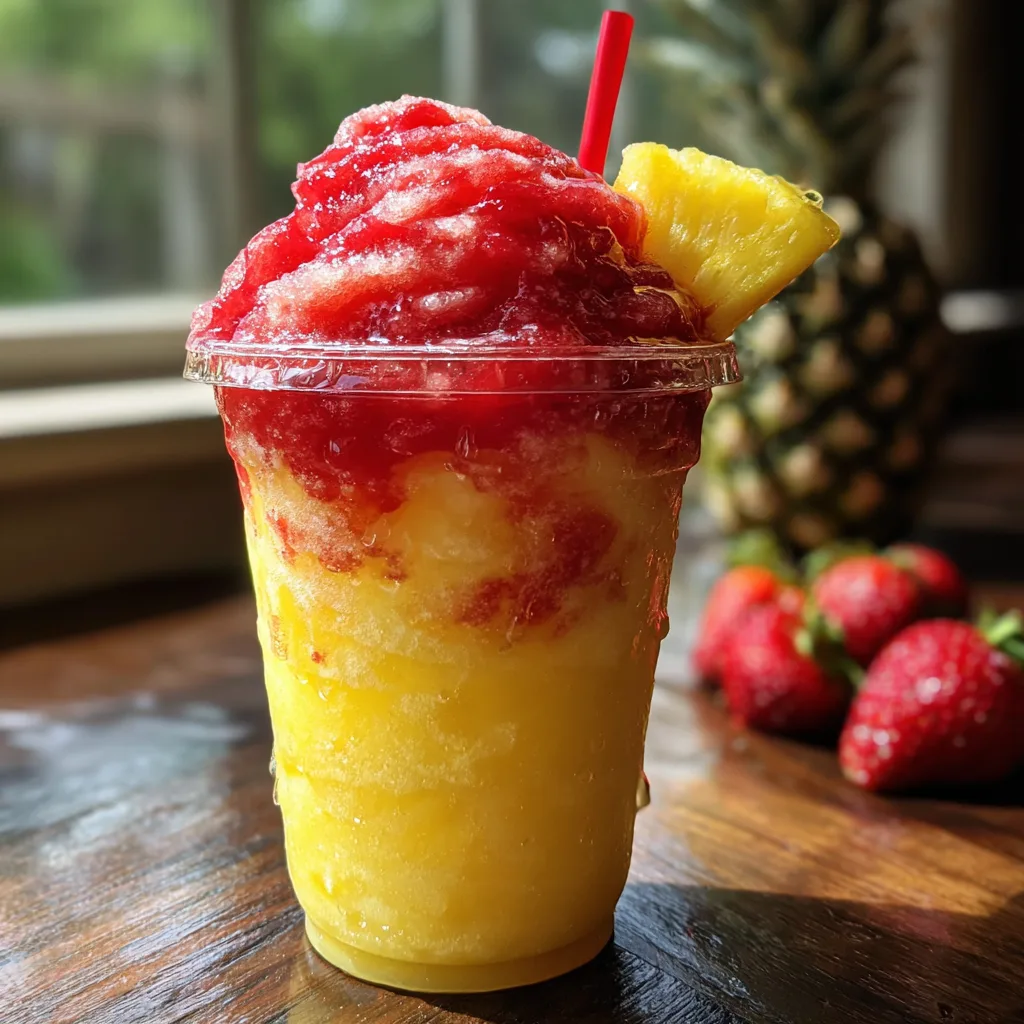
- Create the Swirl: Now for the fun part. Take your prepared glasses. Spoon a thick layer of the yellow pineapple slush into the bottom of the cup. Next, spoon a thick layer of the red strawberry slush directly on top. Repeat this alternating process—yellow, red, yellow, red—until the glass is full and you are piling the slushies high above the rim of the cup.
- The Final Flourish: To enhance the swirl effect, take a long straw or a butter knife and gently drag it up and down through the layers just once or twice right near the inside edge of the cup. Do not overmix! Finally, stick a thick straw into the center, garnish the rim with a fresh pineapple wedge, and serve immediately before the summer heat gets to it!
Pro Tips for the Ultimate Consistency
To ensure your Pineapple Strawberry Swirled Slushies look exactly like the mouth-watering pictures, keep these expert tips in mind.
Never Use Ice Cubes: It is tempting to stretch the recipe by tossing in a handful of ice cubes, but resist the urge. Ice cubes dilute the flavor of the fruit and create a watery, granular texture rather than a smooth, velvety slush. The frozen fruit is the only “ice” you need.
Control the Liquid: The biggest mistake people make is pouring in a whole cup of juice at the beginning. Start with a very small amount of liquid—just enough to help the blender blades catch the fruit. You want the mixture to be so thick you have to spoon it into the cup, not pour it.
Freeze Fresh Fruit Properly: If you are using fresh fruit from the farmer’s market, chop the pineapple and hull the strawberries, then lay them out in a single layer on a parchment-lined baking sheet. Freeze them until solid (usually 4-6 hours) before transferring them to a ziplock bag. This prevents the fruit from clumping together into one giant, un-blendable glacier.
Creative Variations to Try
Once you have mastered the basic two-toned swirl, the recipe becomes a blank canvas for your culinary imagination. Here are a few ways to mix things up.
The Tropical Colada Swirl
Take this slushie straight to the Caribbean by substituting the liquid in both layers with rich, full-fat canned coconut milk or coconut cream. The fat in the coconut milk will make the slushies incredibly creamy, almost like a dairy-free milkshake, and the flavor combination of pineapple, strawberry, and coconut is legendary.
Adults-Only Spiked Slushies
If you are hosting a summer cocktail party, these swirled slushies make an incredible base for frozen drinks. For the pineapple layer, blend in a shot of white rum or coconut rum. For the strawberry layer, blend in a shot of vodka or tequila. The alcohol lowers the freezing point, so you may need slightly less liquid to maintain the thick consistency. Serve with a warning—they go down dangerously easy!
The Mango Tango Addition
If you want to introduce a third color and flavor, substitute half of the pineapple with frozen mango chunks. Mango brings a dense, velvety texture to smoothies and slushies and pairs beautifully with both the pineapple and the strawberry.
Health Benefits: Sipping on Superfoods
While it tastes like a decadent dessert, the Pineapple Strawberry Swirled Slushie is actually a nutritional powerhouse, provided you skip the heavy added sugars. It is an excellent way to sneak daily fruit servings into your family’s diet.
Pineapples are incredibly rich in Vitamin C, which supports a healthy immune system, and they contain an enzyme called bromelain. Bromelain is known for its powerful anti-inflammatory properties and its ability to aid in digestion. It is the perfect fruit to consume after a heavy barbecue meal!
Strawberries, on the other hand, are packed with antioxidants, particularly anthocyanins, which give them their deep red color. They are also an excellent source of manganese, potassium, and folate. Blending these two fruits together creates a beverage that is not only hydrating but also actively supports your overall health and wellness.
Conclusion
The Pineapple Strawberry Swirled Slushie is more than just a drink; it is a quintessential summer experience in a cup. It represents the joy of simple, vibrant ingredients coming together to create something that is visually spectacular and undeniably delicious. With no artificial colors, no heavy syrups, and an irresistible frosty texture, it is a recipe that you will find yourself turning to time and time again when the weather gets warm. So, plug in your blender, stock up on frozen fruit, and get ready to swirl your way to the most refreshing summer yet.
Pineapple Strawberry Swirled Slushies
Ingredients
Equipment
Method
- Set out two large, clear plastic cups or glass tumblers.
- In a blender, combine the frozen pineapple, pineapple juice, and optional sweetener. Blend on high, using a tamper or stopping to scrape the sides, until very thick and smooth. Transfer to a bowl.
- Quickly rinse out the blender pitcher to remove the yellow residue.
- Add the frozen strawberries, apple juice (or water), and optional sweetener to the blender. Blend on high until thick and smooth like sorbet.
- To assemble, spoon a thick layer of the yellow pineapple slush into the bottom of each cup. Follow with a layer of the red strawberry slush.
- Repeat alternating layers until the cups are filled and piled high above the rim.
- Garnish the edge of the cup with a fresh pineapple wedge, insert a thick straw, and serve immediately.