Fruity Pebbles Tacos
The Ultimate Fruity Pebbles Cheesecake Tacos Recipe: A Nostalgic Dessert Dream
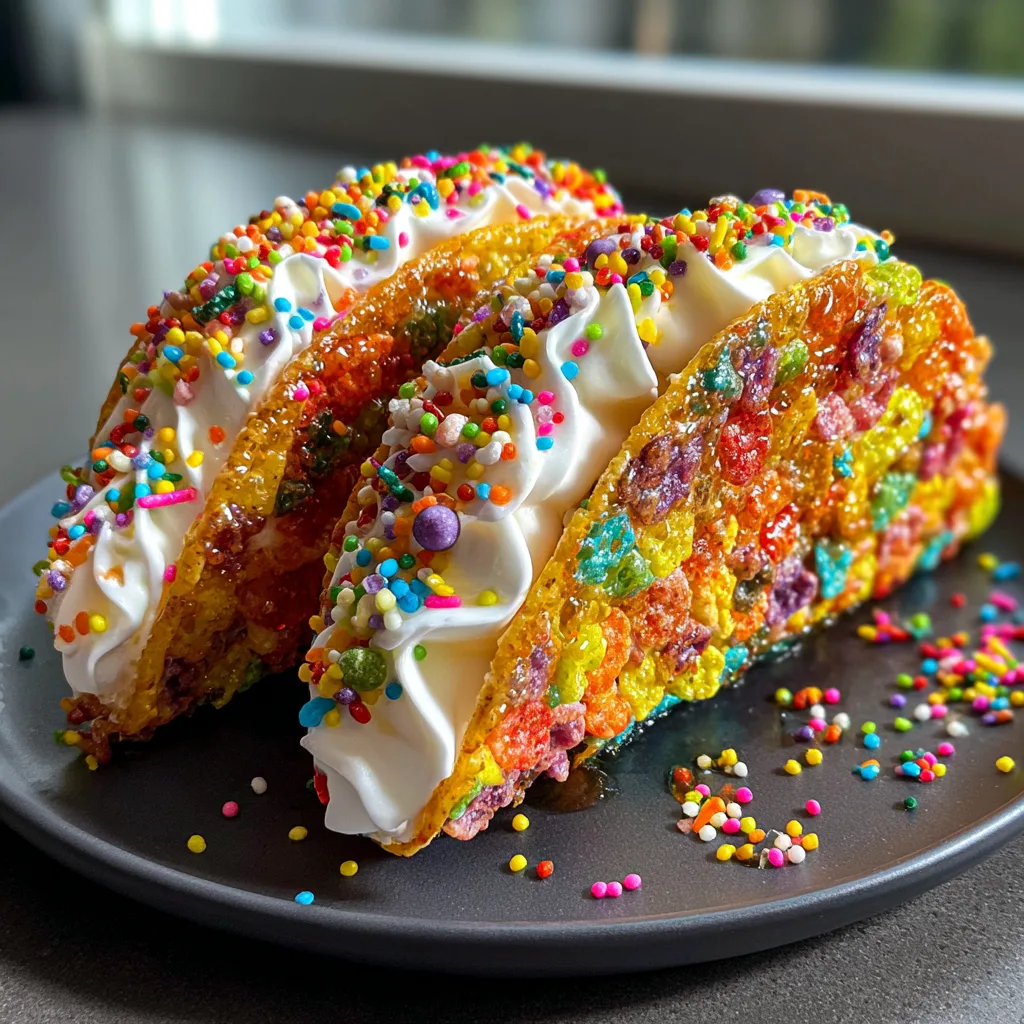
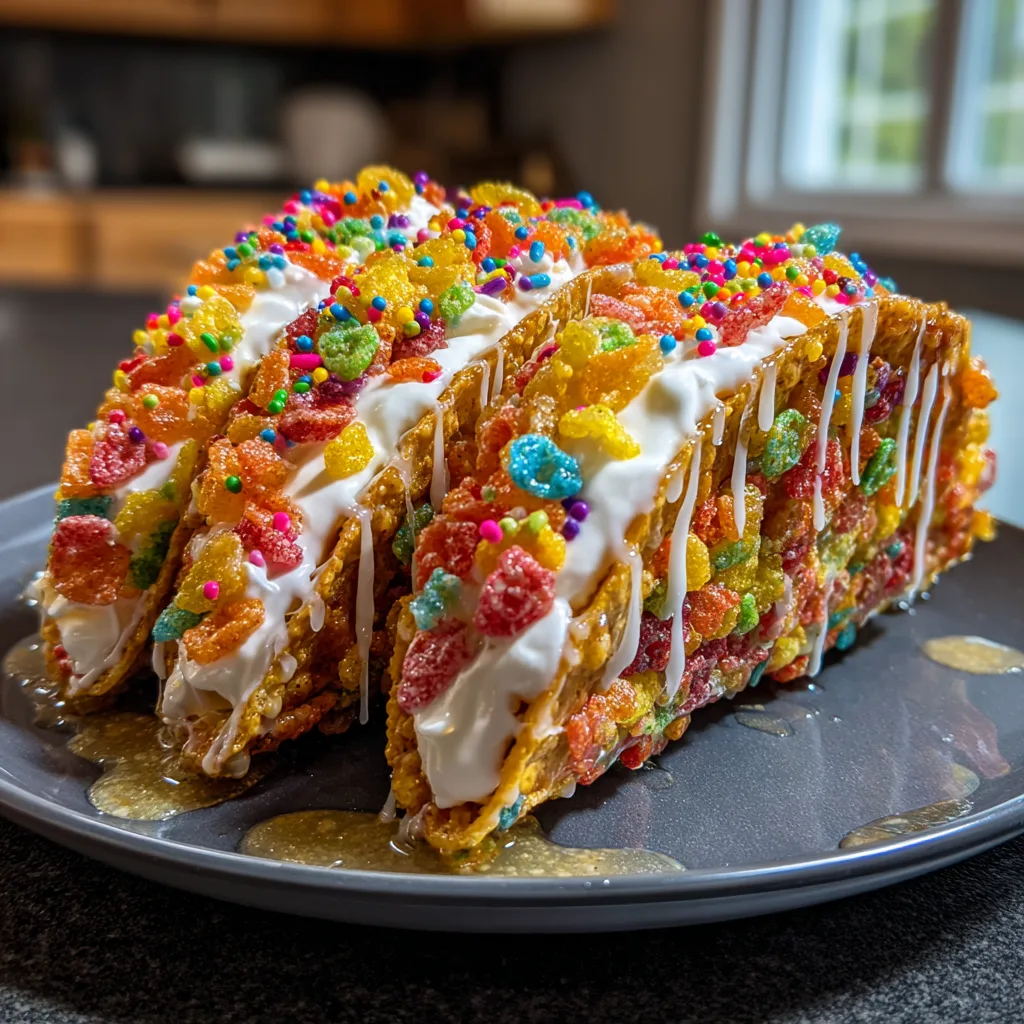
When it comes to desserts that instantly bring a smile to your face, few things can compete with a treat that is as visually spectacular as it is delicious. Enter the Fruity Pebbles Cheesecake Taco. This vibrant, whimsical creation takes everything you love about a classic weekend morning breakfast and transforms it into an elevated, decadent, yet completely approachable no-bake dessert. By marrying the crispy, sweet, and fruity crunch of iconic cereal with the rich, tangy, and velvety smoothness of a no-bake cheesecake, you create a handheld masterpiece that will be the undisputed star of any party, potluck, or family gathering.
In this comprehensive guide, we will dive deep into the art of crafting these colorful confections. We will explore the precise science of making the perfect molded cereal shell so it doesn’t fall apart in your hands, the secrets to whipping up a light and fluffy no-bake cheesecake filling that holds its shape, and all the creative ways you can customize this recipe to suit any occasion. Whether you are a seasoned baker looking for a fun weekend project or a beginner wanting to impress your friends with a unique treat, this recipe is guaranteed to deliver exceptional results.
The Rise of the Dessert Taco
The concept of the dessert taco has taken the culinary world by storm over the last few years. Traditional tacos are universally beloved for their handheld convenience and their perfect ratio of shell to filling. Translating this architecture into the realm of sweets was a natural evolution. Instead of corn or flour tortillas, dessert tacos utilize sweet foundations—waffle cones, cookie dough, pancakes, or, in our spectacular case, a marshmallow-bound cereal treat.
The Fruity Pebbles Cheesecake Taco specifically shines because it hits the ultimate trifecta of dessert perfection: texture, flavor contrast, and visual appeal. The rainbow hues of the cereal provide a neon-bright, eye-catching exterior that practically demands to be photographed. The crunch of the cereal shell offers a satisfying snap that gives way to the luxuriously soft, cloud-like cheesecake center. It is a playful, nostalgic dessert that appeals to the inner child in everyone while offering a sophisticated balance of sweetness and tanginess.
The Anatomy of the Cereal Shell: Mastering the Marshmallow Bind
The foundation of this dessert is the vibrant taco shell. If you have ever made traditional Rice Krispies Treats, you already understand the basic mechanics at play here. The shell relies on a simple mixture of melted butter and marshmallows to act as the edible glue that holds the Fruity Pebbles together.
However, making a flat square in a baking pan is one thing; molding that sticky mixture into a curved taco shape requires a bit more finesse. The key lies in temperature control and timing. You must melt the butter and marshmallows gently over low heat. If the heat is too high, the sugars in the marshmallows will crystallize and become rock hard as they cool, resulting in a shell that will crack your teeth rather than providing a pleasant chew. A gentle melt ensures the binder remains pliable.
Once the cereal is folded into the melted marshmallow mixture, you have a brief window of workability before it begins to set. You must press the mixture flat while it is still warm, and then drape it over a cylindrical object—like a thick wooden rolling pin or a suspended taco holder—to cool and harden into that iconic U-shape. Using parchment paper or a silicone baking mat heavily greased with non-stick cooking spray is absolutely essential to prevent the sticky shells from tearing as you work with them.
The Perfect No-Bake Cheesecake Filling
While the colorful shell is the visual draw, the heart of this dessert is the cheesecake filling. Because we are putting this into a delicate cereal shell, a traditional baked cheesecake filling is out of the question. We need a no-bake filling that is sturdy enough to be piped and hold its shape, yet light enough to contrast the dense, chewy shell.
The secret to the perfect no-bake cheesecake lies in the aeration of heavy whipping cream. Instead of relying on eggs and the structural stability of baking, a no-bake cheesecake gets its volume and firmness from whipped cream folded into sweetened cream cheese.
The Cream Cheese: Always use full-fat, brick-style cream cheese. Do not use the whipped cream cheese that comes in a tub, as it contains too much air and moisture and will result in a runny filling. The cream cheese must be softened to room temperature before you begin. If it is cold, it will be lumpy, and you will never achieve that silky-smooth texture.
The Heavy Cream: Your heavy whipping cream should be as cold as possible. Cold cream whips faster and holds stiffer peaks. You will whip the cream separately until it forms stiff peaks, then gently fold it into the cream cheese mixture. This two-bowl method ensures you don’t accidentally overbeat the mixture and break the emulsion.
The Flavor Balance: Fruity Pebbles are intensely sweet. Therefore, the cheesecake filling must carry enough tanginess and richness to cut through that sugar. A dash of pure vanilla extract enhances the overall flavor profile, while a squeeze of fresh lemon juice (optional, but highly recommended) can amplify the natural tang of the cream cheese, creating a perfectly balanced bite.
Ingredients
To create these stunning and delicious dessert tacos, you will need to gather the following ingredients. This recipe yields approximately 6 to 8 tacos depending on the size of the shells you mold.
For the Fruity Pebbles Taco Shells:
- – 4 cups Fruity Pebbles cereal
- – 4 cups mini marshmallows (fresh is best)
- – 3 tablespoons unsalted butter
- – Non-stick cooking spray (crucial for molding)
For the No-Bake Cheesecake Filling:
- – 16 oz (two 8-oz bricks) full-fat cream cheese, softened to room temperature
- – 1 cup heavy whipping cream, very cold
- – 3/4 cup powdered sugar, sifted
- – 1 teaspoon pure vanilla extract
- – 1 teaspoon fresh lemon juice (optional, for extra tang)
For the Toppings:
- – Rainbow nonpareils (tiny round sprinkles)
- – Extra Fruity Pebbles or small colorful candies
Step-by-Step Instructions
Follow these detailed steps carefully, especially the instructions for molding the shells, to ensure your dessert tacos look exactly like the pictures.
- Prepare Your Molding Station: Before you melt anything, set up your shaping tools. You can use an inverted muffin tin (nestling the flat discs between the cups to form a U-shape), a large rolling pin wrapped in parchment paper, or taco holder stands. Grease whatever you are using generously with non-stick spray. Have several squares of parchment paper cut and ready.
- Melt the Binder: In a large, heavy-bottomed pot, melt the unsalted butter over low heat. Once the butter is completely melted, add the mini marshmallows. Stir continuously with a silicone spatula until the marshmallows are completely smooth and melted. Immediately remove the pot from the heat. Do not let the mixture boil.
- Coat the Cereal: Pour the Fruity Pebbles cereal into the melted marshmallow mixture. Gently fold the cereal into the marshmallow until every single flake is evenly coated in the sticky binder.
- Form the Discs: Spray your hands generously with non-stick cooking spray. Scoop out a portion of the warm cereal mixture (about 1/2 cup) and place it onto a piece of parchment paper. Flatten it with your greased hands or a greased rolling pin into a flat circle, about 5 to 6 inches in diameter and 1/4 inch thick. Work quickly before the mixture cools and hardens.
- Shape the Tacos: While the cereal disc is still warm and pliable, carefully drape it over your prepared rolling pin or between the inverted muffin cups to form a classic taco shell shape. Let the shells sit completely undisturbed for at least 30 to 45 minutes to cool and harden into shape.
- Whip the Cream: While the shells are setting, prepare the filling. In a medium chilled bowl, use a hand mixer to beat the cold heavy whipping cream until stiff peaks form. Set aside in the refrigerator.
- Beat the Cream Cheese: In a separate large bowl, beat the softened cream cheese until it is completely smooth, creamy, and free of any lumps. Add the sifted powdered sugar, vanilla extract, and lemon juice (if using). Beat again until fully combined and fluffy.
- Fold to Combine: Take the chilled whipped cream and gently fold it into the cream cheese mixture using a rubber spatula. Use a sweeping motion, bringing the mixture from the bottom of the bowl over the top. Do not overmix or stir vigorously, or you will deflate the air you whipped into the cream.
- Pipe the Filling: Transfer the finished no-bake cheesecake filling into a large piping bag fitted with a large round tip or a star tip. If the filling feels a bit soft, place the piping bag in the refrigerator for 20 minutes to firm up.
- Assemble the Tacos: Carefully remove the hardened Fruity Pebbles shells from their molds. Hold a shell in one hand and pipe a generous amount of the cheesecake filling directly into the center of the taco, filling it from end to end.
- Decorate: Immediately sprinkle the exposed white cheesecake filling with rainbow nonpareils and extra candy pieces. The sprinkles will adhere perfectly to the freshly piped filling.
- Chill and Serve: Place the assembled tacos upright in a container or taco holder and chill in the refrigerator for at least 1 hour before serving to allow the filling to set completely. Serve cold.
Troubleshooting Common Issues
Even with a straightforward recipe, a few pitfalls can catch novice makers off guard. Here is how to ensure perfection.
Soggy Shells: If your shells lose their crunch and become soggy quickly, it usually means there was too much moisture in the environment or the filling sat in the shell too long before being eaten. These are best assembled the day they are meant to be consumed. To maximize crunch, ensure the marshmallow mixture is cooked just enough to melt, not a second longer.
Lumpy Cheesecake Filling: This is the most common error in no-bake cheesecakes and is entirely due to using cold cream cheese. The cream cheese must be incredibly soft. If you are in a rush, you can microwave the unwrapped brick of cream cheese for 10-15 seconds, but room temperature softening is best.
Shells Breaking When Bending: If the cereal mixture cools down too much while you are flattening it, it will crack and snap when you try to fold it into a taco shape. The solution is to work in batches. If the mixture in the pot gets too hard to work with, place it over the lowest possible heat for a few seconds just to re-soften the marshmallow, then continue forming.
Creative Variations to Try
Once you master the basic technique of the cereal taco shell, the flavor possibilities are limited only by your imagination and the cereal aisle at your local grocery store.
Cocoa Pebbles Chocolate Tacos: Swap the Fruity Pebbles for Cocoa Pebbles. Add 1/4 cup of sifted high-quality cocoa powder to your cream cheese mixture for a double chocolate dessert taco. Top with chocolate shavings and mini chocolate chips.
Cinnamon Toast Crunch Churro Tacos: Use Cinnamon Toast Crunch for the shell. Leave the cheesecake filling plain vanilla, but drizzle the top with warm caramel sauce and a dusting of cinnamon sugar right before serving to mimic the flavor profile of a churro cheesecake.
Strawberry Shortcake Tacos: Keep the Fruity Pebbles shell, but fold finely diced fresh strawberries into the cheesecake filling. Top with crushed freeze-dried strawberries and a drizzle of white chocolate.
Serving Suggestions for Parties
These tacos are visually spectacular and make for a perfect centerpiece at birthdays, baby showers, or summer barbecues. To serve them effectively at a party, consider setting up a “Taco Bar.”
You can pre-make and shape the cereal shells the day before. Keep the cheesecake filling chilled in piping bags. Allow your guests to grab a shell, pipe their own filling, and then provide a buffet of toppings: crushed Oreos, assorted sprinkles, mini chocolate chips, fresh berries, caramel sauce, and chocolate syrup. This interactive element makes the dessert even more memorable.
Storage and Make-Ahead Instructions
Due to the nature of the cereal and the moisture of the cheesecake, these tacos have a relatively short shelf life when fully assembled.
Making Ahead: You can prepare the components in advance. The Fruity Pebbles shells can be made up to 2 days ahead of time. Store them in an airtight container at room temperature, separated by parchment paper so they do not stick together. The cheesecake filling can be made 2 days in advance and stored in an airtight container in the refrigerator.
Storing Leftovers: If you have fully assembled tacos left over, store them in the refrigerator in an airtight container. They will be safe to eat for up to 3 days, but note that the cereal shell will soften and lose its crunch after the first 24 hours as it absorbs the moisture from the cheesecake filling. They will still taste delicious, but the texture will be more akin to a soft cake.
Conclusion
The Fruity Pebbles Cheesecake Taco is a triumph of fun, flavor, and texture. It proves that culinary creativity doesn’t have to be fussy or require advanced pastry skills. With a box of cereal, some marshmallows, and a simple no-bake filling, you can create a show-stopping dessert that appeals to all ages. The bright colors, the satisfying crunch, and the creamy, tangy center make this a recipe you will return to time and time again. So grab your mixing bowls, unleash your inner child, and get ready to enjoy the most playful dessert you’ve ever made.
Fruity Pebbles Cheesecake Tacos
Ingredients
Equipment
Method
- Prepare your shaping tools (rolling pin or inverted muffin tin) by spraying them heavily with non-stick cooking spray.
- In a large pot over low heat, melt the butter. Add the marshmallows and stir constantly until completely smooth. Remove from heat immediately.
- Add the Fruity Pebbles to the pot and fold gently until all the cereal is coated with the marshmallow mixture.
- Spray your hands with cooking spray. Take about 1/2 cup of the warm mixture and press it into a 5-inch flat circle on parchment paper.
- Immediately drape the warm cereal circle over your prepared rolling pin to form a taco shape. Let set for 30 minutes until hardened. Repeat with remaining mixture.
- In a chilled bowl, beat the cold heavy cream until stiff peaks form. Set aside.
- In a large bowl, beat the softened cream cheese, powdered sugar, vanilla, and lemon juice until completely smooth and fluffy.
- Gently fold the whipped cream into the cream cheese mixture until just combined. Transfer to a piping bag.
- Pipe the cheesecake filling generously into the hardened cereal taco shells.
- Decorate with rainbow sprinkles and chill for 1 hour before serving.