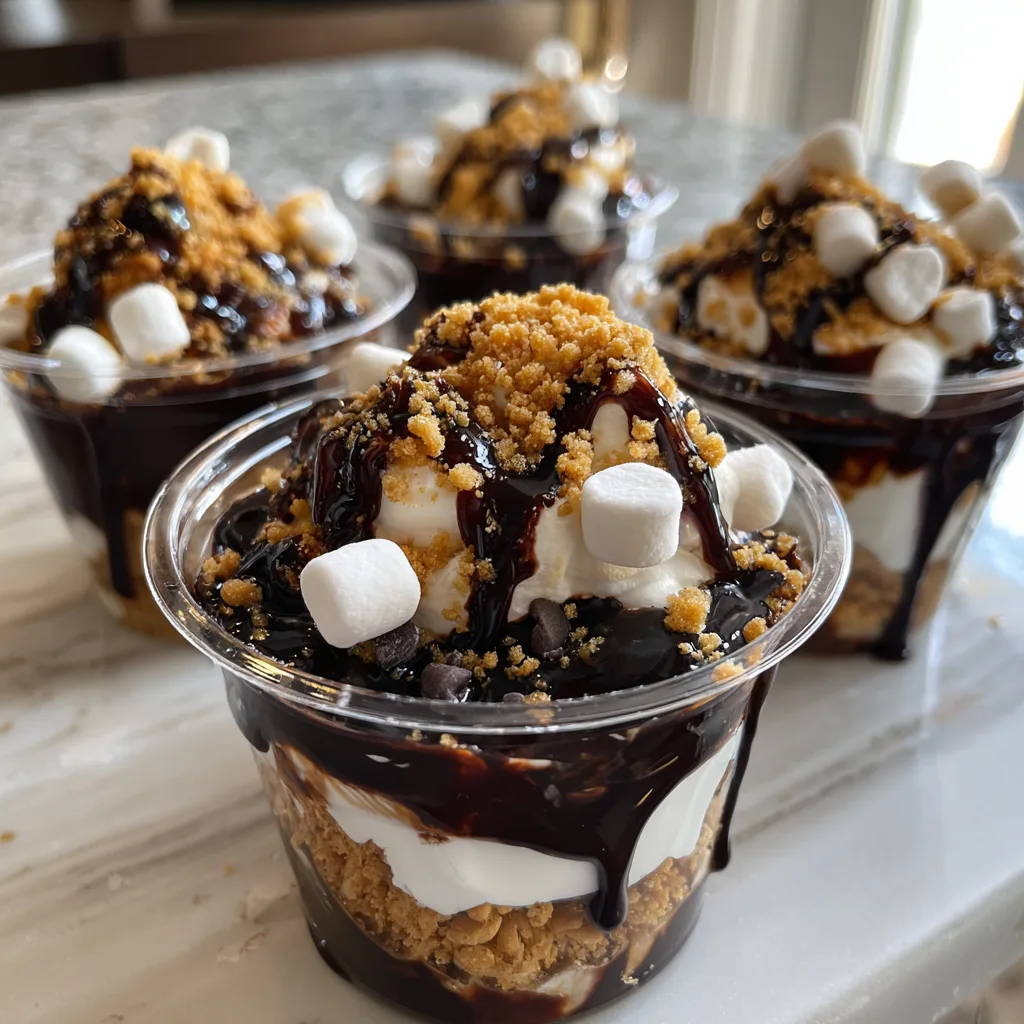
S’mores in a Cup
S’mores in a Cup: The Ultimate No-Bake Camping Dessert
There is absolutely nothing quite like the classic taste of a s’more. The crunch of sweet graham crackers, the gooey, sticky warmth of a toasted marshmallow, and the rich, melting slab of chocolate all come together to create a flavor profile that is practically synonymous with summer nights, campfires, and childhood joy. But what happens when you crave that iconic taste but do not have access to a campfire, or you are hosting a large group of kids indoors? Enter S’mores in a Cup. This brilliant, no-bake dessert layers all the familiar flavors of a traditional s’more into an easy-to-eat, mess-free, and incredibly charming individual portion. Whether you are throwing an end-of-the-year school party, hosting a backyard summer barbecue, or just looking for a fun weekend activity to do with the kids, these dessert cups are guaranteed to be a massive hit.
Why You Will Love This Recipe
If you have ever tried to manage a group of excited children around an open flame with sticky marshmallows, you already know why this recipe is a lifesaver. Here is a breakdown of why S’mores in a Cup will quickly become one of your favorite go-to treats:
- Zero Baking Required: You do not need to turn on your oven or light a fire. This entire dessert is assembled cold, making it perfectly safe for little helpers to join in on the fun.
- Perfectly Portioned: Serving desserts in individual clear plastic cups means no cutting, no slicing, and no fighting over who got the bigger piece. Everyone gets their own perfect serving.
- Make-Ahead Magic: Unlike traditional s’mores which must be eaten immediately while hot, these cups can be assembled hours (or even a day) in advance and kept in the refrigerator until it is party time.
- Customizable: Dietary restrictions? No problem. It is incredibly easy to swap in gluten-free graham crackers or dairy-free pudding options to accommodate everyone.
- Mess-Free: Traditional s’mores are notoriously sticky and messy. By containing all the ingredients in a cup, you save yourself a massive cleanup operation later.

The Magic and Nostalgia of S’mores
The concept of the s’more is deeply ingrained in North American camping culture. The first recorded version of the recipe appeared in a 1927 Girl Scout guidebook, where it was originally called a “Some More,” because, quite simply, you always want some more! Over the decades, the name was contracted into the catchy “s’more” we know today.
What makes the flavor combination so universally beloved? It comes down to a perfect balance of textures and tastes. The graham cracker provides a sturdy, slightly savory, and cinnamon-kissed crunch. The chocolate introduces a deep, rich, and slightly bitter sweetness that coats the palate. Finally, the marshmallow brings a light, airy, and intensely sweet vanilla note, along with a sticky texture that binds it all together. When creating S’mores in a Cup, the goal is to replicate these distinct layers so that every single spoonful delivers that nostalgic campfire magic without the smoke in your eyes.
Essential Equipment for Your Dessert Cups
One of the best things about this recipe is how remarkably simple the equipment list is. You likely already have everything you need in your kitchen right now:
- Clear Plastic Cups: 9 oz or 12 oz clear plastic cups work best so you can see the beautiful distinct layers.
- Large Mixing Bowls: For whisking up the instant pudding.
- Whisk or Hand Mixer: To ensure your pudding is smooth and creamy.
- Food Processor or Rolling Pin: For crushing the graham crackers into the perfect sandy crumb. A large zip-top bag and a rolling pin is a great method if you want to let the kids help.
- Piping Bags or Zip-Top Bags: (Optional but highly recommended) Piping the pudding and marshmallow fluff into the cups keeps the sides of the cups clean and makes assembly much faster.
- Spoons: For assembling and, of course, for eating!
Breaking Down the Ingredients
The beauty of this dessert lies in its simplicity. You only need a handful of readily available ingredients to bring this treat to life.
The Graham Cracker Layer
You will need standard honey graham crackers. To elevate the crust layer, you can mix the crushed crumbs with a little bit of melted butter. This helps the crumbs clump together slightly, mimicking the texture of a true cheesecake crust, though leaving them dry works perfectly fine too if you prefer a lighter dessert.
The Chocolate Layer
To replicate the melted chocolate bar, we use rich, dark chocolate instant pudding. It provides a creamy, luxurious texture that contrasts beautifully with the crunch of the crackers. You will need instant chocolate pudding mix and the cold milk required on the package instructions.
The Marshmallow Layer
You have a few options here. The most authentic route is to use marshmallow fluff (marshmallow creme) slightly warmed so it is easier to spoon. Alternatively, if you find fluff too sticky or sweet, you can make a layer of instant vanilla pudding folded with mini marshmallows, or use a stabilized whipped cream flavored with toasted marshmallow syrup.
The Toppings
The top of the cup is where the visual magic happens. You will need mini marshmallows, semi-sweet chocolate chips (or chunks of a classic Hershey’s bar), and a sprinkle of leftover graham cracker crumbs to tie the whole look together.
Step-by-Step Assembly Instructions
Follow these instructions to build the perfect, visually stunning dessert cups.
- Crush the Crackers: Place the graham crackers into a food processor and pulse until they resemble coarse sand. If using the rolling pin method, place the crackers in a large zip-top bag, seal tightly, and roll over them until crushed. If desired, toss the crumbs with a few tablespoons of melted butter.
- Prepare the Chocolate Pudding: In a large mixing bowl, whisk together the instant chocolate pudding mix and cold milk according to the package directions. Whisk for about 2 minutes until it begins to thicken. Place the bowl in the refrigerator for 5-10 minutes to set completely.
- Prepare the Marshmallow Layer: If using marshmallow fluff, transfer it to a piping bag. If it is too stiff, microwave it for 10-15 seconds to soften it slightly. If using a vanilla pudding alternative, prepare it just as you did the chocolate pudding.
- Build the Base Layer: Spoon about 2 to 3 tablespoons of the crushed graham crackers into the bottom of each clear plastic cup. Give the cup a gentle shake to level the crumbs.
- Add the Chocolate Layer: Transfer the set chocolate pudding to a piping bag (or a zip-top bag with the corner snipped off). Pipe a generous layer of chocolate pudding directly over the graham cracker crumbs.
- Add the Marshmallow Layer: Pipe a layer of marshmallow fluff or vanilla pudding directly over the chocolate layer. Take care to pipe evenly so the layers look distinct from the outside of the cup.
- Add the Final Crumb Layer: Sprinkle another tablespoon of graham cracker crumbs over the marshmallow layer.
- Top it Off: Finish each cup by generously sprinkling mini marshmallows and chocolate chips on top. For an extra authentic touch, you can use a culinary kitchen torch to very lightly toast the mini marshmallows on top just before serving.
- Chill or Serve: Serve immediately, or place the cups in the refrigerator to chill until you are ready to serve.
Pro Tips for the Best S’mores Cups
Creating these cups is incredibly easy, but a few expert tips will ensure they look just as good as they taste:
- Keep the Cups Clean: The biggest mistake people make is smearing pudding down the inside of the cup. Using piping bags is the secret to getting those perfect, sharp, distinct layers that look so appealing from the outside.
- Do Not Crush the Crumbs Too Fine: You want some texture in your graham cracker layers. If you turn them into an absolute powder, they will turn into mush when they touch the pudding. Leave a few slightly larger chunks for crunch.
- Toast the Top (Safely): If you do decide to use a kitchen torch on the top marshmallows, be extremely careful not to melt the plastic cup. Keep the flame focused strictly on the center of the cup.
Variations and Customizations
Once you have mastered the basic recipe, you can get incredibly creative with your flavors:
- Peanut Butter S’mores: Add a layer of peanut butter mousse, or use peanut butter cups instead of standard chocolate chips for the topping.
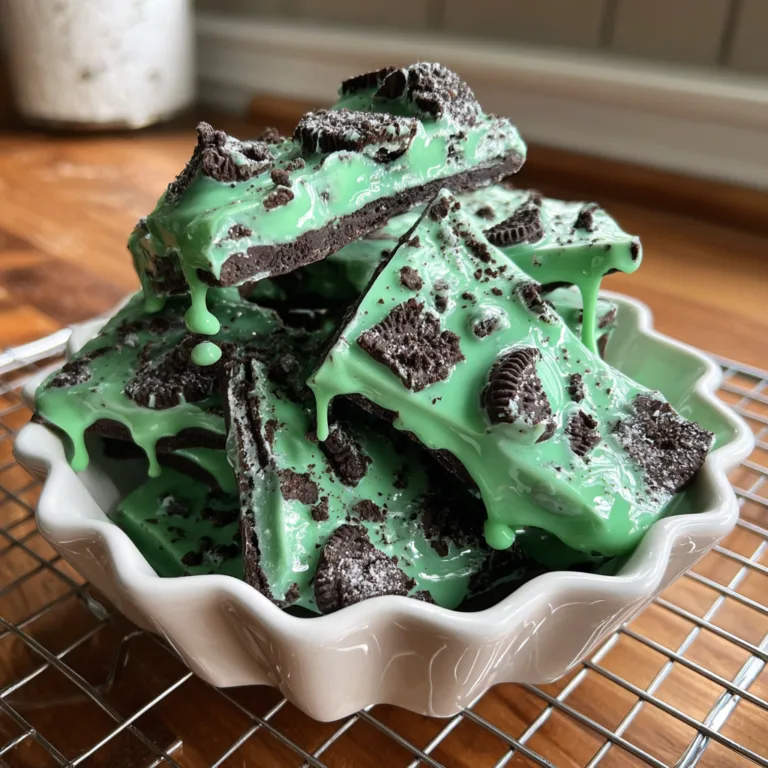
- Mint Chocolate S’mores: Add a drop of peppermint extract to the chocolate pudding and top with chopped mint chocolate candies.
- Fruity S’mores: Add a layer of fresh sliced strawberries or a dollop of raspberry jam between the chocolate and marshmallow layers. Fruit and chocolate are always a winning combination.
Storage Instructions
These cups are fantastic for preparing ahead of time. If you assemble them fully, they will keep well in the refrigerator for up to 24 hours. Keep in mind that the longer they sit, the softer the graham cracker crumbs will become as they absorb moisture from the pudding. If you prefer a very crunchy graham cracker layer, it is best to prepare the pudding and crush the crackers in advance, but wait to assemble the layers in the cups until an hour or two before serving.
We do not recommend freezing these dessert cups, as the pudding texture will change and become watery upon thawing.
Frequently Asked Questions (FAQs)
Can I make this dairy-free?
Yes, absolutely! You can swap the standard instant pudding for a dairy-free or vegan instant pudding mix (ensure it sets up with plant-based milks, as some require specific types to thicken). Use dairy-free chocolate chips and ensure your graham crackers do not contain honey if you are strictly vegan.
Is there a substitute for marshmallow fluff?
If you cannot find marshmallow fluff or find it too sweet, you can make a stabilized whipped cream, use a marshmallow-flavored yogurt, or simply use vanilla instant pudding folded with lots of mini marshmallows.
How many cups does this recipe make?
This largely depends on the size of the cups you use and how thick you make your layers. Generally, one standard box of instant pudding will yield enough to make 4 to 6 generous 9-oz cups. You can easily double or triple the recipe for larger parties.
Conclusion
S’mores in a Cup captures all the joy, flavor, and nostalgia of a classic campfire treat without any of the hassle, smoke, or sticky mess. It is a visually appealing, universally loved dessert that is just as fun to make as it is to eat. Whether you are whipping up a batch for a school party, a summer cookout, or just a Tuesday night family treat, these little cups of joy are guaranteed to bring smiles to the table. Grab your spoons, dig through those decadent layers, and enjoy the ultimate taste of summer!
S’mores in a Cup
Ingredients
Equipment
Method
- Crush the graham crackers into coarse crumbs. If desired, mix with melted butter.
- In a bowl, whisk together the instant chocolate pudding mix and cold milk for 2 minutes. Let sit in the fridge for 5 minutes to thicken.
- Place 2 tablespoons of graham cracker crumbs into the bottom of each clear plastic cup.
- Pipe or spoon a layer of chocolate pudding over the graham cracker crumbs.
- Pipe or spoon a layer of marshmallow fluff over the chocolate pudding.
- Add another small sprinkle of graham cracker crumbs on top of the marshmallow layer.
- Top generously with mini marshmallows and chocolate chips.
- Serve immediately or chill in the refrigerator until ready to eat.