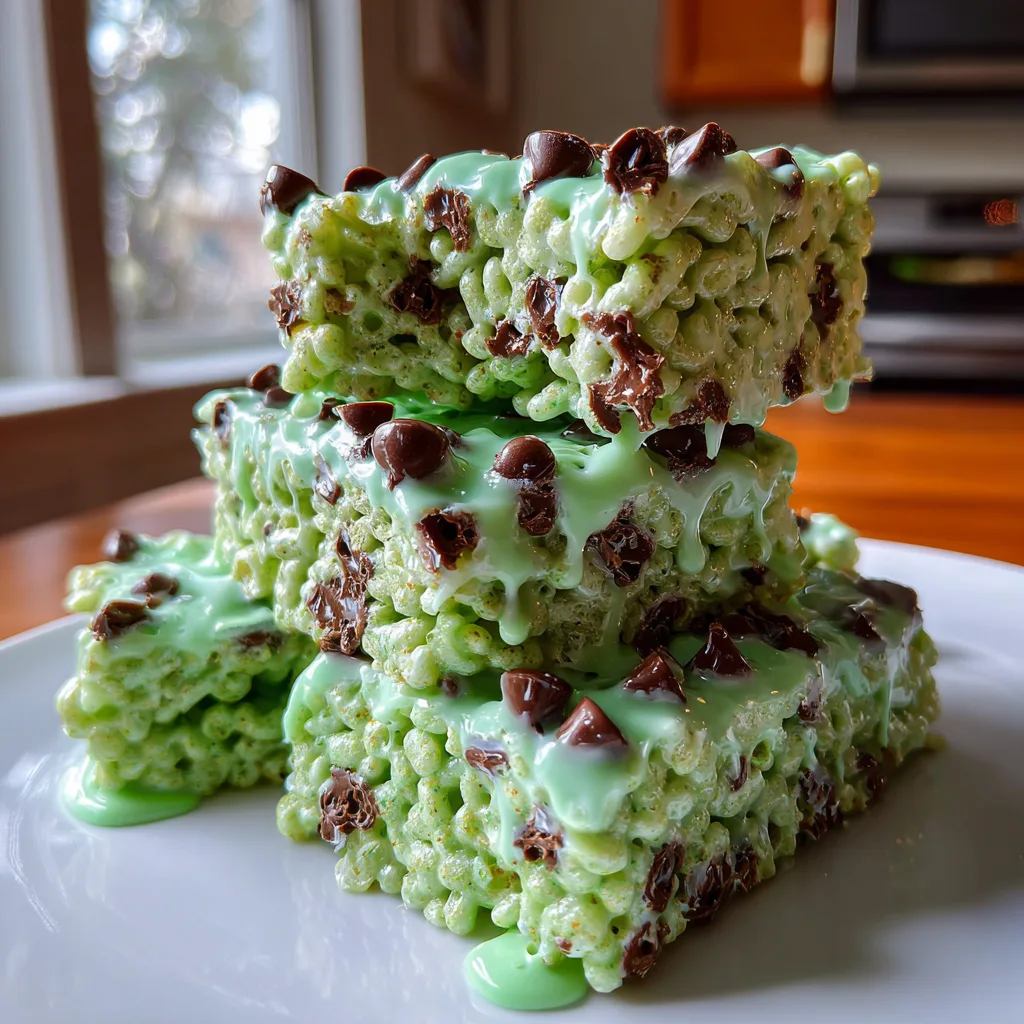
Mint Chocolate Krispie Treats
The Ultimate Mint Chocolate Chip Rice Krispie Treats Recipe: A Refreshing Spin on a Classic
There is arguably no dessert in the great American culinary playbook that brings forth a stronger wave of childhood nostalgia than the classic Rice Krispie Treat. They are the staple of school bake sales, after-school snacks, and impromptu late-night sweet cravings. The magnificent alchemy of melting butter and marshmallows together to bind crispy rice cereal into a chewy, gooey square of perfection is culinary magic in its simplest form. But what happens when you take that beloved, buttery canvas and introduce one of the most iconic flavor combinations of all time? You get the spectacular, crowd-pleasing, undeniably delicious Mint Chocolate Chip Rice Krispie Treats.
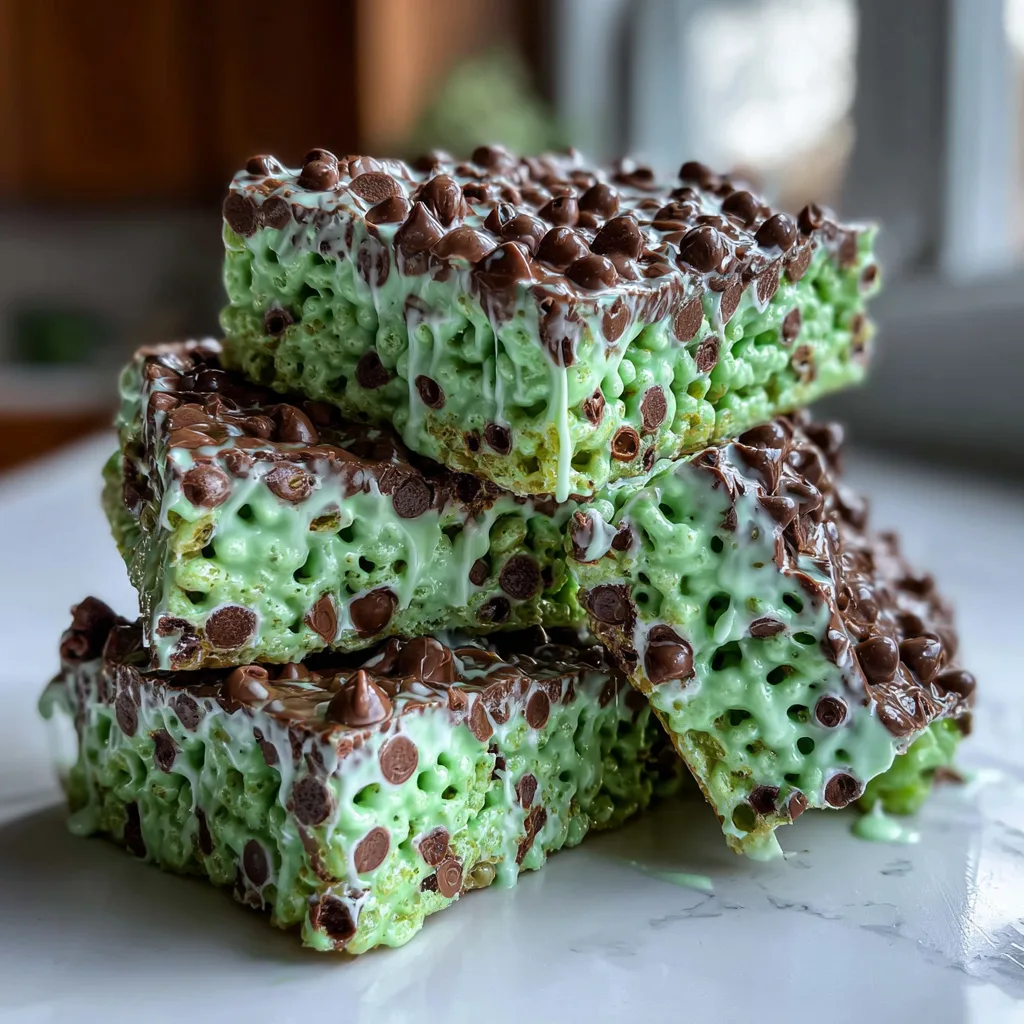
This vibrant, green-tinted dessert is an absolute showstopper. It takes the familiar marshmallow chewiness you love and elevates it with the cool, refreshing blast of mint extract and the rich, semi-sweet bite of miniature chocolate chips. Whether you are whipping up a festive treat for St. Patrick’s Day, looking for a unique holiday dessert, or simply craving the flavor of a scoop of mint chocolate chip ice cream in a portable, no-bake format, this comprehensive recipe guide has everything you need. In the following sections, we will explore the science of the perfect marshmallow pull, the exact ingredients needed for success, and expert tips that will ensure your cereal bars are never dry, hard, or overly sweet.
The Magic Behind the Mint and Chocolate Flavor Profile
Mint and chocolate is a polarizing flavor combination—people tend to either passionately love it or fiercely avoid it. But for the devotees of this dynamic duo, the pairing is nothing short of perfection. The magic lies in the contrast. Chocolate, especially semi-sweet or dark chocolate, provides a deep, earthy, roasted richness that coats the palate. Mint, on the other hand, contains menthol, a compound that triggers the cold-sensitive receptors in your mouth. This creates a literal sensation of coolness that cleanses the palate and cuts directly through the heavy richness of the chocolate and the sugary sweetness of the marshmallows.
When translated into a Rice Krispie Treat, this flavor profile works wonders. Traditional cereal bars, while delicious, are essentially one-note: sweet marshmallow and butter. By adding mint extract, you introduce a bright, aromatic top note that makes the treat feel lighter and more refreshing. The mini chocolate chips add bursts of slight bitterness and a satisfying, waxy snap that contrasts beautifully with the soft, chewy, and sticky texture of the cereal bar base.
Choosing the Right Extract: Peppermint vs. Mint
One of the most critical steps in mastering this recipe is selecting the correct flavoring. When you go to the baking aisle, you will likely see two options: Peppermint Extract and Mint (or Spearmint) Extract. While they might seem interchangeable, they will yield very different results.
Peppermint Extract: This is the sharp, intense, icy flavor associated with candy canes and winter holiday desserts. It is potent and piercing. If you want your treats to taste like a peppermint patty or a holiday bark, this is the extract to choose. However, use it sparingly, as peppermint can easily overpower a delicate marshmallow base and veer into “toothpaste” territory if heavy-handed.
Mint Extract: This is usually a blend of spearmint and peppermint. It is a softer, sweeter, more herbaceous flavor that closely mimics the taste of classic green mint chocolate chip ice cream or a fresh sprig of mint. For the truest ice cream parlor vibe, a standard “Mint Extract” is highly recommended for this particular recipe.
Essential Ingredients for Mint Chocolate Cereal Treats
Because this recipe requires no baking and relies on just a few components, the quality and freshness of your ingredients are paramount to your success. Here is what you will need:
- – 1/2 cup (1 stick) Unsalted Butter: Using unsalted butter allows you to control the sodium level. Butter is what keeps the treats soft and adds a rich, dairy flavor.
- – 1 (10 oz) package Mini Marshmallows: Plus an extra cup for folding in later! Always use brand new, fresh marshmallows. Stale, hardened marshmallows will not melt properly and will result in rock-hard treats. Mini marshmallows melt faster and more evenly than the jumbo size.
- – 6 cups Crisp Rice Cereal: The classic base. Make sure your cereal is fresh and crispy, not stale.
- – 1 teaspoon Mint Extract (or Peppermint): As discussed above, to give that signature refreshing flavor.
- – Green Food Coloring: Liquid or gel coloring works. This is technically optional, but it provides the visual cue that signals “mint” to the brain before you even take a bite.
- – 1 cup Mini Semi-Sweet Chocolate Chips: Mini chips are essential here! Standard-sized chips are too heavy and will sink to the bottom of the warm mixture. Mini chips distribute evenly throughout the cereal, ensuring chocolate in every single bite.
- – A pinch of Salt: To balance the immense sweetness of the marshmallows.
Step-by-Step Instructions for Gooey Perfection
Follow these steps closely, and pay special attention to the temperature of your mixture to prevent your chocolate chips from melting into a muddy brown mess.
- Prep Your Pan: Start by lining a 9×13 inch baking pan with parchment paper or greasing it very well with butter or non-stick cooking spray. Setting this up first is crucial because you need to move quickly once the marshmallow is melted.
- Melt the Butter and Marshmallows: In a large Dutch oven or heavy-bottomed pot, melt the stick of butter over low heat. Never rush this step with high heat, or you will scorch the butter. Once the butter is completely melted, add the 10 oz bag of mini marshmallows (reserving that extra 1 cup for later). Stir continuously with a silicone spatula until the marshmallows are completely melted and the mixture is smooth and velvety.
- Add Flavor and Color: Remove the pot entirely from the heat. This is a crucial step! Stir in the mint extract, a pinch of salt, and a few drops of green food coloring. Start with just 3-4 drops of green. You want a lovely pastel, minty green, not a dark, artificial neon color. Mix until the color is uniformly distributed.
- Fold in the Cereal: Add the 6 cups of crisp rice cereal to the pot. Using your spatula, gently fold the cereal into the marshmallow mixture. Be gentle so you do not crush the delicate puffed rice. Make sure every single piece of cereal is coated in the sticky, green marshmallow.
- The Cooling Period (Crucial Step!): Allow the mixture to sit in the pot for about 3 to 5 minutes. You need the mixture to cool down slightly before adding the chocolate. If the marshmallow is bubbling hot, the chocolate chips will instantly melt, turning your beautiful green treats into an unappetizing muddy brown color.
- Add the Mix-Ins: Once the mixture has cooled slightly but is still pliable, fold in the extra 1 cup of mini marshmallows and 3/4 cup of the mini chocolate chips. Reserving the extra marshmallows creates glorious pockets of un-melted, fluffy marshmallow throughout the bars.
- Press and Top: Transfer the sticky mixture into your prepared 9×13 pan. Lightly grease your hands or a piece of wax paper and gently press the mixture into an even layer. Do not pack it down hard! Pressing too firmly will compress the cereal and result in dense, hard bricks instead of airy, chewy treats. Sprinkle the remaining 1/4 cup of mini chocolate chips over the top and press them lightly so they adhere.
- Set and Slice: Let the treats sit at room temperature for at least 1 hour to set up completely. Once cool and firm, lift them out using the parchment paper overhang, place them on a cutting board, and slice them into large squares.
The Science of the Perfect Marshmallow Pull
Every home baker knows the disappointment of biting into a Rice Krispie Treat that threatens to break a tooth. Why does this happen? The secret lies in the sugar structure of the marshmallow. Marshmallows are primarily composed of sugar, corn syrup, water, and gelatin. When you expose sugar to high heat, it reaches different “stages” (like the soft-ball or hard-crack stages in candy making).
If you melt your butter and marshmallows over medium or high heat, you are essentially cooking the sugar. As the sugar cooks, it hardens as it cools. Therefore, the golden rule of Rice Krispie Treats is Low and Slow. You want the heat just high enough to melt the gelatin and allow the structure to collapse into a liquid, without actually cooking the sugar crystals. Removing the pot from the heat immediately once they are melted ensures maximum gooeyness and that legendary, stretchy marshmallow pull when you break a square in half.
Creative Variations and Fun Mix-Ins
Once you have mastered the basic Mint Chocolate Chip Rice Krispie Treat, you can use this recipe as a canvas for endless creativity. Here are a few ways to customize your batch:
The Andes Mint Upgrade: Instead of using mini chocolate chips, chop up a box of Andes Mints (those iconic rectangular chocolate and mint layered candies) and fold them in. This doubles down on the mint chocolate flavor and adds a beautiful visual element.
The Grasshopper Pie Vibe: Crush up a cup of Oreo cookies (or any chocolate sandwich cookie) and fold them into the mixture along with the chocolate chips. The dark, cocoa-rich cookie crumb pairs exquisitely with the bright green mint base, mimicking a classic Grasshopper pie or mint cookies-and-cream ice cream.
Dark Chocolate Drizzle: For a more gourmet, bakery-style presentation, skip mixing the chocolate chips inside. Instead, melt half a cup of high-quality dark chocolate in the microwave and use a fork to aggressively drizzle the melted chocolate over the top of the pressed pan of green treats. Let the chocolate shell harden before slicing.
How to Store and Freeze Your Cereal Treats
One of the best attributes of Rice Krispie Treats is their impressive shelf life when stored correctly. Air is the enemy of a gooey marshmallow treat. Exposure to open air will dry them out rapidly.
Room Temperature Storage: Place the cut squares in an airtight container, separating layers with a sheet of wax or parchment paper to prevent them from sticking together. Store them at room temperature. Kept out of direct sunlight and sealed tightly, they will remain soft and fresh for up to 5 days.
Can You Freeze Them? Absolutely! If you want to make a batch well in advance of a party or holiday, Rice Krispie Treats freeze beautifully. Wrap each individual square tightly in plastic wrap, then place all the wrapped squares into a large, heavy-duty ziplock freezer bag. Squeeze out as much air as possible. They can be frozen for up to 6 weeks. To enjoy, simply let them sit at room temperature for 15-20 minutes to thaw. Never put them in the refrigerator, as the cold, dry air of a fridge will accelerate the staling process and make them hard.
Frequently Asked Questions (FAQ)
Why did my treats turn a muddy brown color?
This happens when the marshmallow mixture is too hot when the chocolate chips are added. The residual heat melts the chocolate, which then smears into the green marshmallow. Always let the mixture cool for 3 to 5 minutes before folding in your chips.
Can I use marshmallow fluff instead of regular marshmallows?
While you can, the texture will be vastly different. Marshmallow fluff (or creme) does not contain gelatin, which is the stabilizing agent that helps the treats set up and hold their square shape. Treats made with fluff will be extremely sticky, wet, and require eating with a spoon or fork.
I don’t have mini chocolate chips; can I use regular ones?
You can, but the eating experience is slightly compromised. Regular chips are heavy and tend to fall to the bottom of the pan. Furthermore, they provide too much chocolate per bite, overpowering the delicate mint cereal base. If you only have regular chips, it is highly recommended to run a knife through them and roughly chop them into smaller pieces before adding them to the bowl.
Conclusion
Whipping up a batch of Mint Chocolate Chip Rice Krispie Treats is a fast, fun, and visually spectacular way to bring joy to any gathering. By combining the nostalgic, buttery, marshmallowy perfection of a classic cereal bar with the refreshing zest of mint and the rich snap of chocolate, you create a dessert that appeals to both kids and adults alike. Remember the golden rules: melt your marshmallows low and slow, let the mixture cool before adding the chocolate, and never pack your pan too tightly. Follow these steps, and you will be rewarded with the softest, gooiest, most deliciously minty treats imaginable. Happy no-baking!
Mint Chocolate Chip Rice Krispie Treats
Ingredients
Equipment
Method
- Line a 9×13 inch baking pan with parchment paper or spray generously with non-stick cooking spray.
- In a large pot, melt the butter over low heat. Once melted, add the 10 oz package of mini marshmallows. Stir continuously until completely smooth and melted, then immediately remove from heat.
- Stir the mint extract, a pinch of salt, and the green food coloring into the melted marshmallow until the color is even.
- Gently fold the crisp rice cereal into the marshmallow mixture until every piece is coated. Let the mixture sit in the pot for 3-5 minutes to cool slightly.
- Once slightly cooled, gently fold in the extra 1 cup of mini marshmallows and 3/4 cup of the mini chocolate chips.
- Transfer the mixture to the prepared baking pan. Using lightly greased hands or a piece of wax paper, gently press the mixture into an even layer. Do not pack it down tightly.
- Sprinkle the remaining 1/4 cup of mini chocolate chips evenly over the top, pressing them down very lightly so they stick.
- Allow the treats to sit at room temperature for at least 1 hour to cool and set completely before lifting them out and slicing into squares.