Kool-Aid Soaked Pineapples
Kool-Aid Soaked Pineapples: The Viral, Colorful Summer Snack You Need to Try
There are certain food trends that capture the imagination not just because they taste incredible, but because they are visually stunning and deeply nostalgic. Enter the vibrant, joyful, and utterly delicious world of Kool-Aid Soaked Pineapples. This viral sensation has taken social media by storm, transforming ordinary canned or fresh pineapple rings into jewel-toned, intensely flavored sweet treats. If you are looking for a show-stopping snack for your next summer barbecue, a fun culinary project to do with the kids, or simply a sweet, tangy treat to keep in the fridge for hot afternoons, this recipe is guaranteed to be a massive hit.
The concept is beautifully simple: take the naturally sweet, slightly acidic canvas of a pineapple and submerge it in a concentrated, sweetened Kool-Aid mixture. Over the course of a day or two, the fruit undergoes a magical transformation. Through the process of osmosis, the pineapple draws in the bright neon colors and the iconic, fruity flavors of the drink mix. The result is a hybrid snack that offers the juicy, fibrous snap of a fresh pineapple combined with the nostalgic, sugary punch of your favorite childhood beverage. From cherry red and tropical blue to lemon-lime green and sunny orange, these soaked pineapples are a feast for the eyes and the palate.
Why You Will Fall in Love with This Fun and Fruity Recipe
There are countless reasons why this recipe has become a staple in households across the country. First and foremost is the sheer visual appeal. When you arrange a platter of bright red, blue, green, and yellow pineapple rings, it instantly looks like a party. They resemble oversized, fruit-flavored gummy candies, making them completely irresistible to children and adults alike. They are the perfect addition to a themed birthday party, a colorful poolside snack spread, or a vibrant summer picnic.
Secondly, the preparation is almost unbelievably easy. This is a “no-bake, no-cook” recipe that requires only a few basic, inexpensive ingredients and about fifteen minutes of active prep time. You do not need any special culinary skills to pull this off. It is essentially an exercise in mixing liquids and letting time do the heavy lifting. This makes it an incredibly accessible recipe for beginner cooks or for parents looking for a safe, fun kitchen activity to share with young children.
Furthermore, the flavor profile is wildly customizable. Because Kool-Aid comes in such a vast array of flavors, you can tailor this snack to your exact preferences. Do you love tart flavors? Go for green apple or lemon-lime. Prefer classic, sweet berries? Cherry, strawberry, and blue raspberry are phenomenal choices. You can even mix different packets together to create custom flavor blends. The pineapple acts as a flavor sponge, adopting whatever delicious profile you choose to give it.
The Science of Flavor Infusion: How It Works
While making Kool-Aid soaked pineapples feels like magic, it relies on a very simple scientific principle: osmosis. Pineapple, whether fresh or canned, is highly porous. It contains natural sugars, water, and acidic juices. When you submerge the fruit in a highly concentrated liquid—in this case, water or pineapple juice mixed with sugar and Kool-Aid powder—the fruit absorbs the surrounding liquid to balance the concentration of sugars and flavors inside and outside of the fruit.
Because the Kool-Aid mixture is so heavily pigmented, the dye penetrates deep into the flesh of the pineapple. At the same time, the tartness of the citric acid in the Kool-Aid mix, combined with the added sugar, creates a sweet-and-sour dynamic that enhances the pineapple’s natural flavor rather than masking it entirely. Leaving the fruit to soak for an extended period (usually 12 to 24 hours) ensures that the flavor and color reach the very center of the ring, resulting in a uniform, intensely flavored bite from edge to edge.
Essential Ingredients for Kool-Aid Pickled Pineapples
To create these vibrant treats, you only need a handful of inexpensive ingredients. Here is a breakdown of what you will need to gather before you start mixing:
- – 4 cans (20 oz each) of pineapple rings in 100% juice: Using canned pineapple is preferred for this recipe because the fruit is already softened, allowing it to absorb the liquid more readily. Be sure to buy the kind in juice, not heavy syrup, as you will be adding your own sugar. Save the juice from the cans!
- – 4 packets of unsweetened Kool-Aid drink mix: Choose four different colors for maximum visual impact. Classic choices include Cherry (red), Blue Raspberry (blue), Lemon-Lime (green), and Orange or Lemon (yellow).
- – 2 to 3 cups of granulated white sugar: Because you are using unsweetened Kool-Aid packets, you need sugar to balance the intense tartness of the drink mix. You can adjust the amount based on how sweet you want your fruit to be.
- – 4 separate airtight containers with lids: You need individual containers for each color to prevent the dyes from mixing together and turning brown. Deli containers, mason jars, or standard plastic food storage containers work perfectly.
Step-by-Step Instructions for Vibrant Candied Pineapples
Follow these simple, foolproof steps to create the ultimate batch of Kool-Aid soaked pineapples. The most difficult part of this entire recipe is waiting for them to soak!
- Prepare the Fruit and Juice: Open all the cans of pineapple rings. Carefully drain the pineapple juice from the cans into a large measuring cup or a pitcher. You should have quite a bit of juice. Do not throw it away, as it forms the flavorful base of our soaking liquid! Set the pineapple rings aside.
- Set Up Your Containers: Line up your four separate food storage containers. Evenly divide the drained pineapple rings among the four containers. If you bought chunks instead of rings, simply divide the chunks evenly.
- Create the Base Liquid: In the pitcher containing the reserved pineapple juice, add the granulated sugar. Stir vigorously until the sugar is completely dissolved into the juice. If the juice is very cold, this might take a minute or two. If you do not have enough juice to cover all the pineapples, you can add a little bit of filtered water to the pitcher.
- Add the Color and Flavor: Open your Kool-Aid packets. Pour one packet of Kool-Aid powder directly into the first container of pineapple rings. Pour the second flavor into the second container, and so on.
- Pour and Mix: Evenly divide the sweetened pineapple juice from your pitcher into the four containers, pouring it directly over the pineapples and the Kool-Aid powder. Secure the lids tightly onto the containers. Give each container a very gentle shake or swirl to dissolve the Kool-Aid powder into the sweet juice and ensure every pineapple ring is submerged.
- The Waiting Game (Soaking): Place the containers in the refrigerator. Let the pineapples soak undisturbed for at least 12 hours, but 24 hours is highly recommended for the deepest color and most intense flavor.
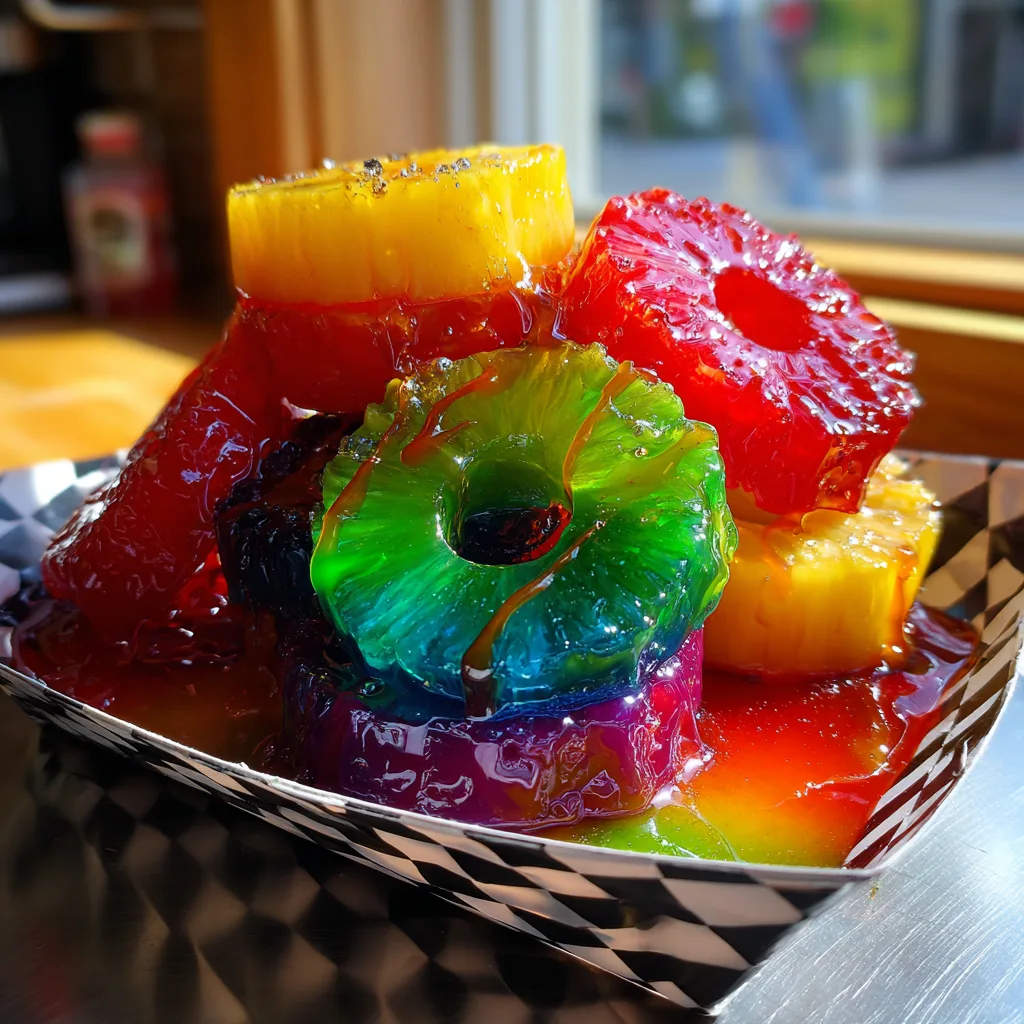
- Serve and Enjoy: Once they have reached your desired color, remove the pineapples from the liquid using a fork or tongs. Serve them chilled on a platter, in individual plastic cups, or in fun paper food trays for that authentic carnival vibe!
Pro Tips for the Best Color and Flavor
While this recipe is straightforward, there are a few insider tips that will elevate your soaked pineapples from good to incredible. First, always use unsweetened Kool-Aid packets rather than the pre-sweetened tubs. The packets contain highly concentrated flavor and color, and adding your own sugar allows you to control the exact sweetness level. If you use pre-sweetened mix, the liquid may not be concentrated enough to deeply dye the fruit.
Second, if you want truly neon colors, use white or light-fleshed pineapples if you are using fresh fruit. Canned pineapples naturally have a slightly muted yellow hue, which works perfectly, but highly saturated fresh yellow pineapples can sometimes alter the final color (for example, a blue packet on a very yellow pineapple might yield a slightly greenish-blue ring).
Lastly, do not discard the soaking liquid once you have eaten the pineapples! That liquid is essentially a highly concentrated, fruity simple syrup. You can use it to flavor sodas, mix into summer cocktails, or freeze it into ice cubes to drop into glasses of lemonade or Sprite.
Creative Variations and Fun Uses
The fun doesn’t stop at just eating the rings out of a bowl. There are dozens of ways to utilize this recipe. For a fantastic summer cool-down treat, insert a popsicle stick into the bottom of a soaked pineapple ring, place it on a parchment-lined baking sheet, and freeze it solid. You will have an incredible, fruit-based popsicle that is much healthier than store-bought icy treats.
If you are hosting an adults-only party, you can easily create a “boozy” version of this recipe. Simply replace half of the reserved pineapple juice with your favorite clear liquor. Coconut rum, vodka, or silver tequila work exceptionally well. The alcohol infuses into the fruit right alongside the Kool-Aid, resulting in a colorful, potent bite that is perfect for summer pool parties or bachelorette weekends.
Furthermore, you do not have to limit yourself to pineapples. This exact same method works beautifully with peeled green grapes, sliced cucumbers, or even dill pickle spears for the viral “Kool-Aid Pickles” (often called Tropickles) that are famous in the American South. The process is identical, and the results are just as fun and colorful.
How to Serve Your Candied Fruit
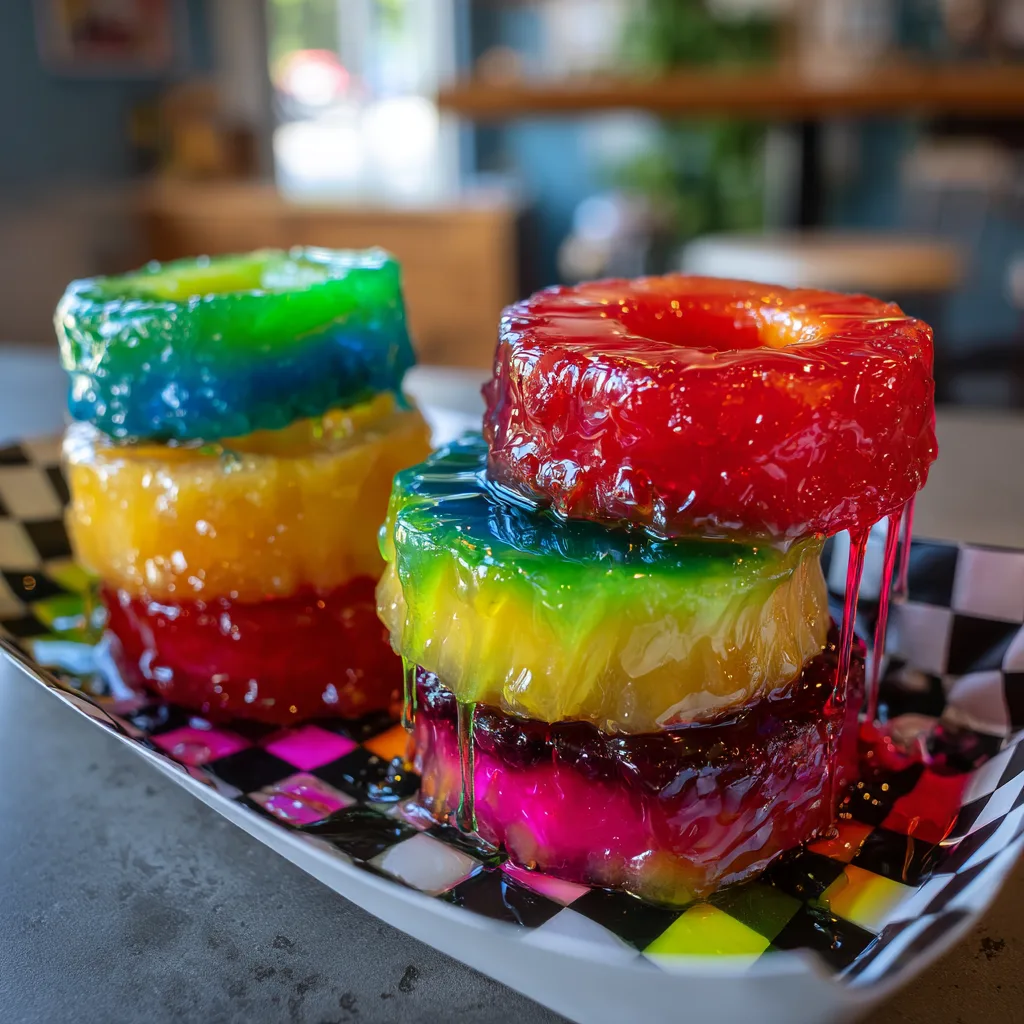
Presentation is half the fun when it comes to Kool-Aid soaked pineapples. Because they are so bright and colorful, you want to show them off. Serving them layered in clear plastic cups—starting with blue at the bottom, then green, yellow, and red at the top—creates a beautiful rainbow effect that kids will go crazy for.
For a barbecue or picnic, setting them out in classic red-and-white or black-and-white checkered paper food boats gives them a nostalgic, state-fair feel. If you are serving them alongside other desserts, they look stunning arranged on a white platter, as the white background makes the neon colors pop vibrantly. Be sure to provide plenty of napkins or toothpicks, as these treats are deliciously sticky and juicy!
Storage Instructions
Kool-Aid soaked pineapples have an excellent shelf life when stored properly. To keep them fresh and intensely flavored, it is best to store them directly in their soaking liquid in airtight containers in the refrigerator. They will easily keep for up to two weeks in the fridge. Over time, the texture of the pineapple may soften slightly, but the flavor will only become more robust.
If you prefer to store them without the liquid, drain them well and place them in an airtight container lined with paper towels to absorb excess moisture. Stored this way, they will last for about 4 to 5 days in the refrigerator. Freezing the leftover rings is also a great option for long-term storage, as they can be eaten straight from the freezer like a popsicle.
Frequently Asked Questions (FAQs)
Can I use fresh pineapple instead of canned?
Yes, you absolutely can! Fresh pineapple works wonderfully and will yield a slightly firmer, snappier bite. Simply peel and slice the fresh pineapple into rings or chunks. However, because you won’t have the canned juice to use as a base, you will need to substitute it with store-bought pineapple juice or water to create your soaking liquid.
Is it possible to make these sugar-free?
Yes. If you are watching your sugar intake, you can use a zero-calorie sweetener like Stevia, Erythritol, or Splenda in place of the granulated sugar. You can also use liquid water enhancers (like Mio) instead of Kool-Aid packets, though the colors may not be quite as vibrantly opaque.
How long do they take to change color?
The outer layer of the pineapple will take on color within just a few hours, but to get that deep, saturated color that penetrates all the way through the fruit, you really need to wait at least 12 hours. For the absolute best, most jewel-like results, a full 24-hour soak is highly recommended.
Whether you are making them for a crowd, a fun afternoon snack with the kids, or just to satisfy a sweet tooth, Kool-Aid Soaked Pineapples are a joyous, colorful recipe that brings a smile to everyone’s face. Grab your favorite flavors, get mixing, and enjoy this incredibly easy, viral summer sensation!
Kool-Aid Soaked Pineapples
Ingredients
Equipment
Method
- Drain the cans of pineapple rings, reserving all of the juices in a large pitcher.
- Divide the pineapple rings evenly among four separate airtight containers.
- Add the granulated sugar to the reserved pineapple juice and stir vigorously until completely dissolved.
- Pour one individual packet of Kool-Aid powder into each of the four containers over the pineapples.
- Evenly distribute the sweetened pineapple juice among the four containers, ensuring the fruit is fully submerged.
- Seal the containers with lids and gently swirl to mix the Kool-Aid powder into the juice.
- Place containers in the refrigerator and let soak for at least 12 to 24 hours for maximum color and flavor.
- Remove rings from the liquid and serve chilled. Store leftovers in the soaking liquid in the fridge.