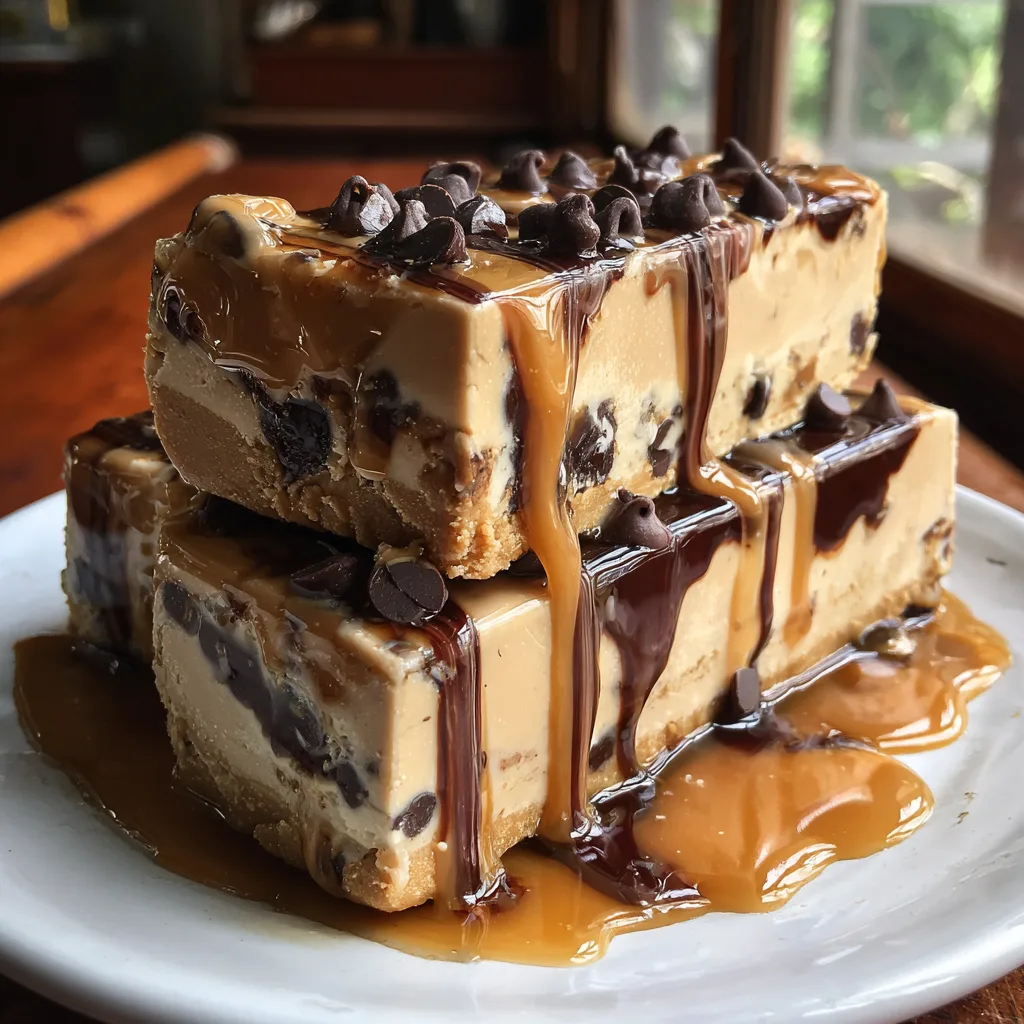
Peanut Butter Yogurt Bars
Decadent Yet Healthy Peanut Butter Frozen Yogurt Bars
There is nothing quite like the craving for a rich, creamy, frozen dessert when the afternoon slump hits or after a long, exhausting day. However, indulging in traditional ice cream every single day can leave you feeling sluggish and weighed down by excess processed sugars and heavy creams. What if there was a way to capture the indulgent, mouth-watering essence of a premium peanut butter cup ice cream, but in a format that actually fuels your body with high-quality protein, gut-friendly probiotics, and healthy fats? Welcome to the ultimate solution: Peanut Butter Frozen Yogurt Bars.
This incredible recipe transforms a handful of basic, wholesome pantry staples into a sophisticated, satisfying treat that both adults and children will absolutely devour. Utilizing the thick, luxurious texture of Greek yogurt, the nutty richness of natural peanut butter, and the subtle, floral sweetness of honey, these bars are a masterclass in balancing health and indulgence. In this comprehensive guide, we are going to explore every single detail of creating these frozen masterpieces. From the science behind preventing ice crystals in homemade frozen yogurt to creative flavor variations and optimal storage techniques, you will become an absolute expert in crafting this spectacular dessert.
Why You Will Fall in Love with These Frozen Yogurt Bars
The beauty of this recipe lies in its sheer simplicity and its extraordinary nutritional profile. Unlike store-bought frozen yogurts that are often pumped full of artificial stabilizers, gums, and excessive refined sugars to maintain their texture, these homemade bars rely entirely on the natural properties of their whole-food ingredients. The Greek yogurt provides a dense, creamy foundation that freezes beautifully, while the peanut butter introduces essential fats that keep the bars soft enough to bite into, preventing them from turning into solid, impenetrable blocks of ice.
Furthermore, these bars require absolutely zero specialized equipment. You do not need an expensive, bulky ice cream machine taking up counter space, nor do you need any complicated cooking techniques. If you have a mixing bowl, a whisk or spoon, and a standard baking dish, you have everything you need to execute this recipe flawlessly. It is a fantastic, fail-proof recipe for beginner home cooks or for a fun, mess-free activity to do with children.
The Magic Behind the Ingredients
To truly master this recipe, it is vital to understand the crucial role each ingredient plays. This is not just a random assortment of items; it is a carefully calibrated formula designed to produce the perfect frozen texture and flavor profile.
1. Greek Yogurt (1 1/2 Cups)
The foundation of our bars is Greek yogurt. It is imperative that you use Greek yogurt rather than standard, regular yogurt. Greek yogurt has been strained extensively to remove excess whey (liquid), resulting in a much thicker, denser product with a significantly higher protein content. This lack of water is exactly what we want for a frozen dessert. If you were to use regular yogurt, the high water content would freeze into large, gritty ice crystals, ruining the creamy mouthfeel. For the absolute best, most luxurious texture, opt for a full-fat (whole milk) Greek yogurt. The fat coats the tongue and provides that classic “ice cream” sensation. However, 2% or even non-fat Greek yogurt will still work beautifully if you are strictly monitoring your fat intake.
2. Peanut Butter (1/2 Cup)
Peanut butter is the star flavor component, but it also serves a vital structural purpose. The natural oils and fats in peanut butter lower the freezing point of the mixture and disrupt ice crystal formation. This ensures that your bars remain slightly soft and yielding, even straight out of the freezer. When selecting a peanut butter, a creamy, natural variety (where the only ingredients are peanuts and salt) yields the smoothest texture. If your natural peanut butter has separated in the jar, ensure you stir it incredibly well before measuring it out, as you want a completely homogenous mixture.
3. Honey or Maple Syrup (1/4 Cup)
Sweetness is necessary not just for flavor, but for texture. Liquid sweeteners like honey or pure maple syrup are viscous and contain different types of sugars (fructose and glucose) that further depress the freezing point of the yogurt base. This means the bars will freeze solidly enough to hold their shape, but will not become rock-hard. Honey brings a lovely, floral stickiness that pairs exceptionally well with peanut butter, while maple syrup introduces a warm, autumnal caramel note. Both are fantastic, unrefined options.
4. Vanilla Extract (1 Teaspoon)
Never underestimate the power of pure vanilla extract. Even though these are peanut butter bars, the vanilla acts as a flavor enhancer, rounding out the tangy notes of the Greek yogurt and elevating the nutty sweetness of the peanut butter. It provides that classic, bakery-style aroma that makes the dessert smell as good as it tastes.
5. Mini Chocolate Chips & Chopped Peanuts (1/4 Cup Each – Optional but Highly Recommended)
While technically optional, these mix-ins are what transform the bars from a simple frozen snack into a decadent dessert experience. Mini chocolate chips are preferable to regular-sized ones because they distribute more evenly throughout the batter, ensuring you get a burst of chocolate in every single bite without overwhelming the yogurt base. The chopped peanuts reinforce the core flavor and provide a wonderful, salty crunch that contrasts beautifully with the smooth yogurt.
The Science of Freezing Yogurt: How to Avoid the “Icy” Texture
One of the biggest complaints people have when making homemade frozen yogurt is that it turns out icy and hard rather than creamy and smooth. Understanding a bit of food science can help you conquer this issue.
Ice cream achieves its airy, scoopable texture through a process called churning, which simultaneously freezes the base and whips tiny air bubbles into it. Because we are making a “no-churn” bar, we are skipping the air incorporation entirely. To compensate for the lack of air, we must rely entirely on our fat and sugar content. Fat (from the full-fat yogurt and peanut butter) and sugar (from the honey) physically get in the way of water molecules as they try to bond together and form ice crystals. The more fat and sugar present, the smaller the ice crystals will be, resulting in a smoother mouthfeel. This is why using low-fat yogurt and skipping the sweetener will inevitably lead to a hard, icy bar. Embrace the healthy fats in this recipe; they are doing heavy structural lifting!
Step-by-Step Instructions for Perfect Preparation
Let us walk through the simple, yet specific, steps to creating your frozen treats.
- Prepare Your Pan: First, line an 8×8 inch square baking dish or a standard loaf pan with parchment paper. Leave an overhang of paper on the sides. This is absolutely crucial; it acts as a sling, allowing you to easily lift the fully frozen block out of the pan for clean, even slicing. Do not substitute with aluminum foil, as the yogurt will stick to it aggressively.
- Mix the Base: In a large mixing bowl, combine the Greek yogurt, peanut butter, honey (or maple syrup), and vanilla extract. Use a sturdy whisk or a silicone spatula to blend them together. You want to mix vigorously until the batter is completely smooth, uniform in color, and entirely streak-free. The mixture should look like a thick, luxurious mousse.
- Fold in the Extras: Once the base is perfectly smooth, gently fold in your mini chocolate chips and chopped peanuts. Stir just until they are evenly distributed.
- Pour and Smooth: Transfer the mixture into your parchment-lined pan. Use your spatula or the back of a spoon to spread it out into an even layer, pushing it firmly into the corners. Tap the pan gently on your counter a few times to release any trapped air bubbles.
- The Swirl (Optional but Beautiful): For a professional, bakery-style finish, you can warm an extra tablespoon of peanut butter in the microwave for 10 seconds until it is runny. Drizzle it randomly over the top of the smoothed yogurt mixture. Take a butter knife or a toothpick and gently drag it through the surface to create beautiful, marbled swirls. You can also sprinkle a few extra chocolate chips on top for visual appeal.
- Freeze: Place the pan flat in your freezer. It needs to freeze undisturbed for a minimum of 3 to 4 hours, or until it is completely solid to the touch.
- Slice and Serve: Once fully frozen, use the parchment paper sling to lift the block out of the pan and onto a cutting board. Using a large, sharp chef’s knife, slice the block into even bars or squares. If the block is too hard to cut safely, let it sit at room temperature for 5 to 10 minutes to soften slightly before slicing.
Exciting Flavor Variations and Customizations
Once you master the base recipe, consider this your blank canvas for endless frozen dessert creations. Here are several exciting ways to customize your bars:
- The PB&J Swirl: Instead of swirling extra peanut butter on top, dollop spoonfuls of your favorite strawberry or raspberry fruit preserves across the top of the batter before freezing. Swirl the jam through with a knife for a nostalgic, fruity twist.
- Almond Joy Inspiration: Swap the peanut butter for almond butter. Fold in sweetened shredded coconut and chopped almonds along with the chocolate chips.
- Protein Power-Up: For an exceptional post-workout recovery treat, whisk one scoop of your favorite vanilla or chocolate whey/plant-based protein powder into the yogurt base. You may need to add an extra splash of milk or a tiny bit more yogurt if the powder makes the batter too dry and thick.
- Double Chocolate Crunch: Add two tablespoons of unsweetened cocoa powder to the yogurt base, and swap the regular peanuts for chocolate-covered pretzels for an incredible sweet-and-salty crunch.
- Vegan Adaptation: To make these entirely plant-based, use a thick, high-quality coconut milk yogurt or soy yogurt. Ensure you use maple syrup instead of honey, and verify that your chocolate chips are dairy-free.
Proper Storage and Thawing Guidelines
Because these bars contain dairy and no artificial preservatives, proper storage is key to maintaining their fresh flavor and preventing freezer burn.
Once you have sliced the block into individual bars, do not leave them exposed in the freezer. Wrap each bar individually in a small square of parchment paper, and then place all the wrapped bars into a large, airtight freezer-safe ziplock bag or a sealed Tupperware container. This double layer of protection ensures that no ambient freezer odors permeate the yogurt, and it stops ice crystals from forming on the surface of the bars. When stored this way, the bars will keep perfectly for up to two months.

When you are ready to enjoy one, patience is a virtue. While you can eat them straight from the freezer, their flavor and creamy texture truly blossom if you let them rest on a plate at room temperature for about 5 to 8 minutes before taking your first bite. This brief thawing period softens the yogurt just enough to mimic the smooth, melt-in-your-mouth consistency of premium ice cream.
Conclusion
These Peanut Butter Frozen Yogurt Bars prove beyond a shadow of a doubt that you do not have to choose between satisfying your sweet tooth and nourishing your body. By combining the protein-packed power of Greek yogurt with the rich, comforting flavor of peanut butter and a touch of natural sweetness, you can create a dessert that is truly the best of both worlds. They are incredibly easy to prepare, endlessly customizable, and guaranteed to become a highly requested staple in your household. Prepare a batch this weekend, stock up your freezer, and enjoy the ultimate guilt-free indulgence whenever the craving strikes!
Peanut Butter Frozen Yogurt Bars
Ingredients
Equipment
Method
- Line an 8×8 inch baking dish or a loaf pan with parchment paper, leaving enough overhang on the sides to easily lift the bars out later.
- In a large mixing bowl, thoroughly whisk together the Greek yogurt, peanut butter, honey, and vanilla extract until completely smooth and creamy.
- Gently fold in the mini chocolate chips and chopped peanuts until evenly distributed throughout the yogurt mixture.
- Pour the mixture into the prepared pan and use a spatula to spread it into an even layer.
- Optional: Drizzle a little extra melted peanut butter on top and swirl with a knife, or sprinkle with extra chocolate chips.
- Place the pan flat in the freezer and freeze for at least 3 to 4 hours, or until completely solid.
- Using the parchment paper overhang, lift the frozen block out of the pan. Let sit for 5 minutes to soften slightly, then slice into 8 bars with a sharp knife.
- Serve immediately or store individually wrapped in the freezer.