Oreo Shake Delight
The Ultimate Oreo Shake Delight: A Cookies and Cream Dream
There are few desserts in the world as universally loved, deeply nostalgic, and instantly satisfying as a classic cookies and cream milkshake. Whether it brings back memories of late-night diner runs, celebratory summer afternoons, or simply the joy of sharing a sweet treat with loved ones, the Oreo Shake Delight is a timeless beverage that hits the spot every single time. It is the perfect marriage of rich vanilla, creamy milk, and the unmistakable, deep cocoa crunch of chocolate sandwich cookies. The best part? You do not need to leave the comfort of your home or pay premium cafe prices to enjoy a restaurant-quality milkshake.
Creating the perfect milkshake at home is often seen as a simple task, but achieving that ideal diner-style consistency—where the shake is thick enough to feel indulgent but smooth enough to travel easily up a straw—is an art form. This specific recipe takes the guesswork out of the equation. By utilizing a carefully tested ratio of ice cream, milk, cookies, and a secret ingredient (ice cubes!), this recipe delivers a frosty, thick, and perfectly balanced dessert experience in just under five minutes. Let us dive into everything you need to know to master the ultimate homemade Oreo Shake Delight.
Why This Specific Recipe Works So Well
You might be wondering why you need a recipe for a milkshake. Isn’t it just ice cream and milk? While that is the basic foundation, throwing random amounts of ingredients into a blender often results in a beverage that is either too runny, resembling flavored milk, or far too thick, requiring a spoon rather than a straw.
This recipe introduces a brilliant textural component: ice cubes. While traditionalists might argue against adding ice to a milkshake, incorporating just half a cup of ice cubes transforms the entire drinking experience. The ice blends down into microscopic frosty crystals, giving the shake a chilled, frappe-like quality that prevents it from becoming too heavy, cloying, or overly sweet. It lightens the mouthfeel while maintaining an incredibly frosty temperature from the first sip to the last drop. Combined with the rich vanilla ice cream and the dense crunch of the Oreos, it creates a perfectly balanced masterpiece.
The Essential Ingredients Breakdown
The beauty of the Oreo Shake Delight lies in its simplicity. With only a handful of ingredients, the quality of each component truly shines through. Here is a deep dive into what you will need to create this frosty beverage.
1. The Milk (The Liquid Base)
The recipe calls for 1 cup of milk, and you have complete freedom here. For the most decadent, classic diner experience, whole milk is the undisputed champion. Its higher fat content contributes to a silkier, creamier mouthfeel. However, if you prefer a slightly lighter shake, 2% milk works beautifully. For those following a dairy-free lifestyle, plant-based milks are excellent alternatives. Oat milk is highly recommended due to its naturally creamy texture and neutral flavor that won’t overpower the cookies. Almond milk or soy milk can also be used, though they may yield a slightly thinner consistency.
2. The Oreo Cookies (The Star of the Show)
You will need 3-4 classic Oreo cookies for the shake itself, plus extra for the crumb topping. Standard Oreos provide the perfect ratio of chocolate wafer to sweet vanilla creme. If you are a die-hard fan of the filling, Double Stuf Oreos will make your shake even sweeter and creamier. Do not scrape the cream out! That filling acts as an additional sweetener and thickener for the milkshake base.
3. Vanilla Ice Cream or Frozen Yogurt (The Creamy Core)
Half a cup of high-quality vanilla ice cream is the backbone of this dessert. Opt for a premium brand with real vanilla bean flecks for the best flavor. The vanilla acts as a canvas, allowing the chocolate cookies to pop. If you are looking for a tangier, slightly lighter profile, frozen yogurt is a phenomenal substitute. It adds a subtle tartness that cuts through the rich sweetness of the cookies, creating a highly complex and refreshing flavor profile.
4. The Ice Cubes (The Frosty Secret)
As mentioned earlier, half a cup of ice cubes is the secret to getting that perfectly chilled, slightly frosty texture. Ensure your ice cubes are fresh so they do not impart any strange freezer odors into your beautiful dessert.
5. Whipped Cream and Extra Crumbs (The Crowning Glory)
No diner shake is complete without a towering mountain of whipped cream. Whether you use fresh heavy cream whipped by hand or the convenience of an aerosol can, the airy sweetness of the cream provides a necessary textural contrast to the dense, frosty shake. Topping it off with extra crushed Oreo crumbs not only makes the drink look professionally crafted but also gives you an immediate burst of chocolate crunch on your first sip.
Step-by-Step Instructions to Milkshake Perfection
Follow these simple instructions to blend your way to happiness. The order in which you add the ingredients to your blender actually matters for the smoothest blend!
- Chill Your Glass: For the ultimate experience, place your serving glass in the freezer for about 10 to 15 minutes before you begin. A frosted glass keeps the milkshake colder for much longer and prevents it from melting rapidly.
- Load the Liquids First: Pour the 1 cup of milk into the bottom of your blender pitcher. Adding the liquid first creates a vortex that helps pull the solid ingredients down into the blades, preventing the blender from jamming.
- Add the Ice and Cream: Add the 1/2 cup of ice cubes and the 1/2 cup of vanilla ice cream (or frozen yogurt) into the blender.
- Toss in the Cookies: Drop the 3-4 whole Oreo cookies right on top. There is no need to crush them beforehand; a good blender will do all the heavy lifting for you.
- Blend to Desired Consistency: Secure the lid tightly on your blender. Start on a low speed to begin crushing the ice and cookies, then gradually increase the speed to high. Blend for about 30 to 45 seconds. You want the mixture to be thick and frosty, but you still want small, distinct specks of cookie remaining for texture. Avoid over-blending, or the shake will become completely gray and lose its signature cookie crunch.
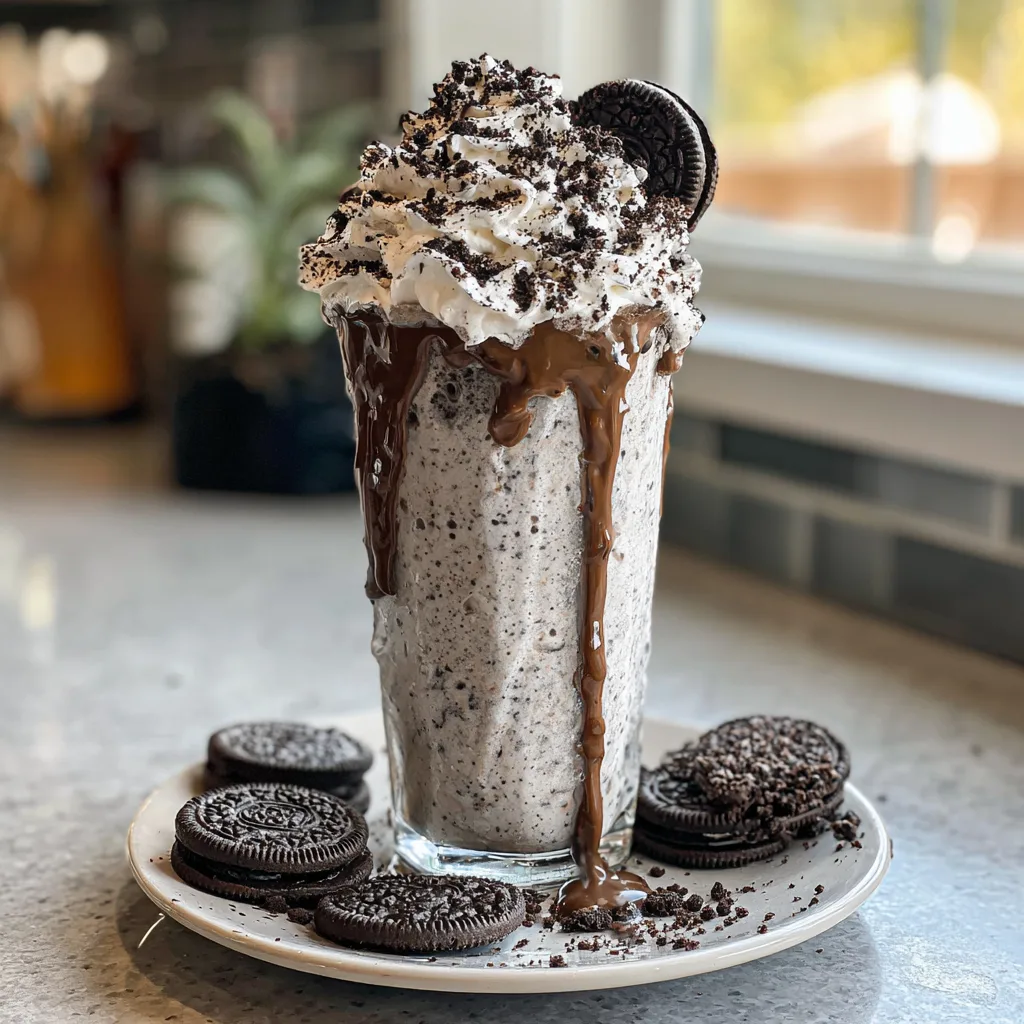
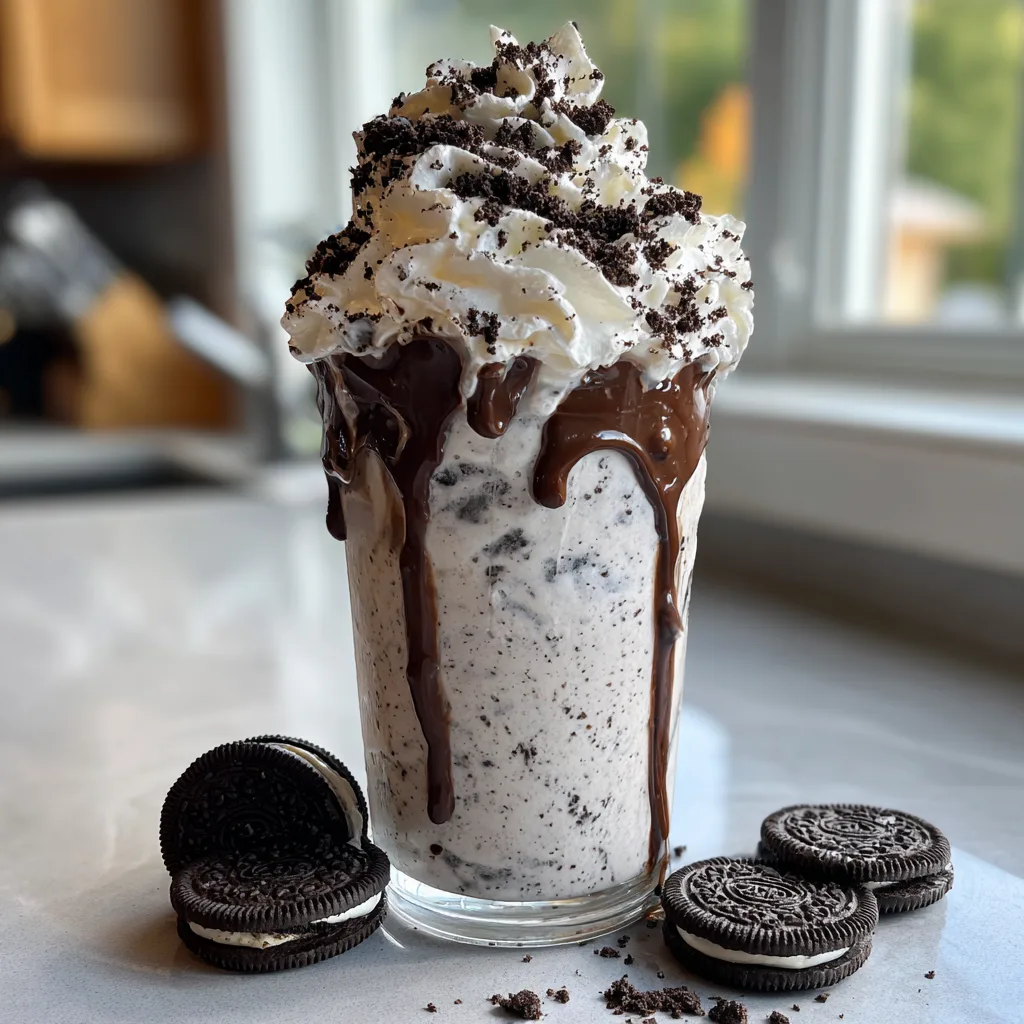
- Pour and Garnish: Pour the thick milkshake into your chilled, frosted glass. Immediately top with a generous, tall swirl of whipped cream. Take an extra Oreo cookie, crush it in your hands, and sprinkle the dark chocolate crumbs heavily over the white whipped cream.
- Serve and Enjoy: Add a wide straw (to easily suck up those cookie bits) and perhaps a long spoon. Serve immediately while frosty and thick!
Creative Variations and Flavor Twists
Once you have mastered the classic Oreo Shake Delight, the blender is your playground. Here are several ways to customize this recipe and create entirely new flavor profiles:
The Mint Chocolate Chip Oreo Shake:
Swap out the standard vanilla ice cream for mint chocolate chip ice cream, or simply add a quarter teaspoon of peppermint extract to the classic recipe. Mint and Oreo are a match made in heaven, resulting in a refreshing, tingly dessert perfect for hot summer days.
The Peanut Butter Lover’s Shake:
Add two tablespoons of creamy or crunchy peanut butter into the blender before mixing. The salty, roasted flavor of the peanut butter balances the intense sweetness of the cookies and creates a dense, incredibly satisfying shake. You can even use Peanut Butter flavored Oreos for a double dose of flavor.
The Mocha Cookie Frappe:
Replace half of the milk with chilled, strong-brewed coffee or a shot of espresso. This transforms the dessert into a caffeinated, coffee-shop-style frappe. The bitterness of the coffee beautifully complements the dark cocoa notes of the Oreo cookies.
The Adult “Boozy” Milkshake:
For a fun, adult-only dessert after a dinner party, add an ounce of Irish Cream liqueur (like Baileys), coffee liqueur (like Kahlúa), or vanilla vodka to the blender. Reduce the milk by a splash to accommodate the extra liquid and keep the shake thick.
Equipment Needed for the Best Results
You do not need a professional-grade kitchen to make a great milkshake, but having the right tools makes the process smoother and the result much better.
- A High-Speed Blender: Since this recipe uses ice cubes, a blender with a strong motor is essential to pulverize the ice into a smooth frost rather than leaving large, crunchy chunks.
- A Tall Glass: A classic soda fountain glass or a large mason jar not only holds the perfect volume but also adds to the nostalgic aesthetic.
- A Wide Straw: Standard thin straws will get clogged by the delicious cookie pieces. Invest in reusable wide boba straws or thick smoothie straws for the best drinking experience.
- A Long Spoon: For scooping up the remaining cookie crumbs and whipped cream at the bottom of the glass!
Expert Tips for the Ultimate Presentation
We eat (and drink) with our eyes first. To make your homemade shake look like a $10 specialty cafe drink, pay attention to the presentation.
Before pouring the blended shake into the glass, take a bottle of chocolate syrup and drizzle it heavily along the inside walls of the chilled glass. As you pour the shake in, the syrup will create beautiful, artistic streaks. You can also rim the edge of the glass with chocolate frosting and roll it in crushed Oreos before pouring the drink inside, creating an edible cookie rim that is absolutely show-stopping.
Frequently Asked Questions
Can I make this milkshake without a blender?
While a blender is highly recommended, especially because of the ice cubes, you can make a version of this without one. Place your ice cream in a bowl and let it soften slightly. Place the Oreos in a ziplock bag and smash them into fine crumbs with a rolling pin. Whisk the milk into the softened ice cream vigorously until smooth, then fold in the cookie crumbs. You will have to skip the ice cubes, but the flavor will still be amazing.
Can I store leftover milkshake in the fridge?
Milkshakes are meant to be consumed immediately while they are thick and frozen. If you put it in the fridge, it will melt into flavored milk. If you put it in the freezer, it will freeze solid into a block of ice. It is best to only make as much as you plan to drink right then and there.
How can I make the shake thicker?
If you prefer a milkshake so thick you have to eat it with a spoon, simply increase the amount of vanilla ice cream to 1 full cup, or reduce the milk to 1/2 cup. The beauty of homemade shakes is that you are in total control of the consistency.
Is it better to use dairy or plant-based milk?
It is entirely up to your dietary needs and personal taste! Dairy milk provides a classic, rich flavor, while oat or cashew milk offers a wonderfully creamy, lactose-free alternative that pairs perfectly with the chocolate cookies.
There is nothing quite like treating yourself to a homemade Oreo Shake Delight. It is quick, affordable, and brings an instant smile to anyone’s face. Grab your blender, grab your cookies, and get ready to enjoy the ultimate cookies and cream masterpiece!
Oreo Shake Delight
Ingredients
Equipment
Method
- Place your serving glass in the freezer for 10 minutes to frost it.
- In a blender, add the milk first, followed by the ice cubes, vanilla ice cream, and the 3-4 whole Oreo cookies.
- Secure the lid and blend, starting on low speed and increasing to high, for about 30 to 45 seconds until the shake is thick and frosty, but still has small cookie pieces.
- Pour the blended milkshake into the chilled glass.
- Top generously with a tall swirl of whipped cream.
- Crush an extra Oreo cookie and sprinkle the crumbs over the whipped cream. Serve immediately with a wide straw.