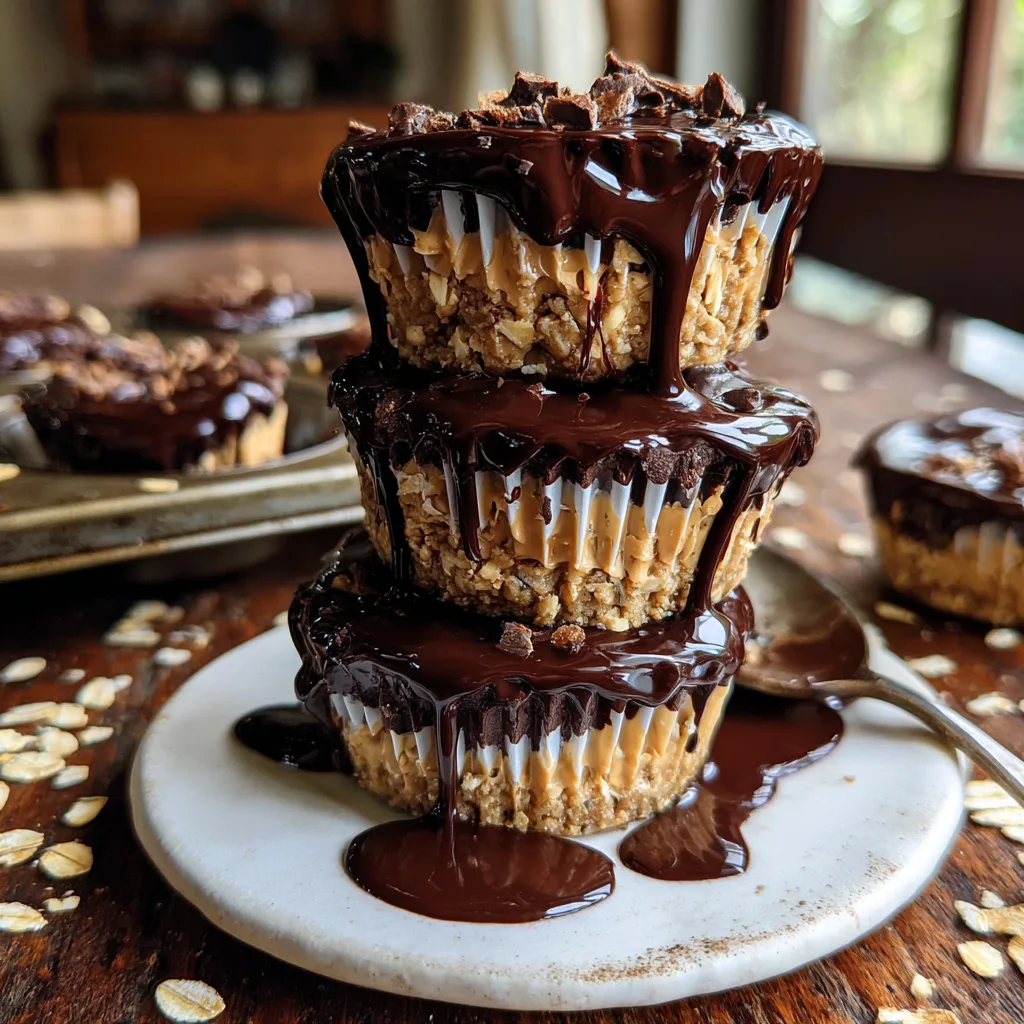
Peanut Butter Oat Cups
The Ultimate Guide to No-Bake Peanut Butter Oat Cups
When the craving for something sweet, salty, chewy, and chocolaty hits, there is nothing quite as satisfying as the classic combination of peanut butter and chocolate. Welcome to the ultimate recipe for No-Bake Peanut Butter Oat Cups. This recipe represents the perfect marriage of wholesome ingredients and indulgent flavors, creating a treat that feels like a decadent dessert but is packed with enough nutritional value to serve as a midday energy booster or a quick breakfast on the go.
In today’s fast-paced world, finding the time to bake a complex dessert from scratch can feel impossible. That is precisely where no-bake recipes swoop in to save the day. With just a handful of pantry staples, a mixing bowl, and your refrigerator, you can create a batch of these glorious peanut butter oat cups without ever turning on your oven. The beauty of this recipe lies in its sheer simplicity and its unbelievable texture—a chewy, satisfyingly dense oat and peanut butter base sitting beneath a rich, crisp, and glossy layer of dark chocolate.
Whether you are meal-prepping snacks for the week, looking for a lunchbox-friendly treat for the kids, or simply trying to survive a 3 PM slump at the office, these cups are your new best friend. In this comprehensive guide, we will walk you through every single detail, from selecting the perfect type of oats to troubleshooting chocolate melting issues, ensuring your no-bake oat cups turn out flawlessly every single time.
Why You Will Fall in Love with This Recipe
There are countless reasons why these No-Bake Peanut Butter Oat Cups will quickly become a staple in your culinary repertoire. First and foremost is the ease of preparation. You do not need any fancy culinary skills, specialized equipment, or a culinary degree to master this recipe. If you can stir ingredients in a bowl and operate a microwave or a stovetop for a few minutes, you are entirely capable of making these.

Secondly, the flavor profile is universally beloved. The slight saltiness of the peanut butter perfectly cuts through the sweetness of the maple syrup and the bitterness of the dark chocolate. Every bite provides a textural contrast that keeps you coming back for more—the hearty, chewy bite of the rolled oats contrasted with the smooth, melt-in-your-mouth richness of the chocolate topping.
Furthermore, these cups are incredibly adaptable. They are naturally vegetarian, easily made vegan (by ensuring your chocolate chips are dairy-free), and naturally gluten-free (provided you use certified gluten-free oats). They are a fantastic, allergy-friendly option (barring peanut allergies, of course, which can easily be bypassed by using a seed butter). They require minimal cleanup, store beautifully in the fridge or freezer, and are perfectly portion-controlled.
The Magic of No-Bake Desserts
No-bake desserts have surged in popularity, and for good reason. During the sweltering summer months, the last thing anyone wants to do is heat up their kitchen by turning on the oven. No-bake treats rely on temperature manipulation—specifically chilling—to set their structure, rather than chemical leaveners and heat. This process not only keeps your kitchen cool but also locks in the raw nutritional benefits of the ingredients you are using.
In this recipe, the combination of sticky liquid sweetener (like maple syrup or honey) and the natural fats in the peanut butter act as the binding agents. When mixed with the dry oats and then chilled, the fats solidify slightly, and the oats absorb a bit of the ambient moisture, creating a firm, chewy base that holds its shape perfectly without any egg or flour needed to bind it. It is kitchen science at its easiest and most delicious.
Detailed Ingredient Breakdown
To achieve the perfect texture and flavor, it is crucial to understand the ingredients you are working with. Here is a deep dive into the components that make up these spectacular cups.
Ingredients for the Peanut Butter Oat Base
– 2 cups old-fashioned rolled oats
– 1 cup creamy peanut butter (natural or conventional, see notes below)
– 1/3 cup pure maple syrup or honey
– 1 teaspoon vanilla extract
– 1/4 teaspoon sea salt (omit if your peanut butter is heavily salted)
Ingredients for the Chocolate Topping
– 1 cup dark chocolate chips or semi-sweet chocolate chips
– 1 tablespoon coconut oil (helps the chocolate set with a softer bite)
Ingredient Notes and Selection Tips
The Oats: The type of oat you use will drastically affect the final texture. Old-fashioned rolled oats are the gold standard here. They provide a hearty, chewy texture that holds up well to the heavy peanut butter mixture. Quick oats can be used in a pinch, but they will result in a much denser, almost mushy base because they absorb liquid too rapidly. Steel-cut oats are a strict no-go for this recipe; they are entirely too hard and require cooking to be digestible.
The Peanut Butter: You have two main choices: natural peanut butter (the kind where the oil separates at the top and requires stirring) or conventional peanut butter (like Jif or Skippy, which contains added oils to prevent separation). Both work! If using natural peanut butter, ensure it is stirred incredibly well so the oils are fully incorporated, otherwise, your base might end up too crumbly or too greasy. Conventional peanut butter will yield a slightly firmer, more candy-like texture. If you have a peanut allergy, almond butter, cashew butter, or sunflower seed butter are excellent 1:1 substitutions.
The Sweetener: Pure maple syrup is highly recommended. It provides a robust, earthy sweetness that pairs magnificently with oats. Honey is another excellent option, though it is slightly thicker and stickier, which might require a bit more elbow grease when mixing. Agave nectar can also work. Avoid granulated sugars for this recipe; liquid sweeteners are essential because they act as the glue holding the oats together.
The Chocolate and Coconut Oil: Using a high-quality chocolate chip will make a world of difference. Dark chocolate (60% cacao or higher) provides a sophisticated bitterness that balances the sweet peanut butter base. The secret ingredient here is the coconut oil. By melting a tablespoon of coconut oil into your chocolate chips, you thin the chocolate slightly, making it easier to pour. More importantly, it tempers the chocolate just enough so that when you take a bite of the chilled cup, the chocolate yields softly instead of shattering into a million pieces and cracking the oat base.
Step-by-Step Instructions
Follow these detailed steps to ensure your No-Bake Peanut Butter Oat Cups turn out perfectly.
1. Prepare your equipment: Line a standard 12-cup muffin tin with paper or silicone cupcake liners. Silicone liners are highly recommended as they peel away effortlessly from the sticky oat base, but standard paper liners will work fine. Set the tin aside.
2. Warm the wet ingredients: In a medium microwave-safe bowl (or a small saucepan over low heat on the stove), combine the creamy peanut butter and the pure maple syrup. Warm the mixture gently—about 30 to 45 seconds in the microwave. You do not want it to boil; you simply want to loosen the peanut butter so it becomes runny, easily pourable, and blends seamlessly with the syrup. Stir until completely smooth and cohesive.
3. Flavor the wet mix: Remove the bowl from the heat or microwave. Stir in the vanilla extract and the sea salt. Mixing these in after heating ensures the delicate flavor compounds of the vanilla do not evaporate.
4. Incorporate the oats: Add the old-fashioned rolled oats to the peanut butter mixture. Using a sturdy silicone spatula or a wooden spoon, fold the mixture together until every single oat is completely coated in the wet mixture. There should be no dry spots of oats remaining at the bottom of the bowl. The mixture will be thick and sticky.
5. Press into the cups: Divide the oat mixture evenly among the 12 lined muffin cups. This should be about 2 tablespoons of the mixture per cup. Using the back of a spoon, or slightly damp fingers (to prevent sticking), press the mixture down firmly and evenly into the bottom of the liners. Packing them tightly is the secret to ensuring they do not crumble when you eat them. Place the muffin tin in the refrigerator while you prepare the topping.
6. Melt the chocolate topping: In a separate, clean microwave-safe bowl, combine the dark chocolate chips and the coconut oil. Microwave in 30-second increments, stirring thoroughly after each interval. Chocolate burns very easily, so patience is key. Once the chocolate is about 90% melted, stop microwaving and just let the residual heat melt the remaining small lumps as you stir. You should be left with a smooth, glossy, liquid chocolate.
7. Pour and spread: Remove the muffin tin from the refrigerator. Spoon the melted chocolate mixture evenly over the top of each chilled oat base. Gently tap the muffin tin on your kitchen counter a few times to help the chocolate settle into an even, flat layer and release any trapped air bubbles.
8. Chill to set: Place the muffin tin back into the refrigerator. Allow the cups to chill for at least 1 to 2 hours, or until the chocolate is completely hardened and the oat base is firm. Alternatively, you can place them in the freezer for about 30 minutes if you are in a rush.
9. Serve and enjoy: Once fully set, remove the cups from the muffin tin, peel off the liners, and enjoy!
Expert Tips for the Perfect Oat Cups
Do Not Skip the Coconut Oil: As mentioned, coconut oil is crucial for the chocolate layer. If you use pure melted chocolate chips, the topping will freeze rock-solid. When you try to bite into it, the pressure will squish the soft oat base underneath, creating a mess. The coconut oil softens the chocolate just enough for a clean bite.
Damp Hands are Your Friend: When pressing the oat mixture into the muffin liners, it can get incredibly sticky. Keep a small bowl of water nearby and lightly dampen your fingertips before pressing the mixture down. This prevents the oats from sticking to your hands and allows you to pack the base tightly and uniformly.
Roast Your Oats: For an elevated, nutty flavor profile, consider toasting your rolled oats in a dry skillet over medium heat for 5-7 minutes before mixing them into the peanut butter. Let them cool slightly before proceeding with the recipe. This extra step adds an incredible depth of flavor that mimics a freshly baked cookie.
Flavor Variations and Substitutions
The beauty of this recipe is its versatility. Think of the base recipe as a blank canvas for your culinary creativity. Here are some fantastic ways to customize your cups:
Protein-Packed Cups: If you want to turn these into a post-workout recovery snack, add a scoop of your favorite vanilla or chocolate protein powder to the oat mixture. You may need to add an extra tablespoon or two of maple syrup or a splash of almond milk to compensate for the dry powder and bring the mixture back to a sticky consistency.
Crunchy Mix-Ins: Stir 1/4 cup of chia seeds, hemp hearts, or flax seeds into the oat mixture for added omega-3s and an extra crunch. You can also fold in mini chocolate chips, crushed peanuts, or Rice Krispies cereal into the base for phenomenal texture.
Gourmet Toppings: Before the chocolate layer sets in the fridge, sprinkle the tops with flaky Maldon sea salt. The salt visually pops against the dark chocolate and violently enhances the sweet and salty dynamic. You can also top them with crushed pretzels, a drizzle of white chocolate, or a swirl of extra peanut butter.
How to Serve and Store
Because these are no-bake and rely on the solidified fats in the peanut butter and chocolate to hold their shape, they are sensitive to heat. They should be served straight from the refrigerator.
Refrigerator Storage: Store the fully set cups in an airtight container in the refrigerator for up to two weeks. They make the perfect grab-and-go snack.
Freezer Storage: These cups freeze exceptionally well! Place them in a freezer-safe ziplock bag or airtight container, separating layers with parchment paper. They will keep in the freezer for up to 3 months. When you are ready to eat one, let it sit at room temperature for about 5-10 minutes to soften slightly before biting in.
Fun Facts About Peanut Butter and Oats
Did you know that it takes about 540 peanuts to make a 12-ounce jar of peanut butter? Peanuts are not actually nuts at all; they are legumes, growing underground rather than on trees. This is why they are so incredibly rich in plant-based protein.
Oats, on the other hand, have been cultivated for thousands of years, initially considered a nuisance weed growing alongside wheat and barley. Today, they are celebrated globally for their high beta-glucan content, a type of soluble fiber that has been strongly linked to improving cholesterol levels and boosting heart health. Combining these two powerhouse ingredients results in a snack that does not just taste amazing but actively fuels your body.
Frequently Asked Questions
Can I use chunky peanut butter?
Absolutely! Chunky peanut butter works wonderfully in this recipe and adds an excellent textural element to the oat base. Just be aware that it might make the base slightly more crumbly, so pack it firmly into the muffin tin.
Why is my oat mixture crumbling and not sticking together?
This usually happens if your peanut butter was too dry (a common issue at the bottom of a jar of natural peanut butter) or if you used quick oats that absorbed the moisture too fast. To fix it, simply add another tablespoon of maple syrup and a tablespoon of peanut butter, mix well, and test the consistency again.
Can I make these into bars instead of cups?
Yes! If you do not want to use a muffin tin, line an 8×8 inch square baking dish with parchment paper, leaving an overhang on the sides. Press the entire oat mixture firmly into the bottom of the pan, pour the melted chocolate over the top, and chill. Once set, use the parchment paper overhang to lift the block out of the pan and slice it into bars or squares with a sharp knife.
No Bake Peanut Butter Oat Cups
Ingredients
Equipment
Method
- Line a standard 12-cup muffin tin with paper or silicone liners.
- In a microwave-safe bowl, combine peanut butter and maple syrup. Heat for 30-45 seconds until runny and smooth. Stir in vanilla extract and sea salt.
- Add the rolled oats to the wet mixture and fold until completely coated and no dry spots remain.
- Divide the oat mixture evenly among the 12 muffin cups. Press down firmly and evenly using the back of a spoon. Place in the refrigerator.
- In a separate microwave-safe bowl, melt the chocolate chips and coconut oil in 30-second increments, stirring until smooth and glossy.
- Spoon the melted chocolate evenly over the chilled oat bases. Tap the tin on the counter to level the chocolate.
- Chill in the refrigerator for at least 1-2 hours until the chocolate is fully set and the cups are firm.
- Remove liners and serve cold. Store in an airtight container in the fridge or freezer.