PB Greek Yogurt Cups
The Ultimate Guide to Healthy Peanut Butter Greek Yogurt Frozen Cups
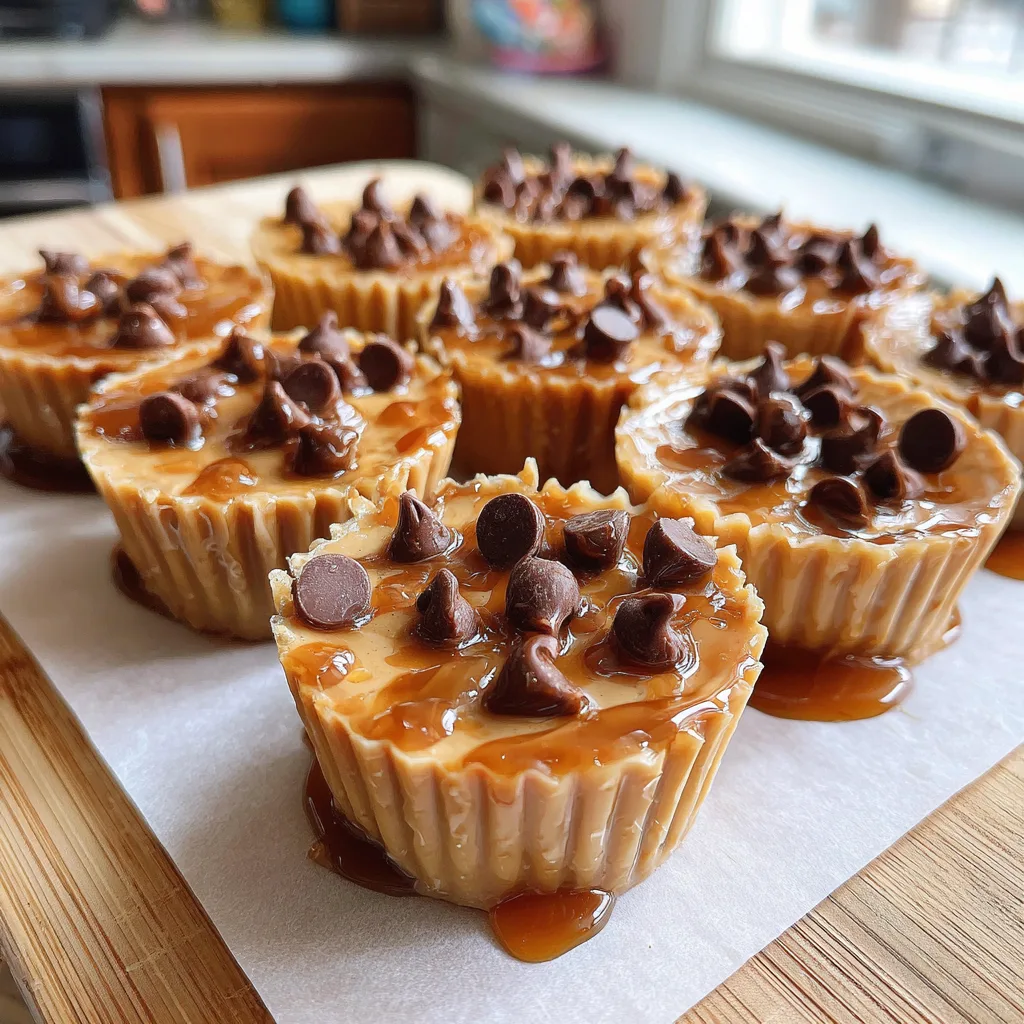
Finding a snack that perfectly bridges the gap between a decadent dessert and a genuinely nutritious bite can often feel like an impossible quest. We constantly find ourselves choosing between sugar-laden, heavily processed sweets that leave us feeling sluggish, or bland health foods that fail to hit the spot. Enter the ultimate solution: Healthy Peanut Butter Greek Yogurt Frozen Cups. These incredible little bites are a true game-changer in the world of meal prep and healthy snacking. With a texture reminiscent of ice cream and the rich, satisfying flavor of a peanut butter cup, these frozen treats are about to become your new household obsession.
In this comprehensive, deep-dive guide, we will explore every facet of creating these magnificent frozen yogurt cups. From selecting the absolute best ingredients to mastering the perfect freezing technique, you will learn how to whip up a batch of these high-protein, low-effort treats. Whether you need a quick post-workout recovery snack, a lunchbox surprise for the kids, or a late-night craving crusher, these four-ingredient wonders deliver on all fronts.
Why You Will Absolutely Love This Recipe
There is an endless list of reasons why these frozen yogurt cups deserve a permanent, dedicated space in your freezer door. First and foremost is the sheer, unbelievable simplicity of the recipe. We are talking about a grand total of four ingredients—most of which are likely sitting in your kitchen right now. There is zero baking required, no complicated tempering of chocolate, and absolutely no culinary expertise needed. If you can stir ingredients in a bowl, you can master this recipe.
Beyond the ease of preparation, the nutritional profile of these cups is staggering. Traditional peanut butter cups and ice cream bites are typically loaded with refined sugars, hydrogenated oils, and empty calories. By utilizing Greek yogurt as the base, you are injecting a massive dose of high-quality protein and gut-friendly probiotics into your snack. The peanut butter adds satiating, heart-healthy fats, ensuring that just one or two of these cups will actually keep you full and satisfied, rather than sparking a sugar crash.
Furthermore, these are the ultimate meal-prep companions. You can spend ten minutes on a Sunday afternoon mixing and portioning these out, and you will have a ready-to-eat, healthy dessert waiting for you every single day of the week. They are pre-portioned, minimizing the risk of mindless overeating, and they look absolutely adorable, making them a hit with both adults and children alike.
The Core Ingredients Breakdown
Because this recipe relies on only four components, the quality of each ingredient plays a massive role in the final taste and texture. Let’s break down exactly what you need and why:
- – Greek Yogurt (1/2 cup): This is the creamy canvas of our frozen cups. It is vital that you use Greek yogurt rather than regular, thinner yogurt. Greek yogurt has been strained to remove excess whey, resulting in a much thicker, richer consistency that mimics ice cream when frozen. Furthermore, it boasts roughly double the protein of standard yogurt. You can use plain, unsweetened Greek yogurt to control the sugar content entirely, or a vanilla bean Greek yogurt for an extra layer of flavor. Whole milk (full-fat) Greek yogurt will yield the creamiest texture and least “icy” bite, though non-fat works perfectly fine if you are strictly watching your macros.
- – Peanut Butter (1/3 cup): The star of the flavor show. For the absolute best results, opt for a creamy, natural peanut butter where the only ingredients are peanuts and salt. Conventional peanut butters often contain added palm oils and sugar, which can alter the freezing consistency and make the treats overly sweet. Natural peanut butter blends seamlessly into the yogurt, providing a rich, roasted, deeply nutty flavor profile and a wonderful dose of monounsaturated fats.
- – Honey or Maple Syrup (1 tablespoon): To balance the tanginess of the Greek yogurt and the savory notes of the peanut butter, we need a touch of natural sweetness. Honey provides a lovely, floral sweetness that pairs beautifully with peanut butter, while pure maple syrup offers a deeper, slightly caramel-like flavor. Both are fantastic unrefined alternatives to white sugar. You can adjust this amount slightly based on your personal sweet tooth, but one tablespoon is generally the sweet spot for this ratio.
- – Chocolate Chips (for topping): No peanut butter treat is complete without a hit of chocolate. We recommend using semi-sweet or dark chocolate chips. Dark chocolate (70% cacao or higher) adds an incredible depth of flavor and a boost of antioxidants. You can use standard-sized chips or mini chocolate chips for a more even distribution across the top of your cups.
Step-by-Step Instructions for Perfect Frozen Cups
Creating these treats is practically effortless, but following these steps ensures you get the perfect consistency and beautiful presentation every single time.
- Prepare Your Equipment: The best tool for this job is a silicone mini muffin pan. Silicone allows you to pop the frozen cups out with zero resistance. If you do not have a silicone pan, a standard metal mini muffin tin works, but you must line it with paper or foil muffin liners. Clear a flat space in your freezer where the pan can sit level.
- Mix the Base: In a medium-sized mixing bowl, add the 1/2 cup of Greek yogurt, 1/3 cup of creamy peanut butter, and 1 tablespoon of honey (or maple syrup). Using a whisk or a sturdy spatula, mix the ingredients vigorously. Keep stirring until the mixture is completely smooth, unified in color (a beautiful light caramel tan), and there are no streaks of yogurt or lumps of peanut butter remaining.
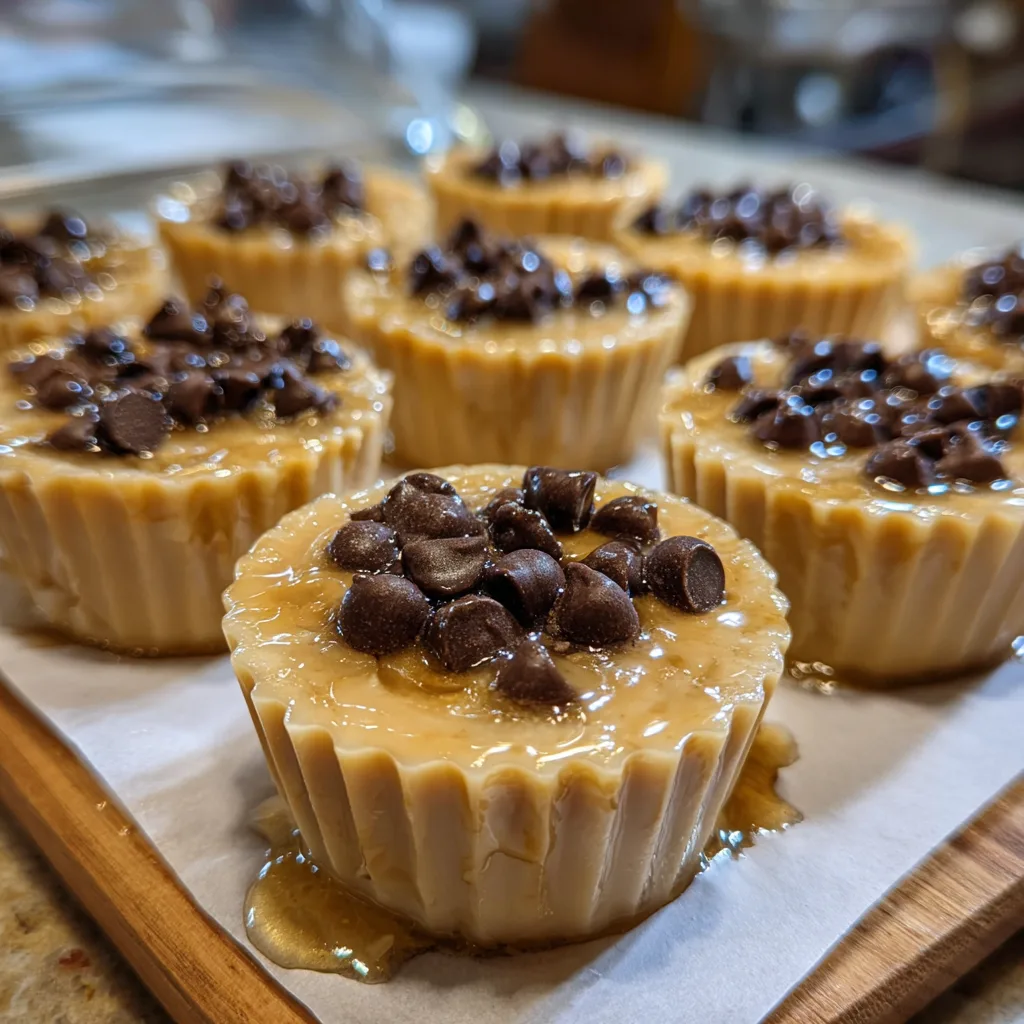
- Portion the Batter: Using a small cookie scoop or a spoon, carefully divide the peanut butter yogurt mixture into the cavities of your prepared muffin tin. Depending on the exact size of your muffin tin, this recipe generally yields about 6 to 8 mini cups. Fill them roughly three-quarters of the way to the top. Tap the pan gently on the counter a few times to level the tops and remove any trapped air bubbles.
- Add the Topping: Generously sprinkle your chocolate chips over the top of each wet cup. Gently press the chocolate chips down just a tiny bit so they adhere to the yogurt mixture and don’t fall off once frozen.
- The Freezing Process: Place the muffin tin flat in the freezer. Allow them to freeze for a minimum of 2 to 3 hours, or until they are completely solid to the touch.
- Unmolding and Enjoying: Once fully frozen solid, remove the pan from the freezer. If using a silicone pan, simply push from the bottom to pop them out. If using paper liners, you can easily peel the paper away to reveal the beautiful, fluted edges of your frozen yogurt cups.
Pro Tips for the Best Frozen Yogurt Texture
Freezing dairy can sometimes be tricky. Water content in yogurt can lead to ice crystals, making frozen treats hard and icy rather than creamy. Here are the chef-approved secrets to getting the best texture:
Embrace the Fat Content: As mentioned earlier, fat is your friend when freezing desserts. Fat does not freeze as hard as water. By using whole milk Greek yogurt and ensuring you use the full 1/3 cup of peanut butter, you are adding enough fat to the mixture to keep it reasonably soft and creamy even at sub-zero temperatures.
The “Thaw” Rule: This is arguably the most important tip. Because home freezers are extremely cold (usually 0°F or -18°C), these cups will be very hard immediately upon removal. For the absolute best, ice-cream-like eating experience, take the cups out of the freezer and let them sit at room temperature for 3 to 5 minutes before taking a bite. This brief thawing period softens the edges, makes the peanut butter flavor blossom, and gives it a luxurious, melt-in-your-mouth feel.
Avoid Over-Mixing: While you want the ingredients thoroughly combined, try not to aggressively whip air into the yogurt. Too much air can cause the cups to freeze unevenly or develop a slightly crumbly texture. Just mix until smooth and integrated.
Exciting Variations and Customizations
This four-ingredient recipe is a fantastic foundational blueprint. Once you master the basic ratio, you can customize these frozen cups in dozens of brilliant ways to suit your cravings or dietary needs.
- – The Protein Powerhouse: If you want to turn this into a serious post-gym recovery snack, add half a scoop of your favorite vanilla or chocolate whey or plant-based protein powder to the mixing bowl. You may need to add a tiny splash of milk (almond or dairy) if the powder makes the batter too thick to spoon easily.
- – Nut-Free Alternative: If you have peanut allergies in the house, this recipe is easily adapted. Swap the peanut butter for an equal amount of sunflower seed butter (SunButter) or soy nut butter. The texture remains identical, and the flavor is equally delicious.
- – Fruity Swirls: For a PB&J vibe, drop a tiny dollop of strawberry or raspberry chia jam into the center of the cup before freezing, swirling it slightly with a toothpick. Alternatively, top the cups with finely diced fresh strawberries or bananas instead of chocolate chips.
- – Crunch Factor: If you love texture, stir a handful of crispy rice cereal, crushed graham crackers, or chopped roasted peanuts directly into the yogurt batter before portioning it out.
- – Vegan/Dairy-Free: To make this entirely plant-based, use a high-quality, thick coconut milk or almond milk Greek-style yogurt, and ensure your chocolate chips and sweetener (maple syrup) are vegan-compliant.
Storage and Serving Suggestions
Proper storage is essential for maintaining the quality of your frozen yogurt cups. If you leave them uncovered in the muffin tin in the freezer, they will quickly absorb odors from other frozen foods and develop freezer burn.
Once the cups are completely frozen solid in their tin, immediately pop them out and transfer them to an airtight, freezer-safe container or a heavy-duty ziplock freezer bag. If you are stacking them in a container, it is a good idea to place a small sheet of parchment or wax paper between the layers so the chocolate chips don’t stick to the bottom of the cup above them.
When stored correctly, these peanut butter Greek yogurt cups will keep brilliantly in the freezer for up to two months. This makes them the ultimate bulk-prep snack. You can double or triple the recipe on a weekend and have a massive stash of healthy treats ready to go.
Serve them as a mid-afternoon pick-me-up alongside a hot cup of coffee—the contrast between the hot coffee and the cold, creamy peanut butter cup is heavenly. They are also fantastic to hand out to kids playing in the yard on a hot summer afternoon; they feel like they are getting ice cream, and you know they are getting a serving of protein and healthy fats.
Frequently Asked Questions (FAQs)
Can I use regular yogurt instead of Greek yogurt?
It is highly discouraged. Regular yogurt has a much higher water content. If you freeze it, you will end up with a very hard, icy block that is difficult to bite into and lacks the creamy mouthfeel of Greek yogurt. If you only have regular yogurt, you would need to strain it through a cheesecloth overnight to thicken it before using.
Why did my chocolate chips sink to the bottom?
If your yogurt batter is too thin (perhaps from using a runny yogurt or overly liquid peanut butter), the heavy chocolate chips might sink. Ensure you are using thick Greek yogurt. If the batter seems too runny, you can pop the bowl in the fridge for 20 minutes to firm up slightly before portioning it into the cups and adding the chips.
Is it normal for them to be hard straight out of the freezer?
Yes, absolutely. Commercial ice creams have emulsifiers, gums, and air whipped into them to keep them soft at freezer temperatures. Because this is a natural, home-made recipe, it will freeze quite solid. Always remember the 3-to-5-minute counter-thaw rule for the best eating experience.
By mastering these simple, wholesome ingredients, you are unlocking a world of guilt-free snacking. These Healthy Peanut Butter Greek Yogurt Frozen Cups prove that you don’t need a pantry full of artificial ingredients to create a truly spectacular, drool-worthy dessert. Get your mixing bowl ready, and enjoy the delicious results of your effortless meal prep!
Healthy Peanut Butter Greek Yogurt Frozen Cups
Ingredients
Equipment
Method
- Prepare a mini muffin tin by either using a silicone pan or lining a metal pan with paper or foil liners.
- In a mixing bowl, aggressively whisk together the Greek yogurt, peanut butter, and honey (or maple syrup) until completely smooth and uniform in color.
- Spoon or scoop the mixture evenly into the muffin cups, filling them about 3/4 of the way to the top.
- Tap the pan gently on the counter to level the mixture, then sprinkle chocolate chips generously over the top of each cup, pressing them in slightly.
- Place the pan flat in the freezer and freeze for 2 to 3 hours, or until completely solid.
- Pop the cups out of the tin. Let them sit at room temperature for 3-5 minutes before eating for the best creamy texture. Store leftovers in an airtight container in the freezer.