Chunky Puff Flower Motif Blanket – Crochet Pattern & Tutorial
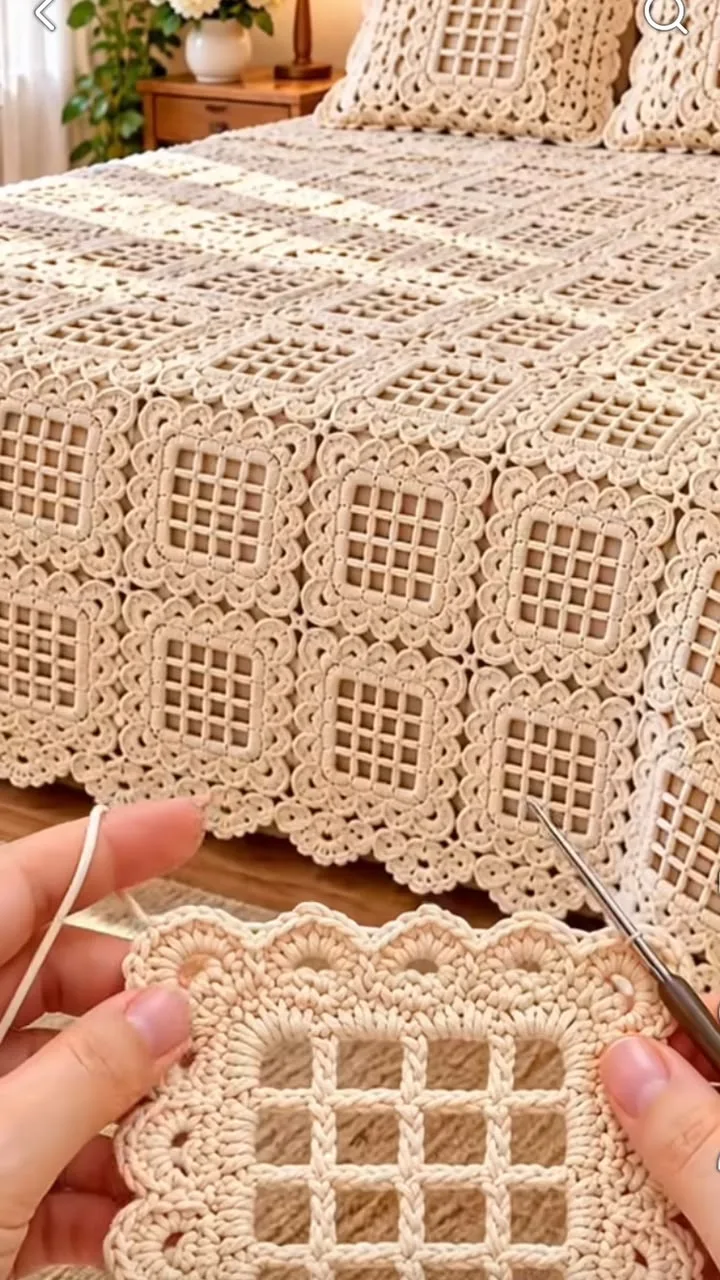
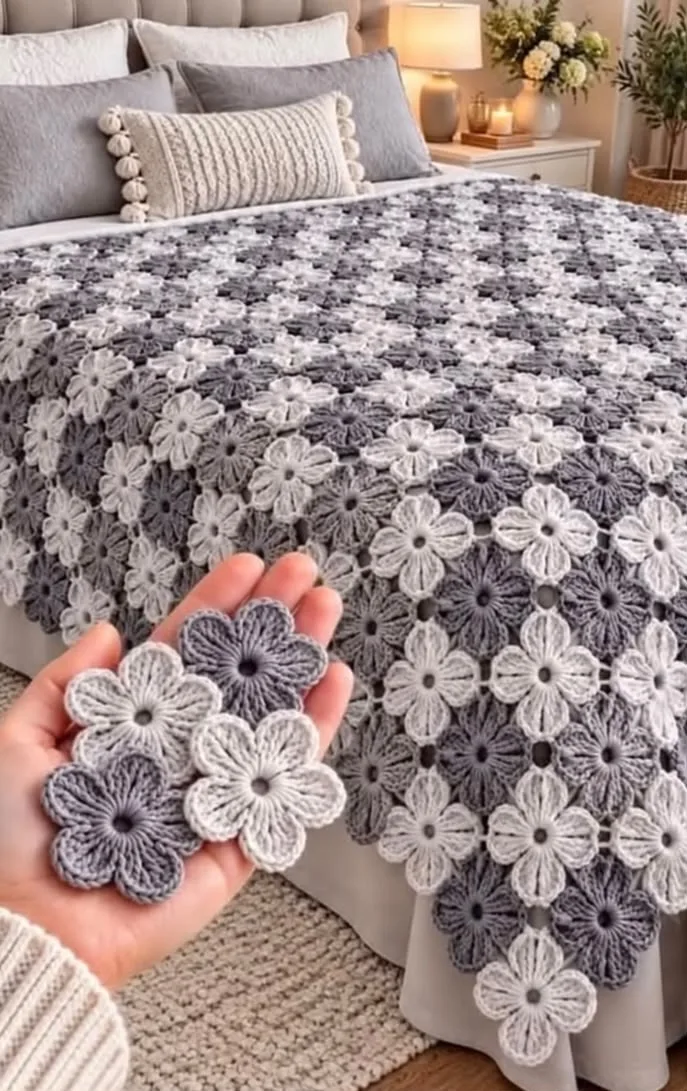
This beautiful crochet project brings together cozy texture, a soothing color palette, and intricate floral motifs to create a bedspread or throw that’s as decorative as it is warm. Each motif resembles a plump, six-petal flower worked in soft grays and whites, arranged to nestle into a seamless field of petals across the surface. The overall impression is both modern and timeless, blending botanical beauty with geometric order.
The colors alternate between gentle, pale gray and deeper, warm charcoal shades, giving the blanket subtle depth and movement. Each flower’s petals are thickly textured, boldly defined by their dimensional puff stitches, with a simple ring at the center. The joined flowers create a visually lacy effect where the motifs meet. This project makes a perfect statement bedspread, but it could just as readily be sized for a crib, sofa throw, or even reimagined as a pillow, scarf, or table runner. The floral blanket is sure to draw compliments and invite cozy moments.
What makes this creation compelling is how accessible yet impactful it is: the basic motif is simple to master, but when joined en masse, the result is truly striking. You’ll love watching the flowers come together, stitch by stitch, as your blanket blossoms before your eyes.
Project Overview
The blanket is constructed from dozens of individual six-petal puff stitch flower motifs, each crocheted separately in the round, then joined together as you go (or sewn together afterwards). The motifs are connected at their petals to form a cohesive, fabric-like field. The project is modular, making it easy to adjust the size and tailor for various uses. There is no distinct border; the outer edges are naturally scalloped by the shape of the motifs.
Skill Level
Advanced Beginner to Intermediate – This project is suitable for those comfortable with basic crochet stitches as well as learning to work puff stitches in the round, join motifs, and maintain an even tension. No advanced shaping or complex construction, but attention to detail and counting will be important for uniform results.
Materials
- Yarn: Worsted weight yarn (category #4). Acrylic or soft cotton blends are recommended for easy care and drape. Choose two high-contrast but harmonious shades, such as light gray (Color A) and charcoal (Color B).
- Amount Needed: For a full/queen size blanket (approx. 170 x 220 cm or 67 x 87 in):
- Color A: about 650 g (approx. 1,200 yds / 1,100 m)
- Color B: about 650 g (approx. 1,200 yds / 1,100 m)
- Crochet hook: 5.0 mm (H-8) or size to obtain gauge
- Tapestry needle (for weaving in ends and sewing motifs if needed)
- Small scissors
- Stitch markers (optional, for marking joining points)
- Measuring tape
Finished Size
Finished blanket size (shown): Approximately 170 cm x 220 cm (67 in x 87 in), fits generously over a queen-sized bed with elegant drape on the sides. Each motif measures about 9 cm (3.5 in) across.
To adjust size: Add or subtract motifs to achieve any dimensions you desire. Lay motifs side-by-side to plan ahead; each motif adds about 9 cm (3.5 in) to the width or length depending on layout.
Gauge
One finished motif = approx. 9 cm (3.5 in) across at widest point. If your motif is smaller or larger, your finished blanket size will change accordingly. Small differences in gauge are acceptable; work a test motif and adjust your hook size if needed.
Stitches and Abbreviations
- ch – chain
- sl st – slip stitch
- sc – single crochet
- dc – double crochet
- puff – puff stitch (see pattern notes)
- MR – magic ring
- rep – repeat
- st(s) – stitch(es)
- sp – space
- FO – fasten off
Important Pattern Notes
- Motifs are worked in joined rounds. Chains do not count as stitches unless specified.
- Puff stitches are made by repeatedly yarning over and pulling up loops before closing all loops at once (see next section for details).
- Join new yarn by placing slip knot on hook and making first ch or sc as instructed.
- Join-as-you-go technique can be used for the final round, or motifs can be sewn together later.
- It is helpful to lay out motifs to plan color placement before joining.
- Use stitch markers to help with joining points if needed.
- Right/Wrong side: Both sides look similar, but keep all motifs facing the same way for neatest results.
Detailed Crochet Pattern
Part 1: Six-Petal Puff Flower Motif
Motif Instructions (make as many as needed to achieve desired size, alternating colors for a checkerboard effect):
Round 1: Center
- With chosen color (A or B), make a magic ring (MR). Ch 1 (does not count as stitch).
- Work 6 sc into the ring. Pull tightly to close. Join with sl st to first sc. (6 sc)
Note: The center should be snug, but not puckered.
Round 2: Petal Bases
- Ch 2 (does not count as stitch). In same st, work (puff, ch 2).
- Puff stitch: Yarn over, insert hook in st, yo and pull up loop (3 loops on hook). Repeat this step 3 more times (total of 4 yarn-overs, 9 loops on hook). Yarn over, pull through all 9 loops. Ch 1 to close puff.
- *(Puff, ch 2) in next st*; rep from * around (6 puffs, each separated by ch 2 sp). Join with sl st to top of first puff. FO or continue if using same color for petals.
You should now have a small flower with 6 puff bases separated by chain-2 spaces.
Round 3: Petal Layer
- Join new color in any ch-2 space if changing colors for maximum contrast.
- In each ch-2 space around, work: (ch 2, puff, ch 2, puff, ch 2), sl st to next ch-2 sp.
- Repeat in each of the 6 spaces, creating thick, fanned out petals. Join with sl st to first ch-2 of round. (6 double-puff petals total)
Puff stitch for petals: Yarn over, insert hook in space, yo and pull up loop (3 loops on hook). Repeat 4 more times (total of 5 yarn-overs, 11 loops on hook). Yarn over, pull through all 11 loops. Ch 1 to close.
Each petal should look full and raised from the fabric surface. Fasten off, leaving a 15 cm (6 in) tail for joining.
Round 4: Motif Finishing & Joining Points
- Insert hook into the gap between any two petals (where ch-2 space is). With same or contrasting yarn, sl st to attach if needed.
- Ch 3, sl st into same gap. (This will be a joining picot for connecting motifs.)
- Repeat for all 6 gaps.
- Fasten off and weave in ends if not joining immediately.
Part 2: Joining the Motifs
There are two options for joining:
- Sewing: Lay out all motifs in alternating colors to form your pattern. With tapestry needle and matching yarn, sew through picots (the ch-3 loops made in Round 4) to join motifs at petal-tips, making sure to align each flower for a lattice effect.
- Join-as-you-go: When working petal picots on a new motif, instead of ch 3, ch 1, then sl st into corresponding picot of adjacent motif, ch 1, sl st back in same gap of your motif. Repeat for each adjoining point.
Ensure each motif is joined on all 6 sides except edges/corners.
Part 3: Blanket Assembly and Edge Finishing
- Continue making and joining motifs until your blanket reaches the desired size. For a throw, about 18 x 22 motifs (396 total) covers a queen bed with overhang.
- After joining all motifs, inspect for gaps and reinforce any weak joins with small, neat whip stitches if needed.
- There is no additional border; the outer scalloped edge is formed naturally by the flowers’ petal shapes.
Part 4: Weaving in Ends & Blocking
- Use tapestry needle to carefully weave in all loose ends at the back of each motif, taking special care to tuck in ends from color changes.
- Gently soak the entire blanket in cool water, squeeze out excess water with a towel (do not wring).
- Spread blanket on a flat surface, gently stretching to shape. Pin petals into neat points if desired. Allow to air dry completely. This evens out motifs and enhances drape.
Assembly and Finishing
- Check that all motifs are securely joined at each touching petal.
- Patch any weak joins or gaps with small whip stitches and matching yarn.
- Weave in ends, concealing them in the puff stitches for a neater finish.
- Shape the blanket gently, smoothing edges to accentuate the floral outline.
- Blocking is highly recommended to open up the layout and create uniform petals.
Customization Ideas
- Use any two or more colors for a gradient, checkerboard, or random mix effect.
- Try ombré shades for petals or single-color neutrals for a minimalist look.
- Make a larger or smaller project (baby blanket, scarf, table runner, pillow cover) by changing motif count.
- Use chunky yarn and a larger hook for an extra-plush throw, or finer yarn for more delicate motifs.
- Edge with one round of single crochet for a different finish, or add tassels to corners if desired.
- Combine with square motifs to frame a central panel or add variety.
Troubleshooting Tips
- Puff petals look loose: Pull up each loop evenly and snugly, and finish puff stitch tightly before chaining to close.
- Motif curling: Try a larger hook or reduce the number of puff stitch loops if your petals curl inward.
- Uneven edges: Carefully block blanket, pinning petals into place to even out the perimeter.
- Blanket too heavy/small: Adjust yarn weight or make fewer/more motifs to match your desired dimensions.
- Color changes not neat: When joining a new color, begin in a chain space for best results. Always weave in color-change ends thoroughly.
- Unsteady joins: Double-check that all petal tips are joined at multiple points, especially at corners/edges.
Care Instructions
- Wash gently by hand or use a machine’s delicate cycle with cold water.
- Lay flat to dry, smoothing into shape to preserve motif details.
- Do not bleach or wring. Store folded flat or loosely rolled to prevent squashing puffs.
Final Notes
Be sure to count stitches as you work and double check motif sizes for consistency. Take your time joining for the neatest finish, and use the project image as a handy visual reference for motif shape, color arrangement, and layout. With patience and attention to detail, you’ll have a breathtaking floral blanket that brings beauty and warmth to any room!