Free Twirling Holiday Tree & Snowflake Helix Wind Spinner Crochet Pattern
📖 B. INTRODUCTION
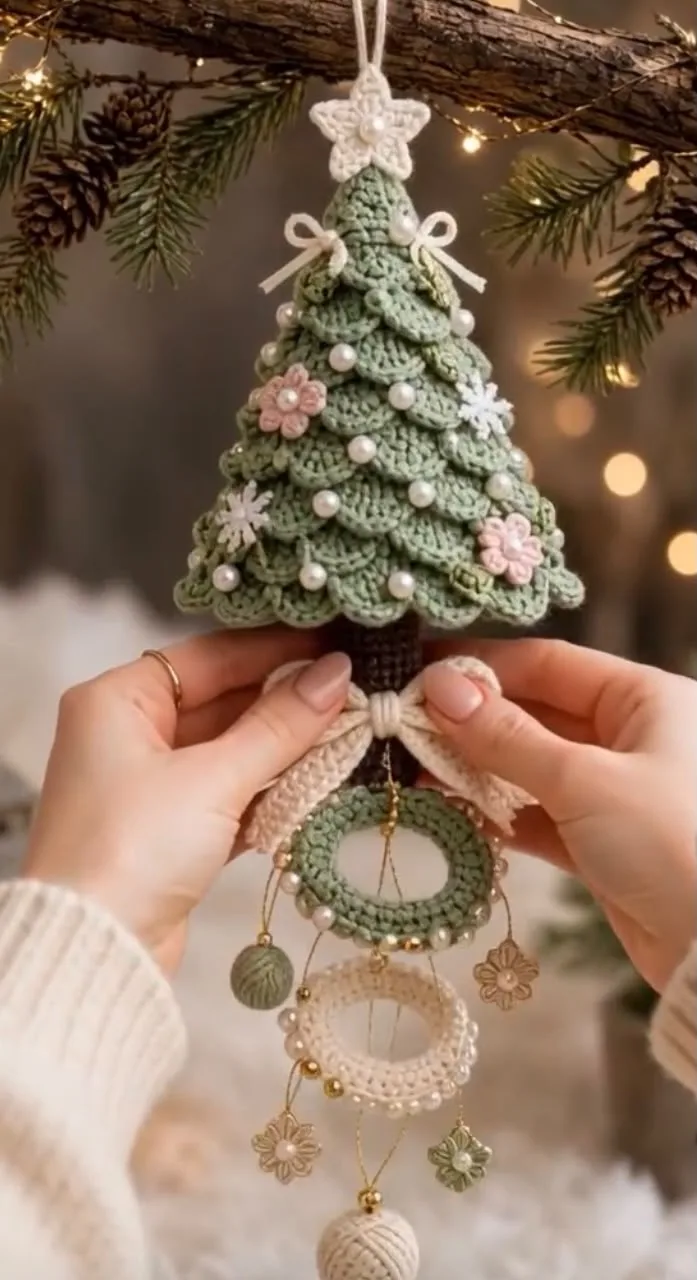
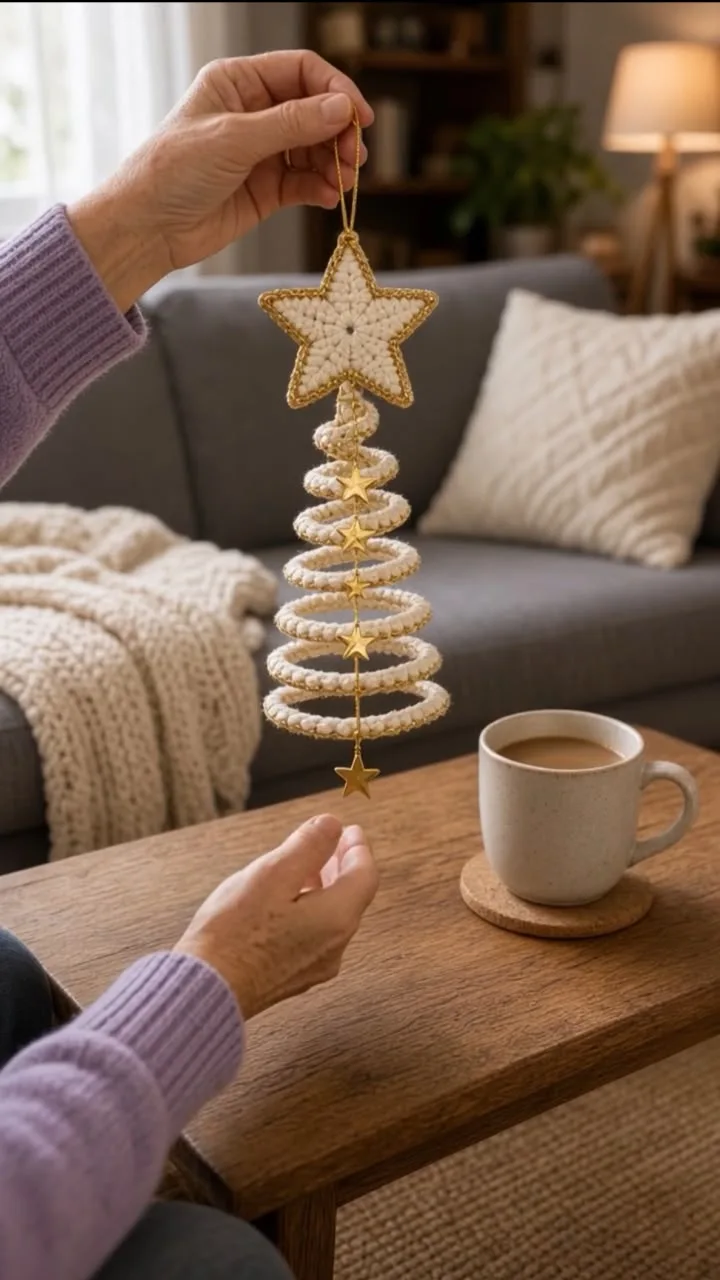
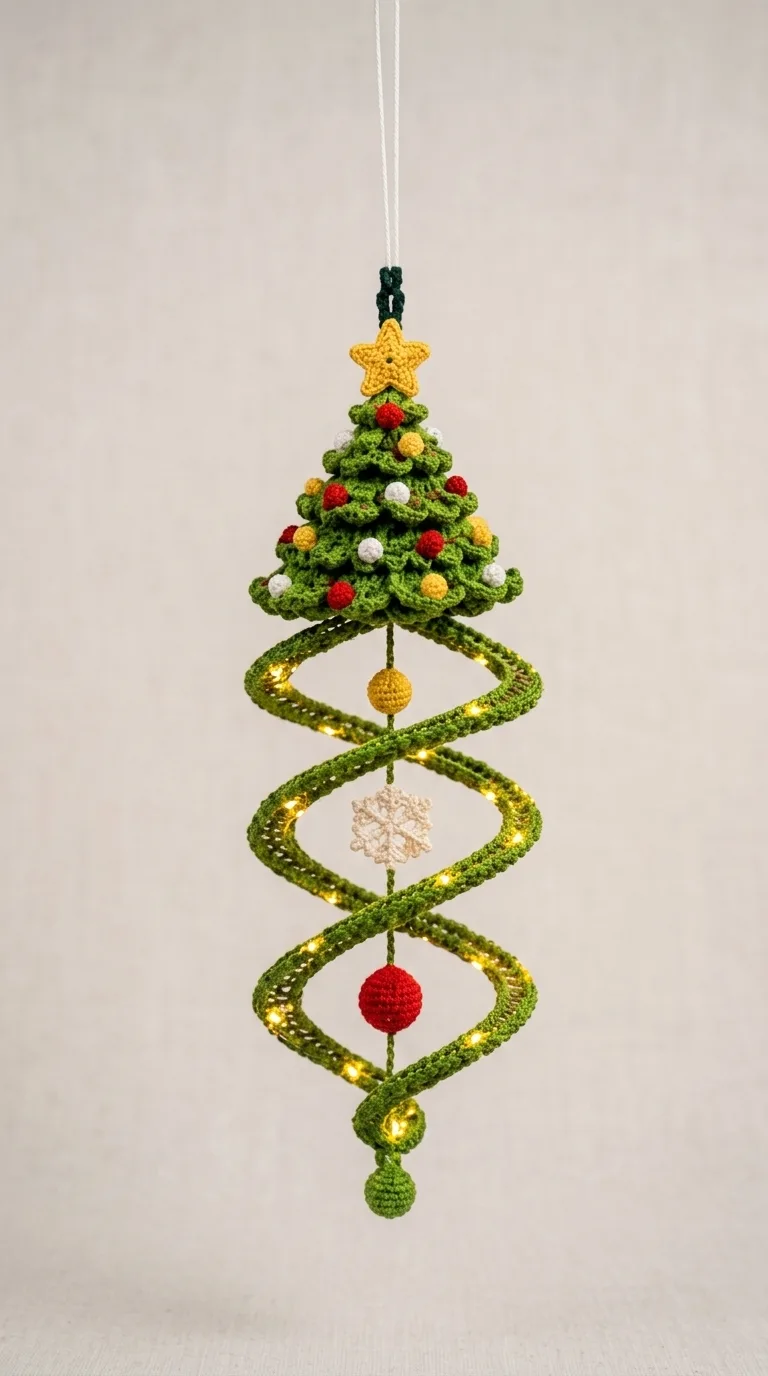
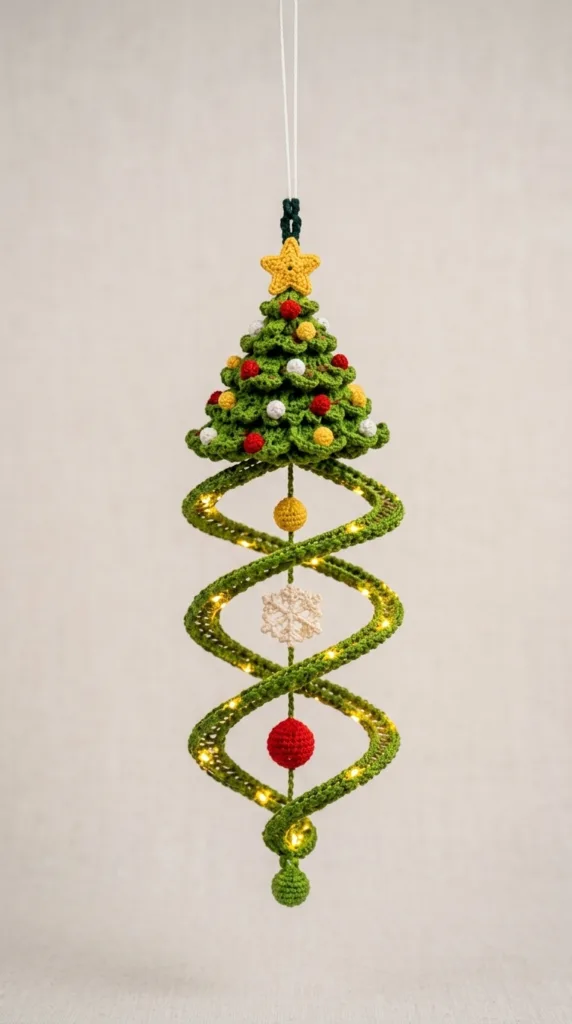
Bring enchanting festive magic to your holiday home with this free twirling Christmas tree helix wind spinner pattern! This hanging ornament pairs a textured, tiered amigurumi Christmas tree cone topped with a golden star with a cascading double-helix spiral ribbon frame. Suspended straight down the central axis inside the twisting ribbon cage is a sequence of festive treasures: a golden orb, a snowflake, and a holiday red bauble ornament, all ending in a finial drop.
Whether hung near a window to catch winter sunlight, displayed on a holiday mantel, or illuminated with micro fairy lights as an eye-catching centerpiece, this project offers a rewarding assembly process and a stunning final silhouette.
This design makes a thoughtful handmade gift, craft fair item, or family keepsake. Customize the color scheme with classic holiday greens, icy blues, or metallic yarns, and tailor the ornament details to match your style.
🔍 C. MAIN PATTERN OVERVIEW
This multi-component hanging sculpture is constructed in modular stages to ensure crisp geometric balance and structural integrity:
- 🎄 Top Tiered Christmas Tree Cone: Built upon an inner amigurumi base cone worked in continuous spiral rounds, featuring strategic Back Loop Only (BLO) ridges. Layered evergreen bough ruffles are worked directly into saved Front Loops (FLO) to create a dense 3D pine branch silhouette, topped with a golden 5-point star.
- 🔴 Tree Bauble Accents: Miniature crocheted spheres in bright yellow, vibrant red, and crisp white are stitched around the evergreen branches like glowing lights.
- 🌀 Double-Helix Twirling Ribbon Frame: Two spiraled crochet ribbons created through stitch multiplication that naturally coil into a double helix. They anchor at the base of the Christmas tree and join again at the bottom finial drop.
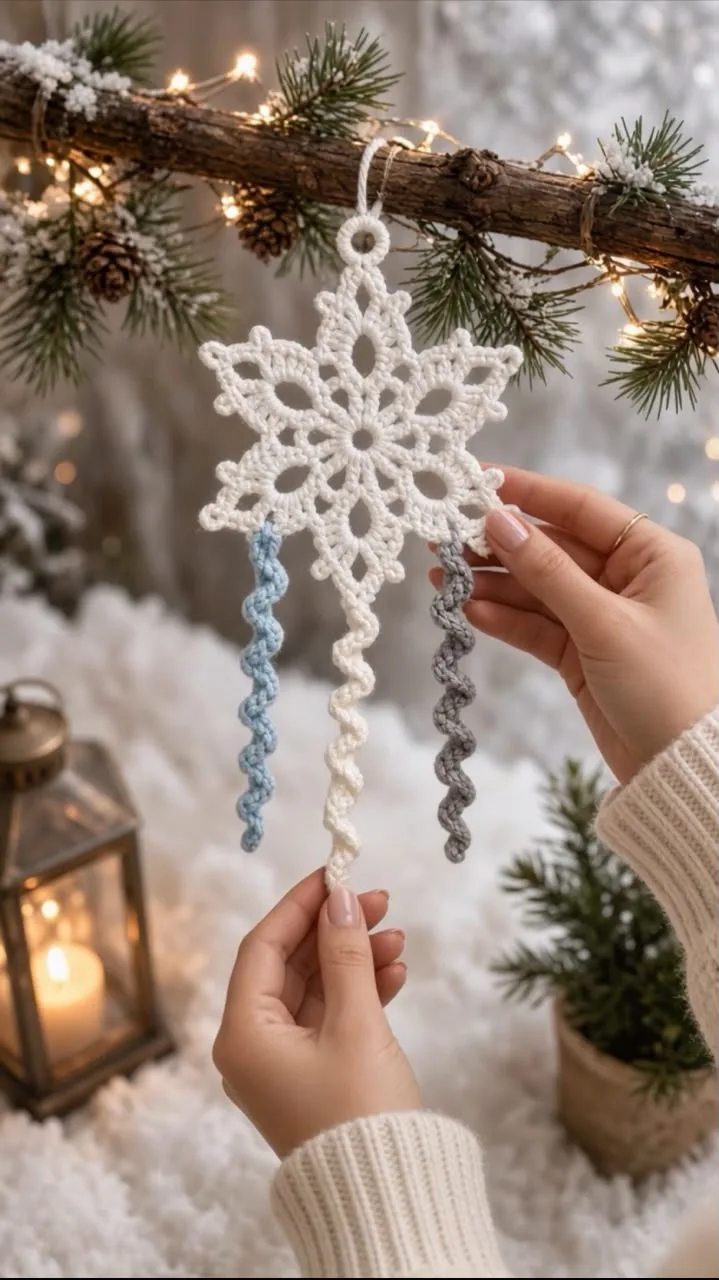
- ❄️ Central Suspended Axis: A central hanging cord running vertically through the middle of the helix, holding a small golden orb, a 6-pointed lace snowflake, and a larger red bauble ornament.
- 💡 Optional LED Illumination: Tiny micro fairy light copper wire can be woven along the spiraling ribbon edges to illuminate the entire spinner.
🎯 D. SKILL LEVEL
Level: Intermediate
While the individual stitches are foundational (single crochet, half double crochet, double crochet, increases, and decreases), this project is rated intermediate due to:
- 🧶 Working into specific loops (FLO and BLO) to build layered branch structures.
- 🧮 Mathematical stitch multiplication to form natural geometric spirals.
- 🪡 Precise central axis assembly, tensioning, and multi-part alignment.
Key Techniques Required:
- ➰ Magic Ring (MR)
- 🔄 Continuous spiral amigurumi rounds
- 📐 Back Loop Only (BLO) & Front Loop Only (FLO) stitches
- 📈 Standard increases (inc) and invisible decreases (dec)
- 🌀 Stitch multiplication coiling (working multiple stitches into a single loop)
- 🧵 Thread embroidery, bead placement, and structural assembly
📏 E. FINISHED SIZE
- 📏 Total Hanging Height: Approximately 18.5 inches (47 cm) from the tip of the hanging loop to the bottom of the finial drop.
- 📏 Christmas Tree Height: Approximately 4.5 inches (11.5 cm) including the star.
- 📏 Tree Base Diameter: Approximately 3.5 inches (9 cm) across the widest branch tier.
- 📏 Helix Spiral Width: Approximately 3.25 inches (8.5 cm) at the widest coil curve.
- 📏 Central Red Ornament: Approximately 1.25 inches (3.2 cm) in diameter.
💡 Note: Using a different yarn weight or hook size will scale the overall dimensions. Maintain tight tension so the spirals hold their structural shape without drooping.
🧮 F. GAUGE
- 🧶 Amigurumi Gauge (Yarn A & B with 2.5 mm Hook): 26 sc x 28 rnds = 4 inches (10 cm) in continuous rounds.
- 📐 Gauge Priority: Exact gauge is not critical for this decorative piece; however, consistent tight stitches are necessary to prevent fiberfill stuffing from peeking through the tree cone and ornament spheres.
🧶 G. REQUIRED YARN AMOUNTS
All yardage estimates are based on Sport / Fine Weight Yarn (Category 2) or DK Weight Yarn (Category 3) worked with a 2.5 mm crochet hook:
- 🟢 Yarn A — Forest Green (Main Tree & Helix Strands): Approx. 130 yards (120 meters / 50 grams)
- 🟡 Yarn B — Golden Yellow (Top Star & Axis Orb): Approx. 20 yards (18 meters / 10 grams)
- 🔴 Yarn C — Festive Red (Baubles & Axis Ornament): Approx. 25 yards (23 meters / 12 grams)
- ⚪ Yarn D — Soft White (Baubles & Central Snowflake): Approx. 18 yards (16 meters / 8 grams)
- 🧵 Structural Thread: 1 yard of strong nylon thread, monofilament, or heavy embroidery floss for the central axis hanging cord.
🔰 H. MATERIALS
- 🪡 Crochet Hook: 2.5 mm (US Size B-1 or C-2) or size needed to obtain dense stitches.
- ☁️ Stuffing: High-grade polyester fiberfill.
- 📌 Notions: Stitch markers, yarn needle, tapestry needle, sewing pins.
- ✂️ Tools: Sharp embroidery scissors.
- 🥖 Structural Support (Optional): Craft wire (18-gauge) or blocking spray if extra helix stiffness is desired.
- 💡 Lighting Accent (Optional): 3-meter warm-white micro LED copper string lights with a small battery pack.
⚠️ Safety Note: If this ornament is hung in a nursery or play space, ensure all tiny baubles, threads, and LED wires are secured to eliminate choking hazards.
🔤 I. ABBREVIATIONS – US TERMS
- MR: Magic Ring
- ch: chain
- sl st: slip stitch
- sc: single crochet
- hdc: half double crochet
- dc: double crochet
- inc: increase (2 sc in indicated stitch)
- hdc-inc: half double crochet increase (2 hdc in indicated stitch)
- dec: invisible decrease (sc2tog through front loops)
- FLO: front loops only
- BLO: back loops only
- st(s): stitch(es)
- rep: repeat pattern instructions
- rnd(s): round(s)
- FO: fasten off
📝 J. NOTES BEFORE YOU BEGIN
- 🔄 Continuous Rounds: Work the amigurumi components (tree base, star, balls, finial) in continuous spirals without joining at the end of rounds unless explicitly instructed. Place a stitch marker in the first stitch of every round to track progress.
- 📐 BLO/FLO Ridge Technique: The tree base cone utilizes alternating rounds of BLO and standard stitches. The front loops left unworked on the exterior will serve as your anchor loops for crocheting the evergreen branch tiers in Section K.
- 🌀 Helix Physics: The twirling wind spinner ribbons curl naturally due to stitch multiplication (working 3 hdc into every sc stitch). Wet blocking or steaming the spirals before final assembly gives them a clean, springy finish.
- 🧵 Tails for Sewing: Leave a 10–12 inch tail on structural pieces to facilitate assembly.
🪡 K. COMPLETE PATTERN
⭐ Golden Top Star (Make 2 Identical Motifs)
Use Yarn B (Golden Yellow) and 2.5 mm hook.
- Rnd 1: MR 10 hdc, sl st to first hdc to join. (10 sts)
- Rnd 2:[Ch 4, sl st in 2nd ch from hook, sc in next ch, hdc in last ch, skip 1 st on base ring, sl st in next st on base ring] rep 5 times total.
- Result: A 5-pointed star motif. Fasten off the first motif. Do NOT fasten off the second motif.
- Assembly of Star: Place the two star motifs wrong sides together. Working through both layers, sc around the edge, working 3 sc into each point tip. Stuff lightly with a small pinch of fiberfill before joining the final point. Sl st to first st to join, FO leaving a 12″ tail for attachment.
🎄 Tiered Christmas Tree Base Shell
Use Yarn A (Forest Green) and 2.5 mm hook.
Worked from the top tip down to the base in continuous rounds.
- Rnd 1: MR 6 sc. (6 sts)
- Rnd 2: (1 sc, inc) x3. (9 sts)
- Rnd 3: (2 sc, inc) x3. (12 sts)
- Rnd 4 [BLO]: 12 sc. (12 sts)
- Rnd 5: (1 sc, inc) x6. (18 sts)
- Rnd 6 [BLO]: 18 sc. (18 sts)
- Rnd 7: (2 sc, inc) x6. (24 sts)
- Rnd 8 [BLO]: 24 sc. (24 sts)
- Rnd 9: (3 sc, inc) x6. (30 sts)
- Rnd 10 [BLO]: 30 sc. (30 sts)
- Rnd 11: (4 sc, inc) x6. (36 sts)
- Rnd 12 [BLO]: 36 sc. (36 sts)
- Rnd 13: (5 sc, inc) x6. (42 sts)
- Rnd 14 [BLO]: 42 sc. (42 sts)
- Rnd 15: (6 sc, inc) x6. (48 sts)
- Rnd 16 [BLO]: 48 sc. (48 sts)
Bottom Closing Base Dish:
- Rnd 17 [BLO]: (6 sc, dec) x6. (42 sts)
- Rnd 18: (5 sc, dec) x6. (36 sts)
- Rnd 19: (4 sc, dec) x6. (30 sts)
- Rnd 20: (3 sc, dec) x6. (24 sts)
- Stuff the cone firmly with fiberfill, shaping it into a smooth, rigid triangle.
- Rnd 21: (2 sc, dec) x6. (18 sts)
- Rnd 22: (1 sc, dec) x6. (12 sts)
- Rnd 23: dec x6. (6 sts)
- FO, weave tail through front loops of remaining 6 sts, pull tight to close, and weave in end.
🌿 Evergreen Branch Ruffle Tiers
Use Yarn A (Forest Green) and 2.5 mm hook.
Attach Yarn A to the saved Front Loops (FLO) left exposed on Rnds 4, 6, 8, 10, 12, 14, and 16.
Work from the top tier (Rnd 4 FLO) down to the bottom tier (Rnd 16 FLO).
- Ruffle Shell Stitch Pattern:Join yarn with sl st in first saved FLO loop of the target round.
- [(1 sc, 1 hdc, 1 dc, ch 2 picot, 1 hdc, 1 sc) all in same FLO st, sl st in next FLO st] rep around the loop ring.
- Fasten off at the end of each round, weave in ends securely into the body of the cone.
- Tier Breakdown:
- Tier 1 (Rnd 4 FLO – 12 sts): Yields 6 Branch Shells.
- Tier 2 (Rnd 6 FLO – 18 sts): Yields 9 Branch Shells.
- Tier 3 (Rnd 8 FLO – 24 sts): Yields 12 Branch Shells.
- Tier 4 (Rnd 10 FLO – 30 sts): Yields 15 Branch Shells.
- Tier 5 (Rnd 12 FLO – 36 sts): Yields 18 Branch Shells.
- Tier 6 (Rnd 14 FLO – 42 sts): Yields 21 Branch Shells.
- Tier 7 (Rnd 16 FLO – 48 sts): Yields 24 Branch Shells.
🔴 Miniature Tree Ornaments (Baubles — Make 12 Total)
Make 4 in Yarn C (Red), 4 in Yarn B (Yellow), 4 in Yarn D (White).
- Rnd 1: MR 5 sc. (5 sts)
- Rnd 2: 5 sc. (5 sts)
- FO, leaving a 6″ tail. Cinch the opening closed tightly to form a tiny 3D ball accent.
🟡 Upper Axis Yellow Ornament Ball
Use Yarn B (Golden Yellow) and 2.5 mm hook.
- Rnd 1: MR 6 sc. (6 sts)
- Rnd 2: inc x6. (12 sts)
- Rnd 3: 12 sc. (12 sts)
- Rnd 4: dec x6. (6 sts)
- Stuff lightly. FO, weave tail through front loops, pull tight, leave long tail for central axis thread mounting.
❄️ Center Delicate Hanging Snowflake
Use Yarn D (White) and 2.5 mm hook.
- Rnd 1: MR 6 sc, sl st to first sc to join. (6 sts)
- Rnd 2:[Ch 5, sl st in 2nd ch from hook, (ch 2, sl st in same ch) for picot tip, sl st in remaining 3 chs, sl st into next base sc] rep 6 times total.
- FO, weave in ends. Block flat with a pin and light steam so the 6 spokes fan out symmetrically.
🔴 Lower Axis Red Ornament Ball
Use Yarn C (Red) and 2.5 mm hook.
- Rnd 1: MR 6 sc. (6 sts)
- Rnd 2: inc x6. (12 sts)
- Rnd 3: (1 sc, inc) x6. (18 sts)
- Rnd 4–6: 18 sc. (18 sts — 3 rnds total)
- Rnd 7: (1 sc, dec) x6. (12 sts)
- Stuff firmly with fiberfill.
- Rnd 8: dec x6. (6 sts)
- FO, weave tail through front loops, pull tight to close, leaving a tail for central axis thread mounting.
🌀 Twirling Double-Helix Ribbons (Make 2 Identical Strands)
Use Yarn A (Forest Green) and 2.5 mm hook.
- Foundation Chain: Ch 121.
- Row 1: Sc in 2nd ch from hook and in each ch across. (120 sc). Turn.
- Row 2: Ch 2 (counts as hdc), 1 hdc in first st, 3 hdc in each st across to end. (359 hdc sts total). Turn.
- Row 3: Ch 1, 1 sc in each st across. (359 sc sts).
- FO, leaving a 12″ tail at both ends.
💡 Note: The rapid multiplication of 3 hdc into every stitch in Row 2 forces the ribbon to curl tight. Gently pull and twist the ribbon between your fingers to encourage a uniform corkscrew spiral.
🟢 Bottom Decorative Finial Drop
Use Yarn A (Forest Green) and 2.5 mm hook.
- Rnd 1: MR 6 sc. (6 sts)
- Rnd 2: inc x6. (12 sts)
- Rnd 3–4: 12 sc. (12 sts)
- Rnd 5: dec x6. (6 sts)
- Stuff upper mini-sphere lightly.
- Rnd 6–7: 6 sc. (6 sts — narrow neck)
- Rnd 8: inc x6. (12 sts)
- Rnd 9: (1 sc, dec) x4. (8 sts)
- Rnd 10: dec x4. (4 sts)
- FO, weave closed, leaving a long mounting tail.
🎨 L. STYLING / ASSEMBLY / STABILITY / FINAL SHAPING
           [ Hanging Loop ]
                 │
            ⭐ Star Peak
                 │
       🎄 Christmas Tree Cone
            (Branch Tiers)
          /      │      \
         /  🟡 Yellow Ball \
        /        │          \
  Helix 🌀   ❄️ Snowflake    🌀 Helix
  Ribbon 1       │          Ribbon 2
        \   🔴 Red Ball     /
         \       │         /
          \      │        /
           🟢 Finial Drop
1. Attachment of Miniature Tree Baubles
- Thread the yarn tails of the 12 tiny colored balls (Red, Yellow, White) through your tapestry needle.
- Sew them scattered evenly across the evergreen branch ruffle tiers, tying off tails securely inside the base cone structure.
2. Central Hanging Cord Stringing
- Cut a 24-inch strand of heavy nylon thread or embroidery floss.
- Thread from bottom to top:
- Anchor securely inside the top of the 🟢 Bottom Finial Drop.
- Pass up through the center of the 🔴 Lower Red Ball.
- Pass up through the middle ring of the ❄️ White Snowflake.
- Pass up through the 🟡 Upper Yellow Ball.
- Thread straight up through the core axis of the 🎄 Christmas Tree Base Cone.
- Pass through the ⭐ Golden Top Star and create a 4-inch loop at the peak for hanging.
- Adjust spacing between internal ornaments so they sit centered within the spiral framework without crowding:
- Yellow Ball: Sits 0.75″ below the tree base.
- Snowflake: Sits 1.5″ below the yellow ball.
- Red Ball: Sits 1.5″ below the snowflake.
3. Mounting the Double Helix Frame
- Take the top ends of both 🌀 Twirling Helix Ribbons and pin them to opposite sides of the tree base (180 degrees apart). Sew securely into Rnd 17 of the base cone using Yarn A.
- Intertwine the two spiraled strands into a double helix structure.
- Pin the bottom ends of both ribbons to the top loop of the 🟢 Bottom Finial Drop. Sew securely.
4. Optional LED Lighting Setup
- Starting at the top of the tree, weave a copper micro fairy light wire downward along the outer edge of one helix strand.
- Loop the lights around the finial drop and weave back upward along the second helix ribbon.
- Conceal the small battery pack inside or behind your hanging backdrop.
📋 Final Shaping Checklist
- ✅ Star is centered and pointing upright at the peak.
- ✅ Branch ruffle tiers flare outward consistently around all 360 degrees.
- ✅ Central axis cord is under light tension so internal ornaments hang straight down.
- ✅ Double helix ribbons curve symmetrically around the suspended ornaments without catching or distorting.
- ✅ All yarn tails are woven internally and trimmed cleanly.
💡 M. HELPFUL CROCHET TIPS
- 💡 Tip 1: Maintain Stiff Tension on Spirals — Use a hook 0.5 mm smaller than recommended on the yarn label for the helix strands. Tighter stitches give the corkscrew more spring and prevent drooping over time.
- 💡 Tip 2: Count Stitches on Ridge Rounds — Pay close attention during Rnds 4, 6, 8, 10, 12, 14, and 16 of the base cone. An accurate count ensures your branch ruffle shells line up evenly without awkward gaps.
- 💡 Tip 3: Steam-Block Before Assembly — Pin out the two helix ribbons on a blocking mat in neat twisted spirals and steam lightly before sewing. This sets the memory of the twist.
- 💡 Tip 4: Use Strong Monofilament for the Axis — Clear fishing line or heavy nylon thread is invisible and will not stretch under the weight of the central ornaments.
- 💡 Tip 5: Color-Match Sewing Tails — Always use matching yarn colors when joining components (e.g., Green for base joins, Yellow for star tip) to ensure seam lines remain invisible.
- 💡 Tip 6: Adjust Helix Spacing — If your helix spirals feel too long or loose, trim 10–15 chains off the foundation chain during construction to tighten the overall vertical frame.
- 💡 Tip 7: Fiberfill Density — Stuff the main tree cone firmly so it acts as a rigid anchor for the hanging weight below.
🧼 N. CARE INSTRUCTIONS
- 🧼 Cleaning: Dust gently with a soft dry brush or compressed air canister. Spot clean only with cold water and mild soap if needed. Do not submerge or machine wash.
- ☀️ Storage: Lay the ornament flat in a box, nesting the helix spirals gently. Store away from direct sunlight and extreme moisture to prevent yarn fading or fiber degradation.
- 🔋 LED Safety: Always turn off battery-operated lights when left unattended.
❓ R. FAQ
- ❓ Can I use DK or Worsted weight yarn instead of Sport weight?
Yes! Using heavier yarn with a larger hook (e.g., 3.5 mm for DK) will produce a larger ornament. Be aware that heavier yarns may require slightly stiffer central cords to support the added weight. - ❓ How do I make the helix twist more tightly?
Increase stitch multiplication in Row 2 of the helix ribbon. For example, working 4 hdc into every sc instead of 3 hdc will yield a significantly tighter corkscrew spiral. - ❓ My wind spinner tilts to one side when hung. How do I fix the balance?
Check the top mounting points of the two helix ribbons. They must be sewn exactly opposite each other (180 degrees apart) on the bottom rim of the tree cone. Adjust the central cord exit point so it emerges precisely from the true center tip of the star. - ❓ Do I need craft wire inside the helix ribbons?
Wire is optional. The stitch math creates a natural spiral curve, but inserting thin 24-gauge floral wire along the edges during Row 3 can help maintain structural alignment in outdoor breezes. - ❓ Can I substitute safety eyes or glass beads for the miniature tree baubles?
Yes! Small 4 mm or 6 mm wooden beads, metallic sequins, or glass beads can be sewn directly onto the branch tiers for an extra festive sparkle. - ❓ How long does it take to complete this project?
An intermediate crocheter can complete this ornament in approximately 6 to 8 hours, including component assembly and blocking.