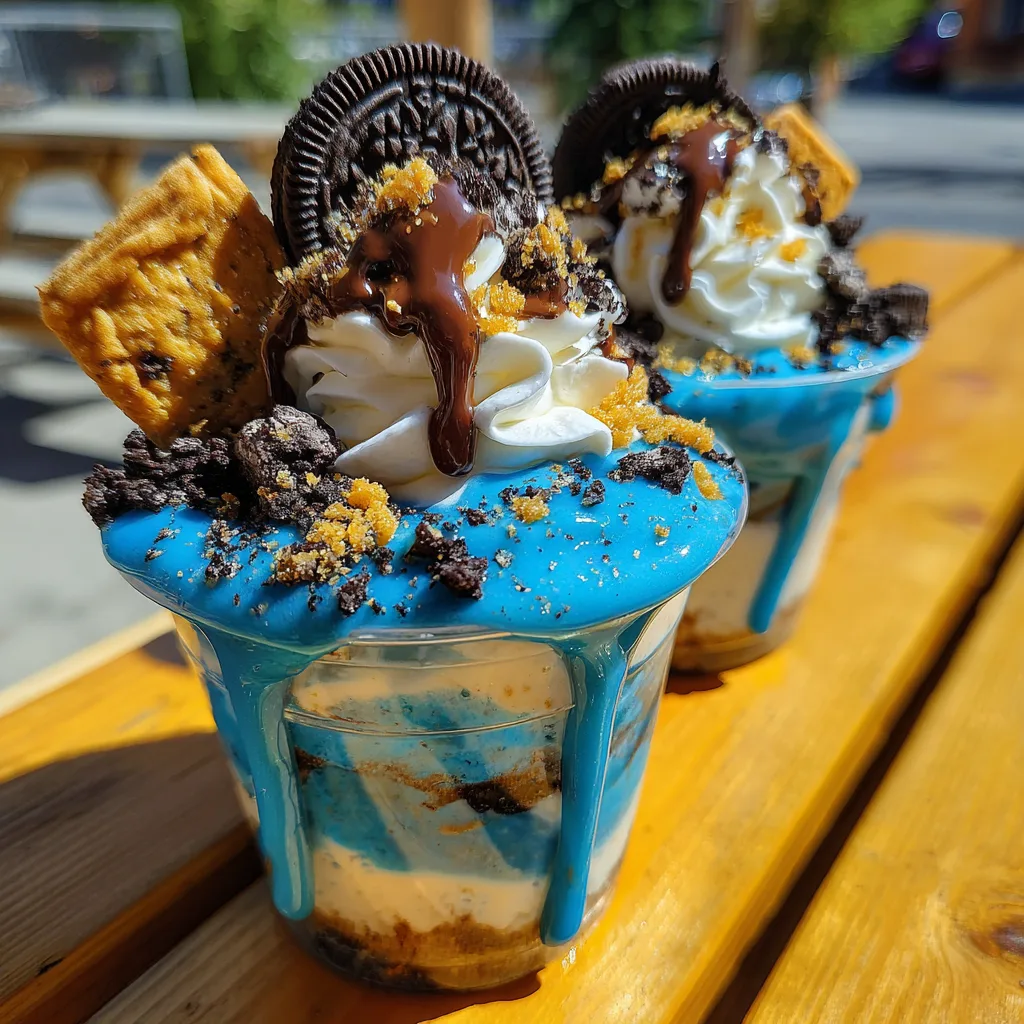
Cookie Monster Cheesecake Cups
The Ultimate Guide to Making Cookie Monster Cheesecake Cups
Welcome to the most fun, vibrant, and undeniably delicious dessert tutorial you will ever read. Today, we are diving deep into the whimsical world of Cookie Monster Cheesecake Cups. If you have ever scrolled through social media and stopped dead in your tracks at the sight of bright blue, layered parfaits overflowing with cookies and cream, you already know the magnetic appeal of this dessert. These cups are a tribute to everyone’s favorite cookie-obsessed character, combining the rich, tangy decadence of a no-bake cheesecake with the nostalgic crunch of two classic cookies: Oreos and chocolate chip.
This comprehensive guide is designed to take you through every single step, ingredient, and pro-tip needed to recreate these viral sensations right in your own kitchen. Whether you are planning a child’s birthday party, a nostalgic movie night, a summer bake sale, or simply want to surprise your family with a treat that is as fun to look at as it is to eat, these layered cups are the ultimate solution. Best of all? They require absolutely no baking. Let us embark on this sweet, blue-tinted culinary adventure together.
Why You Will Be Obsessed With Cookie Monster Cheesecake Cups
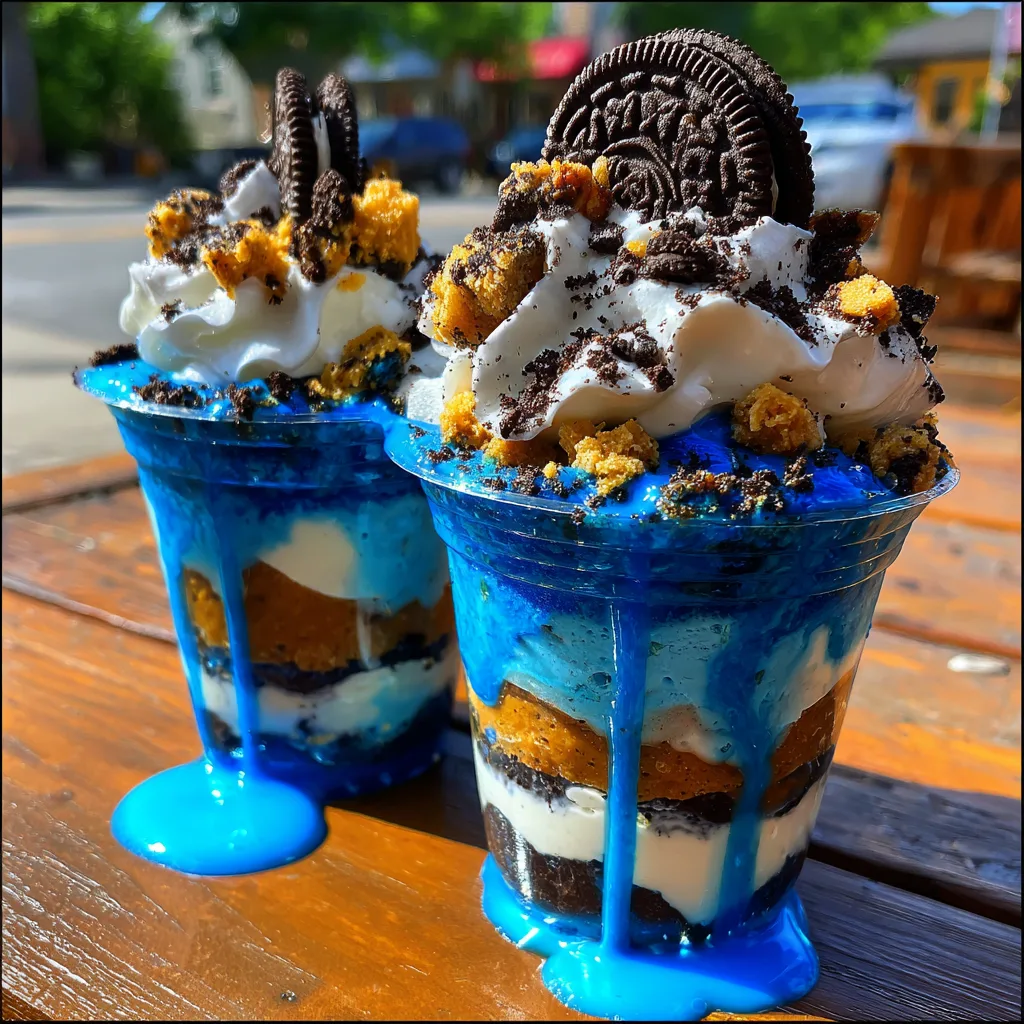
There is a multitude of reasons why this dessert has taken the internet by storm and why it deserves a permanent spot in your recipe box. First and foremost is the visual impact. The stark contrast between the electric blue cheesecake, the pristine white vanilla layers, the stark black of the crushed Oreos, and the golden brown of the chocolate chip cookies creates a feast for the eyes before you even take a bite. We eat with our eyes first, and these cups are a guaranteed showstopper.
Secondly, the convenience factor is off the charts. Because this is a completely no-bake recipe, you do not have to worry about preheating ovens, monitoring bake times, dealing with water baths, or praying that your cheesecake does not crack down the middle. This is a low-stress dessert that is incredibly forgiving, making it perfect for beginner bakers or for involving kids in the kitchen.
Furthermore, the portion control and portability make these cups incredibly practical. Layering the dessert into individual clear plastic cups with dome lids means they are ready to grab and go. You can easily serve them at outdoor barbecues, picnics, or large gatherings without the hassle of slicing and plating a traditional cake. Plus, the combination of a tangy cream cheese base with sweet, crunchy cookies offers a textural and flavor contrast that is universally beloved.
The Anatomy of the Perfect Dessert Cup
To truly master this recipe, it is essential to understand the architecture of the cup. The magic lies in the distinct, alternating layers that provide a different experience in every spoonful.
The Cookie Crumble Layers: Unlike a traditional cheesecake that features a single, solid crust at the bottom, these cups feature multiple layers of “crust” scattered throughout. We use a combination of classic chocolate sandwich cookies (Oreos) and crunchy chocolate chip cookies. Crushing them roughly—rather than turning them into a fine dust—ensures you get satisfying, crunchy bursts of chocolate and vanilla throughout the creamy dessert.
The Bright Blue Cheesecake Layer: This is the signature element of the dessert. It is a classic no-bake cheesecake batter made from full-fat cream cheese, powdered sugar, and vanilla, which is then lightened with freshly whipped heavy cream. The vivid color comes from high-quality gel food coloring, which provides an intense hue without watering down the batter.
The White Vanilla Cream Layer: To provide visual contrast and to balance the intensity of the blue, we leave a portion of the cheesecake mixture uncolored. This pristine white layer breaks up the blue and highlights the dark cookie crumbs sandwiched between them.
The Over-the-Top Garnish: A dessert cup is only as good as its crown. The dome lids allow you to pile the toppings high. A final swirl of cream, a halved Oreo, and a generous chunk of chocolate chip cookie instantly communicate exactly what flavors are waiting inside.
Deep Dive into the Ingredients
The success of a no-bake dessert relies heavily on the quality and temperature of its ingredients. Let us look closely at what you need.
- – 24 oz (3 blocks) Full-Fat Cream Cheese: This is the backbone of the dessert. It must be full-fat for the proper texture and richness. Crucially, it must be softened to true room temperature. If it is even slightly cold, your batter will be lumpy, and no amount of mixing will fix it.
- – 1 1/2 cups Powdered Sugar: We use powdered sugar (confectioners’ sugar) instead of granulated sugar because it dissolves instantly into the room-temperature cream cheese, ensuring a silky smooth texture without any grittiness.
- – 2 teaspoons Pure Vanilla Extract: Vanilla enhances all the other flavors. Since this is not baked, the alcohol in the extract won’t cook off, so using a high-quality pure vanilla extract makes a noticeable difference in the final taste.
- – 2 cups Heavy Whipping Cream: This must be very cold. The heavy cream is whipped to stiff peaks and folded into the heavy cream cheese mixture. This is what transforms a dense cheese block into a light, airy, mousse-like dessert.
- – Royal Blue Gel Food Coloring: Gel coloring is mandatory here. Liquid food coloring from the grocery store baking aisle is water-based; you would need to add so much to achieve the right color that it would ruin the consistency of your cheesecake. Gel is concentrated and won’t affect the texture.
- – 1 package (about 14 oz) Chocolate Sandwich Cookies: Classic Oreos work best. You will need some crushed for the layers and some halved for the garnish.
- – 1 package (about 12 oz) Crunchy Chocolate Chip Cookies: Chips Ahoy or a similar brand works beautifully. You want a crunchy cookie rather than a soft-baked one, as soft cookies will turn to mush when layered with the cream.
Essential Equipment
You do not need a professional pastry kitchen to make these, but a few key tools will make the process infinitely easier and yield a much more professional-looking result.
- – Clear Plastic Cups with Dome Lids: 9 oz to 12 oz cups are the ideal size. The dome lids are crucial for accommodating the tall garnishes without squishing them.
- – Stand Mixer or Electric Hand Mixer: Beating the cream cheese and whipping the heavy cream by hand is a monumental task. An electric mixer ensures everything is adequately aerated.
- – Piping Bags: Do not try to spoon the cheesecake batter into the cups. You will get it all over the sides, ruining the distinct layered look. Large disposable piping bags are your best friend here.
- – Food Processor or Ziploc Bags: For crushing the cookies to the perfect consistency.
Step-by-Step Instructions
Follow these precise steps to build your masterpiece.
- Prepare the Cookie Crumbs: Start by separating your cookies. Set aside about 8-10 whole Oreos and 8-10 whole chocolate chip cookies for the final garnish. Place the remaining Oreos in a large Ziploc bag, seal it, and use a rolling pin to crush them into coarse crumbs. Repeat this process in a separate bag with the chocolate chip cookies. You want noticeable chunks, not a fine powder. Set both bags aside.
- Whip the Heavy Cream: In a large, chilled mixing bowl, beat the cold heavy whipping cream on high speed until stiff peaks form. The cream should hold its shape firmly when you lift the beaters. Be careful not to over-whip into butter. Set this bowl in the refrigerator while you prepare the cheese mixture.
- Beat the Cream Cheese: In a separate, very large bowl, beat the softened room-temperature cream cheese on medium-high speed for about 3 to 4 minutes. It should be incredibly smooth and creamy. Scrape down the sides and bottom of the bowl with a rubber spatula frequently.
- Sweeten and Flavor: Add the powdered sugar and vanilla extract to the cream cheese. Beat on low speed initially so the sugar does not fly everywhere, then increase to medium until the mixture is completely combined and smooth.
- Lighten the Mixture: Remove the whipped cream from the fridge. Gently fold the whipped cream into the cream cheese mixture using a rubber spatula. Use a sweeping under-and-over motion. Do not stir vigorously, or you will deflate the air you just whipped into the cream. Fold until no white streaks remain.
- Divide and Color: Divide the cheesecake batter evenly into two separate bowls. Leave one bowl plain white. In the second bowl, add a few drops of the royal blue gel food coloring. Fold it in gently until the desired vibrant “Cookie Monster” blue is achieved.
- Prepare for Piping: Transfer the blue cheesecake batter into one large piping bag (snip a large hole at the tip) and the white cheesecake batter into a second piping bag.
- Begin Assembly: Line up your clear plastic cups. Start by piping a layer of the blue cheesecake into the bottom of each cup. Next, sprinkle a generous layer of crushed chocolate chip cookies over the blue layer.
- Continue Layering: Pipe a layer of the white vanilla cheesecake over the chocolate chip crumbs. Follow this with a generous layer of crushed Oreos. Continue alternating—blue cream, chocolate chip crumbs, white cream, Oreo crumbs—until the cup is filled almost to the brim. Always end with a swirl of cream on top.
- Garnish: Take the reserved whole cookies. Cut them in half. Press half of an Oreo and half of a chocolate chip cookie into the final top swirl of cream on each cup. Sprinkle any remaining cookie crumbs over the top for extra flair.
- Chill to Set: Snap the dome lids securely onto the cups. Place the cups in the refrigerator for at least 4 hours, or ideally overnight. This chilling time is absolutely critical; it allows the cookies to soften slightly and the cheesecake batter to firm up into a lush, spoonable texture.
Pro Tips for Bakery-Quality Results
Creating picture-perfect dessert cups requires a little bit of finesse. Keep these tips in mind:
The Importance of Piping: If you try to spoon the thick batter into the cups, it will drag against the sides and blur your layers. Piping allows you to place the batter exactly where you want it. Ensure the hole you cut in the piping bag is wide enough so you aren’t struggling to squeeze the thick batter out.
Tapping the Cups: As you add each layer of cream, gently tap the bottom of the plastic cup against your kitchen counter a few times. This forces the cream to settle, removing any trapped air bubbles and creating clean, flat layers before you add the next round of cookie crumbs.
Don’t Skimp on Chilling: No-bake cheesecake right out of the mixing bowl is soft and pudding-like. It relies on the chilling process for the butterfat in the cream cheese and heavy cream to solidify, giving it that classic, dense-yet-fluffy cheesecake texture. Serving it too soon will result in a messy, sloppy dessert.
Variations and Customizations
The beauty of this recipe is its versatility. Once you master the base technique, you can customize it for any occasion.
Elmo Cups: Swap the blue food coloring for bright red. Keep the Oreos, but perhaps swap the chocolate chip cookies for crushed graham crackers or vanilla wafers to mimic Elmo’s theme.
Mint Chocolate Chip: Dye the batter a light mint green instead of blue, add a teaspoon of peppermint extract, and use exclusively crushed Oreos and mini chocolate chips for the layers.
Strawberry Crunch: Leave the batter white, fold in fresh diced strawberries, and use crushed Golden Oreos mixed with freeze-dried strawberries for the crunch layers.
Storage and Make-Ahead Advice
These Cookie Monster Cheesecake Cups are the ultimate make-ahead dessert, which is why they are so beloved for parties and catering.
Refrigeration: Assembled cups, securely covered with their dome lids, will keep perfectly in the refrigerator for up to 3 to 4 days. In fact, many people prefer them on day two or three, as the moisture from the cream softens the cookie crumbs into an almost cake-like texture, similar to an icebox cake.
Freezing: You can absolutely freeze these cups! Assemble them completely, secure the lids, and place them in the freezer. They will keep for up to 2 months. You can serve them frozen for an ice-cream-like treat (allow them to sit at room temperature for about 15 minutes before eating so you can get a spoon through them), or let them thaw overnight in the refrigerator to return to their cheesecake texture.
A Fun Culinary Fact
The concept of “no-bake cheesecake” became wildly popular in the mid-20th century in America, largely driven by the invention and mass marketing of commercial cream cheese and instant gelatins. Home cooks loved the convenience of a dessert that didn’t heat up the kitchen during hot summer months. Today, we’ve elevated the simple icebox pie into gourmet, Instagram-worthy layered treats that capture the imagination of kids and adults alike. Enjoy creating this incredibly fun, vibrant, and delicious masterpiece!
Cookie Monster Cheesecake Cups
Ingredients
Equipment
Method
- Reserve 8 whole Oreos and 8 whole chocolate chip cookies for garnish. Place the remaining cookies into two separate Ziploc bags and crush them into coarse pieces.
- In a chilled bowl, whip the heavy cream until stiff peaks form. Set aside in the refrigerator.
- In a large bowl, beat the softened cream cheese until completely smooth and creamy, about 3 minutes.
- Add the powdered sugar and vanilla extract to the cream cheese and beat until fully combined.
- Gently fold the chilled whipped cream into the cream cheese mixture until no white streaks remain. Do not overmix.
- Divide the cheesecake batter evenly into two bowls. Leave one white, and add royal blue gel food coloring to the other, mixing until brightly colored.
- Transfer the blue batter into one piping bag and the white batter into a second piping bag.
- Pipe a layer of blue cheesecake into the bottom of each plastic cup.
- Add a layer of crushed chocolate chip cookies, followed by a layer of white cheesecake, then a layer of crushed Oreos.
- Repeat the layering process until the cups are full, ending with a swirl of cheesecake on top.
- Garnish each cup with half of a reserved Oreo and half of a chocolate chip cookie.
- Secure dome lids on the cups and refrigerate for at least 4 hours before serving to allow the dessert to set.