Easter Peanut Butter Blossoms
The Ultimate Easter Peanut Butter Blossoms Recipe
When spring finally arrives and the world begins to bloom with vibrant colors, our kitchens naturally follow suit. The heavy, warm spices of winter baking make way for bright, cheerful treats that celebrate the season. One of the most joyful ways to welcome this transition is by giving a beloved classic a festive makeover. Enter the Easter Peanut Butter Blossom. These cookies take everything you adore about the traditional, nostalgic peanut butter and chocolate pairing and dress it up in a sparkling coat of pastel perfection. They are visually stunning, incredibly delicious, and guaranteed to be the centerpiece of your holiday dessert table.
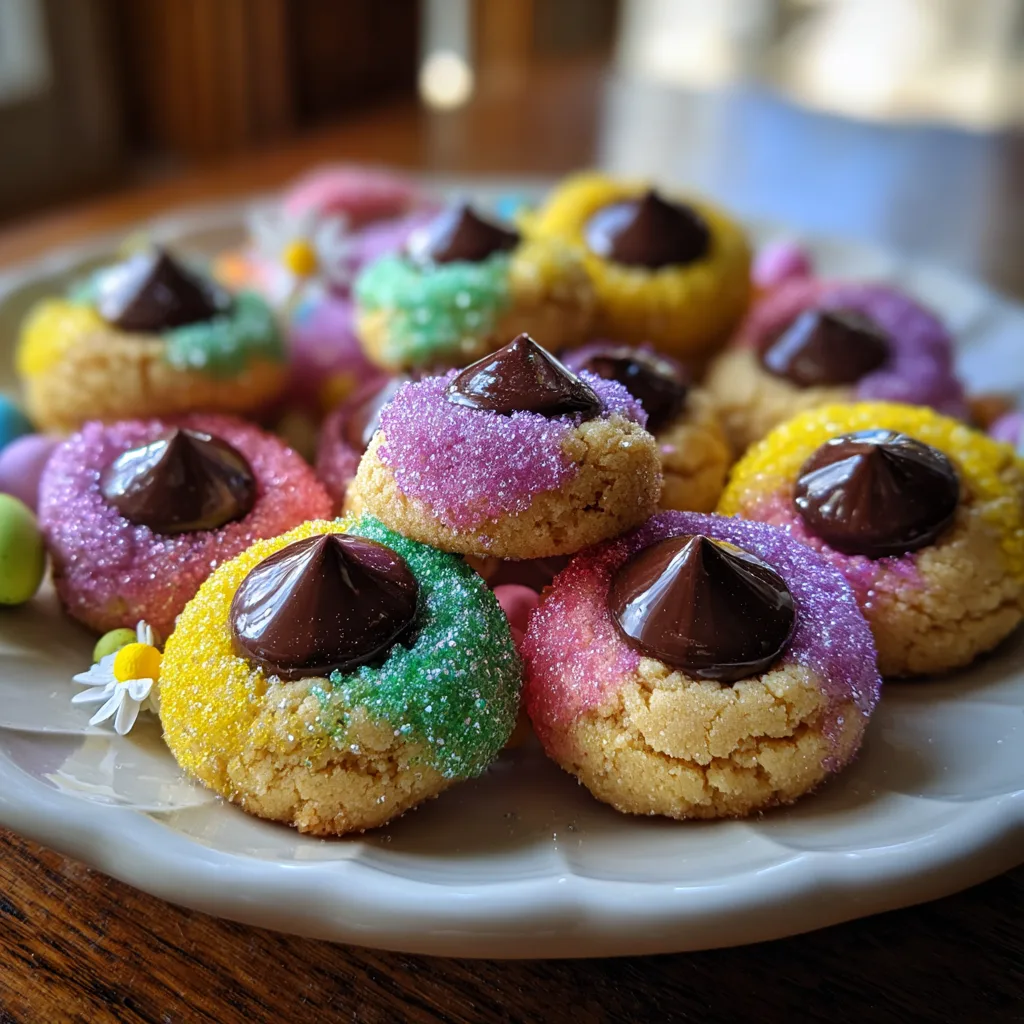
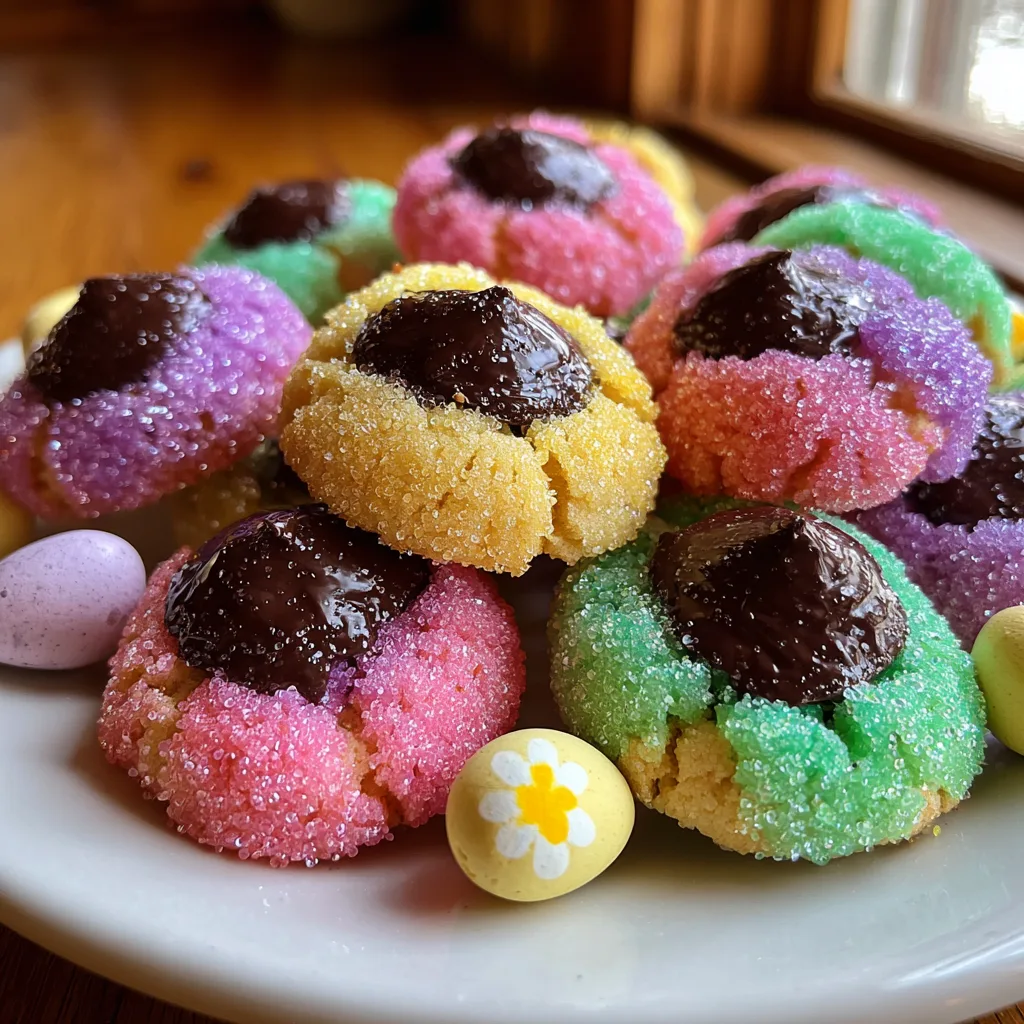
Peanut butter blossoms have been a staple in American baking for decades, and for good reason. The contrast between the soft, slightly chewy, intensely peanut-buttery cookie and the rich, solid bite of the milk chocolate kiss is a textural and flavor masterpiece. By simply swapping the traditional roll in white granulated sugar for a vibrant array of colored sanding sugars—think soft pinks, sunny yellows, mint greens, and lavender purples—you instantly transform an everyday cookie into an event. They look like little springtime jewels, yet they require virtually no extra effort to make.
Why You Will Absolutely Love These Easter Blossoms
If you are looking for the perfect baking project to tackle this spring, look no further. First, these cookies are incredibly family-friendly. The dough is sturdy and forgiving, making it the perfect canvas for little hands to help roll into balls and coat in the colorful sugar. Pressing the chocolate kiss into the center right as they come out of the oven is a deeply satisfying kitchen task that kids (and adults) adore.
Secondly, the flavor is undeniably perfect. The dough uses a perfect ratio of brown sugar to white sugar, ensuring the cookies stay soft and chewy for days rather than turning crisp or crumbly. The peanut butter provides a savory, salty undertone that prevents the cookie from becoming cloyingly sweet, perfectly balancing the chocolate on top.
Finally, these are show-stoppers. When you arrange a platter of these multi-colored, sparkling cookies, they instantly brighten up any room. Whether you are bringing them to an Easter potluck, packing them into spring gift boxes, or just keeping them on the counter to celebrate the weekend, they bring a sense of festivity and fun that is hard to match.
The Magic Behind the Ingredients
The beauty of this recipe lies in its simplicity. You likely already have most of these pantry staples in your kitchen right now. Here is exactly what you need to create these spring delights:
- – 1/2 cup butter, softened
- – 1/2 cup granulated sugar
- – 1/2 cup brown sugar
- – 1/2 cup creamy peanut butter
- – 1 egg
- – 1 tsp vanilla extract
- – 1 1/2 cups all-purpose flour
- – 1 tsp baking soda
- – Colored sanding sugar
- – Chocolate kisses (about 30)
The Peanut Butter: For the best results, stick to standard commercial creamy peanut butter (like Jif or Skippy). Natural peanut butters that require stirring can sometimes separate during baking and alter the texture of your cookies, making them excessively oily or crumbly.
The Sugars: The combination of equal parts brown and granulated sugar is the secret to the perfect texture. The molasses in the brown sugar contributes to the chewiness and depth of flavor, while the granulated sugar helps the cookie spread just the right amount and crisp up slightly on the edges.
The Sanding Sugar: This is where the Easter magic happens! You can find pastel sanding sugars in the baking aisle of most grocery stores, especially around the holidays. If you can’t find them, you can easily make your own by adding a tiny drop of food coloring to a bowl of standard granulated sugar and rubbing it together with your fingers until the color is evenly distributed.
Step-by-Step Instructions
Ready to bake? Follow these simple steps for perfect, sparkling blossoms every single time.
- Prep and Cream: Preheat your oven to 375°F. In a large mixing bowl or the bowl of a stand mixer, combine the softened butter, granulated sugar, and brown sugar. Cream them together on medium speed until the mixture is light, fluffy, and well combined.
- Add the Wet Ingredients: Mix in the creamy peanut butter, the egg, and the vanilla extract. Beat until everything is completely smooth, scraping down the sides of the bowl with a rubber spatula as needed.
- Incorporate the Dry Ingredients: Gradually stir in the all-purpose flour and the baking soda. Mix just until the flour disappears into the dough. Do not overmix, or your cookies will become tough.
- Roll and Coat: Scoop the dough and roll it into smooth, 1-inch balls. Pour your colored sanding sugars into separate small bowls. Roll each dough ball entirely in the colored sugar of your choice until it is fully coated and sparkling. Place the coated balls onto an ungreased baking sheet, spacing them about 2 inches apart.
- Bake: Bake in the preheated oven for 8–10 minutes. The cookies should be slightly puffed and just barely set around the edges. Do not overbake them; they will continue to set as they cool.
- The Final Touch: As soon as you pull the baking sheet out of the oven, immediately press one unwrapped chocolate kiss firmly into the center of each hot cookie. The edges of the cookie will crackle beautifully around the chocolate.
- Cool: Let the cookies sit on the hot baking sheet for 2 to 3 minutes before transferring them to a wire rack to cool completely. It is crucial to let them cool undisturbed, as the chocolate kisses will become very soft from the residual heat before firming back up.
Pro Tips for the Best Blossoms
To elevate your cookies from great to bakery-quality, keep these helpful tips in mind before you preheat the oven.
Unwrap the Kisses Early: This is perhaps the most important tip! The chocolate kisses must be pressed into the cookies the exact second they come out of the oven. If you are frantically trying to unwrap 30 foils while the cookies are cooling, you will miss your window. Unwrap all your chocolate kisses and have them sitting in a bowl ready to go before you even start mixing the dough.
Chill the Dough: If your kitchen is warm or if your butter was slightly too soft, the dough might be sticky and hard to roll. If this happens, simply cover the bowl and place it in the refrigerator for 20 to 30 minutes. Chilled dough is much easier to roll into perfect spheres and will prevent the cookies from spreading too flat in the oven.
Freeze Your Chocolate: If you are baking in a hot climate and are worried about the chocolate kisses melting entirely into puddles when pressed into the hot cookies, put your unwrapped kisses in the freezer for an hour before baking. The frozen chocolate will hold its shape perfectly against the hot dough.
Exciting Variations
Once you master this classic recipe, it is incredibly easy to customize it for different holidays or flavor preferences.
Chocolate Lovers Blossoms: Swap half a cup of the all-purpose flour for unsweetened cocoa powder to create a rich, double-chocolate peanut butter dough.
Alternative Centers: Not a fan of milk chocolate kisses? You can press almost anything into the center of these cookies! Try a miniature peanut butter cup, a solid dark chocolate kiss, a striped “hug” kiss, or even a solid chocolate Easter egg candy.
Different Rollings: If you don’t have colored sanding sugar, you can roll the dough balls in finely chopped peanuts or pecans for an added salty crunch, or stick to the classic roll in plain white granulated sugar.
Storage Instructions
Because these cookies look so beautiful, they are perfect for making ahead of time. However, storing them requires a little bit of care to keep the chocolate intact.
Once the cookies have cooled completely and the chocolate kisses have entirely solidified (this can take an hour or two at room temperature), store them in an airtight container. If you need to stack them, place a sheet of wax paper or parchment paper between the layers to prevent the tips of the chocolate kisses from getting smudged or broken.
They will keep beautifully at room temperature for up to 5 days. You can also freeze the baked cookies in a freezer-safe bag or container for up to 3 months. Let them thaw at room temperature before serving.
Conclusion
Easter Peanut Butter Blossoms are the perfect embodiment of spring baking: bright, cheerful, effortless, and undeniably delicious. They take a beloved, comforting recipe and elevate it with a simple, colorful twist that instantly brings a smile to anyone’s face. The contrast of the sugary, sparkling crunch, the soft, peanut-buttery chew, and the smooth, rich chocolate center is a timeless combination for a reason. Gather your ingredients, unwrap those chocolates, and enjoy baking a batch of springtime joy!
Easter Peanut Butter Blossoms
Ingredients
Equipment
Method
- Preheat oven to 375°F.
- In a large bowl, cream together the softened butter, granulated sugar, and brown sugar until light and fluffy.
- Mix in the creamy peanut butter, egg, and vanilla extract until smooth.
- Stir in the all-purpose flour and baking soda until just combined. Do not overmix.
- Roll the dough into 1-inch balls. Roll each ball in the colored sanding sugar to coat completely.
- Place the coated balls on an ungreased baking sheet.
- Bake for 8-10 minutes until slightly puffed and set around the edges.
- Immediately upon removing from the oven, press an unwrapped chocolate kiss firmly into the center of each cookie.
- Let cool on the baking sheet for a few minutes before transferring to a wire rack to cool completely.