Easy No-Bake S’mores Pops!
The Ultimate Easy S’mores Pops Recipe
Introduction: Campfire Magic Without the Campfire
There is nothing quite like the nostalgic, comforting taste of a classic s’more. The combination of toasted, gooey marshmallow, rich, melting chocolate, and sweet, crunchy graham crackers is a universally beloved flavor profile. However, making traditional s’mores usually requires a campfire, a fire pit, or at the very least, a gas stove and a high tolerance for sticky fingers and messy faces. What if you could capture that exact same magical flavor combination in a neat, portable, and entirely no-bake treat?
Enter the S’mores Pop: the easiest, most crowd-pleasing dessert you will ever make. This brilliant little confection takes the holy trinity of s’mores ingredients and transforms them into a fun, bite-sized lollipop. By skewering a fluffy marshmallow, dunking it into a pool of silky melted chocolate, and rolling it in crushed graham crackers, you get all the taste of a summer campfire with a fraction of the effort.
These S’mores Pops are an absolute lifesaver for busy parents, party hosts, or anyone craving a quick sweet treat. They require zero baking, take only about 15 minutes of active prep time, and are incredibly fun to make with kids. Whether you are throwing a summer backyard barbecue, looking for a unique birthday party favor, or just want a cozy movie night snack, these pops are guaranteed to be an instant hit.
The Anatomy of a Perfect S’mores Pop
Because this recipe is incredibly simple, utilizing only three main edible ingredients, the success of the pop relies entirely on the quality and preparation of those components. Here is how to ensure your S’mores Pops turn out perfectly every time.
The Marshmallow Base: The marshmallow is the canvas for your pop. You want to use standard “large” marshmallows—not the jumbo campfire size (which are too heavy for the sticks) and definitely not the mini ones. Freshness is key here. A fresh marshmallow will be soft, pillowy, and easy to pierce with a stick without tearing. Stale marshmallows will be tough, chewy, and difficult to work with.
The Chocolate Coating: The chocolate acts as both the primary flavor contrast to the sweet marshmallow and the “glue” that holds the graham cracker crumbs in place. While you can melt standard chocolate chips, they can sometimes be a bit thick for dipping. For the smoothest, glossiest coat, we recommend using high-quality chocolate melting wafers (like Ghirardelli) or adding a tiny teaspoon of coconut oil to your chocolate chips to thin them out and give them a beautiful shine.
The Graham Cracker Crunch: The graham crackers provide the essential textural contrast. You do not want a fine, powdery dust; you want coarse, rustic crumbs that provide a satisfying crunch. The best way to achieve this is by placing full graham cracker sheets into a zip-top bag and lightly crushing them with a rolling pin. This gives you beautiful, varied pieces that adhere perfectly to the wet chocolate.
Ingredients and Equipment You Will Need
Gather these simple ingredients to create your no-bake treats. You will also need some basic lollipop sticks, which can be found in the baking aisle of almost any craft or grocery store.
- – 12 Large marshmallows
- – 1 cup Semi-sweet chocolate chips or dark chocolate melting wafers
- – 1/2 teaspoon Coconut oil (optional, but highly recommended for smooth melting if using chips)
- – 3-4 Full sheets of honey graham crackers
- – 12 Paper lollipop sticks or wooden skewers
Step-by-Step Instructions
Follow these incredibly easy steps to assemble a batch of beautiful, delicious S’mores Pops in no time.
- Prep Your Station: Line a baking sheet with parchment paper or wax paper. This is crucial, as it prevents the wet chocolate from sticking as the pops set.
- Crush the Graham Crackers: Place the graham cracker sheets into a large zip-top plastic bag. Seal the bag, pressing out the air. Use a rolling pin or the back of a heavy spoon to gently bash the crackers until you have a mix of fine crumbs and small, coarse chunks. Pour these crumbs into a shallow bowl or onto a plate.
- Skewer the Marshmallows: Take one lollipop stick and push it firmly into the flat bottom of a marshmallow, going about halfway through. Ensure it feels secure. Repeat with all 12 marshmallows.
- Melt the Chocolate: Place the chocolate chips (and coconut oil, if using) into a microwave-safe bowl. Microwave on 50% power in 30-second increments. Stir vigorously after each 30-second burst. Continue until the chocolate is completely smooth and glossy. Alternatively, you can melt the chocolate using a double boiler on the stove.
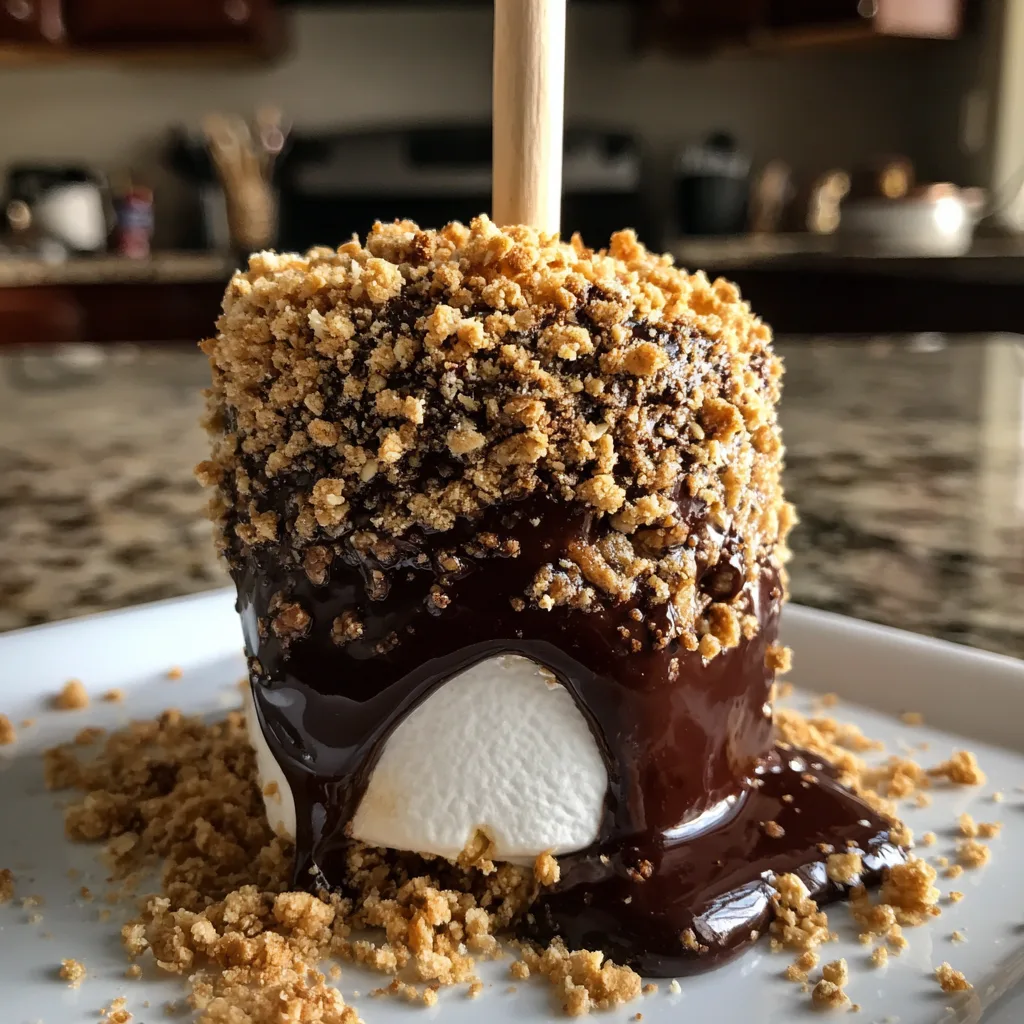
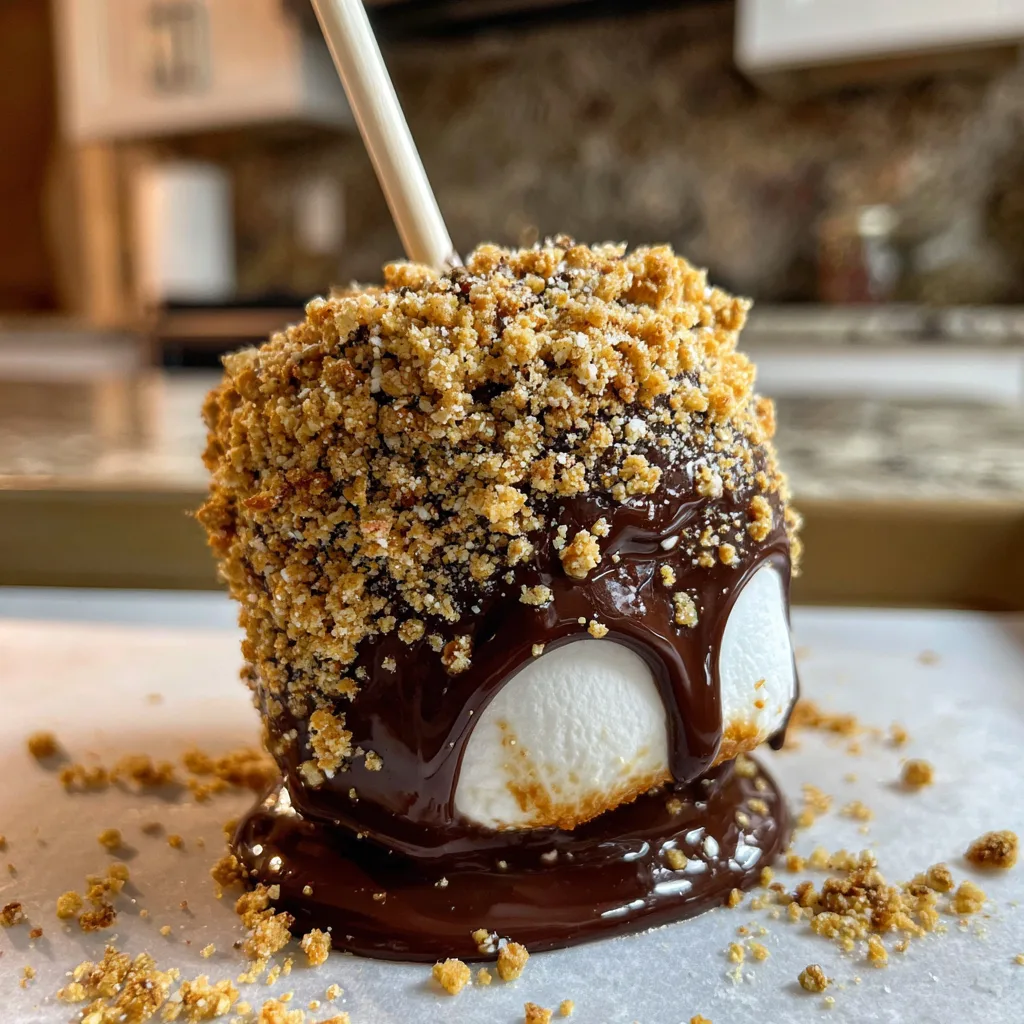
- Dip the Pops: Hold a skewered marshmallow by the stick and dip the bottom half directly into the warm, melted chocolate. Gently twirl the stick to let any excess chocolate drip back into the bowl. You want a generous coating, but not so much that it slides right off.
- Roll in the Crumbs: Immediately transfer the chocolate-dipped marshmallow to the bowl of graham cracker crumbs. Gently roll the sides and dab the bottom to ensure the chocolate is thoroughly coated in the crumbs.
- Let Them Set: Place the finished S’mores Pop upright (stick pointing toward the ceiling) on your prepared parchment-lined baking sheet. Repeat the dipping and rolling process for all remaining pops. Allow them to sit at room temperature for about 30 minutes, or pop them in the refrigerator for 10 minutes to speed up the setting process.
Customizing Your S’mores Pops
The beauty of this recipe is its endless adaptability. Once you master the basic dip-and-roll technique, you can let your imagination run wild with different flavor profiles.
The “Toasted” S’mores Pop: If you miss the authentic, caramelized flavor of a campfire marshmallow, you can safely replicate it indoors! Before dipping, use a small culinary butane torch to lightly toast the outside of the marshmallow while it is on the stick. Let it cool for a minute before dipping it into the chocolate.
Chocolate Swaps: Not a fan of semi-sweet chocolate? Swap it out! These pops are fantastic when dipped in melted white chocolate, milk chocolate, or even butterscotch or peanut butter chips. A white chocolate dip rolled in crushed Oreo cookies makes for a fantastic “Cookies and Cream” pop.
Creative Coatings: You are not limited to graham crackers! Try rolling the wet chocolate in mini M&Ms, crushed pretzels (for a sweet and salty vibe), rainbow sprinkles, toasted shredded coconut, or finely chopped toasted pecans.
Storage and Make-Ahead Tips
S’mores Pops are incredibly convenient because they can easily be made ahead of time for a party.
Once the chocolate has completely set and hardened, you can store the pops in an airtight container at room temperature. They will stay fresh for up to a week. If you are stacking them in a container, place a sheet of parchment paper between the layers to prevent them from sticking together.
Avoid storing them in the refrigerator for long periods. The moisture in the fridge can cause the graham crackers to become soggy, and the marshmallows may dry out and become hard. Room temperature is the perfect environment for these treats.
Frequently Asked Questions (FAQs)
Why is my marshmallow sliding off the stick?
This usually happens if the marshmallow is stale and hard, requiring too much force to push the stick in, which tears the inside. It can also happen if your melted chocolate is too hot and heavy. Let the chocolate cool slightly before dipping.
Can I use chocolate bars instead of chips?
Absolutely! In fact, using chopped up high-quality chocolate bars (like Hershey’s, to keep it authentic to the classic s’more) melts beautifully and tastes fantastic. Just be sure to chop the bar finely so it melts evenly.
How do I display these for a party?
S’mores Pops look fantastic when displayed upright. You can take a block of floral foam (available at craft stores), wrap it in nice tissue paper or place it in a decorative box, and poke the sticks directly into the foam. Alternatively, you can fill a glass jar with granulated sugar or un-crushed graham cracker crumbs and stand the sticks up in the jar.
Conclusion
S’mores Pops are the ultimate proof that you do not need a lot of time, equipment, or culinary skill to create a dessert that brings immense joy. By taking the classic, nostalgic flavors of a campfire treat and putting them on a stick, you create a fun, mess-free, and utterly delicious snack that appeals to kids and adults alike. Whether you customize them with different chocolates and toppings or stick to the original graham cracker perfection, this simple recipe is sure to become a beloved staple in your dessert repertoire.
Easy S’mores Pops
Ingredients
Equipment
Method
- Line a baking sheet with parchment paper.
- Place graham cracker sheets in a zip-top bag and crush with a rolling pin into coarse crumbs. Pour into a shallow bowl.
- Push a lollipop stick halfway into the flat bottom of each marshmallow.
- In a microwave-safe bowl, melt the chocolate chips (and coconut oil, if using) in 30-second increments at 50% power, stirring in between, until smooth.
- Dip the bottom half of each skewered marshmallow into the melted chocolate, letting excess drip off.
- Immediately roll the chocolate-covered portion in the crushed graham crackers to coat thoroughly.
- Place upright on the prepared baking sheet and let set at room temperature for 30 minutes, or in the fridge for 10 minutes, until chocolate is firm.