Fruity Pebbles Marshmallow Treats
The Ultimate Gooey Fruity Pebbles Rice Krispie Treats Recipe
When it comes to nostalgic, childhood-favorite desserts, few things can compete with the vibrant, sugary perfection of a classic cereal bar. But if you want to elevate the traditional treat into something truly spectacular, Fruity Pebbles Rice Krispie Treats are the ultimate answer. Bursting with bright, rainbow colors and a bold, fruity flavor profile that instantly transports you back to Saturday morning cartoons, these gooey marshmallow squares are a guaranteed crowd-pleaser for kids and adults alike.
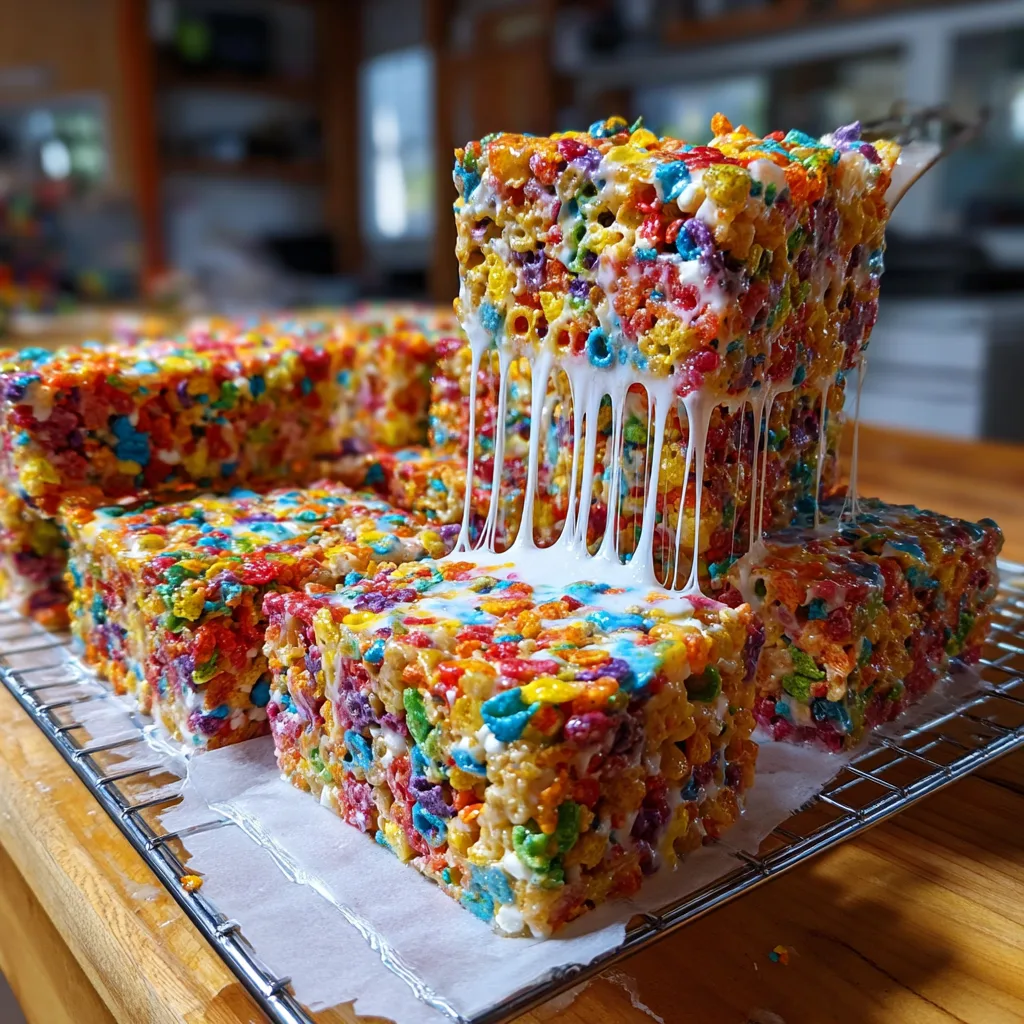
What sets this specific recipe apart is the relentless pursuit of the perfect texture. We have all experienced the disappointment of biting into a rock-hard cereal treat that scratches the roof of your mouth. This recipe is engineered to completely avoid that fate. By optimizing the ratio of butter to marshmallows and employing a gentle, low-heat melting technique, these Fruity Pebbles treats emerge flawlessly soft, incredibly chewy, and capable of producing those epic, Instagram-worthy marshmallow cheese-pulls every single time you break one apart.
Whether you are throwing a vibrant birthday party, contributing to a neighborhood bake sale, packing a special lunchbox surprise, or simply craving a sweet, no-bake late-night snack, these treats come together in a matter of minutes. Read on to discover the science of the perfect marshmallow melt, the essential tips for pressing them without compacting them, and the fascinating history behind these beloved ingredients.
Why You Will Love These Fruity Pebbles Treats
There is a multitude of reasons why these treats deserve a permanent spot in your recipe rotation. First and foremost is the undeniable visual appeal. Fruity Pebbles are famous for their brilliant spectrum of colors—reds, oranges, yellows, greens, blues, and purples. When bound together by snowy white marshmallow, the resulting squares look like edible confetti. They are naturally festive without requiring a single drop of artificial food coloring on your part, making them an instant centerpiece for any dessert table.
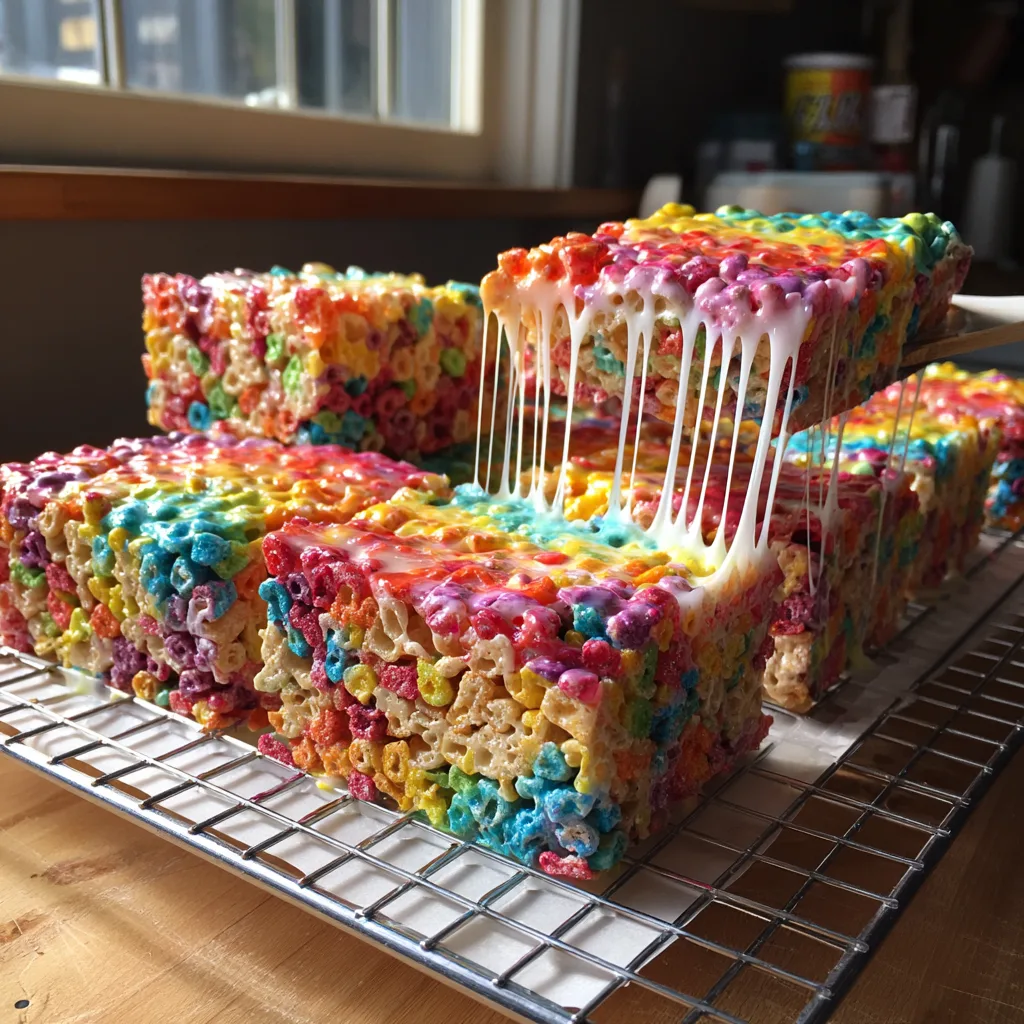
Secondly, the flavor is undeniably iconic. While traditional toasted rice cereal offers a wonderful, neutral canvas for sweet marshmallow, Fruity Pebbles bring their own intense, sweet citrus and berry notes to the party. The combination of the tangy, fruity cereal with the rich, creamy sweetness of vanilla-laced marshmallow creates a dynamic flavor profile that prevents the treat from tasting one-dimensionally sweet.
Finally, the convenience factor cannot be overstated. In a world of complex baking projects that require precise measurements, rising times, and oven monitoring, the no-bake cereal treat is a breath of fresh air. You only need a single pot, a few simple ingredients, and about fifteen minutes of active kitchen time. There is no flour to sift, no eggs to temper, and absolutely no need to turn on your oven—a massive benefit during the hot summer months.
The Secret to the Gooiest Marshmallow Treats
The difference between a mediocre cereal bar and a transcendent one lies entirely in the handling of the marshmallow. The goal is a treat that bends before it breaks, remaining soft and pliable for days after it is made. Achieving this requires understanding a little bit of sugar science.
Freshness Matters: Marshmallows are essentially whipped sugar, corn syrup, water, and gelatin. Over time, they lose moisture and become stale. If you attempt to melt old, hard marshmallows, they will not break down smoothly, resulting in a stiff, brittle treat. Always purchase a brand-new bag of marshmallows specifically for this recipe. Mini marshmallows are highly recommended over large ones because their smaller surface area allows them to melt faster and much more evenly.
Low and Slow is the Golden Rule: When melting your butter and marshmallows, patience is not just a virtue; it is a strict requirement. If you blast the mixture with high heat, the sugar in the marshmallows will actually begin to caramelize and harden, practically turning into candy. By using medium-low to low heat, you gently coax the marshmallows into a molten, creamy liquid without altering their chemical structure. As soon as the last few lumps of marshmallow disappear, you must immediately remove the pot from the heat.
The Butter Ratio: The enemy of a good cereal treat is dryness. Many classic recipes skimp on the butter, leading to a treat that tastes a bit like cardboard the next day. This recipe calls for a generous amount of unsalted butter. The milk solids in the butter provide a rich, luxurious flavor, while the fat ensures the marshmallow remains soft, glossy, and beautifully gooey.
Ingredients You Will Need
- – 1/2 cup (1 stick) Unsalted Butter: Using unsalted butter allows you to control the sodium level perfectly. The butter provides the rich, savory backbone that balances the intense sweetness of the cereal and marshmallows.
- – 1 (16 oz) package Mini Marshmallows: Mini marshmallows melt quickly and evenly. We use a full 16 ounces to ensure a high marshmallow-to-cereal ratio for maximum gooeyness. Reserve 1 cup of these to fold in whole at the very end!
- – 1 teaspoon Pure Vanilla Extract: Do not skip the vanilla. It elevates the basic sugar flavor of the marshmallows, making the treats taste like they came from a gourmet bakery rather than a home kitchen.
- – 1/4 teaspoon Salt: A tiny pinch of salt is the secret ingredient in any sweet dessert. It cuts through the cloying sweetness and actually enhances the fruity flavors of the cereal.
- – 6 cups Fruity Pebbles Cereal: The star of the show. Ensure your cereal is fresh and crispy. Stale cereal will result in a chewy, unpleasant texture, even if your marshmallow mixture is perfect.
Step-by-Step Instructions
- 1. Prepare the Baking Pan: Begin by lining a 9×13 inch baking dish with parchment paper. Leave an overhang of parchment on the sides; this acts as a sling, allowing you to easily lift the entire block of treats out of the pan later for perfectly clean slicing. Lightly grease the parchment paper with a small amount of butter or a very light mist of non-stick cooking spray to ensure absolute zero sticking.
- 2. Melt the Butter: Place a large, heavy-bottomed pot or Dutch oven over medium-low heat. Add the unsalted butter and allow it to melt completely. Do not let the butter brown; you just want it melted and bubbling very slightly.
- 3. Melt the Marshmallows: Add the mini marshmallows to the melted butter, reserving exactly 1 cup of the marshmallows for later. Stir continuously with a silicone spatula. The gentle heat will slowly break down the marshmallows. Keep stirring until the mixture is completely smooth, glossy, and free of any lumps.
- 4. Add Flavorings: The moment the marshmallow is completely melted, immediately remove the pot from the heat source. Stir in the pure vanilla extract and the salt. The mixture will bubble up slightly as the vanilla hits the hot sugar; just keep stirring until it is thoroughly incorporated.
- 5. Fold in the Cereal: Pour the 6 cups of Fruity Pebbles cereal into the hot marshmallow mixture. Working quickly but gently, use your silicone spatula to fold the cereal into the marshmallow. Use a scooping motion from the bottom of the pot to ensure every single flake of cereal is coated in the sticky mixture.
- 6. The Secret Extra Marshmallows: Once the cereal is mostly coated, gently fold in the reserved 1 cup of mini marshmallows. The residual heat will soften these slightly, leaving distinct, gooey pockets of whole marshmallow throughout the final treats.
- 7. Press into the Pan: Transfer the sticky mixture into your prepared 9×13 inch baking pan. Now, here is the most critical step: Do not pack it down hard. If you crush the cereal with heavy pressure, the treats will become dense and hard. Instead, lightly grease your fingertips or a piece of wax paper, and gently press the mixture just until it spreads evenly into the corners of the pan. Leave it as airy as possible.
- 8. Cool and Slice: Allow the treats to sit at room temperature for about 45 minutes to 1 hour to set. Do not put them in the refrigerator, as this will draw out moisture and make them rock hard. Once set, use the parchment overhang to lift them onto a cutting board, and use a sharp chef’s knife to cut them into squares.
Essential Tips for Perfect Cereal Bars
The “Light Touch” Pressing Method: As mentioned in the instructions, the way you press the mixture into the pan dictates the final texture. A great trick is to use a silicone spatula coated in a tiny bit of butter, and just lightly guide the mixture into place. You want the cereal pieces to gently hold hands, not be crushed into a solid brick.
Proper Storage is Key: Fruity Pebbles Treats are best enjoyed within the first 48 hours. To keep them fresh and soft, store them in a truly airtight container at room temperature. If stacking them, place a sheet of wax paper or parchment paper between the layers to prevent them from fusing into one giant block. Never refrigerate them.
The Butter Wrapper Trick: Save the wrapper from your stick of butter! It has the perfect amount of residual butter left on it to grease your baking pan or to use as a non-stick barrier when gently pressing the cereal mixture down.
Fun Variations and Add-Ins
While these treats are spectacular on their own, the recipe serves as a fantastic foundation for culinary creativity. Here are a few ways to customize your Fruity Pebbles treats:
Half and Half: If you find pure Fruity Pebbles a bit too sweet, you can easily balance the flavor profile by using 3 cups of Fruity Pebbles and 3 cups of classic crisp rice cereal. You still get the beautiful pops of color and the fruity flavor, but with a more subdued, classic crunch.
White Chocolate Drizzle: For an elegant finish, melt high-quality white chocolate or white candy melts and generously drizzle it over the top of the uncut pan of treats. Let the chocolate set completely before slicing. The creamy white chocolate pairs gorgeously with the fruit flavors.
Stuffed Treats: For an extreme indulgence, pour half the mixture into the pan and press lightly. Add a layer of marshmallow fluff or even a thin layer of vanilla frosting, then top with the remaining cereal mixture. It is messy, sticky, and absolutely decadent.
Serving Suggestions
Birthday Parties: Because of their rainbow appearance, these treats are practically mandatory for children’s birthday parties. You can even cut them using large cookie cutters into stars, hearts, or numbers corresponding to the child’s age.
Lunchbox Surprises: Wrap individual squares tightly in plastic wrap to tuck into a lunchbox. They hold up incredibly well throughout the day and provide a vibrant, sweet pick-me-up in the middle of the afternoon.
Ice Cream Sandwiches: Take two thin squares of Fruity Pebbles treats and sandwich a scoop of vanilla bean ice cream between them. Press gently, wrap in plastic, and freeze for an hour. The crunch of the cereal against the cold, creamy ice cream is a textural masterpiece.
Fun Facts and Cultural Context
Did you know that the original Rice Krispies Treat was invented in 1939 by Kellogg Company employees Malitta Jensen and Mildred Day? They created the recipe for a Camp Fire Girls bake sale, and it quickly became an American culinary icon. The recipe was officially added to cereal boxes in 1941.
Fruity Pebbles, on the other hand, have their own fascinating history. Introduced in 1970 alongside Cocoa Pebbles, they were the very first cereal brands explicitly created around a media character—in this case, characters from the beloved animated sitcom The Flintstones. The vibrant colors and fruity flavors were designed to mimic the prehistoric, cartoonish aesthetic of the show. Combining this 1970s pop-culture cereal with the 1930s marshmallow technique creates a dessert that bridges generations of American snacking history.
Frequently Asked Questions
Can I make these in the microwave? Yes, you can melt the butter and marshmallows in a large microwave-safe bowl. Heat in 30-second bursts, stirring in between, until smooth. However, the stovetop method provides better control to ensure you do not overheat the sugar.
Why did my treats turn out hard? This is almost always caused by one of two things: either you heated the marshmallows over heat that was too high (which cooks the sugar into candy), or you pressed the mixture much too firmly into your baking pan. Remember: low heat, and a very gentle press.
Can I freeze Fruity Pebbles Treats? Yes! Wrap individual squares tightly in plastic wrap, then place them in an airtight freezer bag for up to 6 weeks. To thaw, simply let them sit at room temperature for about 15-20 minutes before eating.
Are these treats vegetarian? Standard marshmallows contain gelatin, which is an animal byproduct, meaning classic treats are not vegetarian. However, you can easily substitute the standard marshmallows for a vegan/vegetarian marshmallow brand (which usually uses agar-agar) to make this recipe vegetarian-friendly. Be aware that vegan marshmallows may take slightly longer to melt.
Enjoy bringing a splash of color and a whole lot of joy to your kitchen with this foolproof recipe. The only problem you will have is trying not to eat the entire pan by yourself!
Gooey Fruity Pebbles Treats
Ingredients
Equipment
Method
- Line a 9×13 inch baking pan with parchment paper, leaving an overhang on the sides for easy removal. Lightly grease the parchment.
- In a large pot over medium-low heat, melt the butter completely.
- Add all but 1 cup of the mini marshmallows to the melted butter. Stir constantly until completely melted and smooth. Immediately remove from heat.
- Stir the vanilla extract and salt into the hot marshmallow mixture.
- Quickly fold in the Fruity Pebbles cereal until thoroughly coated with the marshmallow.
- Gently fold in the reserved 1 cup of mini marshmallows so they remain slightly intact.
- Transfer the mixture to the prepared pan. Using lightly greased hands or a spatula, gently press the mixture evenly into the pan. Do not pack tightly.
- Allow to cool at room temperature for at least 45 minutes before using the parchment overhang to lift out and slice into squares.